Getting started with Listivo Theme: a step-by-step guide
Work through the first settings a new Listivo site needs — logo and contact details, number format and currency, monetization, maps, translations and custom fields — in the order that keeps you from redoing work.
3 minute read
Thank you for installing the Listivo Theme. This article will guide you through the initial steps of setting up your website.
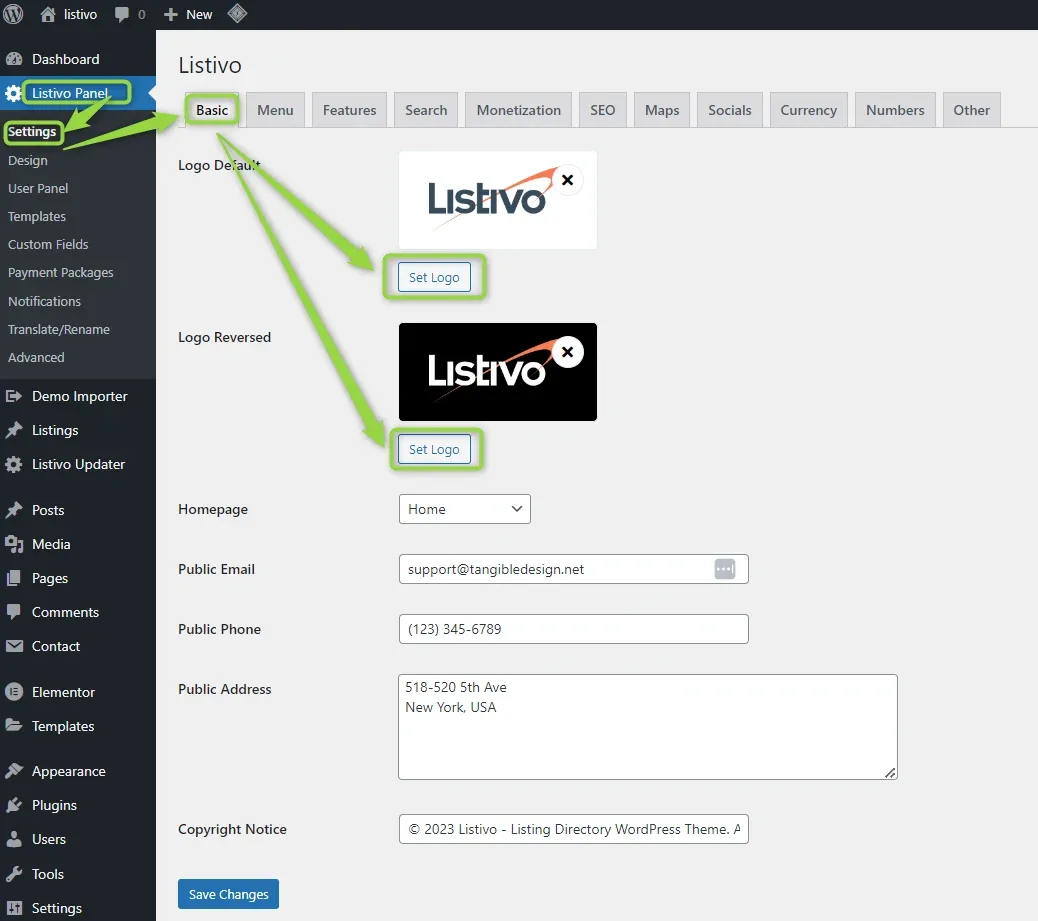
1. Set up your logo
To add a logo to your new website, go to Listivo Panel → Settings → Basic in wp-admin. The same screen holds the essential information about your website, such as address, email and phone number.
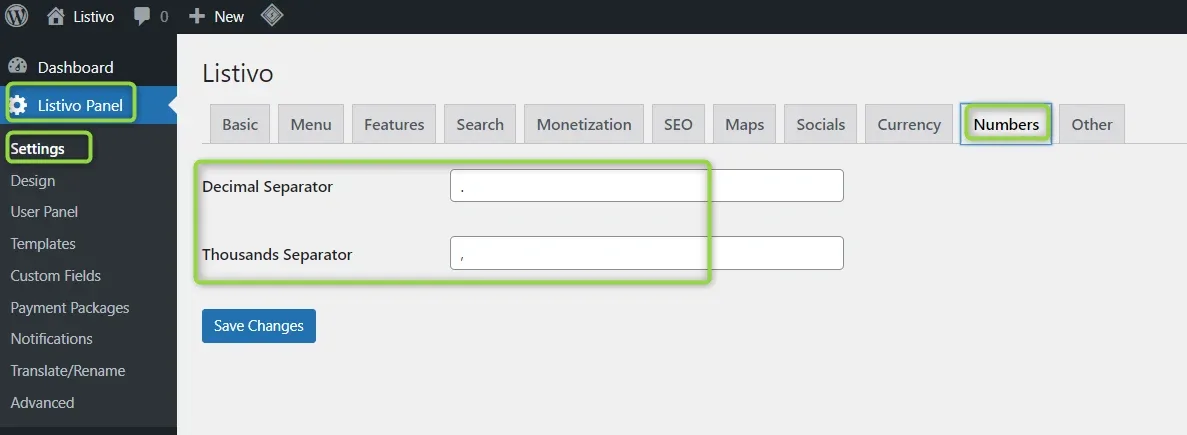
2. Configure number separators
Number separators are crucial for displaying numbers on your website. Adjust the decimal and thousands separators on the Numbers tab of the same Settings screen.
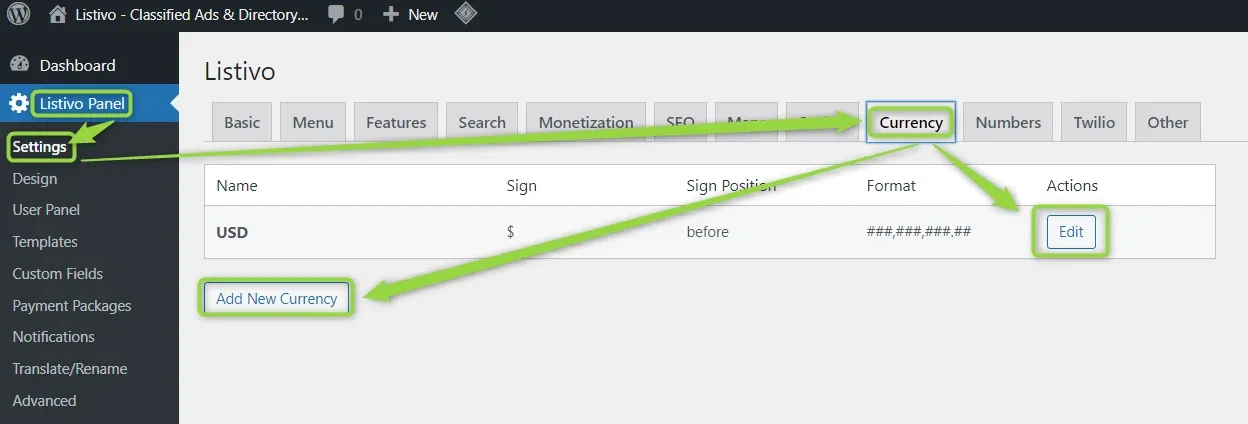
3. Set the currency
To set or change your currency, go to Listivo Panel → Settings → Currency. By default, the currency is set to USD, but you can edit it or add another one.
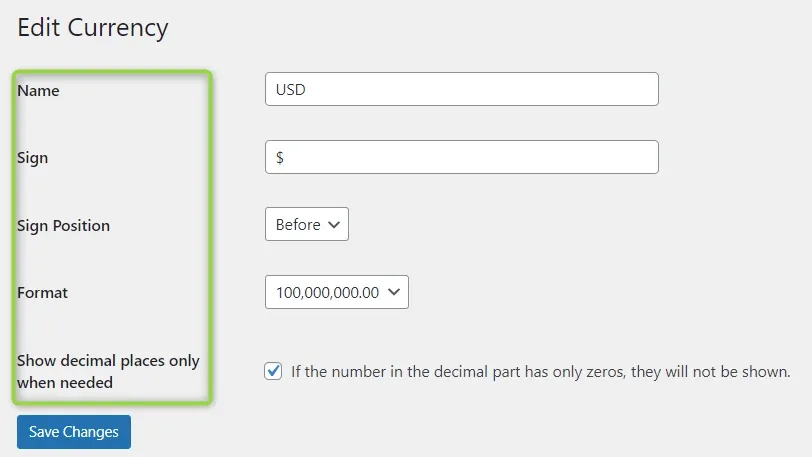
You can define the currency name, symbol, symbol position and format, and have decimal places shown only when they are needed.
4. Enable the monetization system
The first step to start earning on your website is to enable monetization. To do it, go to Listivo Panel → Monetization, tick Enabled and save the changes.
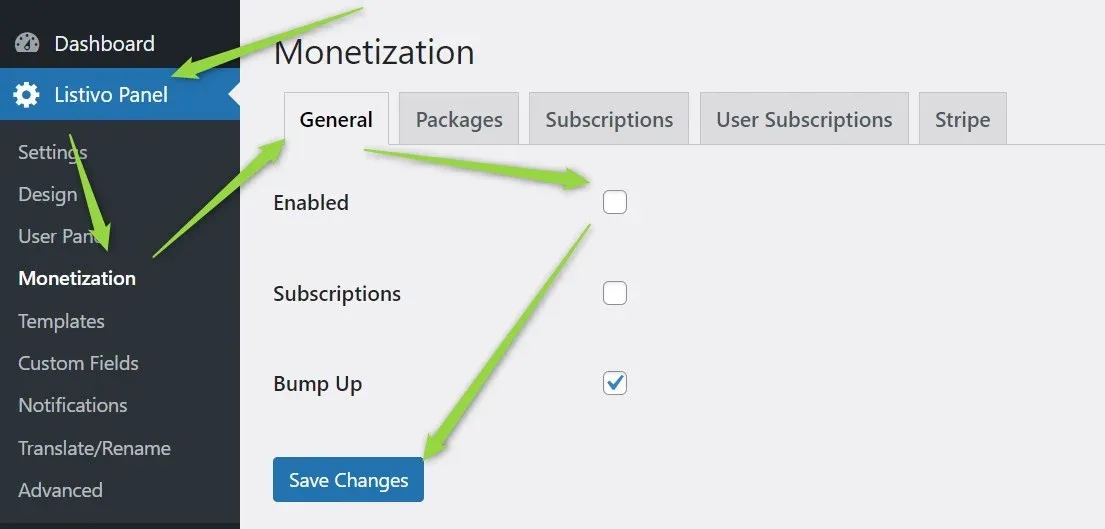
More information about the monetization system you can find here: Monetization system.
5. Enable maps
You can choose the map provider on Listivo Panel → Settings → Maps.
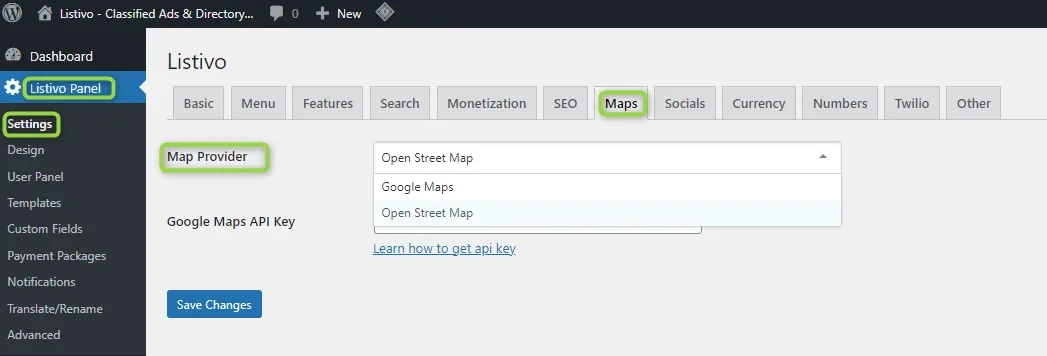
We recommend reading this article to learn more: How to Enable Google Maps and Obtain a Google Maps API Key.
6. Translate Listivo
Listivo's own texts are renamed and translated from the Translate/Rename screen of the panel. We recommend reading this article to learn more: How to Translate or Rename All Texts.
7. Understand custom fields
To customize Listivo to suit your needs, you may need to add new custom fields. We have prepared a series of articles to guide you through this process:
8. Show a new field on the single and search results pages
A newly added custom field is not visible on your website until you place it where it should appear. Please check this article: How to add new field on single / inventory page?.
In short
- Logo and contact details live in Listivo Panel → Settings → Basic.
- Number separators and currency are set on the Numbers and Currency tabs of the same screen.
- Monetization does nothing until you enable it in Listivo Panel → Monetization.
- Maps need a provider, and a Google Maps API key if you want geocoding.
- A new custom field also has to be placed on the pages where it should appear.
Ask the people who build Listivo
We answer by email from support@tangiblewp.com. With Premium Support, we also fix your site when something breaks.
We can also run your site for you, or build a new one.
Was this guide helpful?