Monetization system
Set up everything Listivo can charge for: turn monetization on, hand out free packages, build paid ad packages and bump-up packages, and offer recurring subscriptions through Stripe.
3 minute read
Enable monetization
The first step to start earning on your website is to enable monetization. To do it, go to Listivo Panel > Monetization.
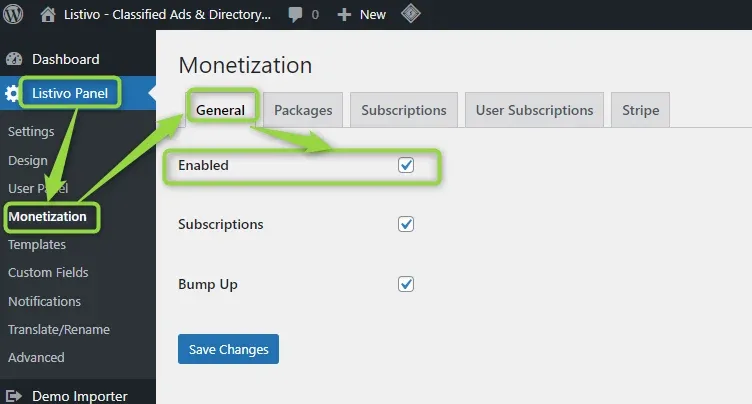
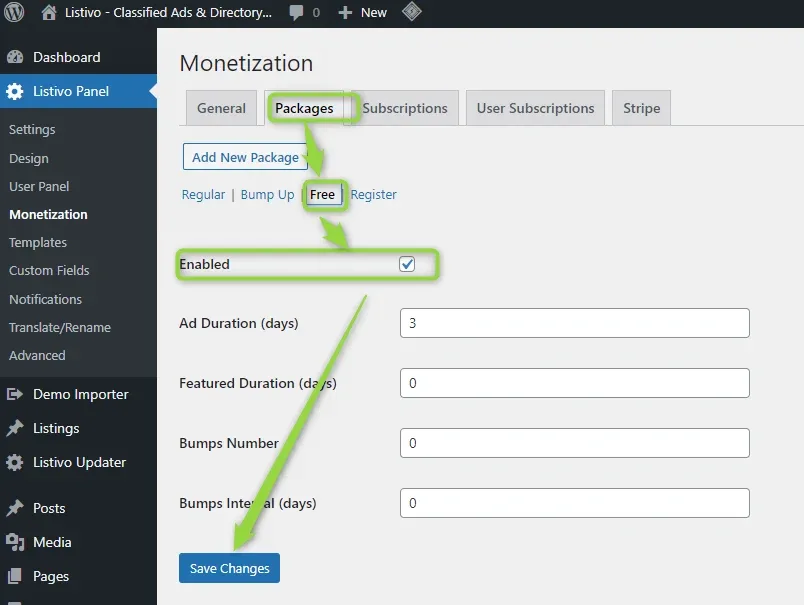
Bump Up – you can enable bump up for your users. After you enable it on Listivo Panel > Monetization, you can set how many bump ups you will offer to users in each package's settings.
Free packages
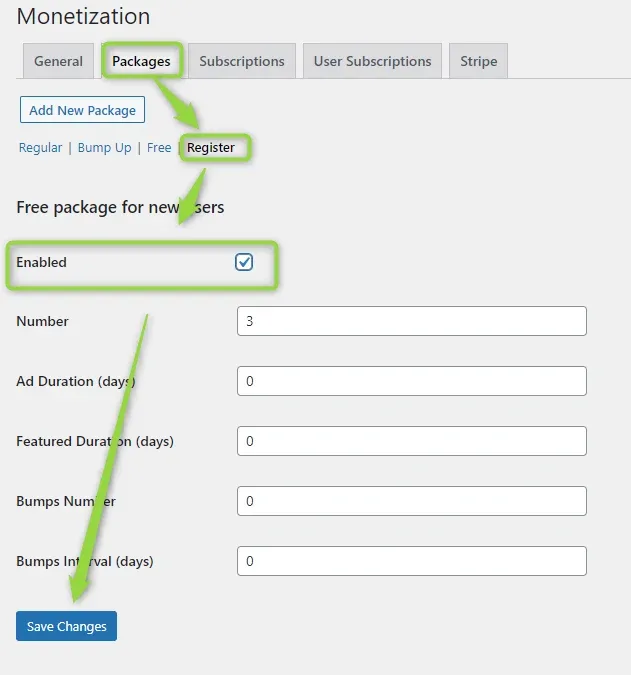
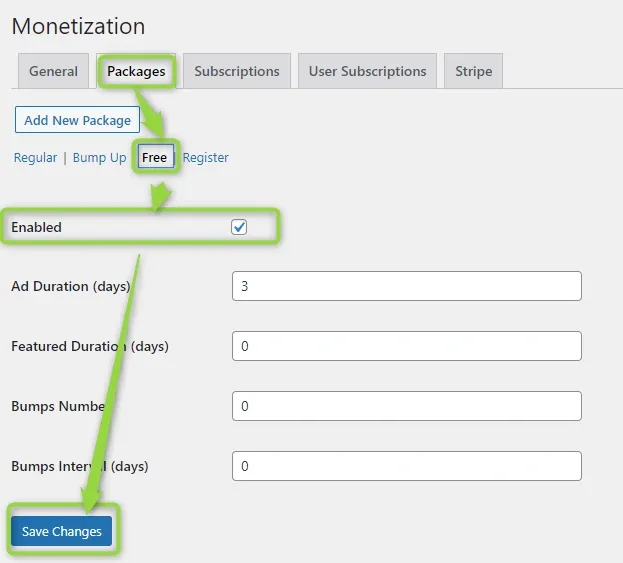
On the Listivo Panel you can set only free packages – 'Free package for new users' and 'Free package'. For each package you can set Duration (days), Featured Duration (days), Bumps Number and Bumps Interval (days).
Free package for new users:
Free package:
Payment packages
Now you can set Payment Packages. You can add new packages and edit or delete existing packages.
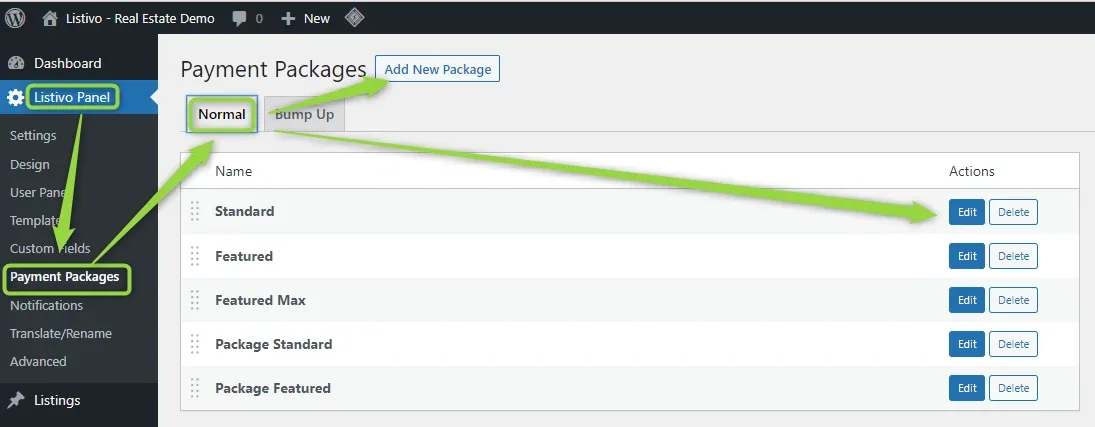
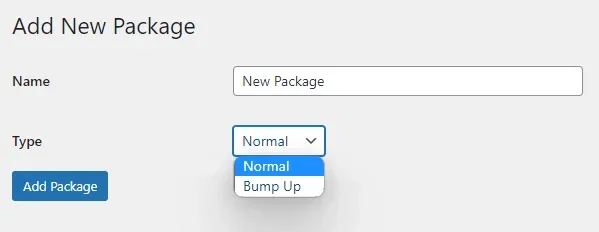
Add new packages – give a name and choose a package type (normal or bump up). Click the 'Add Package' button and edit your new package.
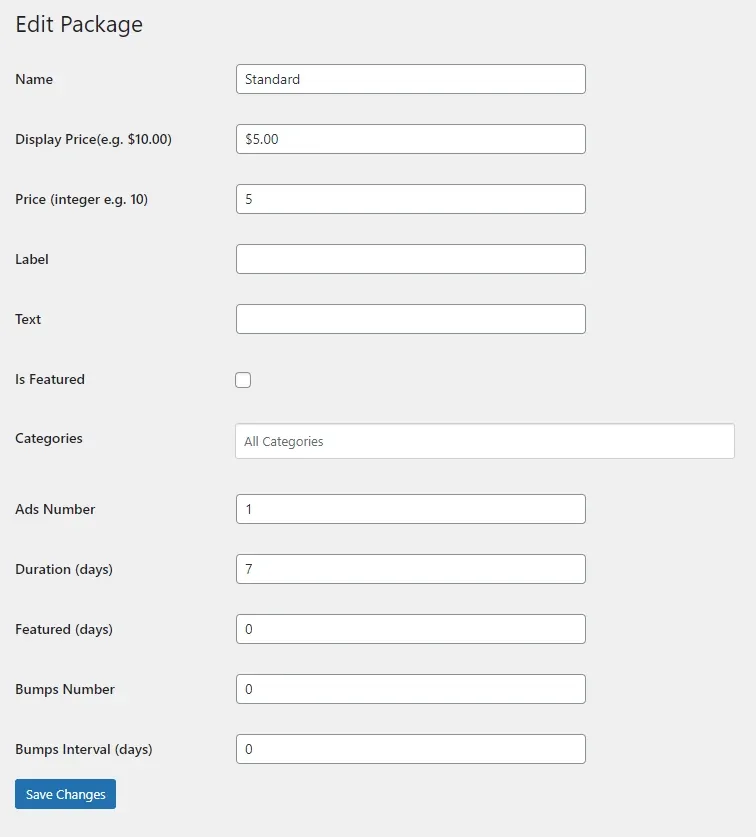
On paid packages, you can set the price, add the text, feature it, or add categories that will be visible.
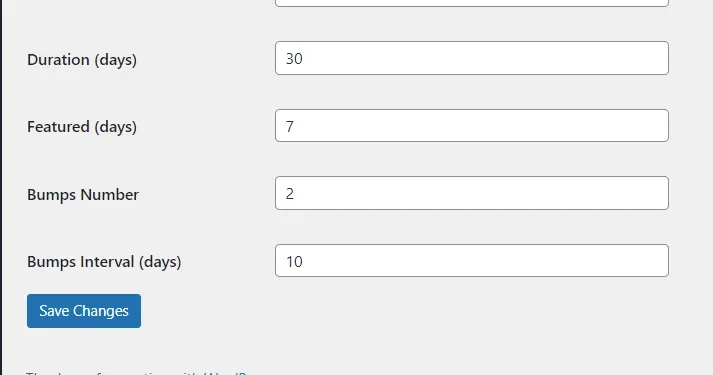
You can set these 4 options. It means that the ad will be 30 days on the website. The ad will be featured for 7 days. The ad will be refreshed 2 times. Bumps Interval is 10 days, so it will be refreshed every 10 days – in this case after 10 and 20 days.
Bump up packages
You can configure a package only with bumps up. Bump up is a service where users place their own ad on the top of the first page of the same category once a day automatically for a limited time. Just add a new package – type bump up – and edit it.
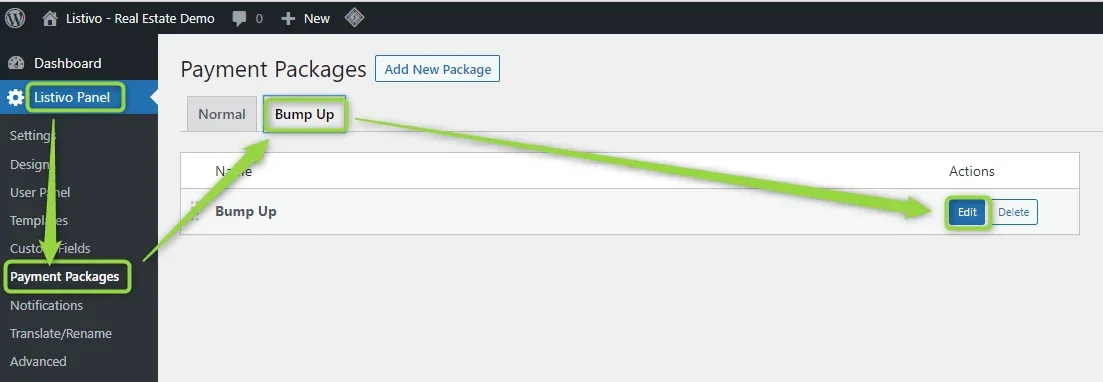
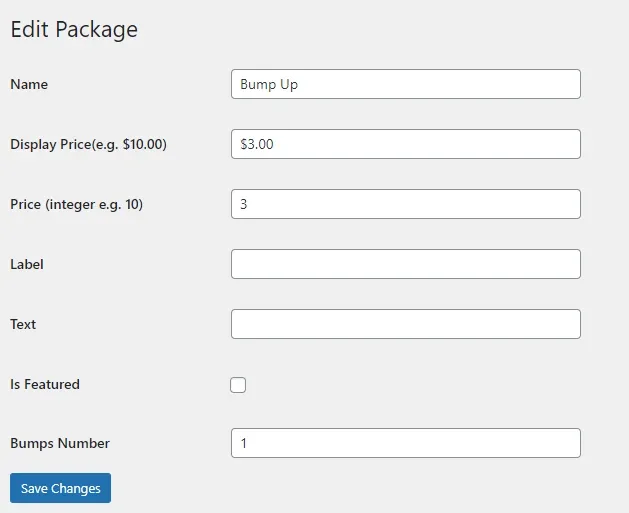
Here you can set the price, the text, 'featured' and how many bumps are in the package. By default, it is possible to refresh this date once for 3 USD. You can change it as you want.
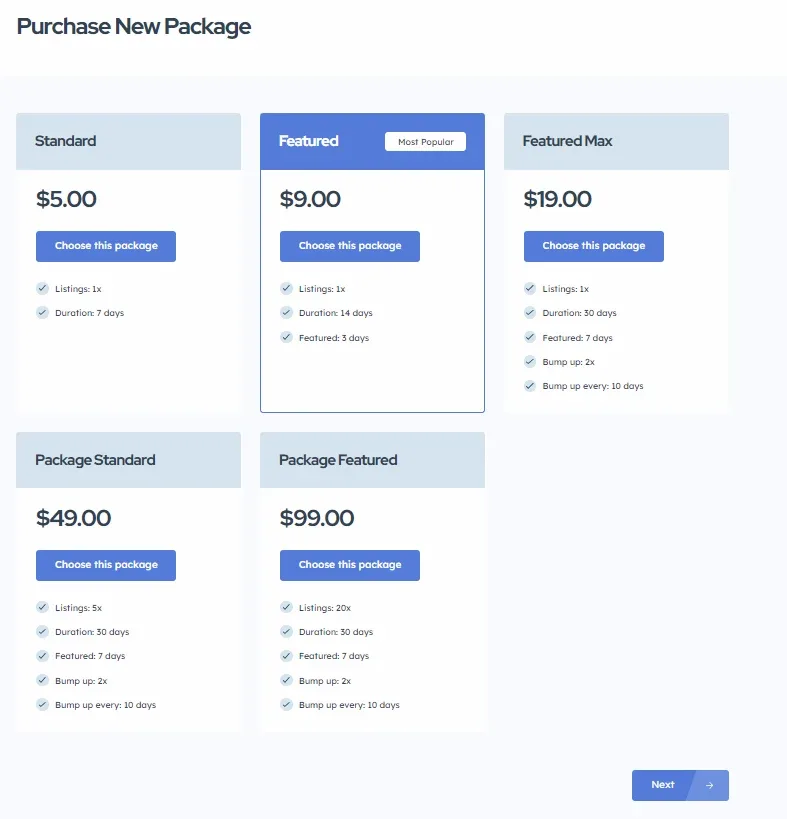
Sample packages:
Subscriptions
-
1
Enable Stripe
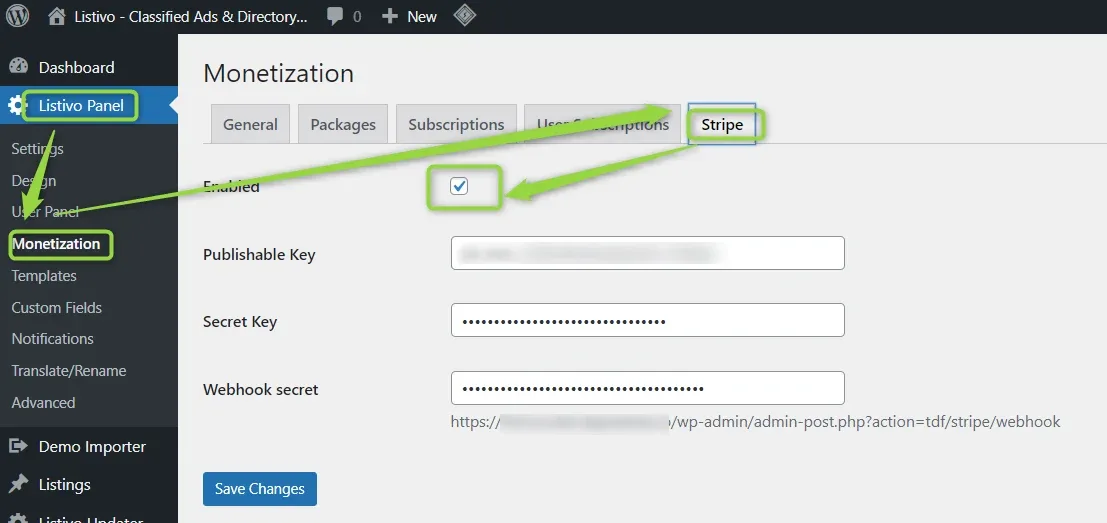
Go to wp-admin > Listivo Panel > Monetization > Stripe, enable it and add all necessary credentials – here you will read more about it.
-
2
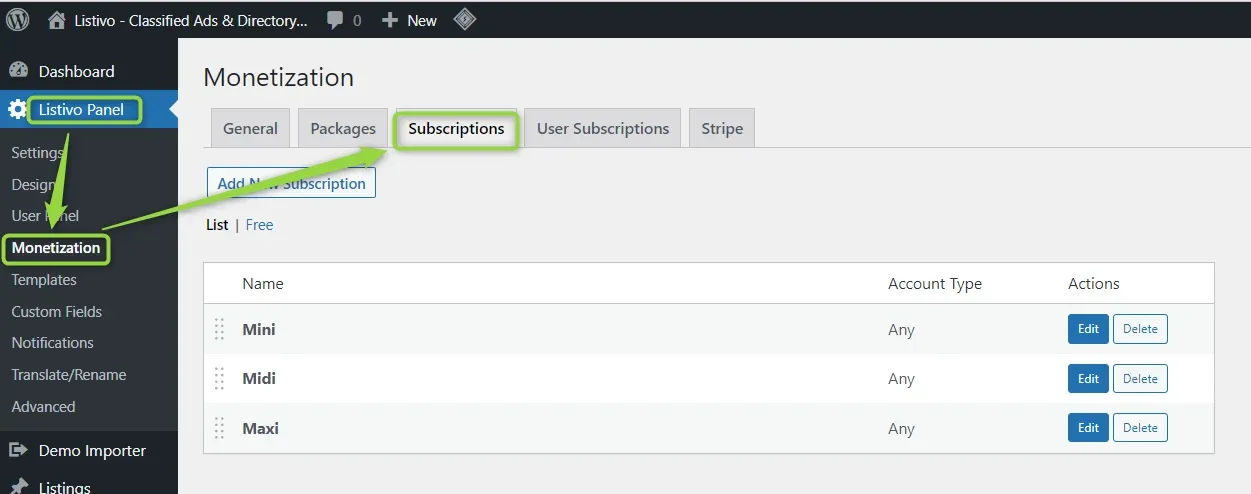
Open the Subscriptions tab
When your Stripe configuration is completed, you can start adding subscriptions.
-
3
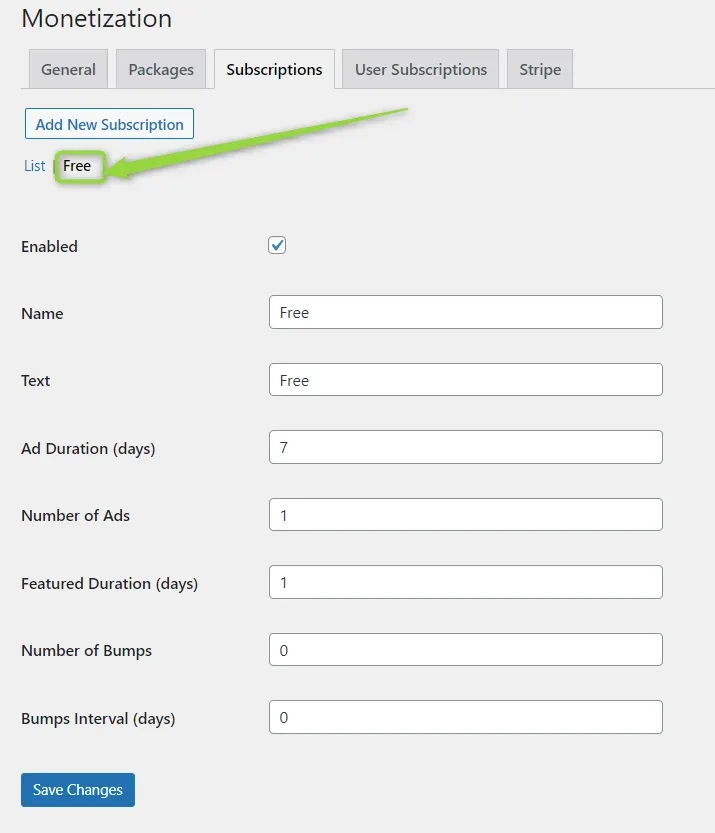
Set up the free subscription
You can set free subscriptions for your users – enable it here and put in all necessary data.
-
4
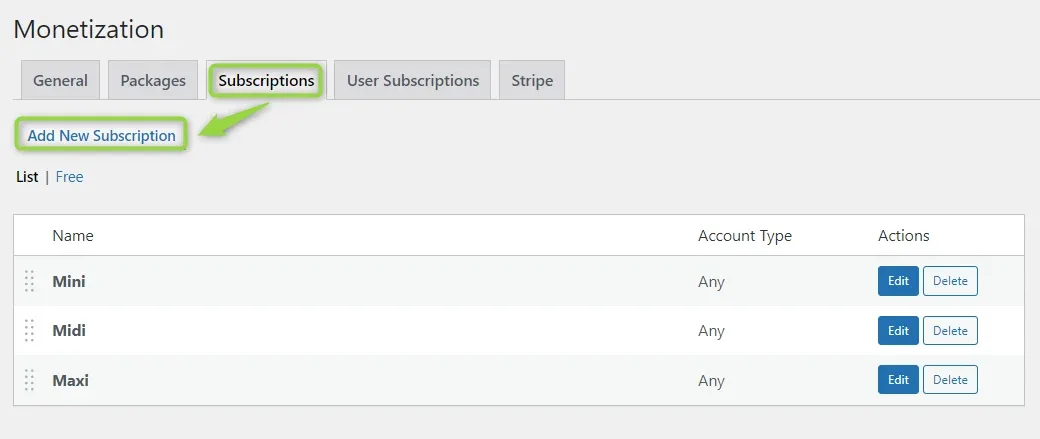
Click "Add New Subscription"
-
5
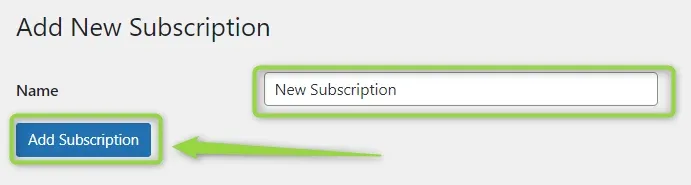
Name the new subscription
Enter a name for the new subscription and click the "Add Subscription" button.
-
6
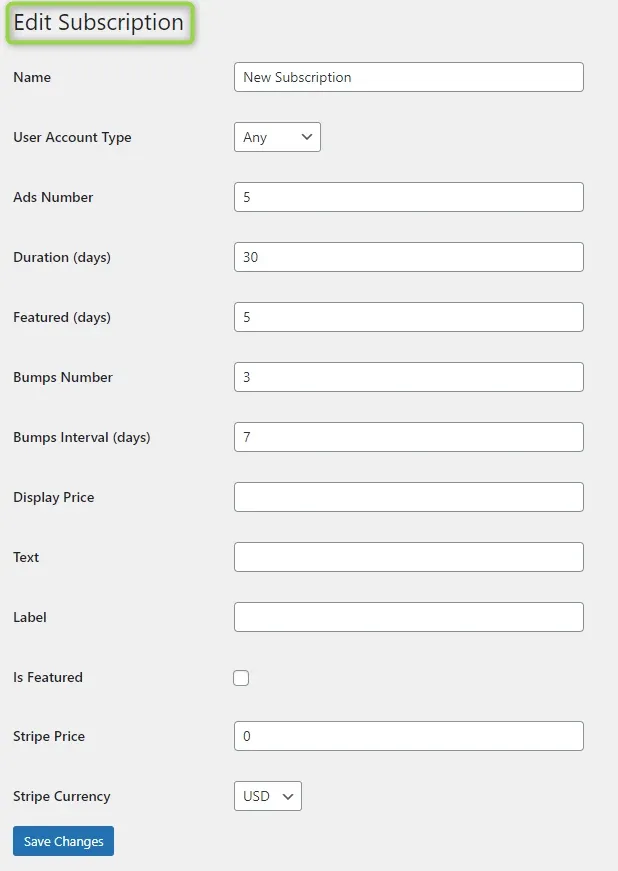
Fill in the subscription settings
Add all the settings for your subscription and save changes.
-
7
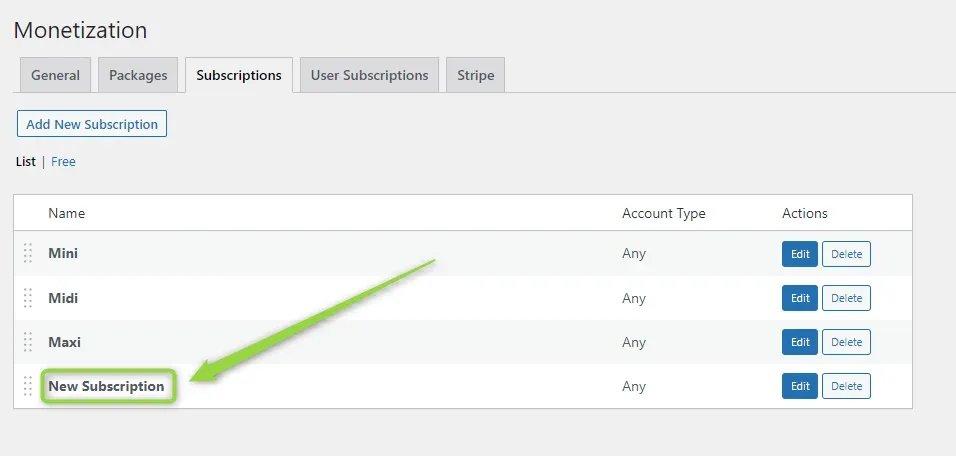
Check it on the subscriptions list
Your "new subscription" is now visible on the subscriptions list. Here you can edit it or delete it.
-
8
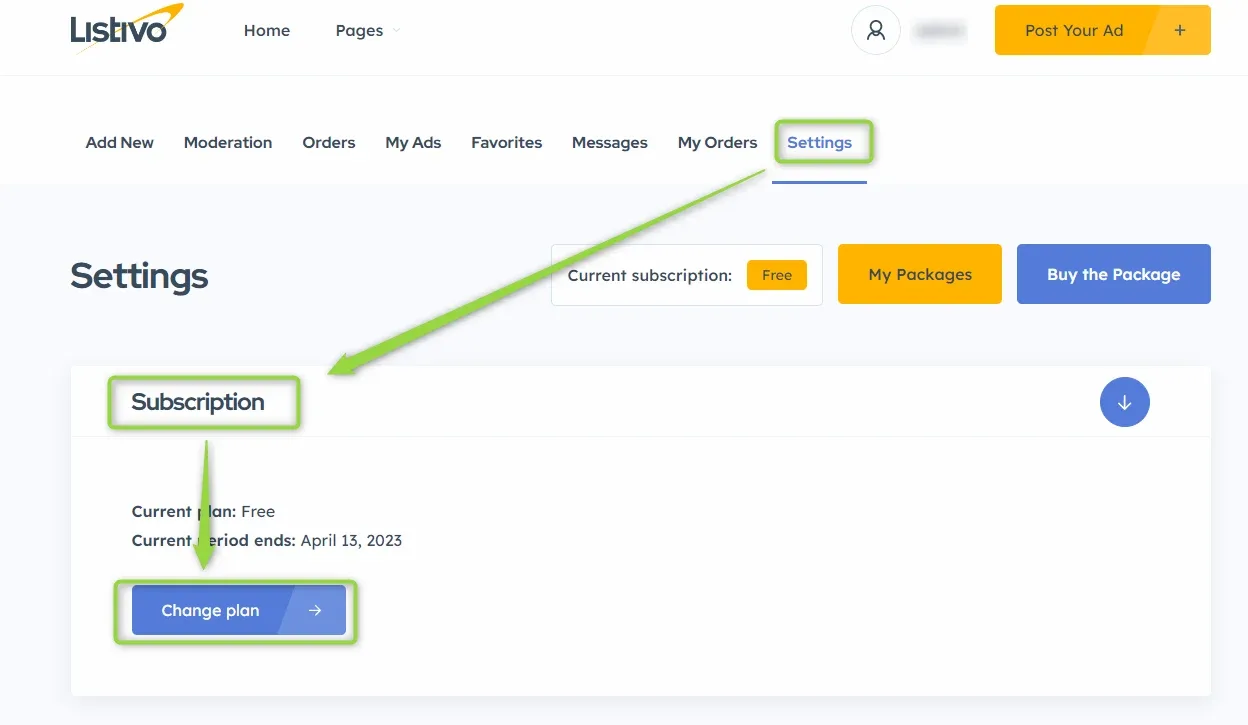
Let users pick their plan
Your users will see their subscriptions in account settings. They can change plan whenever they want to.
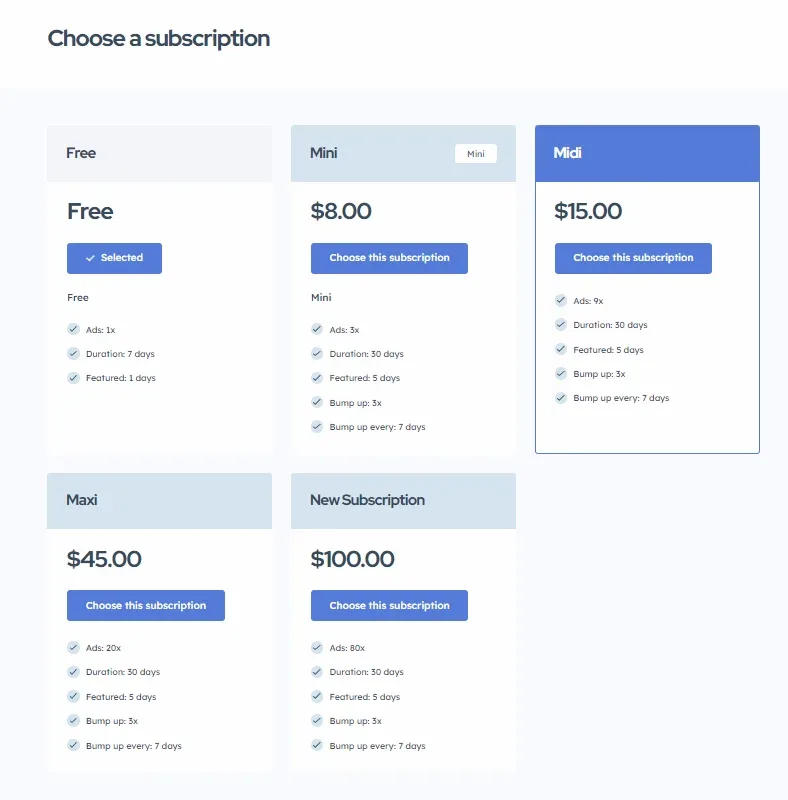
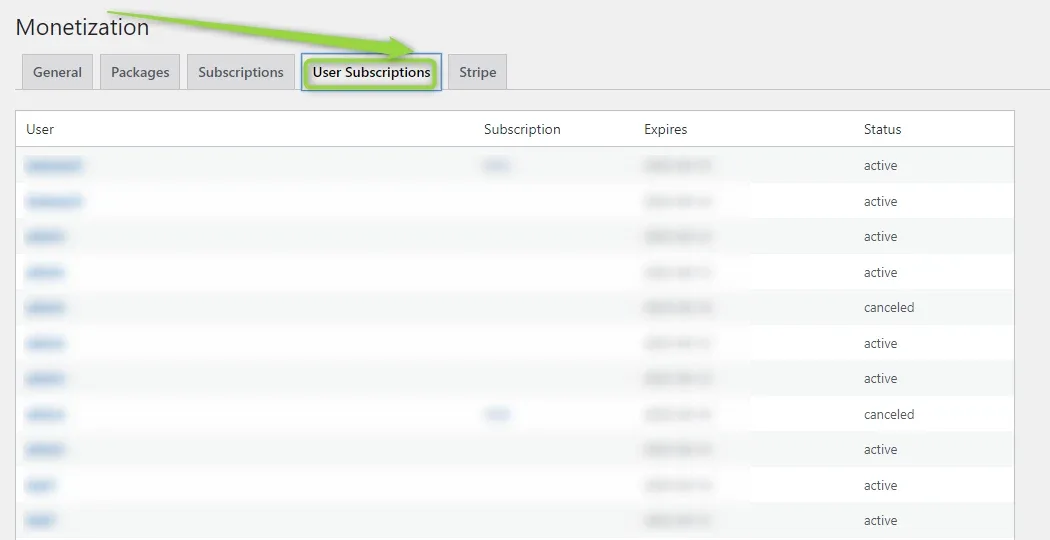
You can see all subscriptions on the "User Subscriptions" tab.
Ask the people who build Listivo
We answer by email from support@tangiblewp.com. With Premium Support, we also fix your site when something breaks.
We can also run your site for you, or build a new one.
Was this guide helpful?