How to import car inventory to your website from an Excel sheet
Your cars already sit in an Excel sheet. Here is how to load all of them onto your website in one go, photos included, without typing a car twice.
In this guide
- Save your Excel sheet as a CSV file, with one row per car
- The free WP All Import plugin loads it into Vehica, with photos from links
- One click on Connect puts every model under its make
- The site does not sync with dealer software, so you mark sold cars yourself
- Plugins cannot be added in the free trial, so you load the file after you buy Vehica or keep the site on Site Care
To import car inventory to your website, save your Excel sheet as a CSV file and load it with the free WP All Import plugin. The photos come in from links in the file, and one click puts each model under its make.
Loading your stock is one step of building a car dealer website. A file lets you upload inventory to a dealer website you run yourself, without dealer software.
WordPress cannot read a CSV file of cars by itself, so a plugin does the CSV import. A car theme then gives every column a field to land in. The screens below come from Vehica, a WordPress theme for car dealers.
1. Tidy up your car inventory spreadsheet
Put one car on each row and one detail in each column. The first row holds the column names, such as Make, Model and Price. Spell each make the same way in every row, or VW and Volkswagen become two makes in your search.
Write numbers as plain numbers, without a currency sign or the word km. Vehica adds your currency and your unit to every car. Add a stock number column too, because the plugin needs one value that is different for every car.
When the sheet is ready, use Save As in Excel and pick CSV UTF-8, which keeps letters such as the ë in Citroën. Does your stock live in dealer software or on a car portal? Ask whether it can give you a CSV or XML file.
A car inventory template to copy
Paste both lines into cell A1 of a new sheet, select column A, then use Text to Columns on the Data tab with Comma. Row 2 shows one car.
Replace the words in brackets. Drop the columns you do not use, and add a photo column for every extra photo.
2. Put your photos online and list their links
The plugin cannot take photos out of an Excel sheet. It downloads each photo from a link in your file, so put the photos online first. Your current website or any photo service with direct links will do.
- Paste one link into your browser and check that it shows only the photo
- Skip shared-folder links, such as Google Drive, which usually open a preview page instead
- Link to full-size photos, since the smaller copies are made as the cars load
- Put each car's photos in the order you want in its gallery
3. Check that every column has a field in Vehica
Vehica's car form already has a field for each usual column. On the demo it asks for make, model, price, year, mileage, fuel type, transmission, color, doors, VIN and a description. For the description, read how to write a car listing description.
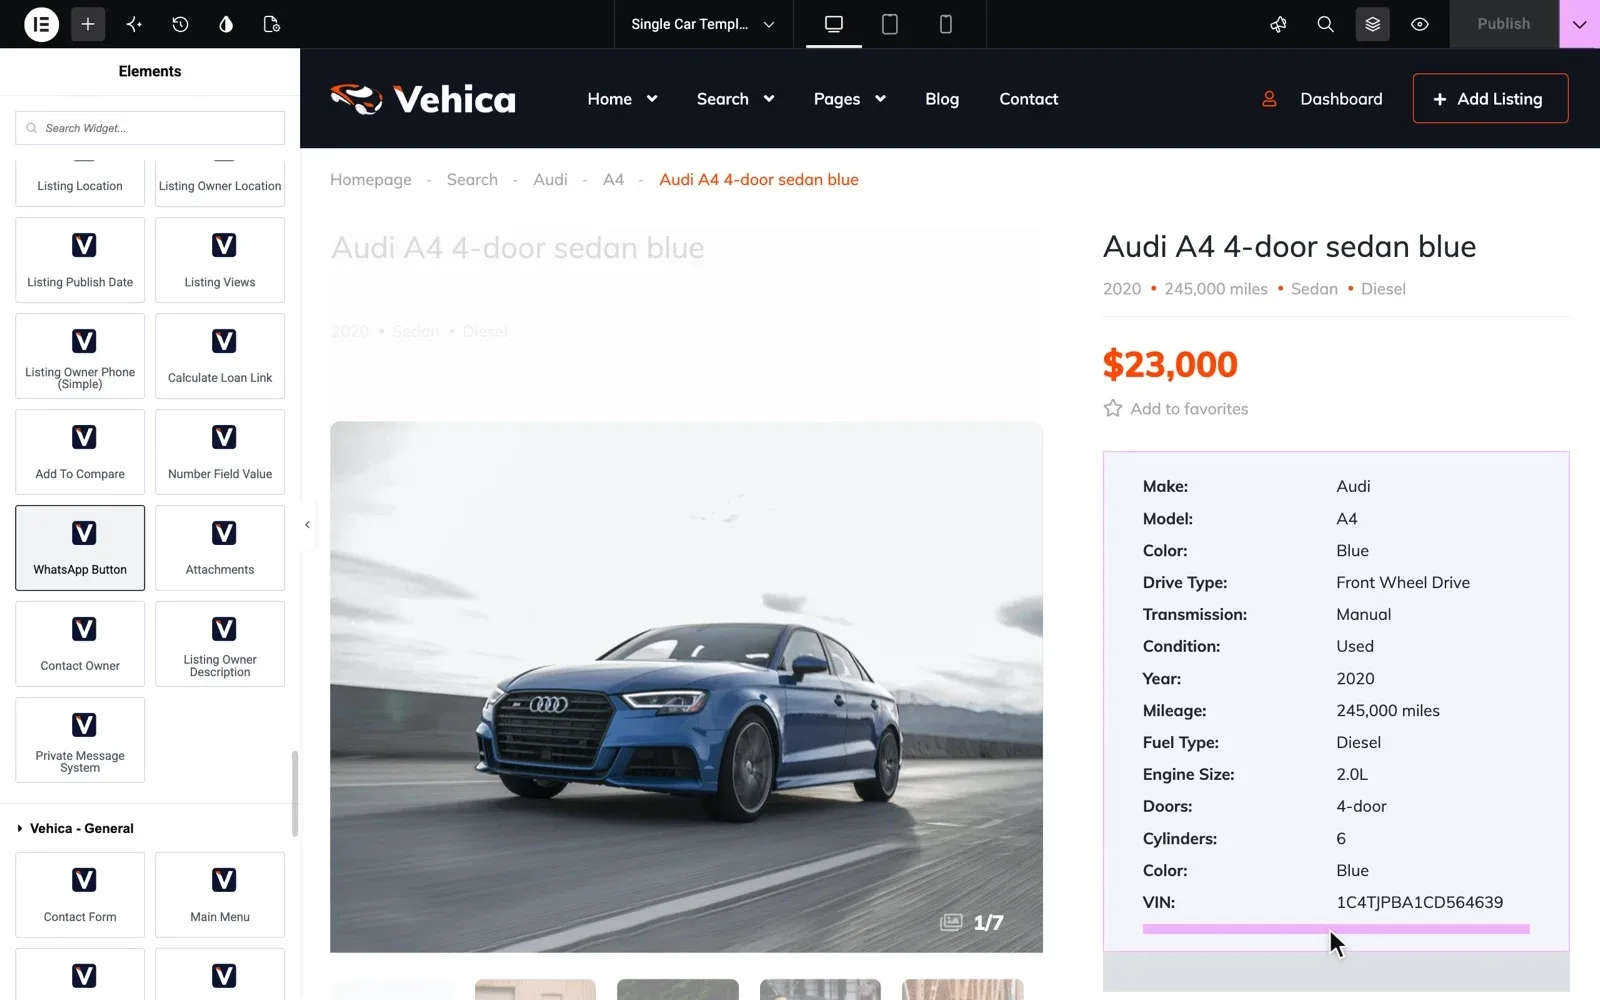
Have a column Vehica does not know, such as range for an electric car? Add a field for it in the Vehica Panel, and it shows on the car form at once. A new field does not appear on the car page or in the search by itself, so you place it there in Elementor.
Want a full list of makes and models, also for cars you do not have today? Paste each make and its models into Bulk Add Terms in the Vehica Panel, and they arrive already linked. Our guide on how to set up a car make and model list shows how.
See where each column of your sheet goes
Get your own Vehica website with the demo in place and the full WordPress admin, ready in a minute. Open the car form and compare it with your sheet.
Try Vehica free Free for 7 days. No card needed.4. Import car inventory to your website with WP All Import
Install the free WP All Import plugin and open All Import in the WordPress admin. Upload your CSV or XML file and choose Listings, which may show as Vehicles on your site. Then drag each column from the list on the right onto its field.
- Drag the make, model and year into the title, and the description into the text box
- Drag the price, year, mileage, engine size and VIN into their fields
- Drag the columns with a fixed list of choices, such as make, model, condition and body type, into Taxonomies
- Drag the photo columns into the gallery, one per line, and pick Download images hosted elsewhere
- Drag the stock number into the Unique Identifier box, choose 1 record in each iteration and run the import
Start with a file of five cars and check them on the site before you load the rest. Every screen is in the guide Import any XML or CSV File (Free WP All Import Compatibility).
Take a backup before a big load, so you can go back if a column lands in the wrong field. Our guide on how to back up a listing website explains how.
5. Connect models to makes and check your cars
Once the cars are in, open the Vehica Panel, go to Advanced and click Connect. Vehica reads your cars and puts each model under its make.
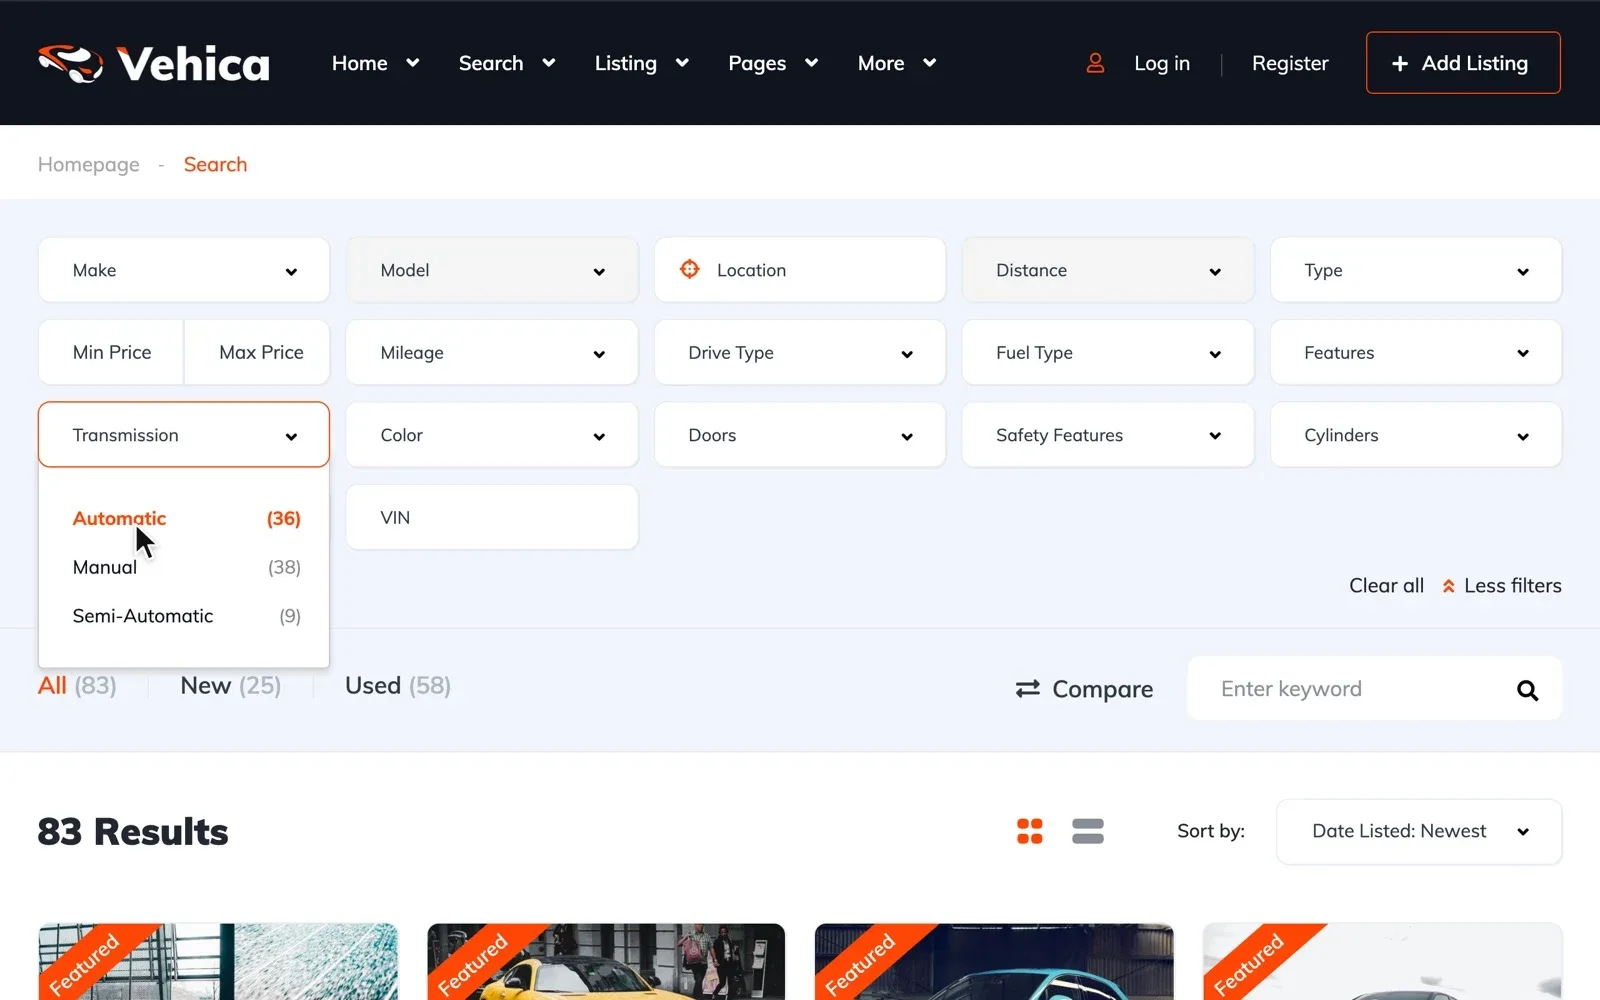
Now open the search page. The fields your columns filled can work as filters, and each option shows how many cars match. Pick a make, and only its models stay in the Model list.
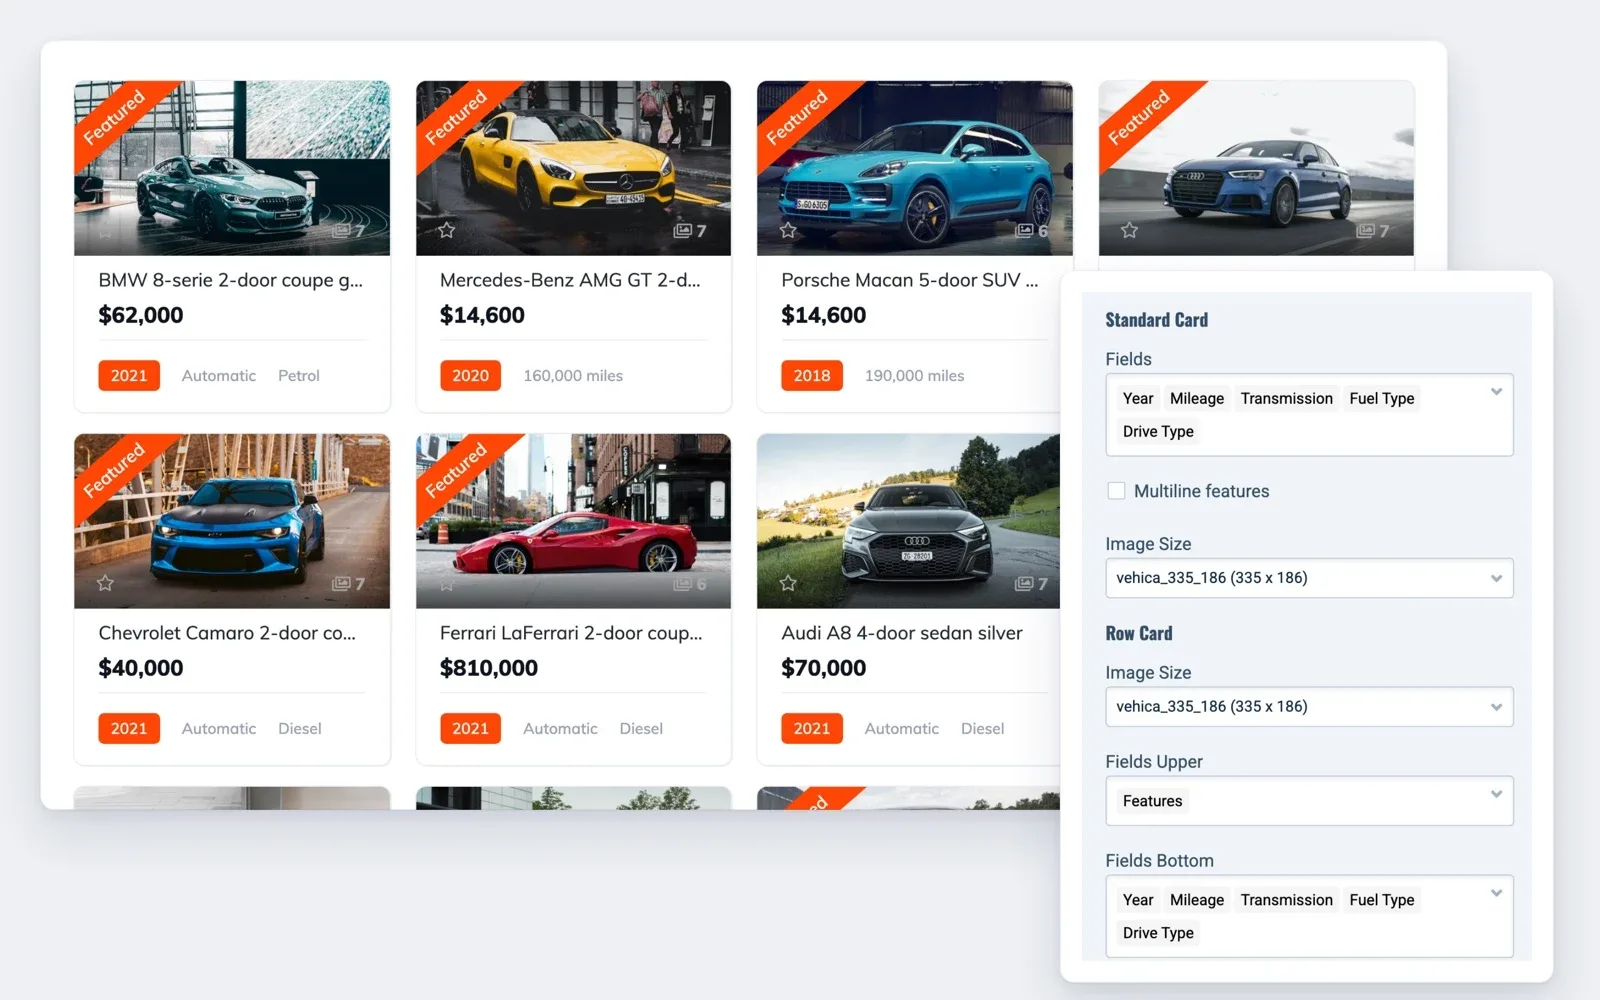
Open five car pages and check the photos, the price with your currency and the mileage with its unit. Then choose what each car card shows.
If photos are missing, a link in your file does not open a photo. If the load stops halfway, your server most likely ends long jobs, and its settings need a change.
Keep your stock up to date after the first load
Your website does not sync with dealer software or car portals. When your stock changes, you change the website too.
- A new car comes in. Add it in the admin, or duplicate a similar car with one click and change the details.
- A car is sold or reserved. Give it a Sold or Reserved label, which you create once, and a ribbon shows on its card.
- You want sold cars out of the search. Vehica can hide them from the results.
- Many cars arrive at once. Load a new file with only those cars.
On a site where other dealers post too, each dealer adds cars one at a time in their panel. Whole files are loaded by you, in the WordPress admin.
Your cars are online, and the car dealer website checklist shows what buyers look for next. Running a small lot? Read how to create a used car dealer website.
Load the cars, leave the site to us
Keep your trial site on Site Care and load your stock file there. You look after the cars, and we look after the site.
Site Care
The team that made your MyHome, Listivo or Vehica site keeps it backed up, updated and fast, with Premium Support included.