Import any XML or CSV File (Free WP All Import Compatibility)
Bring an existing vehicle inventory into Vehica from an XML or CSV file with the free WP All Import plugin: map the title, custom fields, taxonomies and gallery images, then connect Parent > Child terms once the records are in.
3 minute read
If you wish to import listings from your XML or CSV file, you can use the free version of the WP All Import Plugin.
This article shows how it works. Please consider that each XML / CSV file can be a little different.
Upload your file and choose what to import
-
1
Install WP All Import
Install the free WP All Import plugin. You can find it here: https://wordpress.org/plugins/wp-all-import/
-
2
Open the plugin
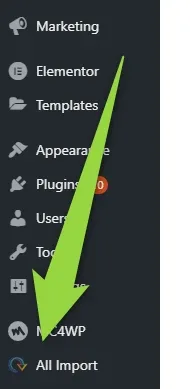
Open All Import in the WordPress admin menu.
-
3
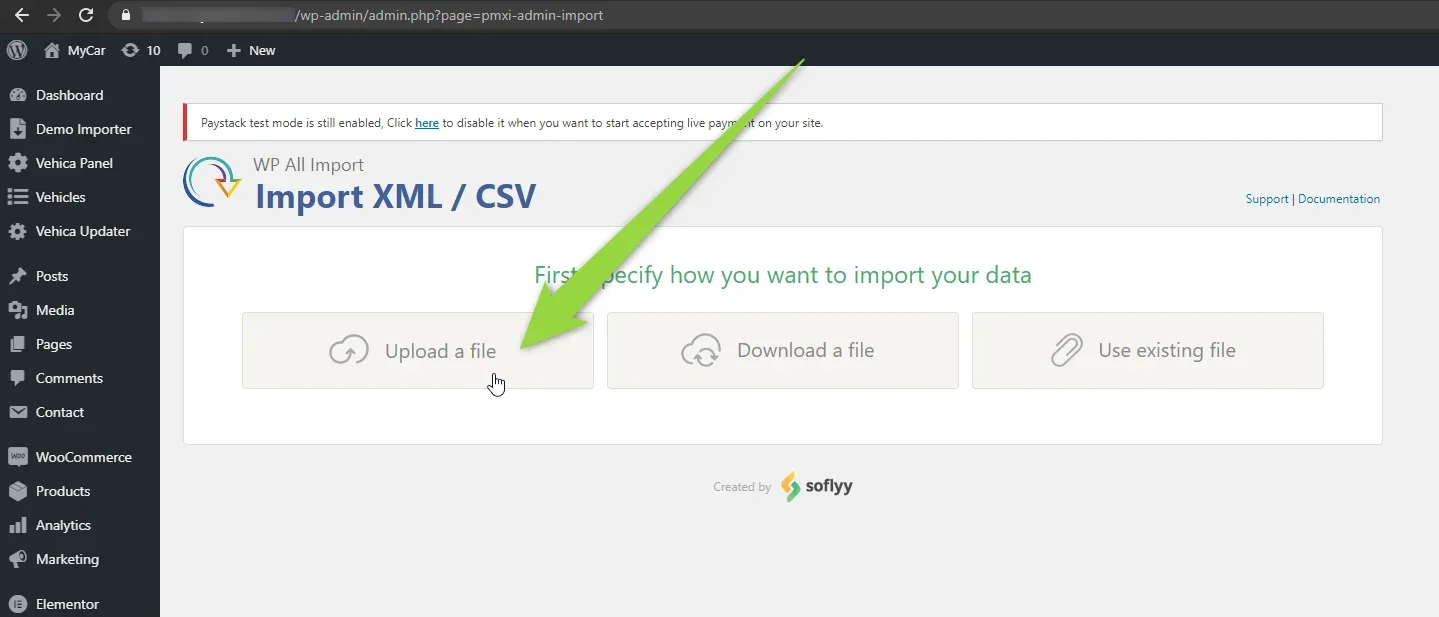
Click “Upload a file”
-
4
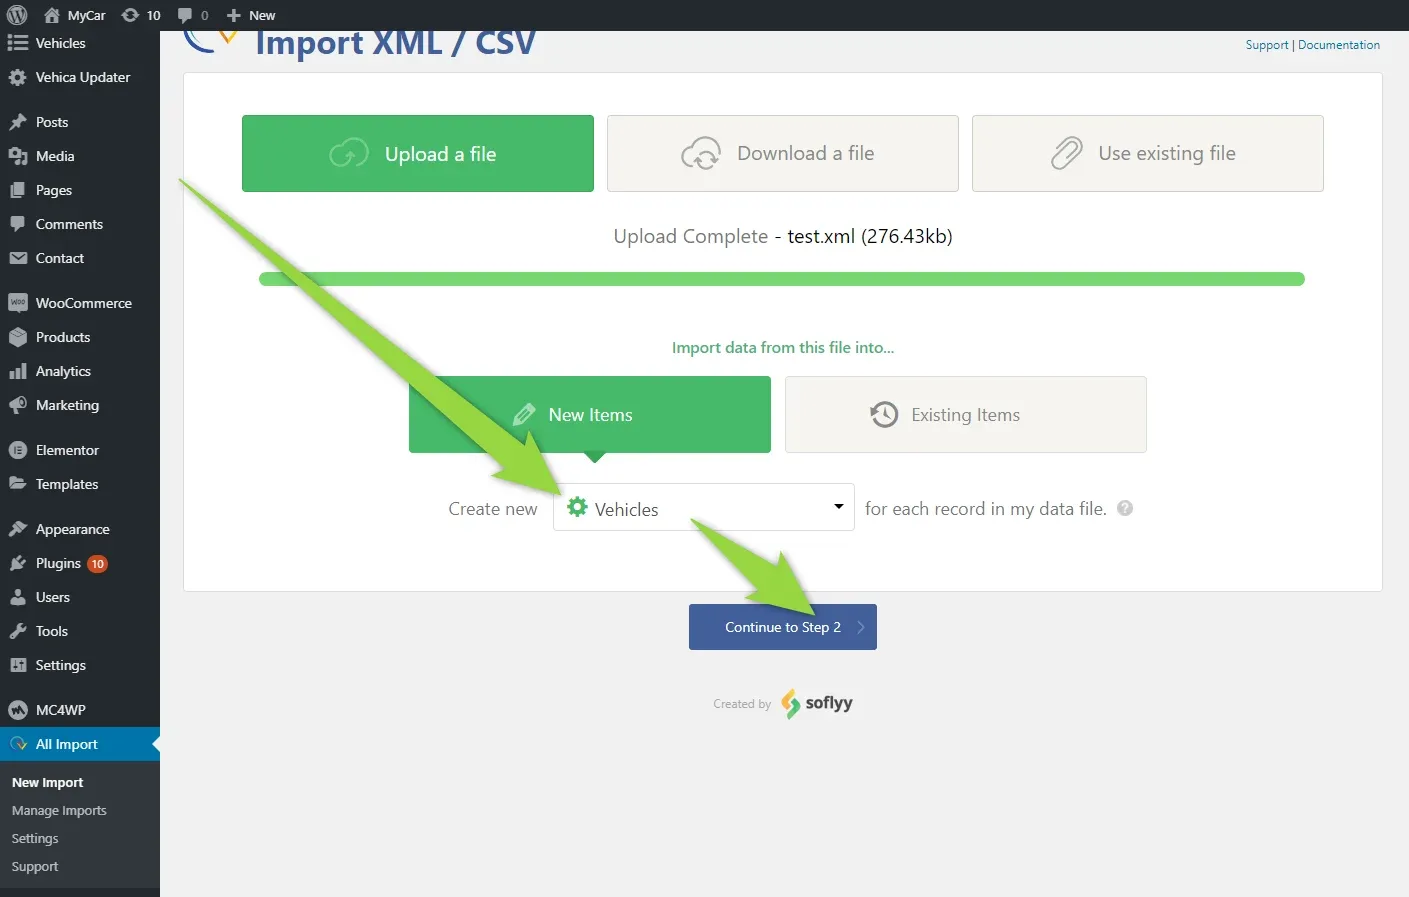
Select “Listings”
Select Listings — if you already renamed it in Vehica Panel > Translate & Rename it can be displayed as e.g. “Vehicles” — and click Continue to Step 2.
-
5
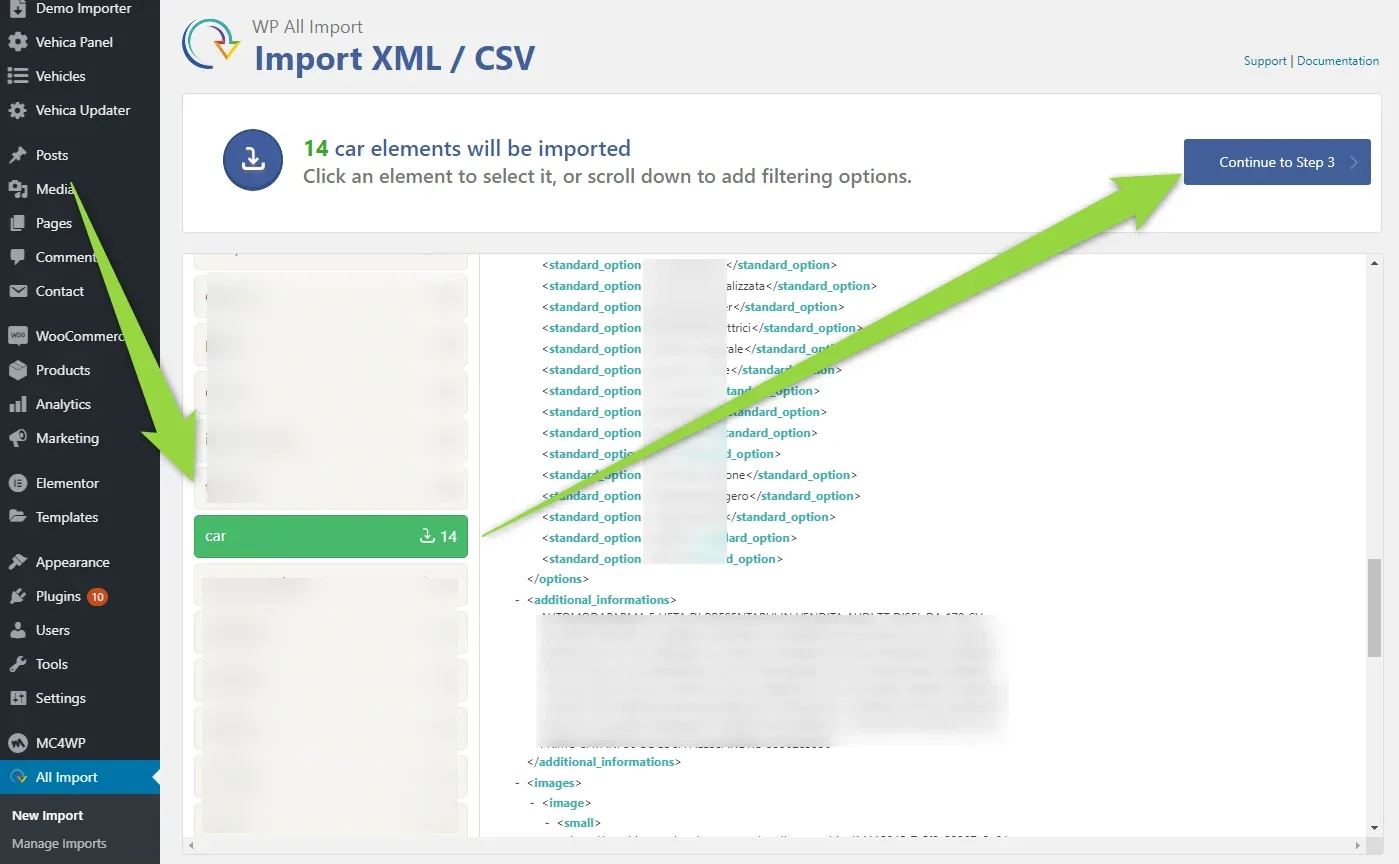
Select the elements to import
Select only the elements you wish to import — usually they are named “car” / “listing” / “vehicle”.
Map your file onto the listing fields
“Drag and drop” variables from the right column onto the field where you wish to import them.
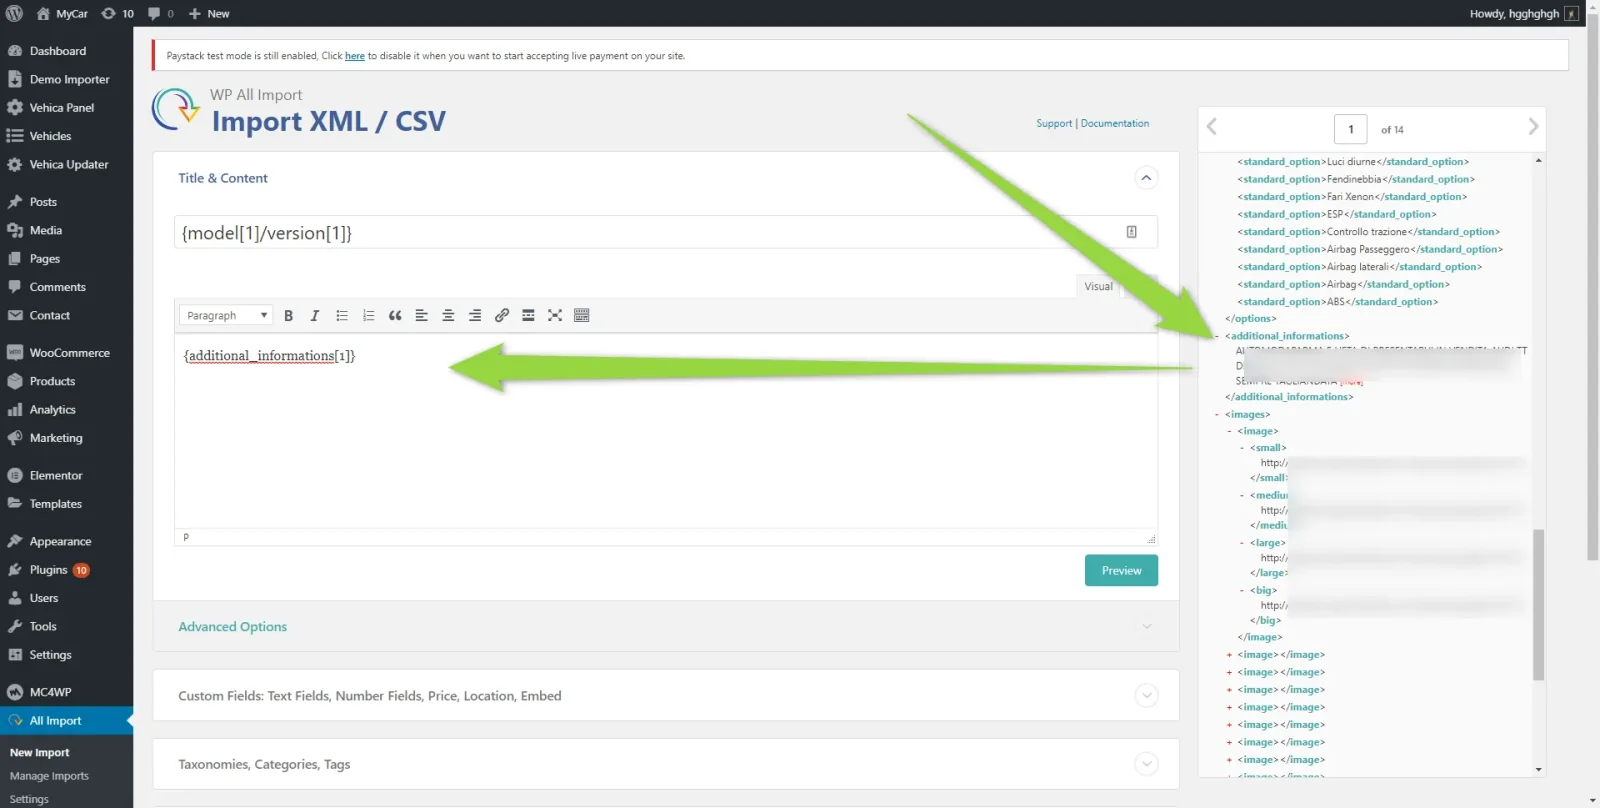
Name and description
Start with the name and the description.
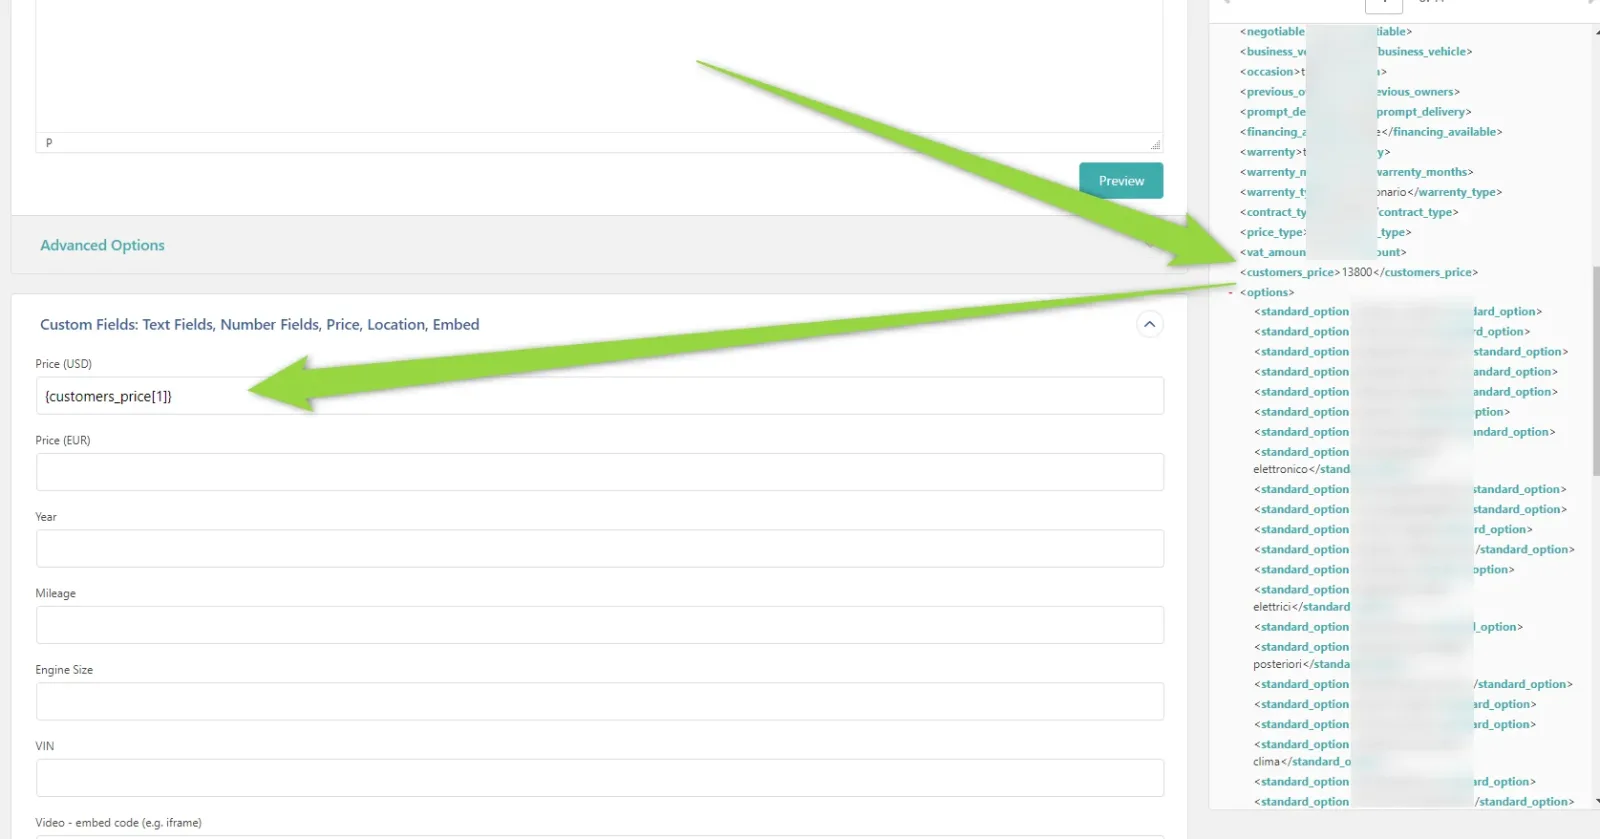
Custom fields, e.g. price
Copy fields such as Price.
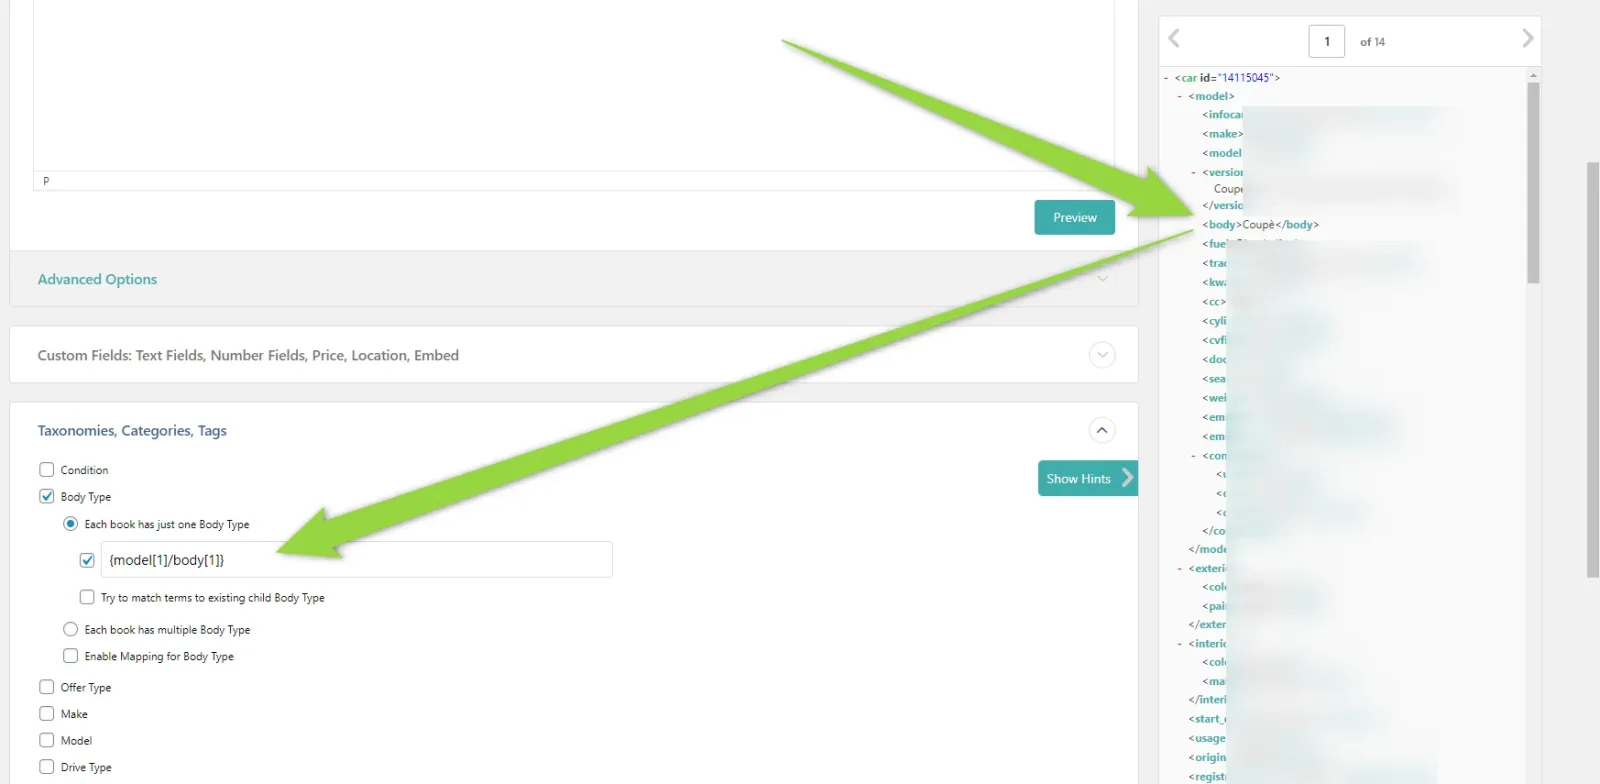
Taxonomies
Drag and drop “Taxonomies” such as “Body Type” or “Condition”.
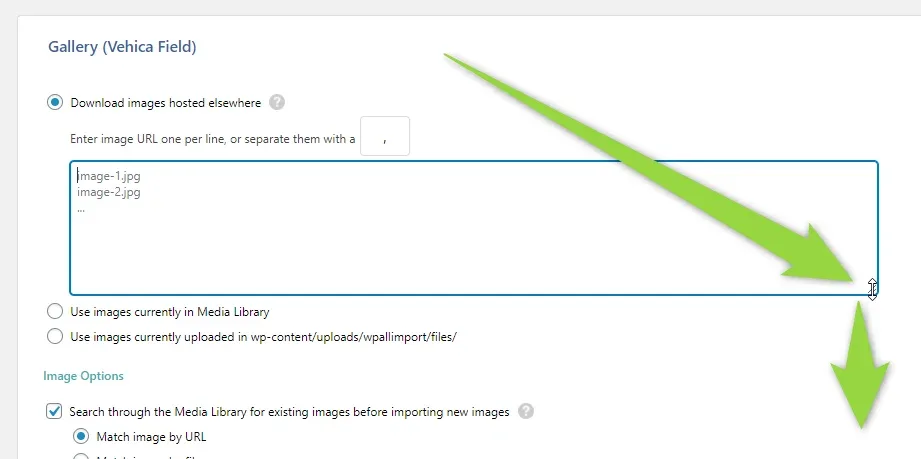
Import the gallery images
“Drag and drop” the gallery image URLs.
Firstly, to make it easier, extend the area where you will add the links.
The original vehicle XML we use has up to 50 images. The best option is to import only the “full images”, because thumbnails are created automatically during the import. Usually the image paths look similar to the screen below (the numbers 1-50 in the URLs refer to the first, second, third… 50th image in the gallery).
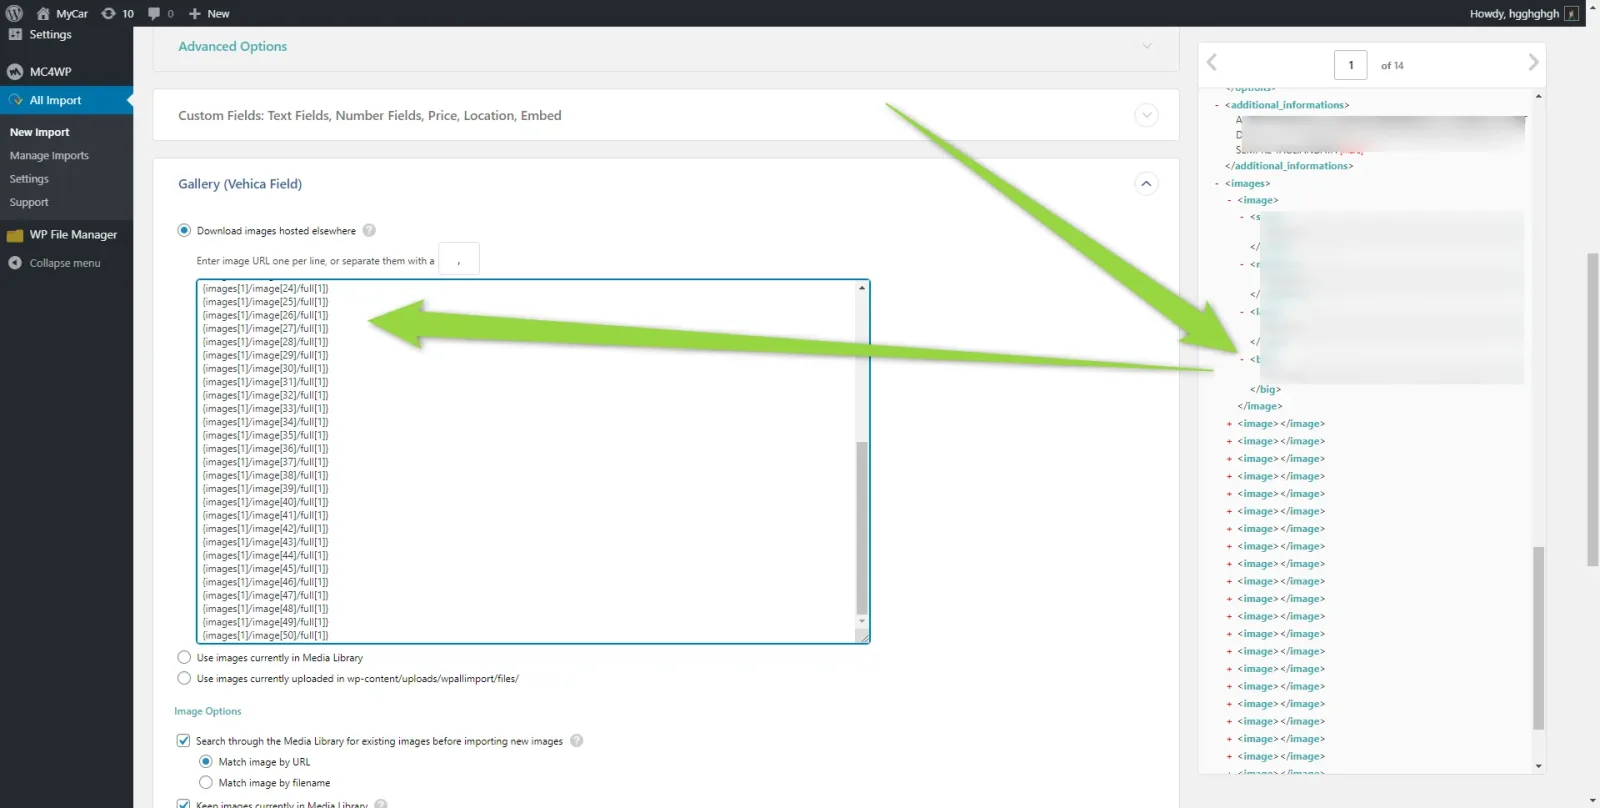
You can find more information about importing images here:
Run the import
-
1
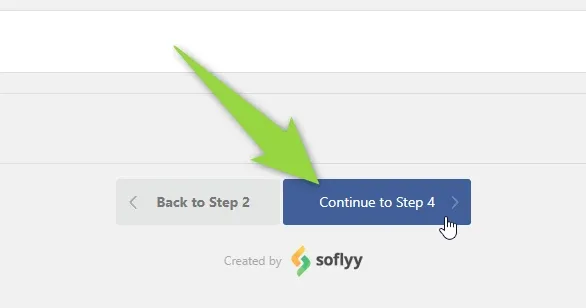
Continue to Step 4
-
2
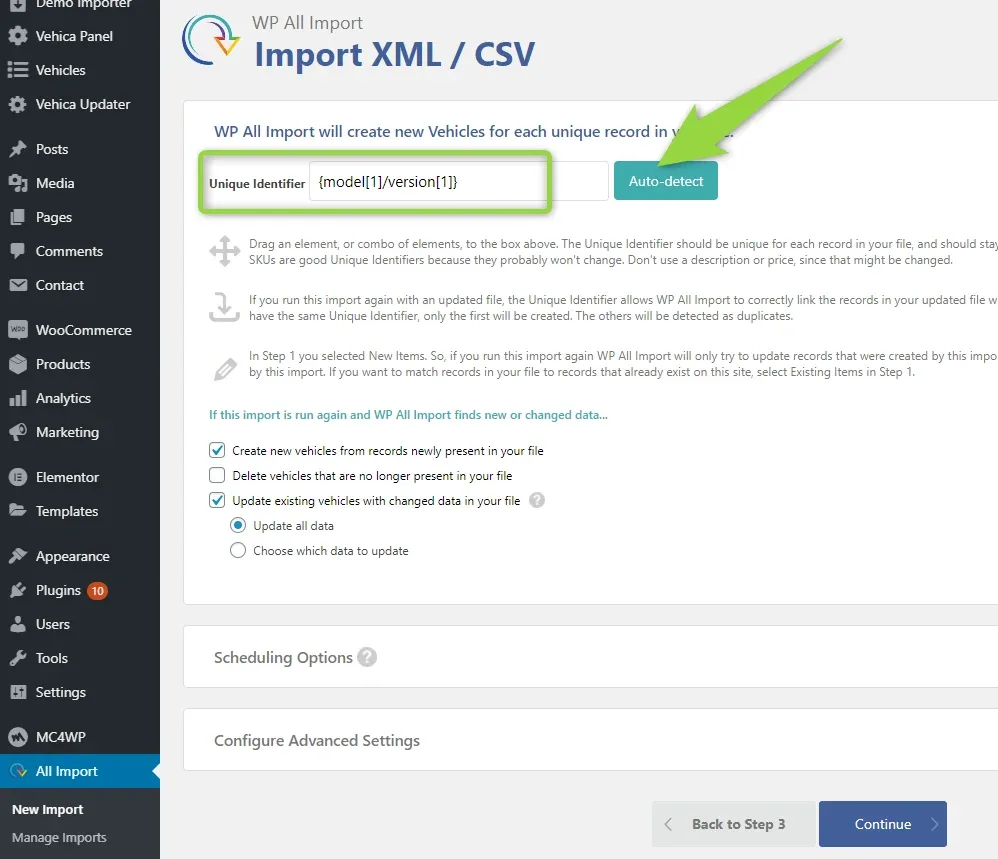
Click “Auto-detect”
-
3
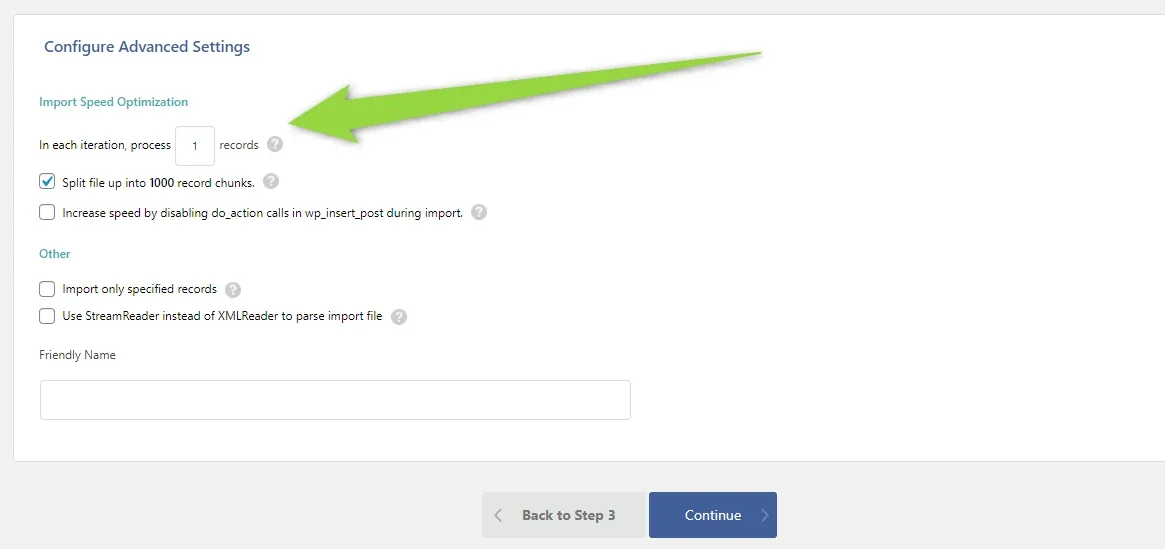
Process one record per iteration
Please make sure the “In each iteration, process 1 record” option is selected.
-
4
Click “Continue”
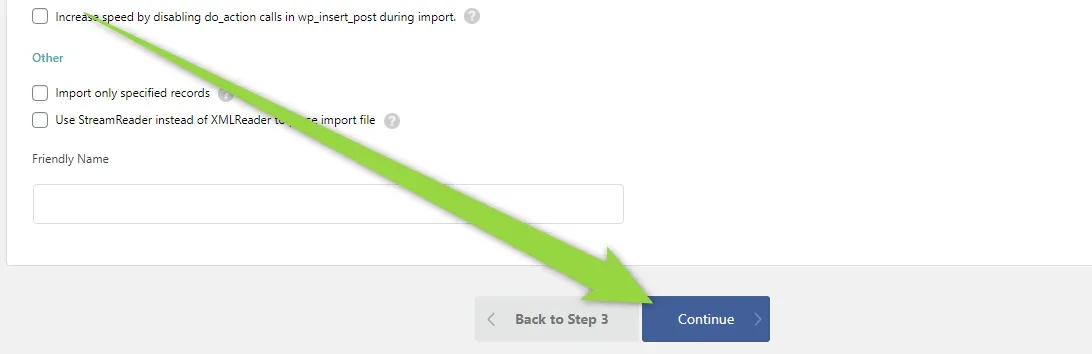
-
5
Click “Continue & Run Import”
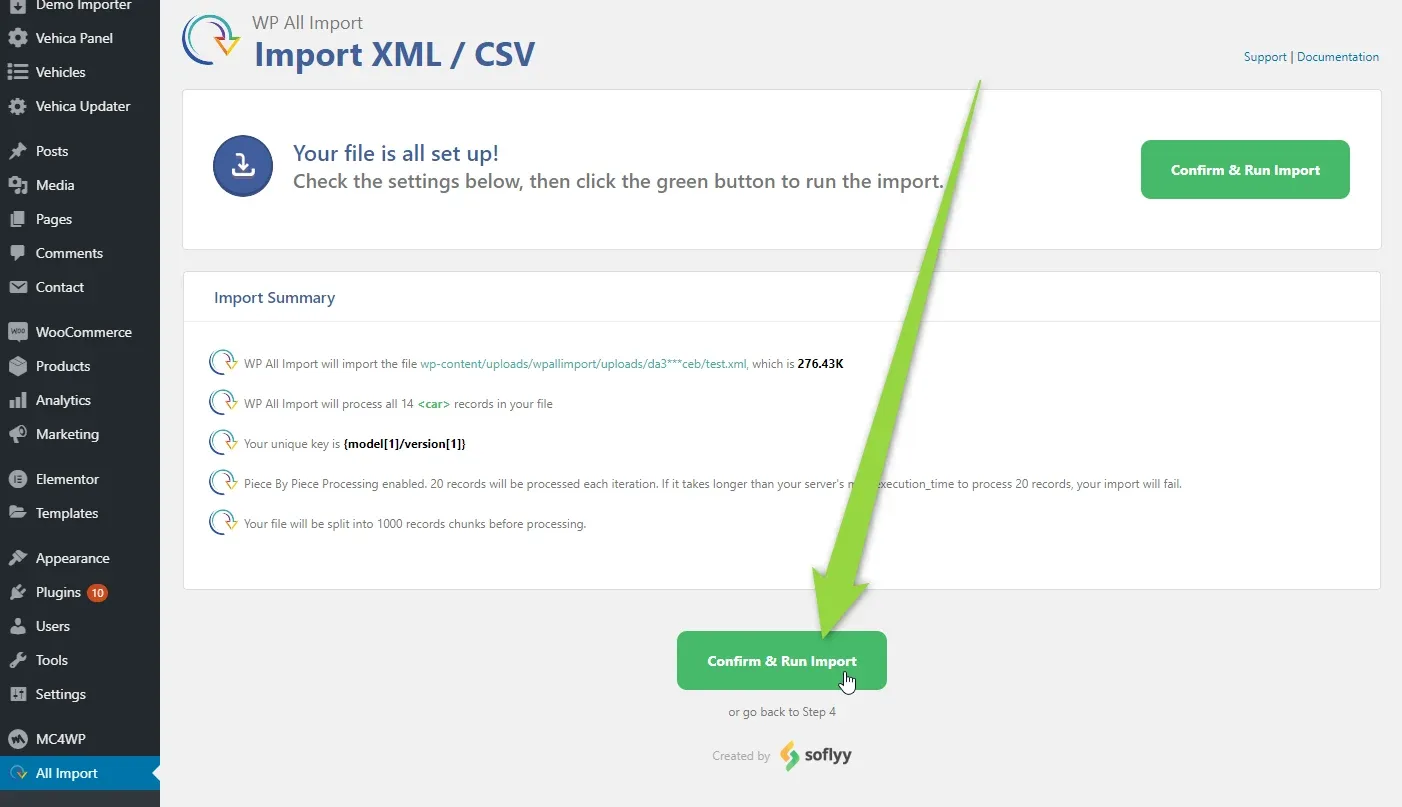
-
6
Wait
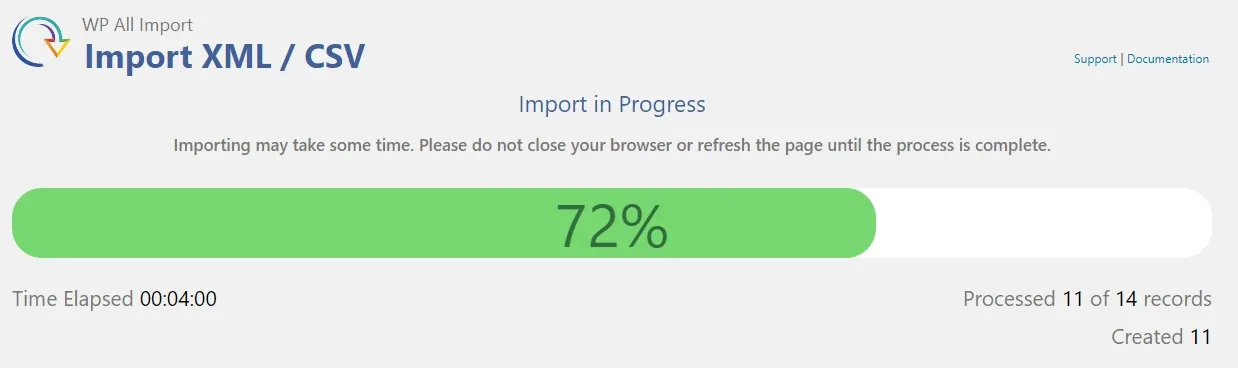
-
7
Done
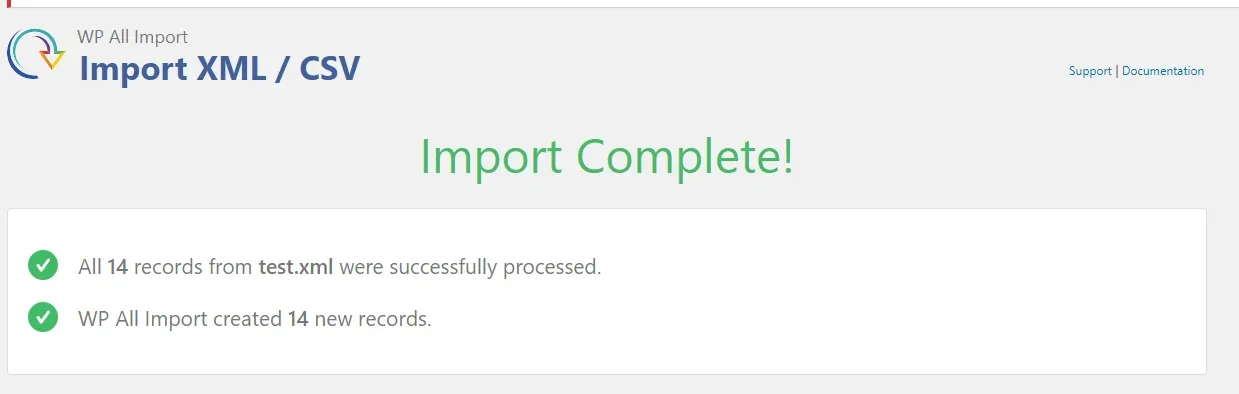
Connect Parent > Child relations
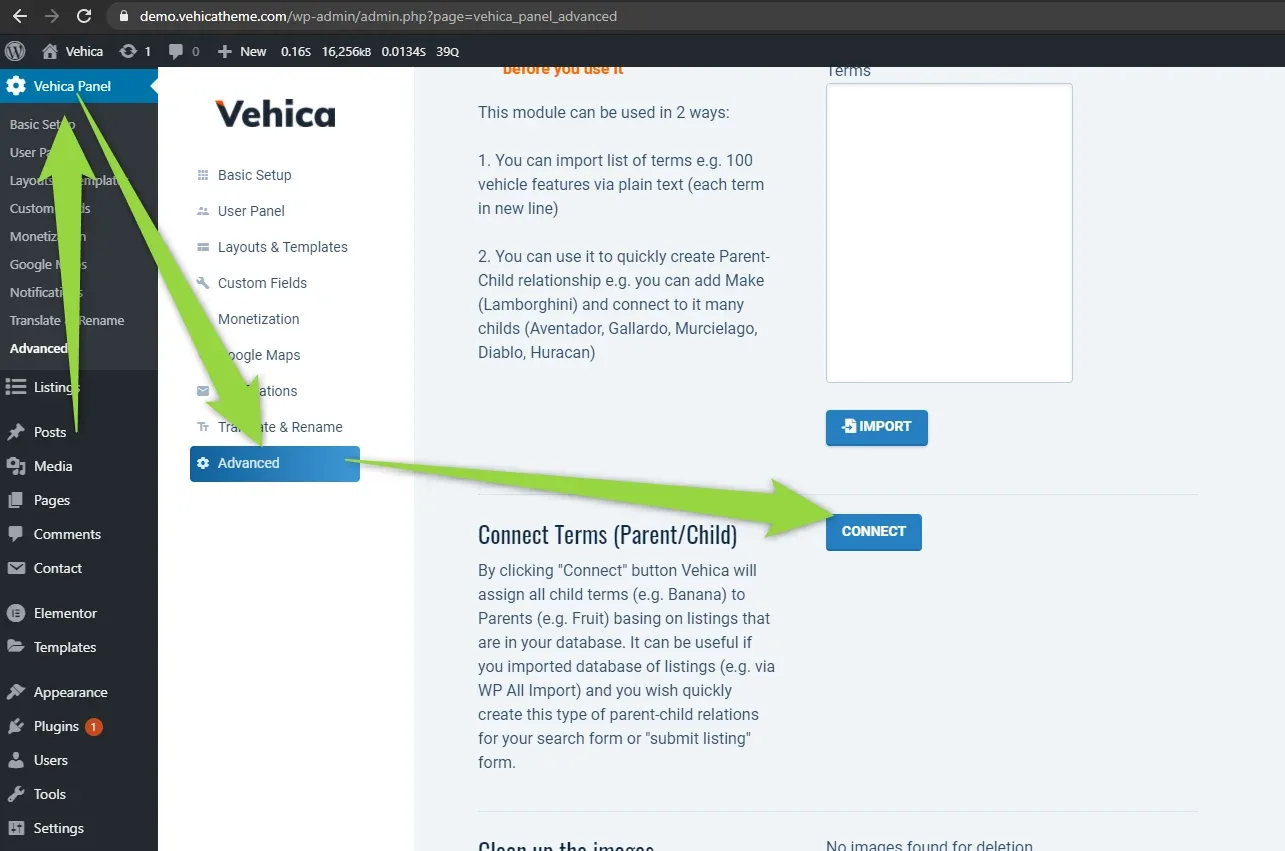
If you have some Parent > Child relation, e.g. Make (BMW) > Model (X7), please click the Connect button in Vehica Panel > Advanced. It is described in more detail in Connect Terms (Parent/Child).
Visit your inventory page to check if the import was done correctly.
If the import does not finish
If there is any problem, it is probably related to the fact that the server is stopping the import process. Please check this article to fix it: https://www.wpallimport.com/documentation/troubleshooting/terminated-imports/
Ask the people who build Vehica
We answer by email from support@tangiblewp.com. With Premium Support, we also fix your site when something breaks.
We can also run your site for you, or build a new one.
Was this guide helpful?