Menu Configuration: A Comprehensive Guide
Learn which of the three places in WordPress controls each Listivo menu setting, how layouts affect the changes you make, and where the menu's limits are.
3 minute read
Listivo offers a variety of menu options including the ability to change colors, adjust typography, and modify logo size. It features a transparent option, a sticky menu option, a customizable call-to-action (CTA) button, and a built-in predefined user menu. On mobile devices, the menu operates as a modern off-canvas solution. This general article will guide you through the different menu options available.
It is very important to note that menu options can be found in three locations.
1. Listivo Panel > Menu > Settings
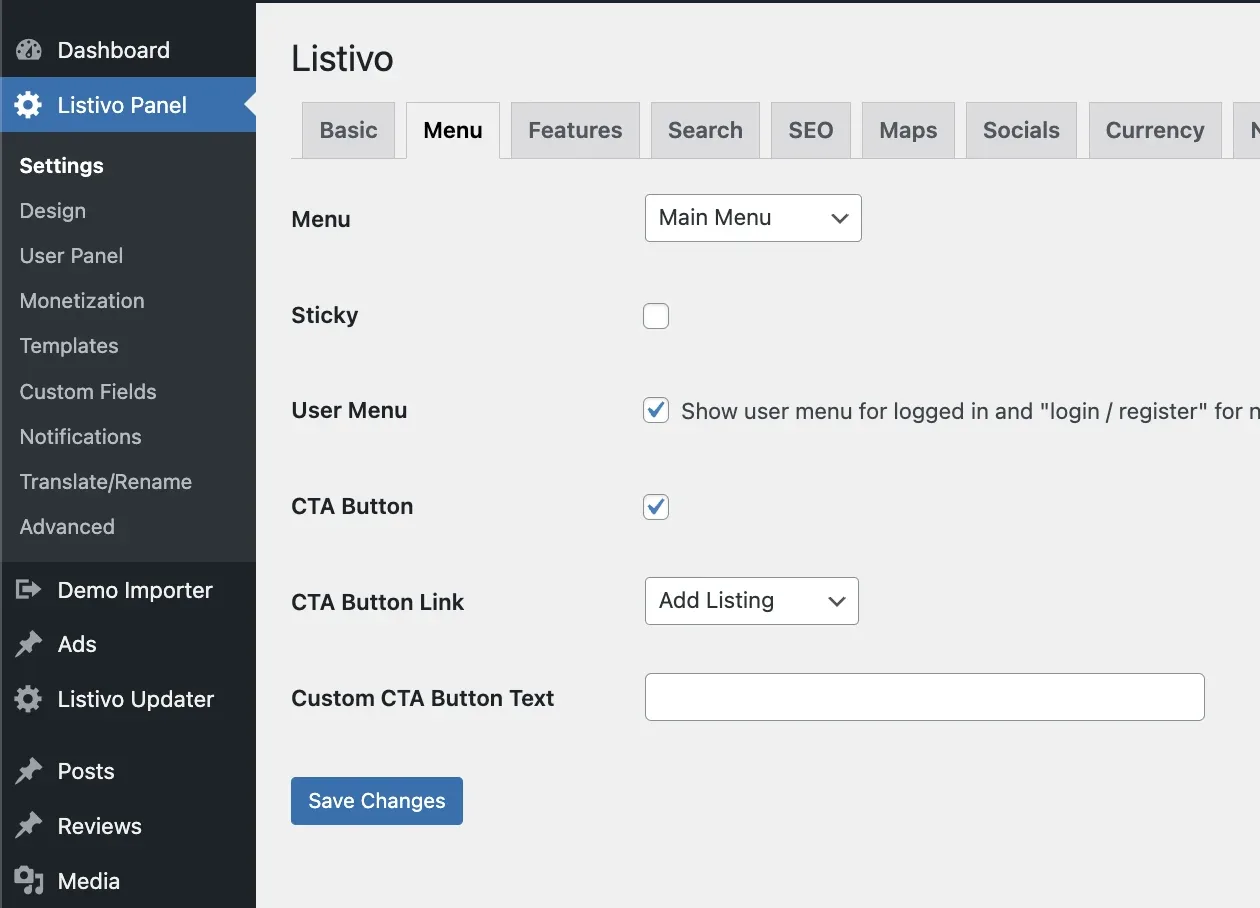
There you can access menu styles, such as logo height, menu width, and other style elements (colors and typography for menu and links). More options are available in the Menu widget found in your template.
2. Elementor Menu Widget, which is part of a specific layout
-
1
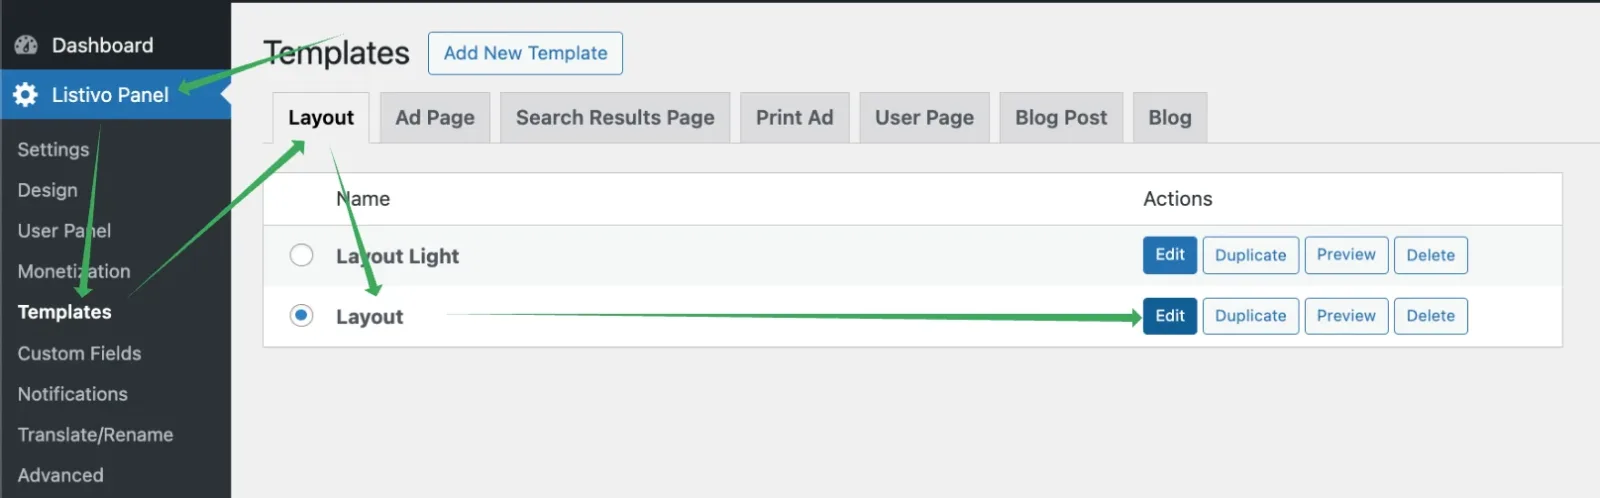
Open the layout
Navigate to Listivo Panel > Templates > Layout and edit the layout.
-
2
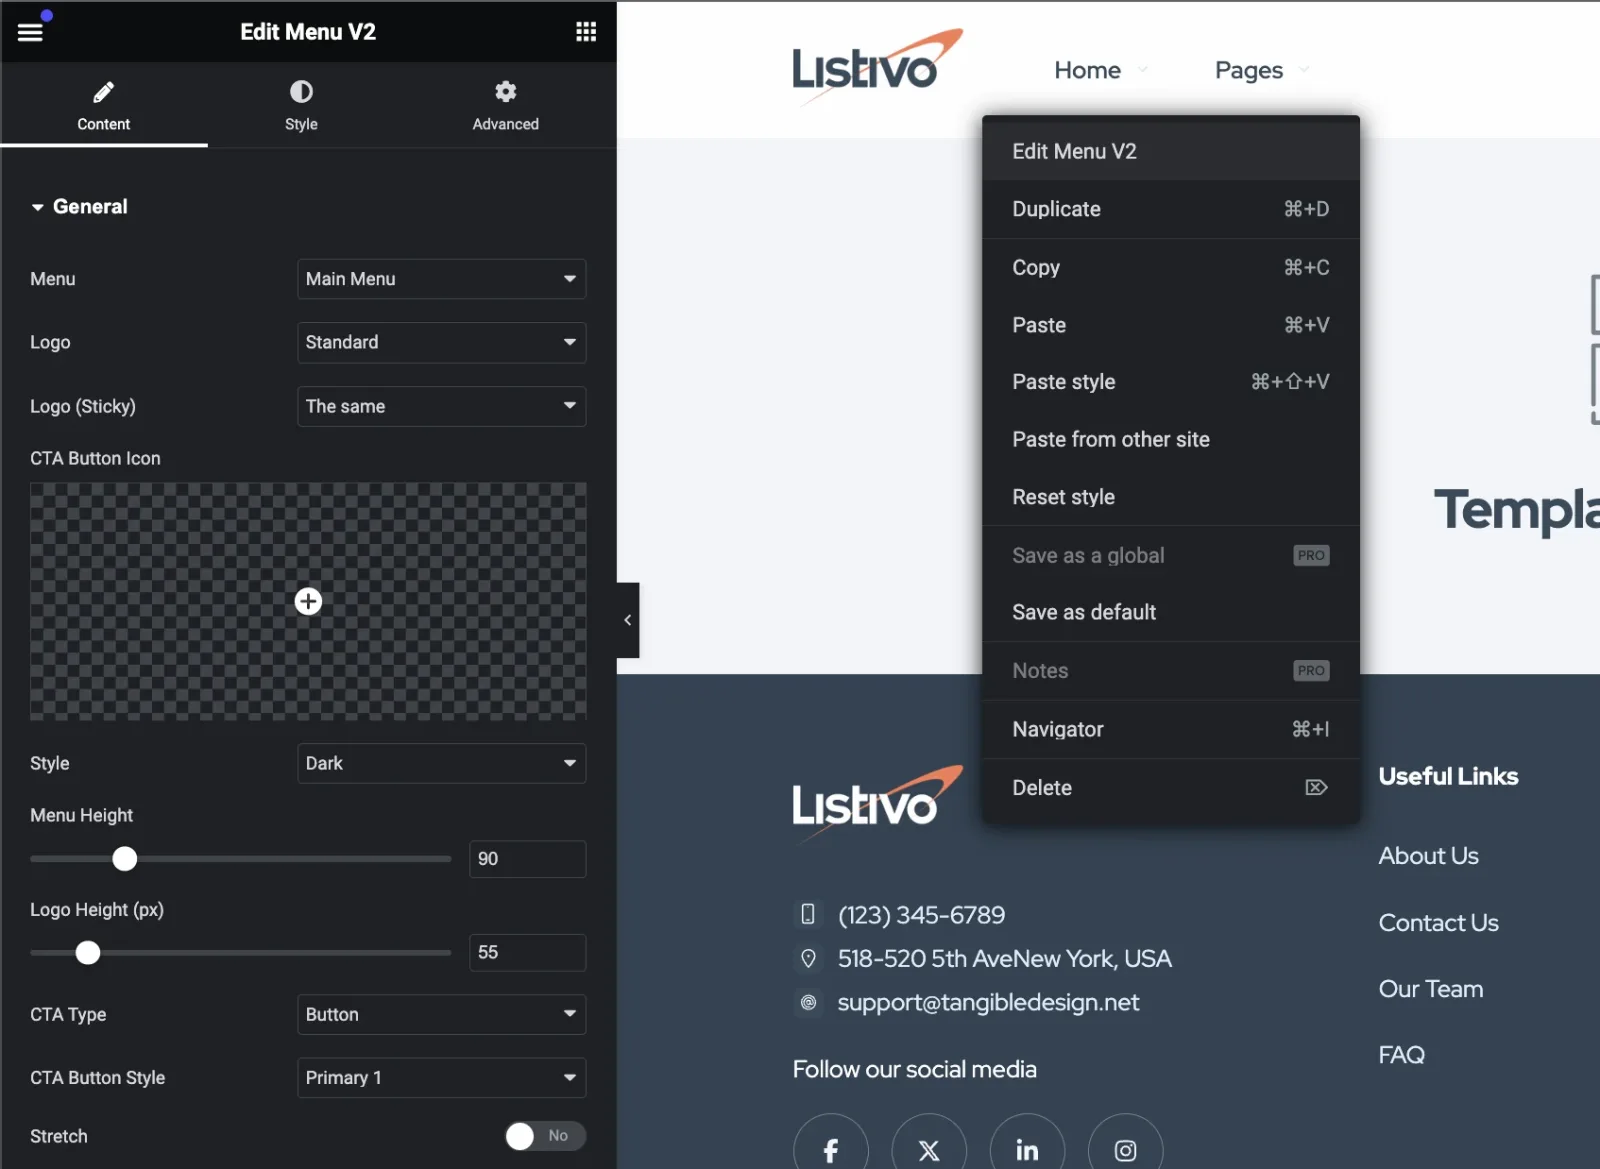
Edit the menu widget
Edit the menu widget to find more options.
-
3
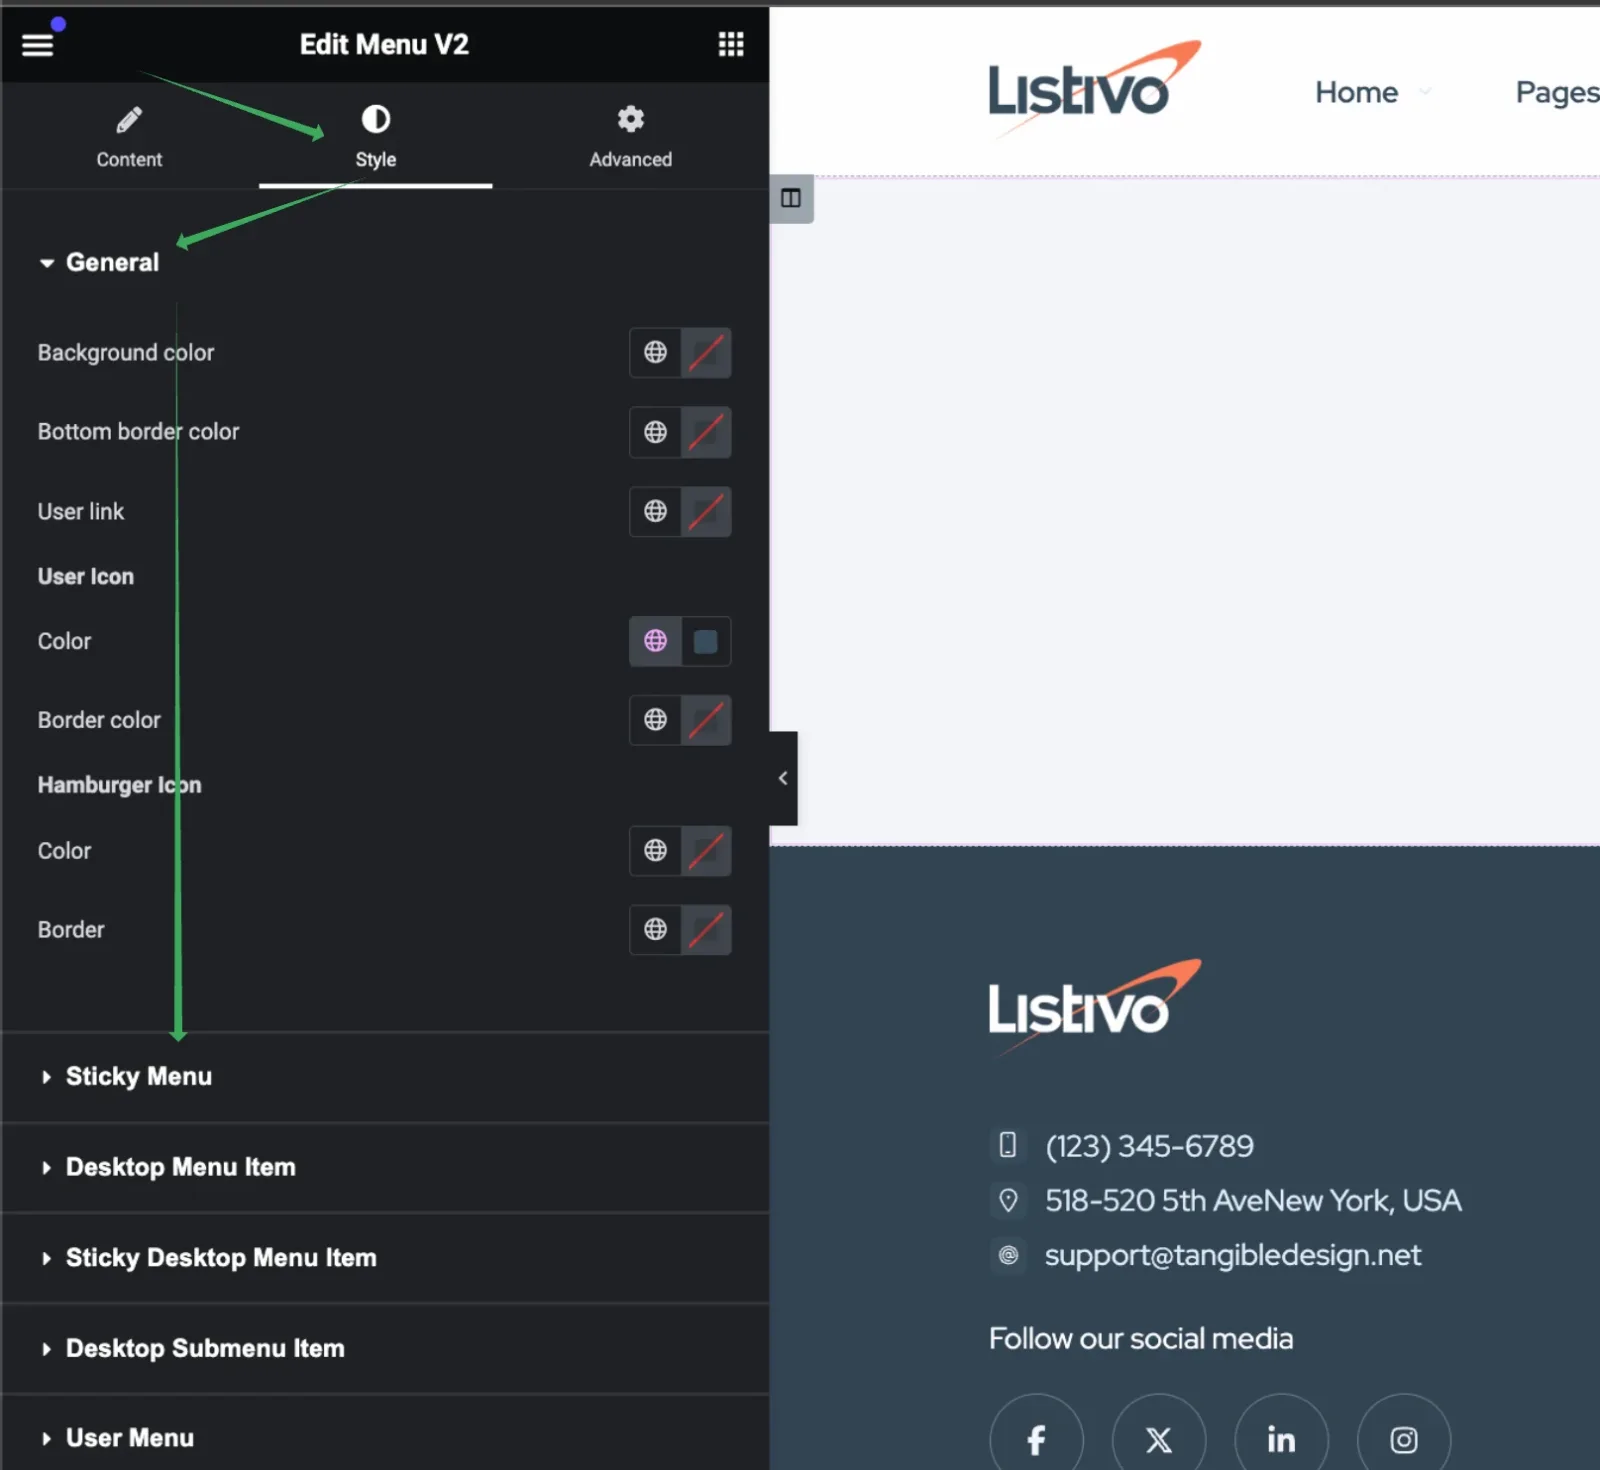
Switch to the Style tab
The Style tab is where you focus on changes in color and typography.
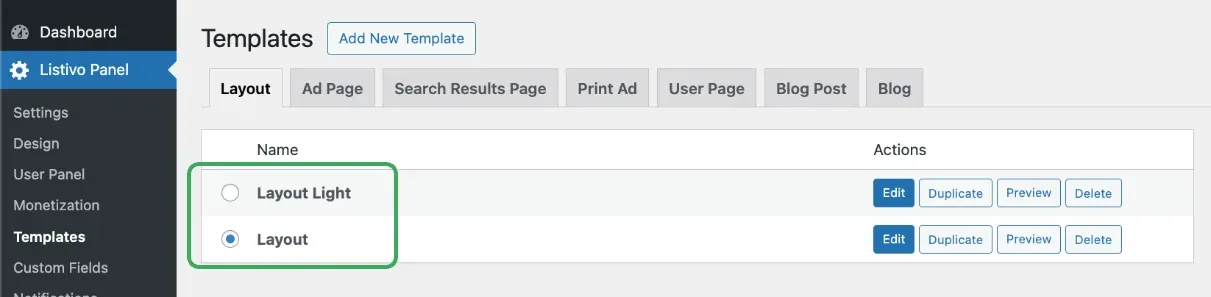
Editing one layout, such as stretching a menu, will not automatically update the Menu Widget in other layouts. If your website uses multiple layouts, we recommend making changes to all of them to ensure consistency, particularly with menu width and typography font sizes. For instance, if you have a homepage with a stretched, transparent menu with link font size 20px, applying the same stretch and font size to other pages with a solid background menu will maintain a consistent look.
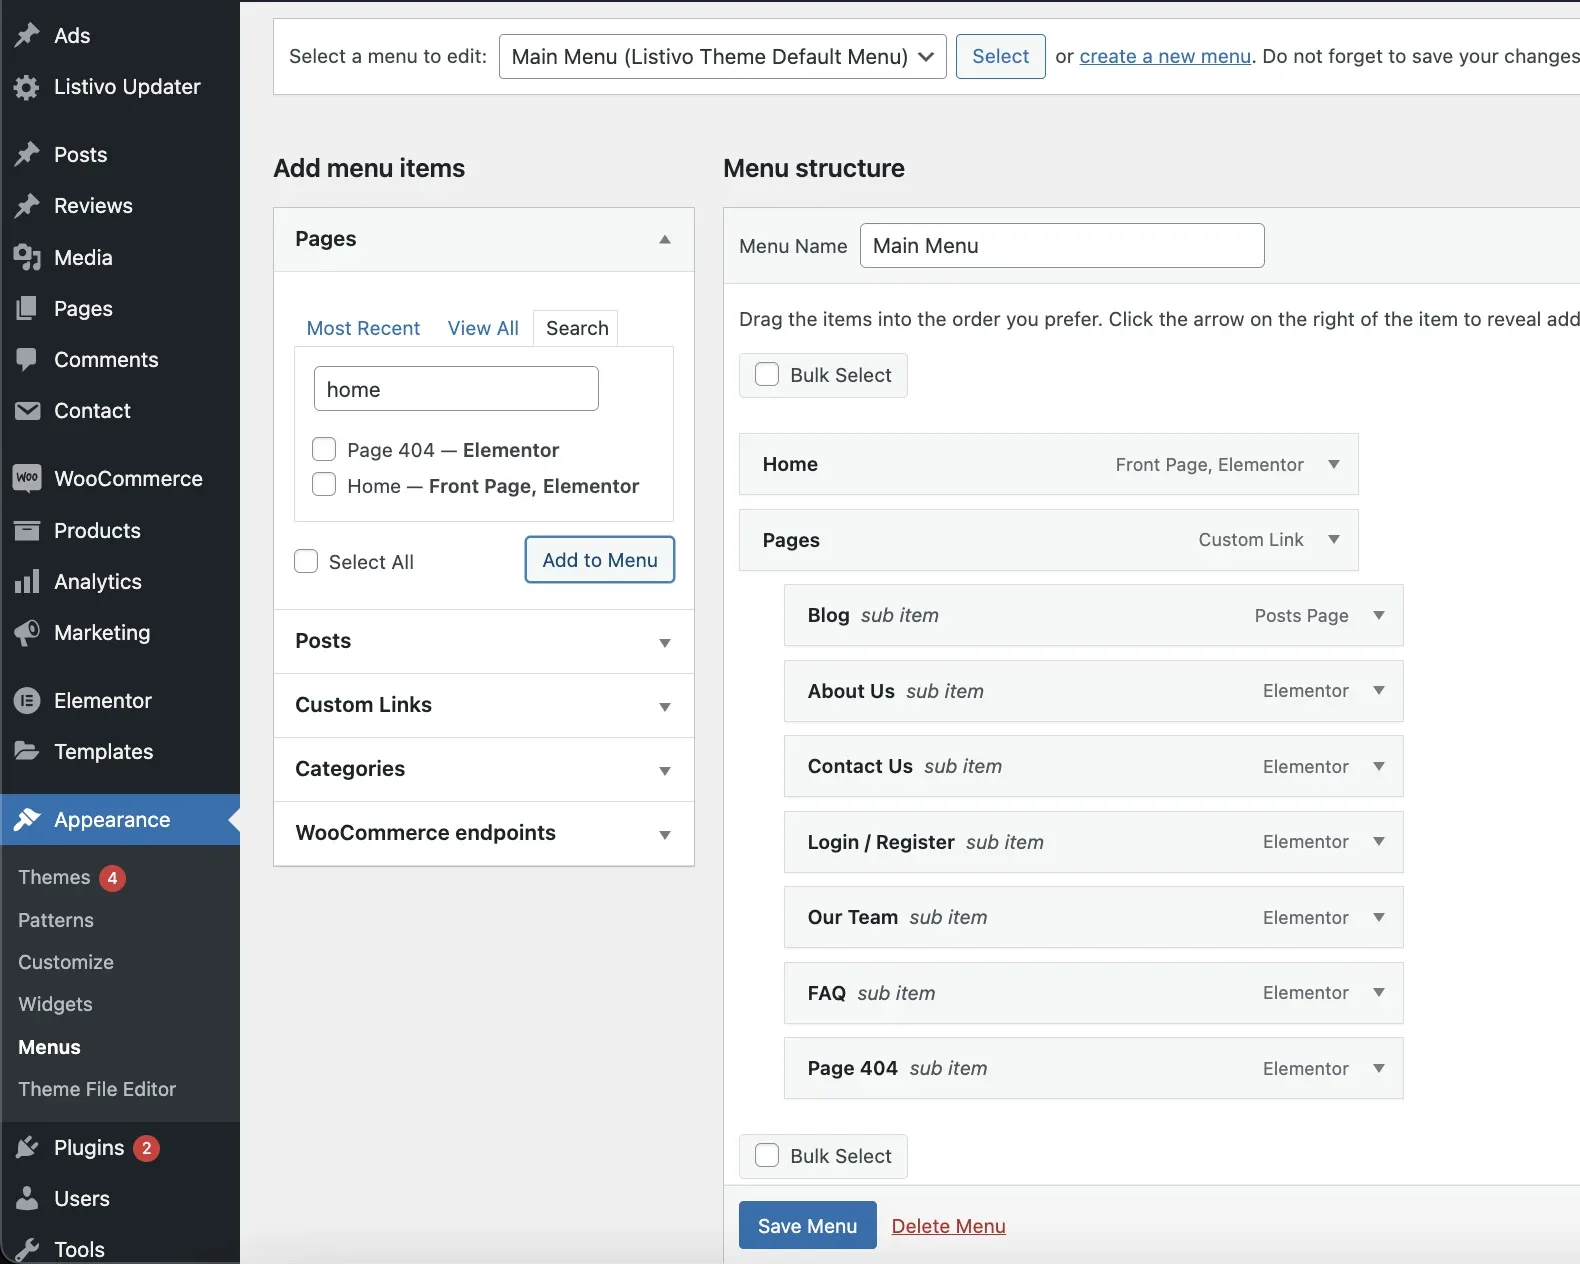
3. Appearance > Menu
This is the default WordPress module for menus where you can build your menu structure by adding, editing, removing, and reordering links. This module is located under Appearance > Menu because it is part of the WordPress core engine. As theme providers, we are obligated not to duplicate functions that are part of WordPress.
Understanding Menu Width
The menu length does not automatically adapt to the number of links it contains. Adding too many links can cause the menu to extend to a second line, which is not supported and may disrupt the layout.
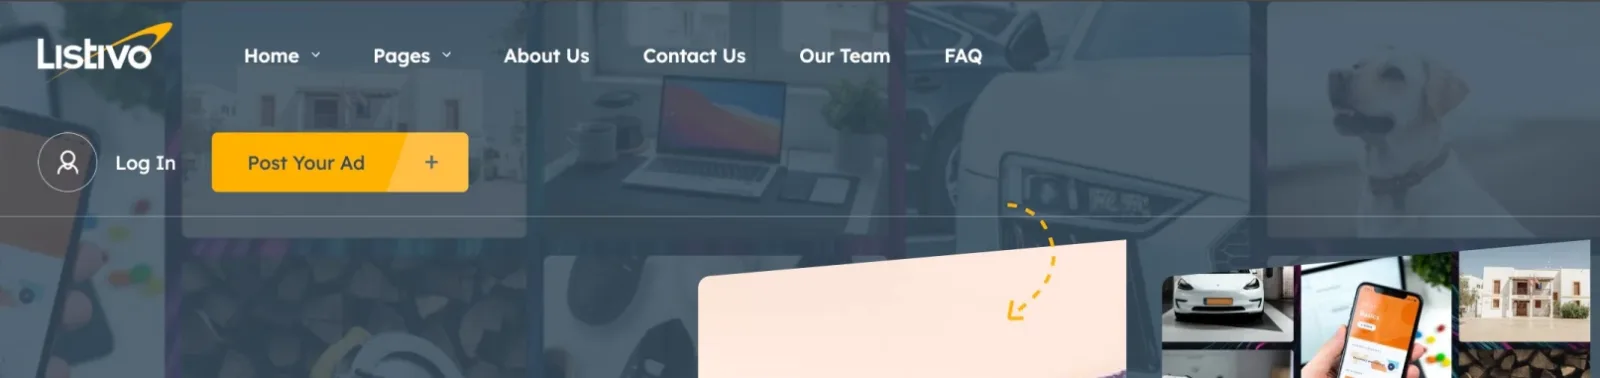
If this happens, don’t worry. For solutions on how to manage and prevent this issue, refer to Fixing Menu Collapse to Second Line.
Detailed articles about the menu
What is not included
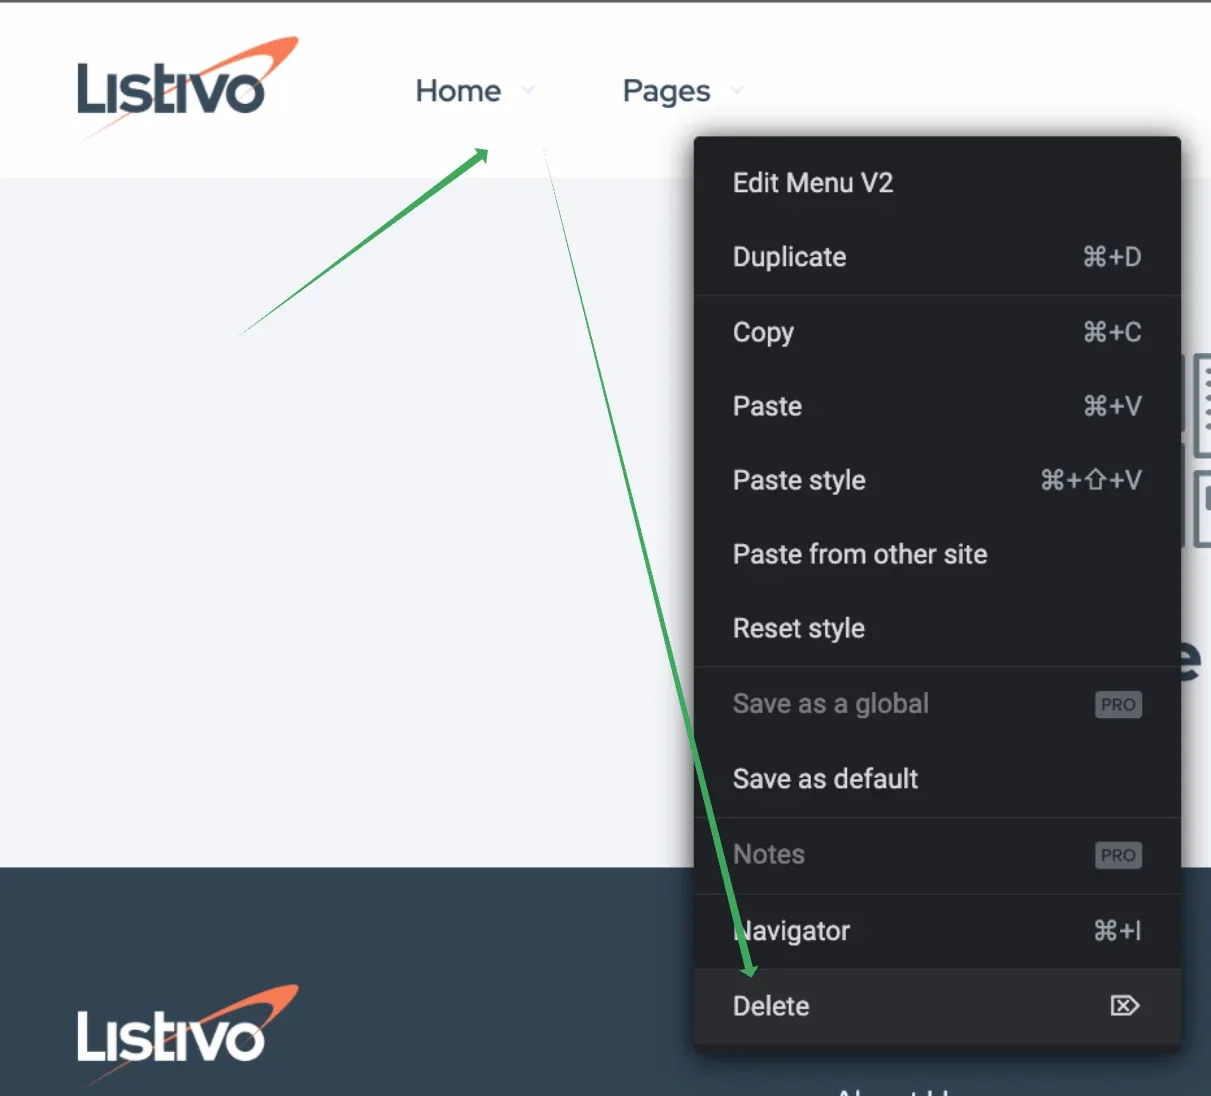
If you need to modify the menu beyond what the system allows, like relocating the 'Add Ad' button on your mobile device, these changes are not included. More extensive modifications might require custom coding or a different menu widget from another author. To replace our widget, simply right-click it in Elementor and select 'Delete'. Then, you can use any alternative that suits your needs better or build your own menu from various Elementor elements. Keep in mind, this is a classified ads theme, and its menu is just one aspect. Some authors spend years mastering menu plugins, and you are welcome to explore other solutions that better fit your requirements.
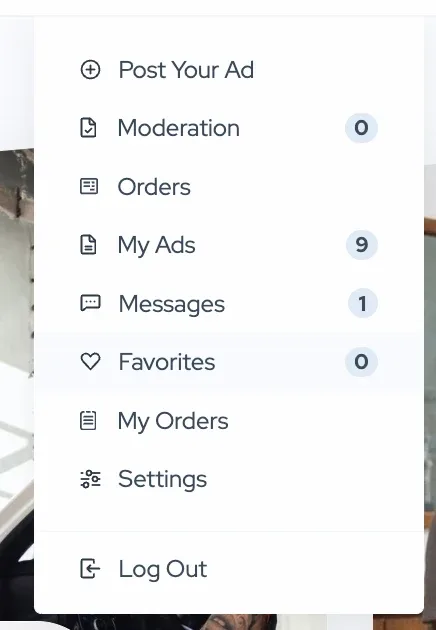
User menu dropdown links are hardcoded in the files, and the theme does not support options to rearrange them or add new pages. Custom coding will be required. They are displayed based on Listivo Panel Settings. For example, if you disable favorites, they will disappear from the menu.
Ask the people who build Listivo
We answer by email from support@tangiblewp.com. With Premium Support, we also fix your site when something breaks.
We can also run your site for you, or build a new one.
Was this guide helpful?