WordPress favicon / site icon
Set the small icon browsers show in the tab and in bookmarks for your site. In Listivo it is handled by WordPress itself, under Site Identity in the Customizer.
1 minute read
The favicon is fully based on WordPress functionality.
-
1
Open Appearance > Customize
Start from
/wp-admin/on your site.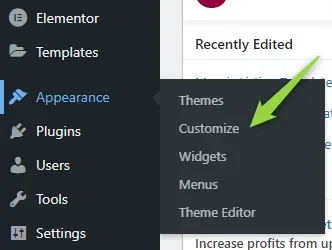
-
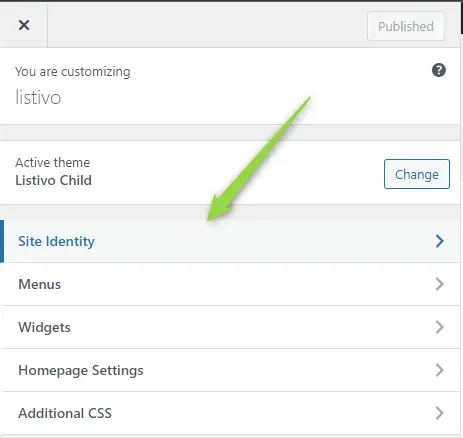
2
Choose Site Identity
-
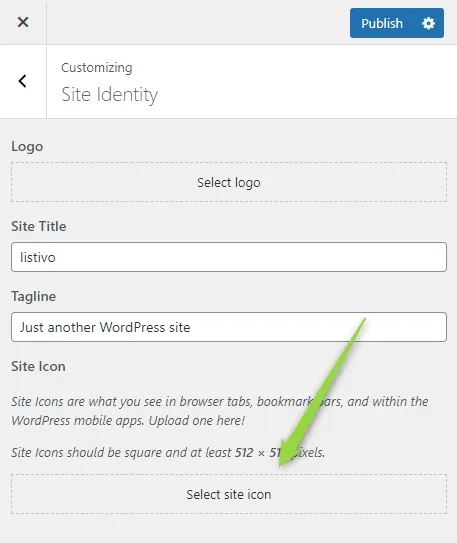
3
Select an image and upload it
-
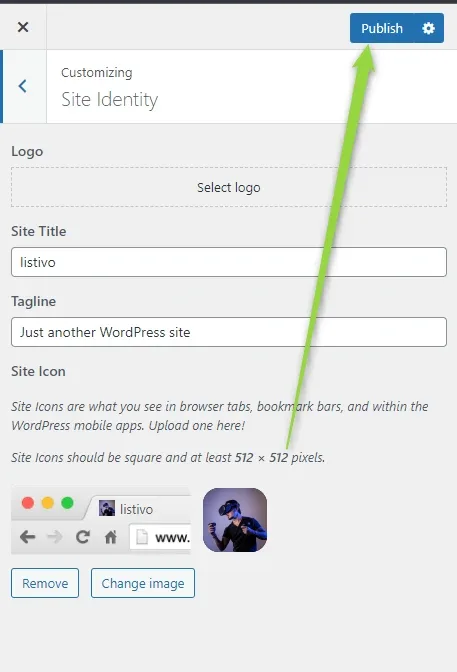
4
Click Publish
Prepare the file first
WordPress notes on that screen that site icons should be square and at least 512 × 512 pixels.
Ask the people who build Listivo
We answer by email from support@tangiblewp.com. With Premium Support, we also fix your site when something breaks.
We can also run your site for you, or build a new one.
Was this guide helpful?