Skip to content

How to customize header (menu colors, font-size etc.)

Listivo builds every page from a layout, and the header menu is part of it. This guide shows where the menu's colours, fonts and sizes live in Elementor, and how to reuse one menu across several layouts.

2 minute read

Listivo has a Layout System.

Layout = header + <page-content> + footer

Open the layout for editing

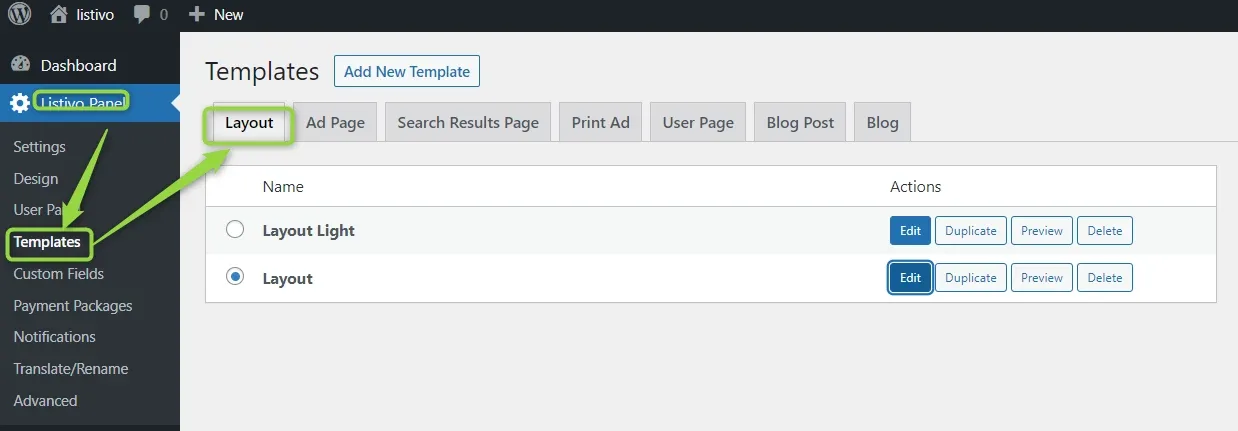
To edit the menu you need to edit the layout. You can do it directly from your wp-admin panel this way:
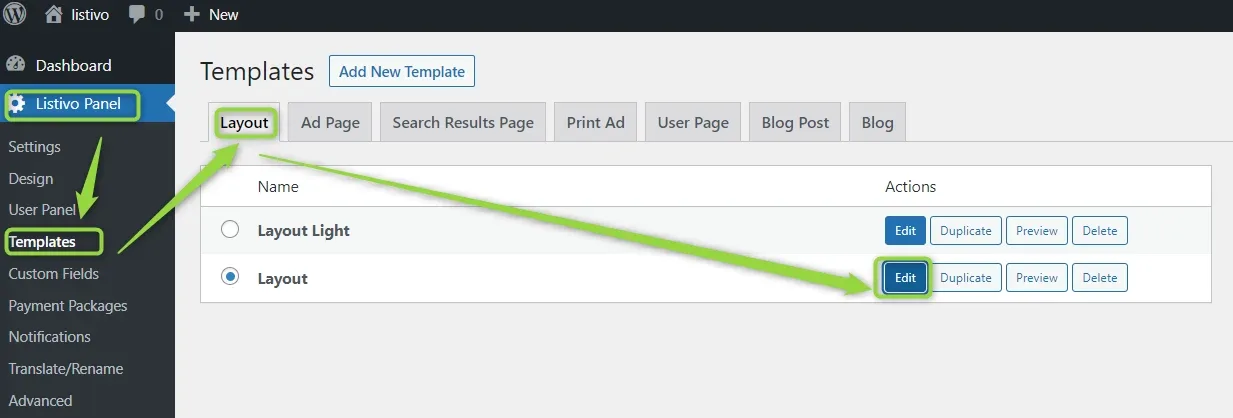
The Listivo Panel Templates screen with the Layout tab open. Arrows point at Templates in the left sidebar and at the Edit button next to the layout named Layout.

Where the menu controls are

You can find the controls related to the menu when you edit it.
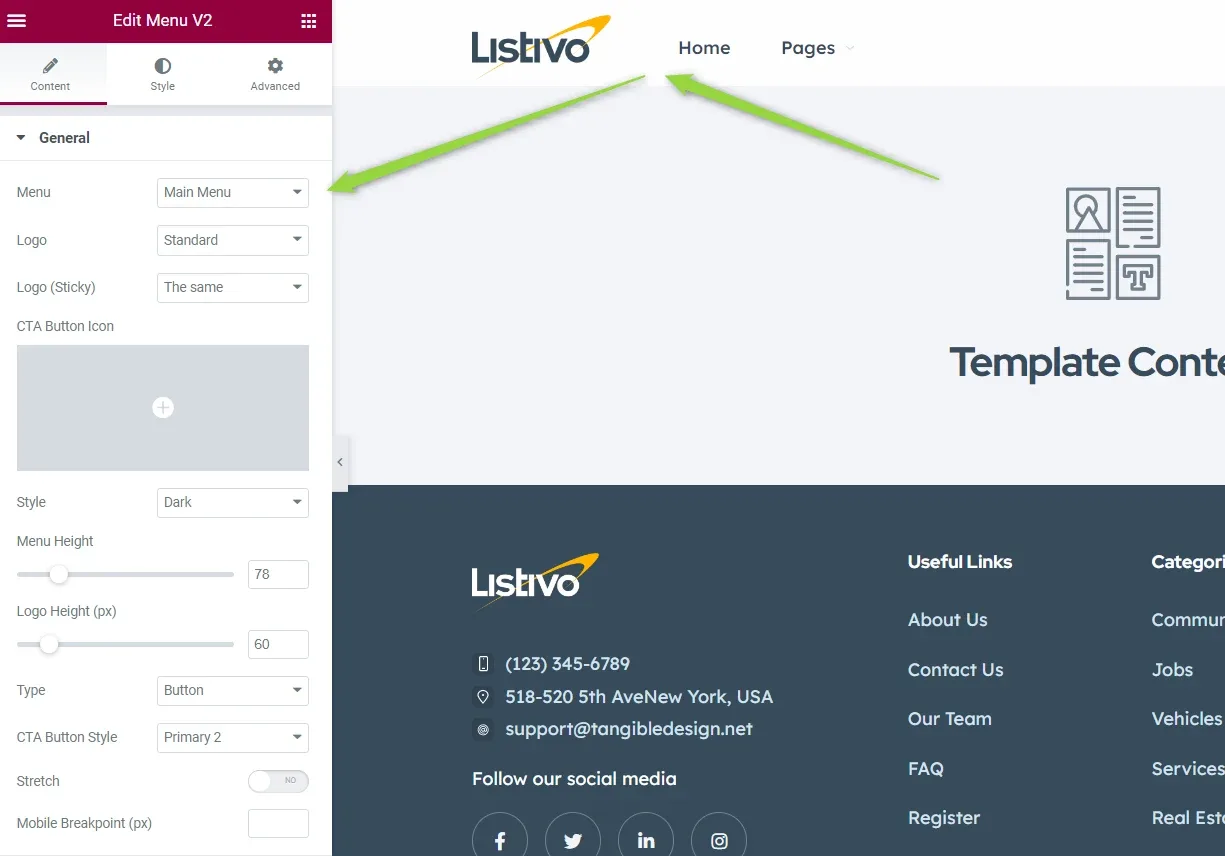
Elementor's Edit Menu V2 panel on the Content tab, with fields for Menu, Logo, Logo (Sticky), CTA Button Icon, Style, Menu Height, Logo Height, Type and Mobile Breakpoint, beside a live preview of the header.

There are even more controls when you switch to the Style tab.
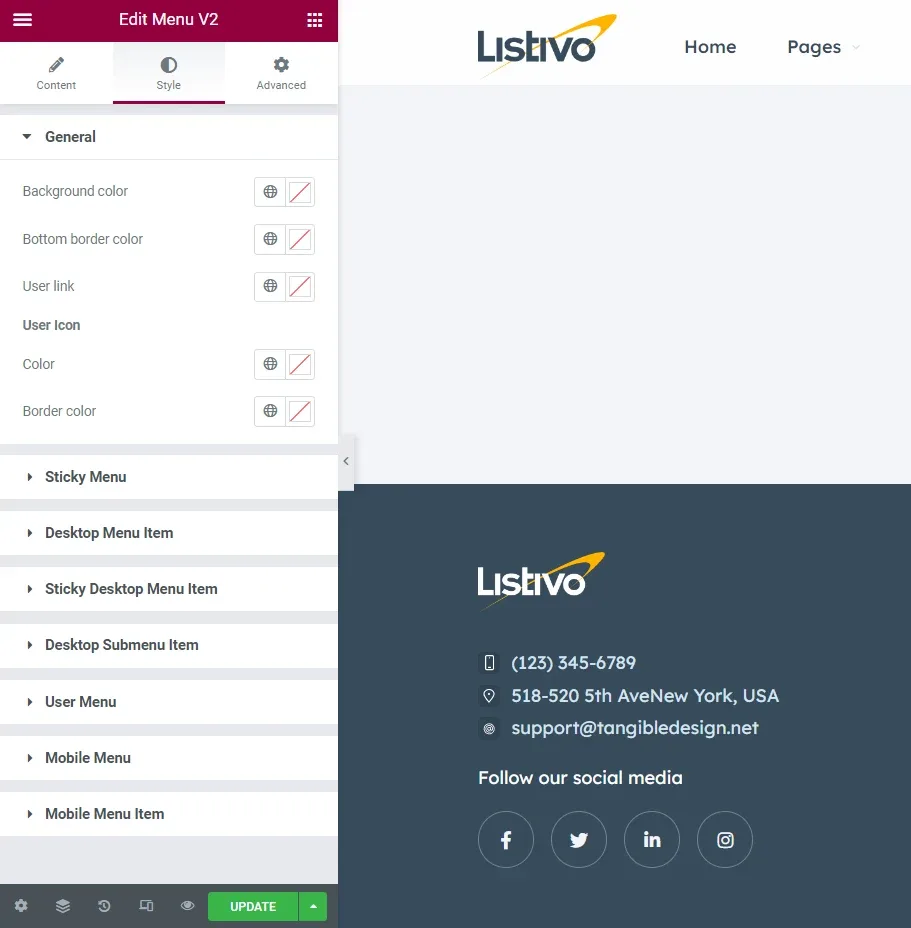
The Style tab of Edit Menu V2, with General colour pickers for background, bottom border and user link, above collapsed sections for Sticky Menu, Desktop Menu Item, Desktop Submenu Item, User Menu and Mobile Menu.

Sites that use more than one layout

Repeat the change in every layout
If your website uses more than one layout — for example, some homepages use the transparent menu layout by default — edit the other layout as well and change the same options there.
The Templates screen again with both layouts listed, Layout Light and Layout, each with Edit, Duplicate, Preview and Delete buttons.

Copy a menu from one layout to another

You can also copy the menu from one layout to another this way:

  1. 1 Open the Navigator

    While editing the layout in Elementor, open the Navigator and select the section that holds the menu.
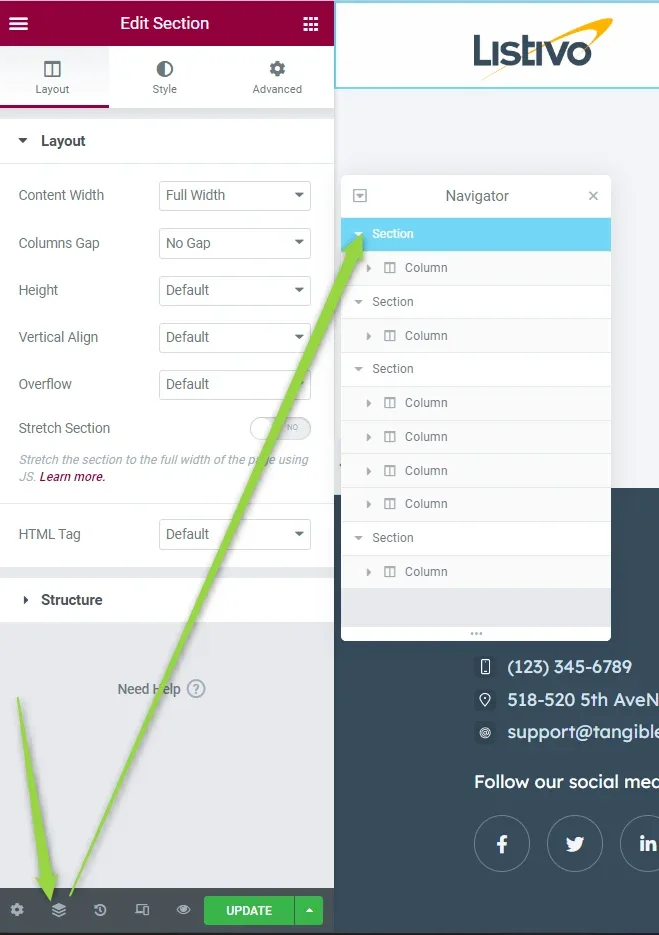
    Elementor's Edit Section panel on the left and the Navigator window on the right, with the top Section entry highlighted; arrows point at the Navigator icon in the bottom toolbar.
  2. 2 Save the section as a template

    Open the section's context menu in the Navigator and choose Save as Template.
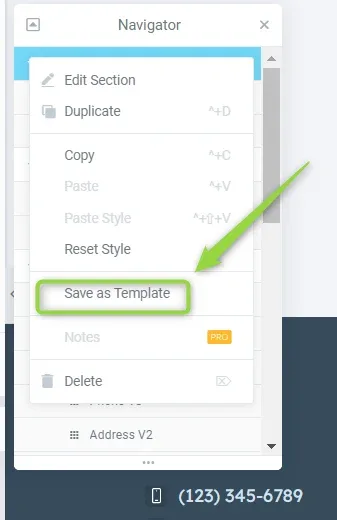
    The Navigator context menu listing Edit Section, Duplicate, Copy, Paste, Paste Style, Reset Style, Save as Template, Notes and Delete, with Save as Template outlined.
  3. 3 Give the template a name

    Enter a name in the Save Your Section to Library dialog and click Save.
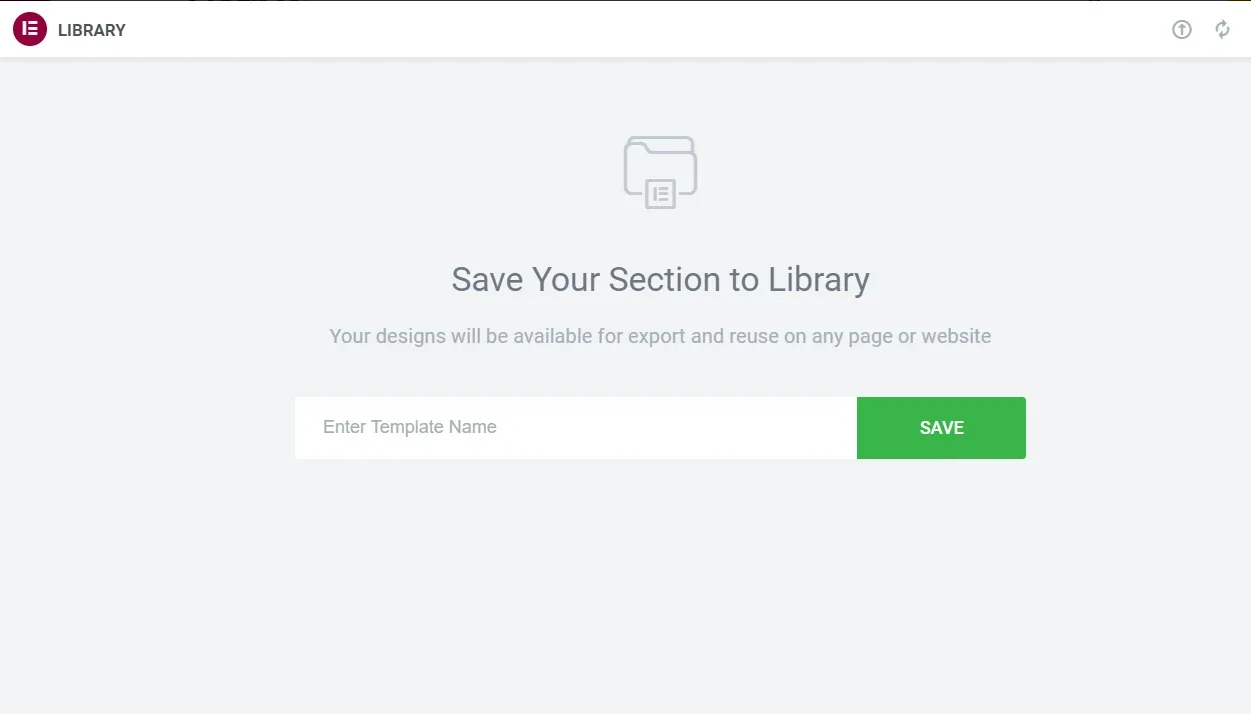
    Elementor's Save Your Section to Library screen with an Enter Template Name field and a green SAVE button.
  4. 4 Open the other layout and add a template

    Open the layout you want the menu in and click the folder icon that adds a template from the library.
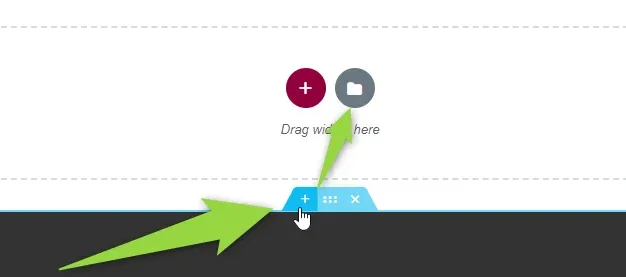
    An empty Elementor drop area with a pink plus button and a grey folder button labelled Drag widget here; an arrow points at the blue section toolbar below it.
  5. 5 Insert the saved menu

    Switch to My Templates, find the template you saved and insert it.
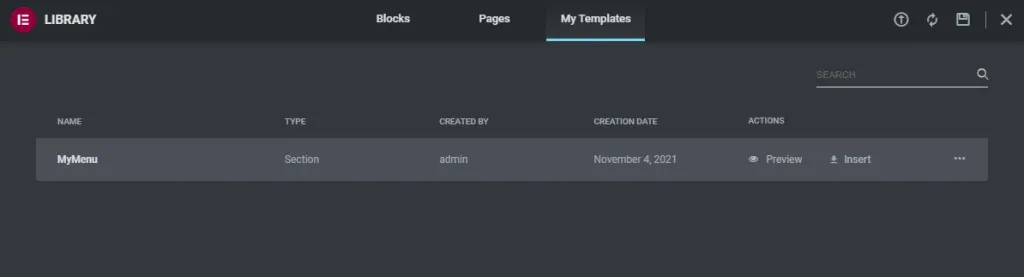
    The Elementor Library dialog on the My Templates tab, listing one section template named MyMenu created by admin, with Preview and Insert actions.

Ask the people who build Listivo

We answer by email from support@tangiblewp.com. With Premium Support, we also fix your site when something breaks.

Was this guide helpful?