Private Message System – how it works
Vehica can let buyers and sellers talk to each other on your site instead of by email. This page shows you how to switch the Private Message System on and where to place the message widget so it appears on listing and user pages.
1 minute read
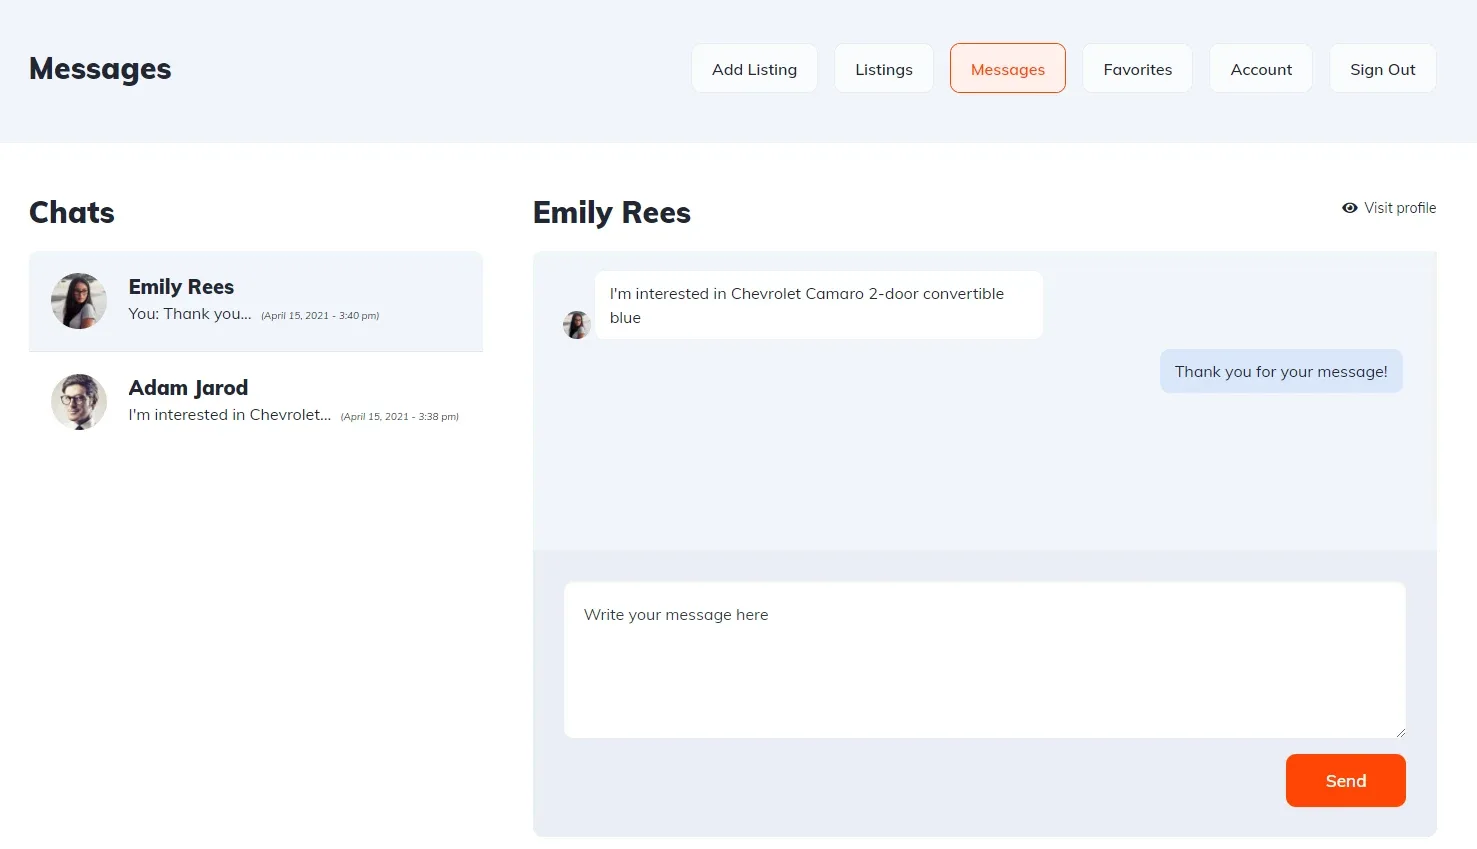
What your users see
Turn the module on
-
1
Enable it in the panel
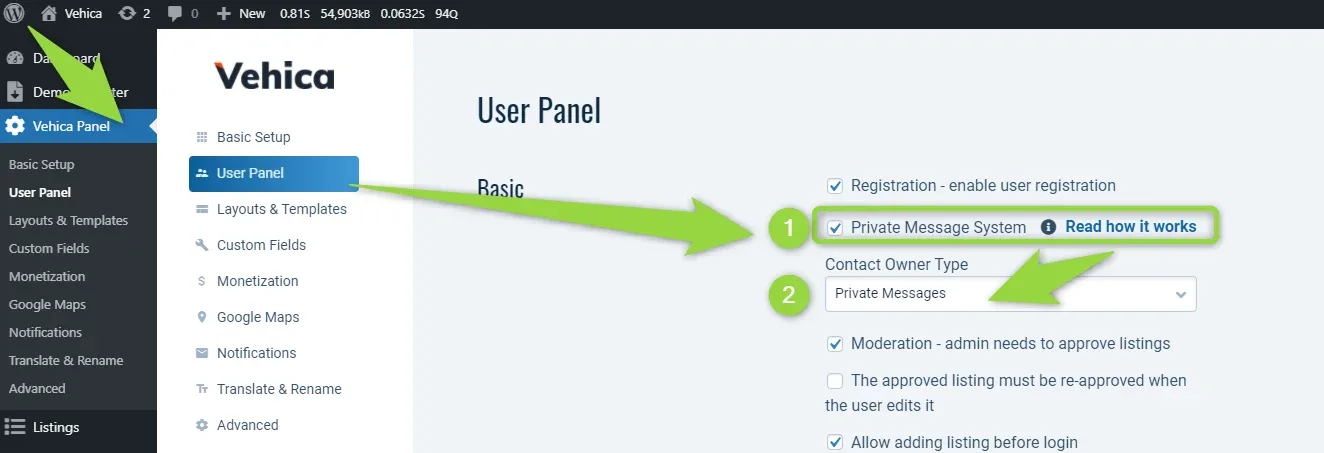
Open Vehica → User Panel → Basic. The screenshot marks the two settings involved: (1) the Private Message System option, and (2) Contact Owner Type, set to Private Messages.
-
2
Edit your templates
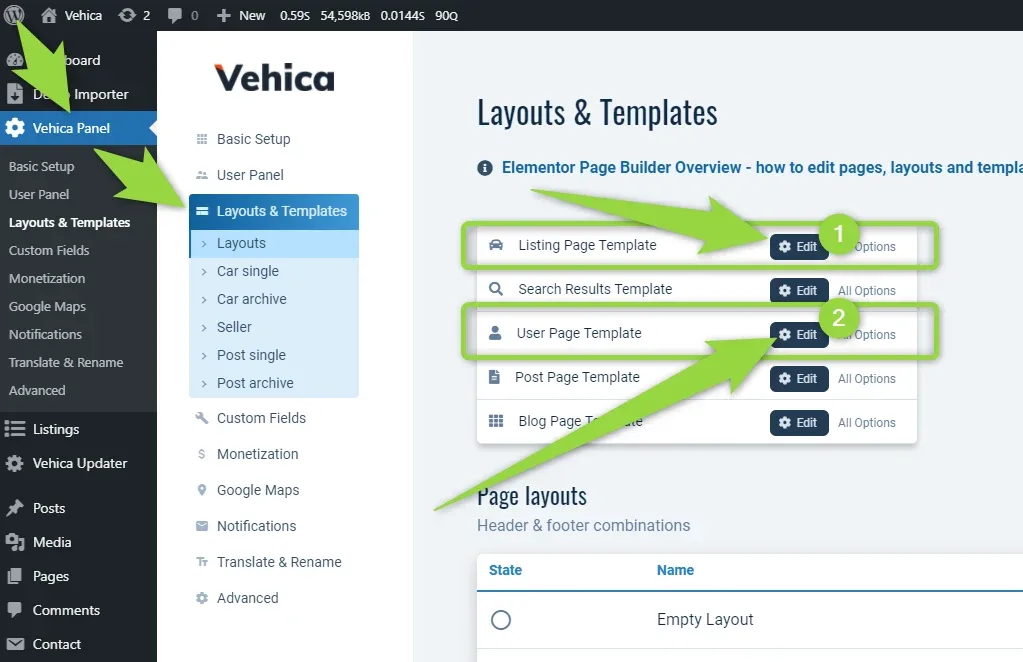
Go to Vehica → Layouts & Templates and click Edit on (1) the Listing Page Template and (2) the User Page Template. Add the Private Message Form widget to each of them.
-
3
Place the widget
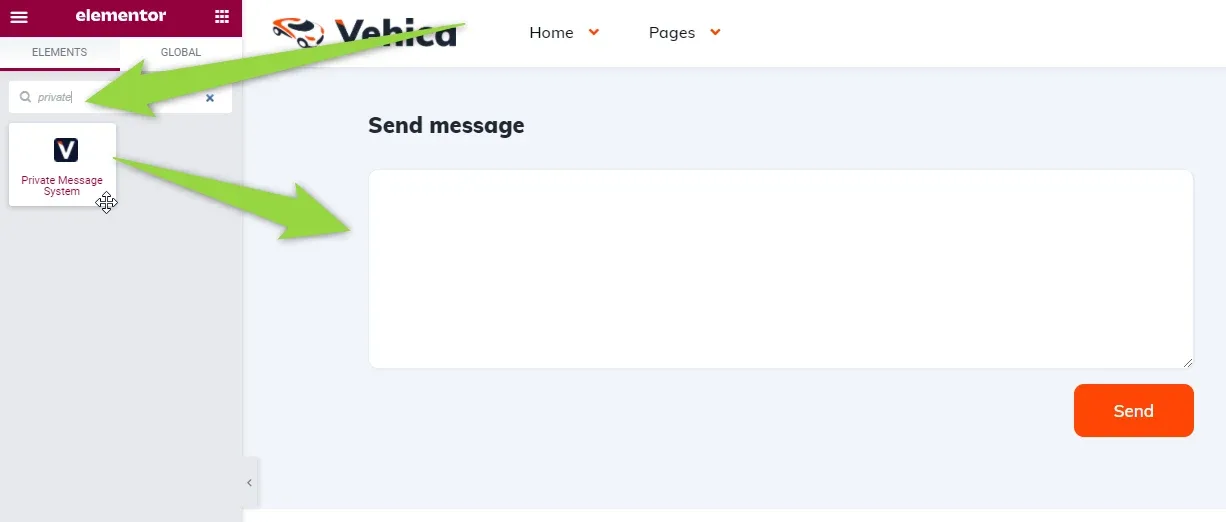
In Elementor, drag the widget from the elements panel into the template — it can go anywhere you wish.
Ask the people who build Vehica
We answer by email from support@tangiblewp.com. With Premium Support, we also fix your site when something breaks.
We can also run your site for you, or build a new one.
Was this guide helpful?