Skip to content

How to create custom registration / login page

Vehica's login and registration forms are Elementor widgets, so you can place them on a page you design yourself. This article walks through creating the page, dropping in the right widget and styling the form.

1 minute read

  1. 1 Create a new page

    In the WordPress admin, go to Pages → Add New.

    The WordPress admin sidebar with the Pages menu open, showing All Pages and a highlighted Add New item.
  2. 2 Edit it with Elementor

    Open the new page and click Edit with Elementor.
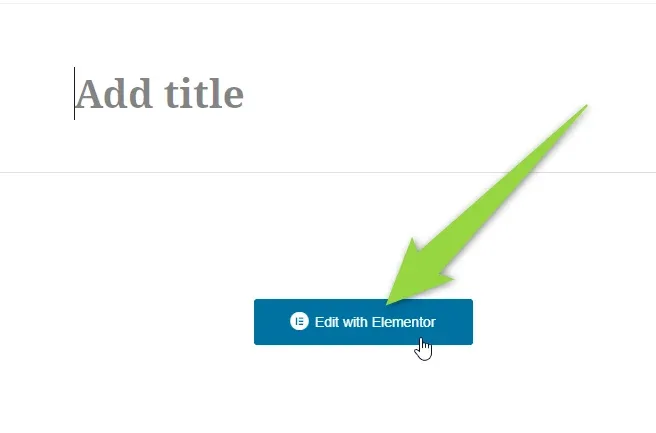
    A new WordPress page with the cursor in the empty "Add title" field and an arrow pointing at the blue "Edit with Elementor" button.
  3. 3 Add the Login widget

    For a login page, type login in the Elementor elements search and pick the Login Form widget.
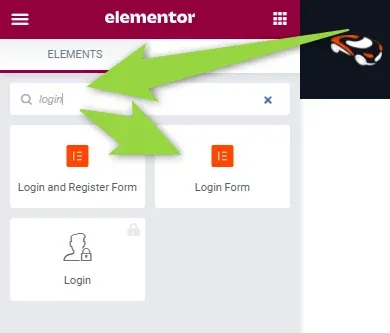
    The Elementor elements panel with "login" typed in the search box; arrows point at the search field and at the widget tiles Login and Register Form, Login Form, and a greyed-out Login tile with a padlock.
  4. 4 Or add the Register widget

    For a registration page, search for register and pick the Register Form widget instead.
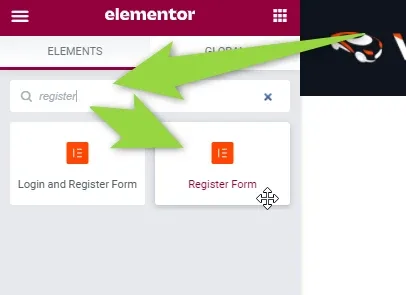
    The Elementor elements panel with "register" typed in the search box; arrows point at the search field and at the Login and Register Form and Register Form tiles, with the cursor grabbing Register Form.
  5. 5 Drag it onto the page

    Drop the widget into the section where the form should appear.
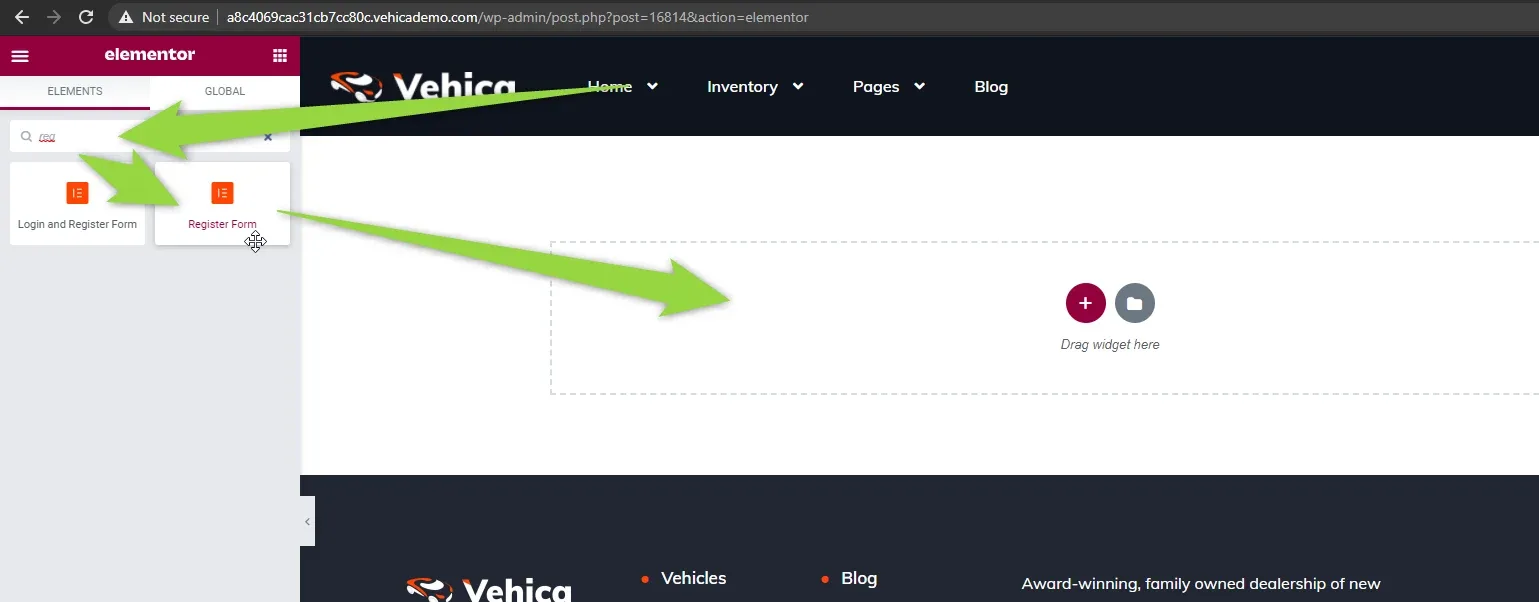
    The Elementor editor on a Vehica page, with arrows leading from the widget tiles in the left panel to an empty section containing a round plus button and a "Drag widget here" drop area.
  6. 6 Customize the form

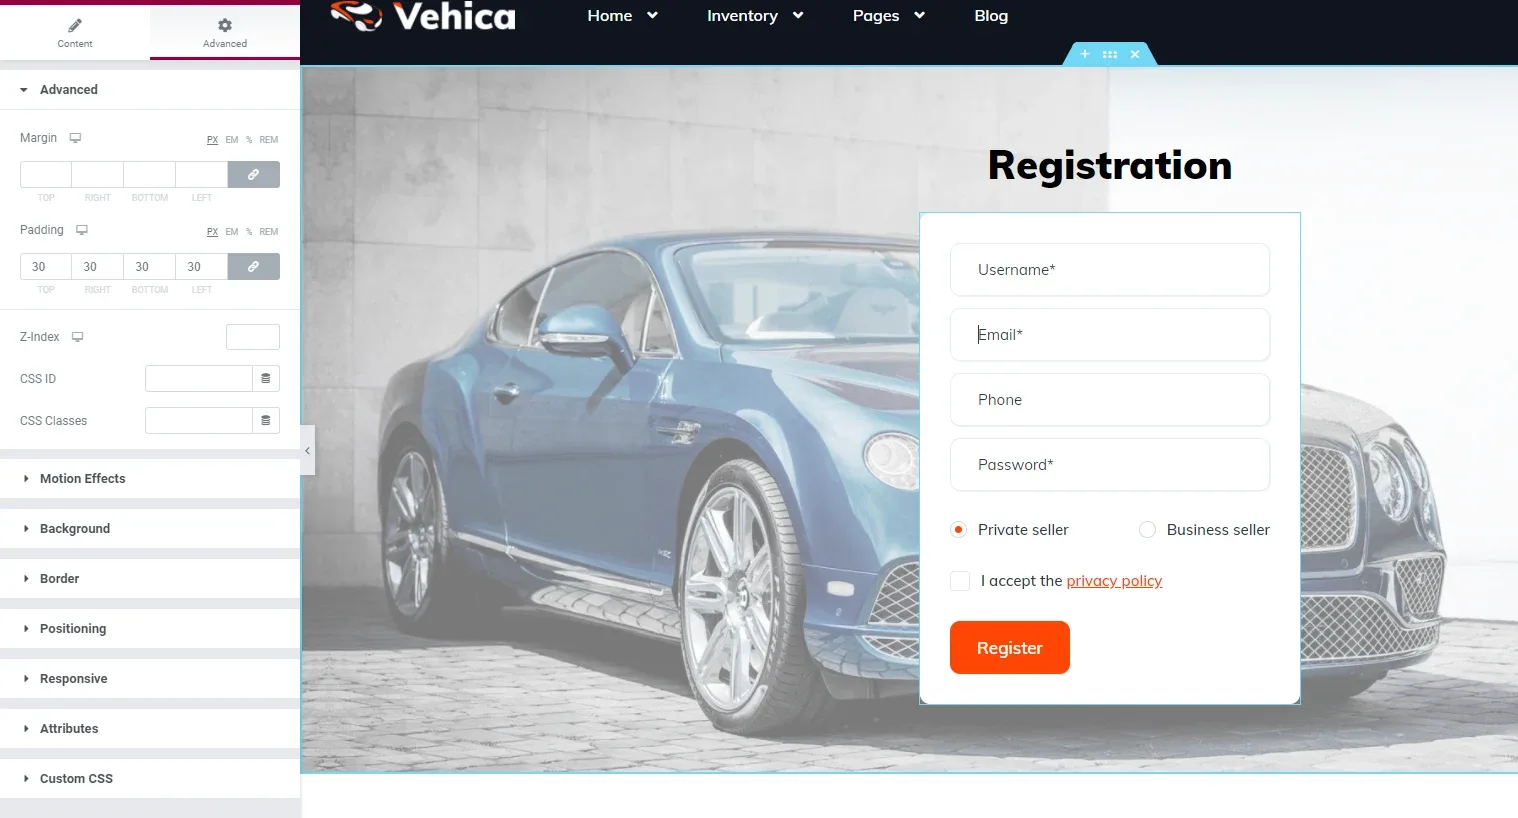
    It will display the form, and you can customize its options — e.g. change the width to inline so the form can be centred in the row, add a white background, add paddings.
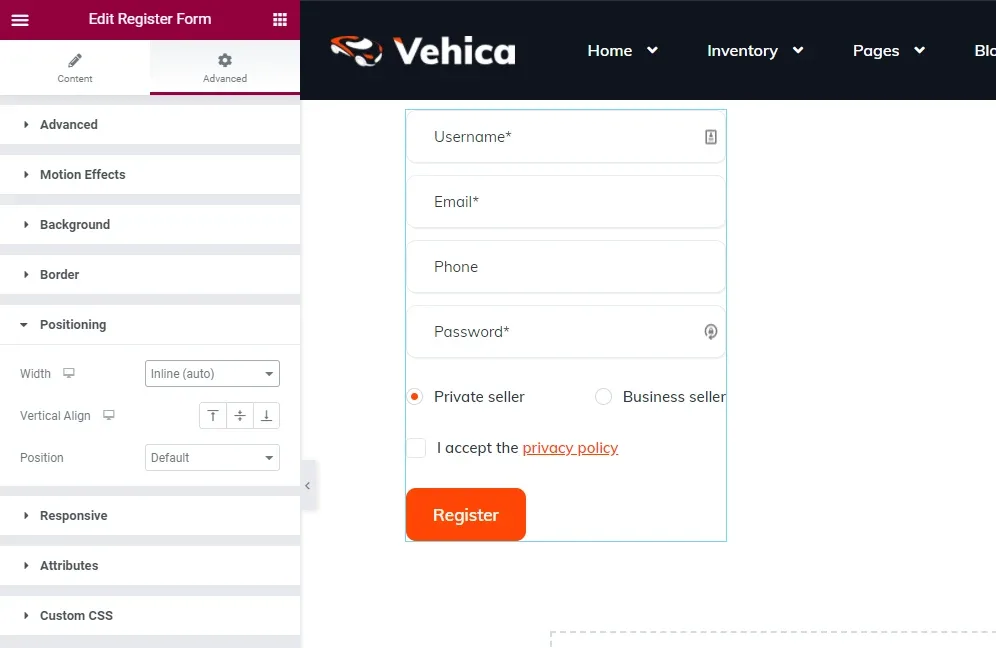
    The "Edit Register Form" panel open on the Advanced tab with Positioning expanded and Width set to "Inline (auto)", beside the live preview of the form: Username, Email, Phone, Password, Private/Business seller options and an orange Register button.
The finished page in Elementor: a "Registration" heading and a white form card with Username, Email, Phone and Password fields, Private seller / Business seller options, a privacy policy checkbox and an orange Register button, over a photo of a blue car.
The same form after styling — inline width, white background and padding.

Ask the people who build Vehica

We answer by email from support@tangiblewp.com. With Premium Support, we also fix your site when something breaks.

Was this guide helpful?