Skip to content

How to customize header (menu colors, font-size etc.)

The header is part of a Vehica layout, so its colors, typography and behaviour are edited in Elementor. Here you will find where those controls are, and how to carry a finished menu over to your other layouts.

1 minute read

Vehica has a Layout System.

Layout = header + <page-content> + footer

Open the layout that holds your menu

To edit the menu you need to edit the layout. You can do it directly on your page this way:
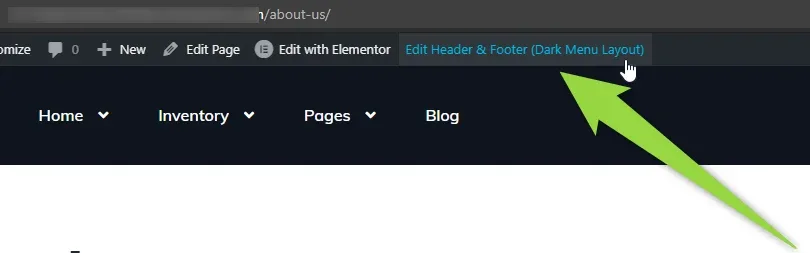
WordPress admin bar on a front-end page with an arrow pointing to the “Edit Header & Footer (Dark Menu Layout)” link, next to “Edit with Elementor”
The link names the layout the page uses, so you always edit the right one.

Or you can select it via the /wp-admin/ panel this way:
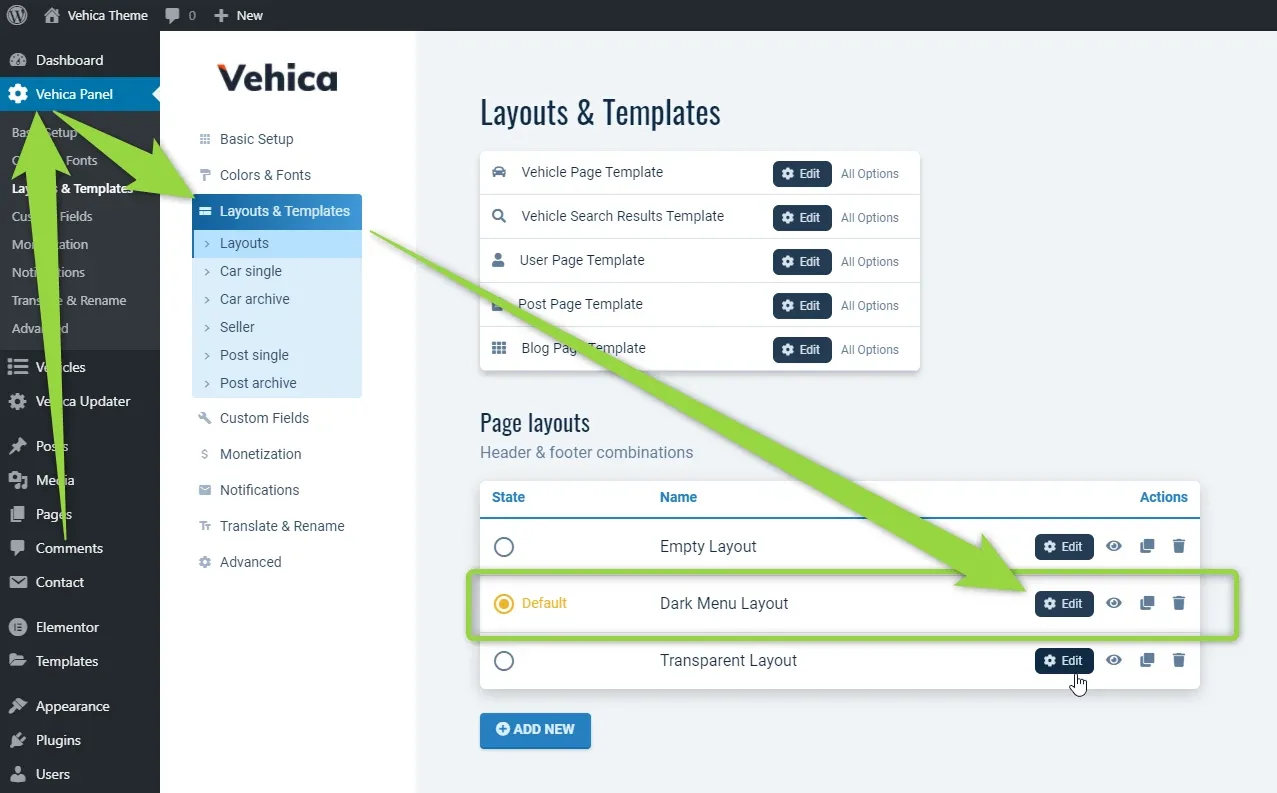
Vehica Panel > Layouts & Templates in wp-admin: the "Page layouts" list shows Empty Layout, Dark Menu Layout marked Default and Transparent Layout, with arrows pointing to the menu item and to the Edit button of the default layout

Where the menu controls are

You can find the controls related to the menu when you edit it:
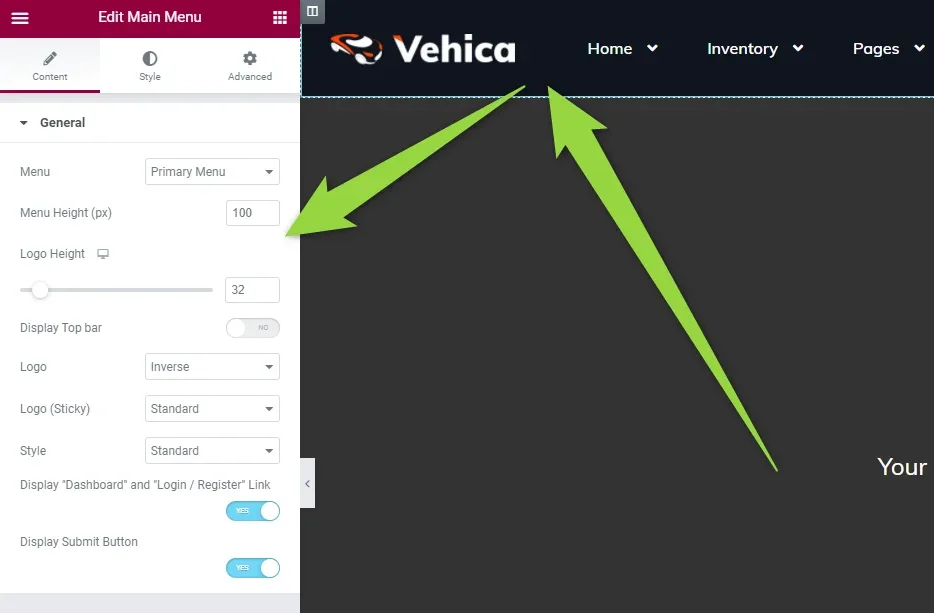
Elementor's Edit Main Menu panel on the Content tab, listing Menu, Menu Height (px), Logo Height, Display Top bar, Logo, Logo (Sticky), Style, and switches for the “Dashboard” / “Login / Register” link and the Submit button

And even more controls when you change the tab to Style:
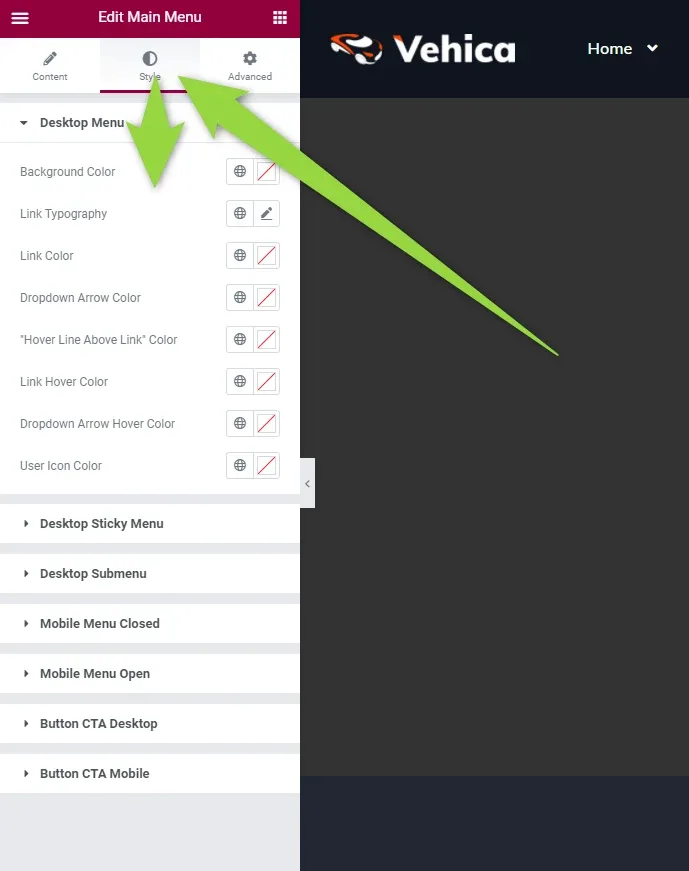
The Style tab of Edit Main Menu with the Desktop Menu group open: Background Color, Link Typography, Link Color, Dropdown Arrow Color, “Hover Line Above Link” Color, Link Hover Color, Dropdown Arrow Hover Color and User Icon Color
Below the open group sit Desktop Sticky Menu, Desktop Submenu, Mobile Menu Closed, Mobile Menu Open, Button CTA Desktop and Button CTA Mobile — each state is styled separately.

Repeat for your other layouts

If your website uses more than one layout (e.g. some homepages use the transparent menu layout by default), edit the other layout and change the options again:
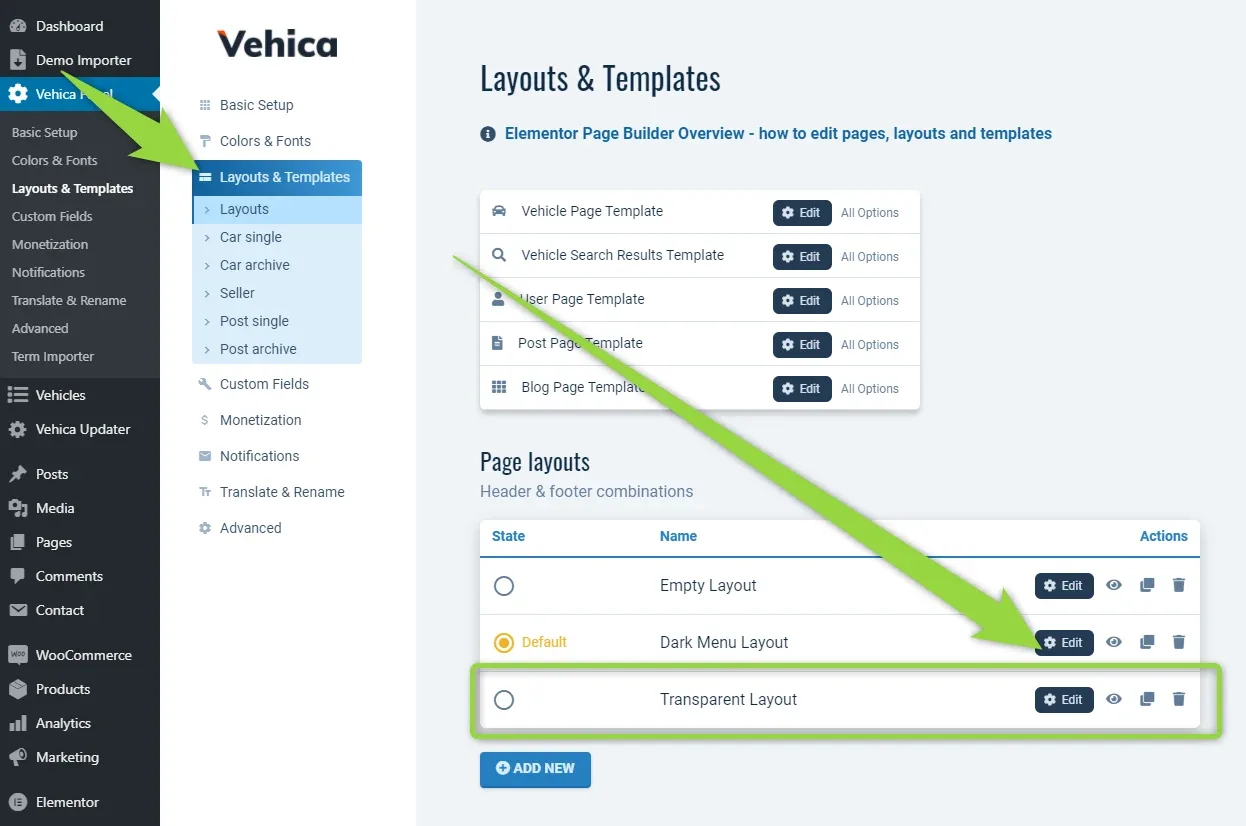
The Page layouts list in Layouts & Templates with an arrow pointing to the Edit button of the Transparent Layout row

Copy the menu to another layout

Instead of setting everything twice, you can copy the menu from one layout to another this way:

  1. 1 Save the menu section as a template

    Open the menu on the header section's handle and choose Save as Template.
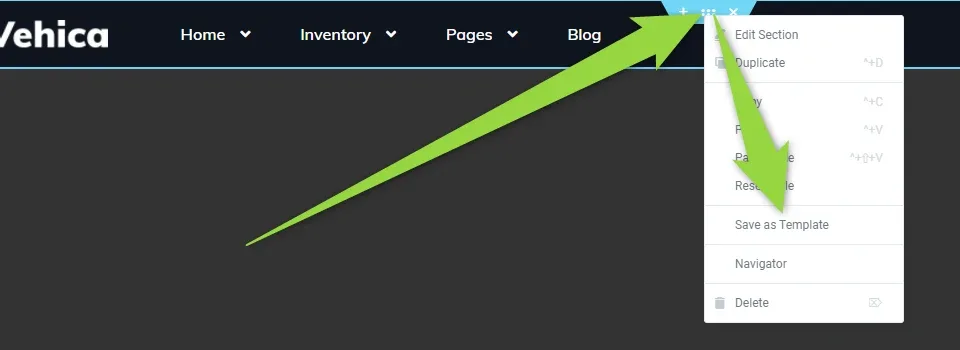
    The Vehica header in Elementor with the section context menu open over it, showing Edit Section, Duplicate, Copy, Paste, Reset Style, Save as Template, Navigator and Delete
  2. 2 Name the template and save

    Type a name for it — "My Menu" in the screenshot — and click SAVE.
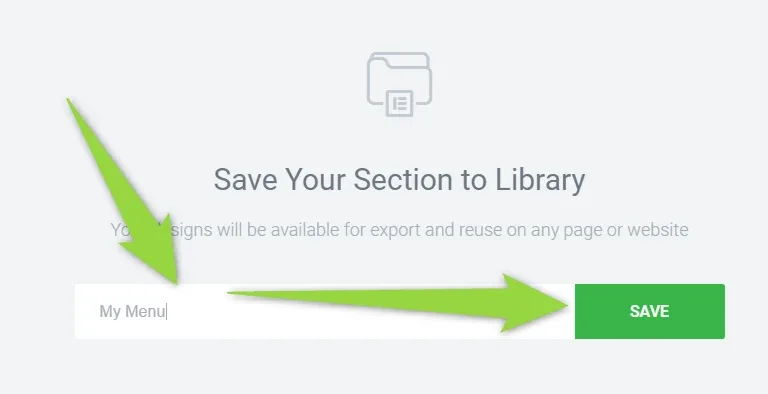
    Elementor's "Save Your Section to Library" dialog with the name field filled in as "My Menu" and arrows pointing to the field and to the green SAVE button
  3. 3 Open another layout and add a template

    In the other layout, add a new section and use the folder icon — Elementor's Add Template button.
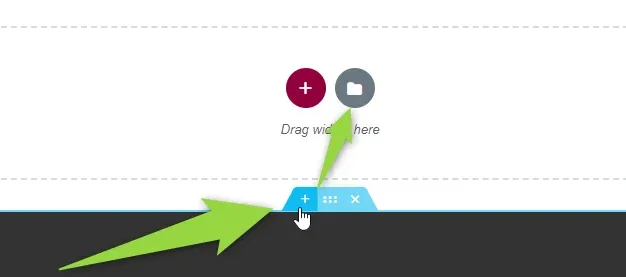
    Empty Elementor section showing the pink plus button and the grey folder (Add Template) button with the "Drag widget here" hint, and an arrow pointing at the section toolbar
  4. 4 Insert it from My Templates

    In the library window switch to the My Templates tab, find the menu you saved and click Insert.
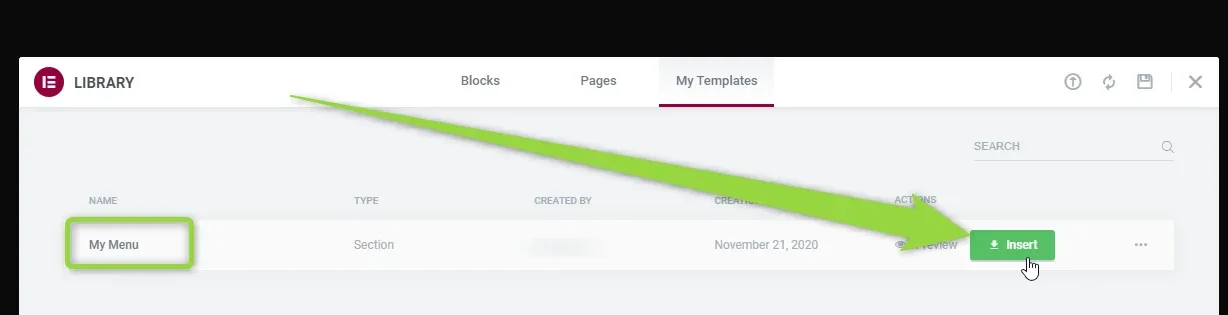
    Elementor Library window on the My Templates tab, listing a Section named "My Menu" with an Insert button, and arrows pointing to the tab and to Insert

Ask the people who build Vehica

We answer by email from support@tangiblewp.com. With Premium Support, we also fix your site when something breaks.

Was this guide helpful?