Customization Example - adding "Old Price" on the listing page
Add a second price field to your Vehica listings and show the old price struck through beside the current one — on the single listing page with the page builder, and on the listing cards with a short PHP snippet.
2 minute read
In this article we create an “Old Price” field and show it on the listing page, so visitors can see at a glance what a listing used to cost. The second half shows how to put the same price on the listing card, which needs a small PHP customization.
1. Create the Old Price field and add it to a sample listing
-
1
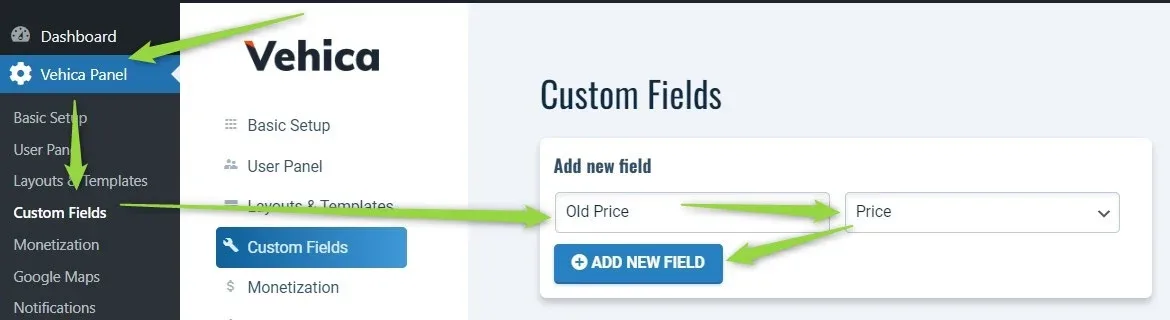
Create a new “Old Price” field
In Vehica Panel > Custom Fields, name the field Old Price and give it the Price type.
-
2
Move the field next to the current price
Drag it in the field list so it sits beside the existing price field.
-
3
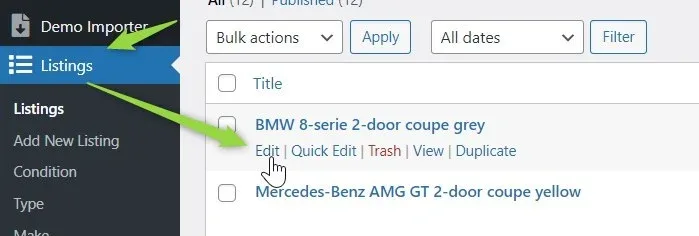
Edit a sample listing
-
4
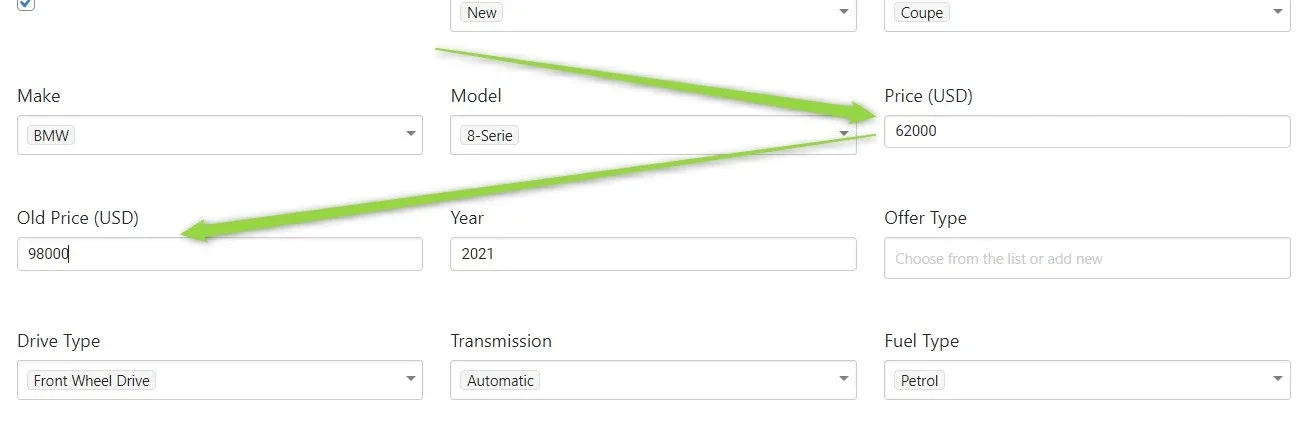
Fill in both prices
-
5
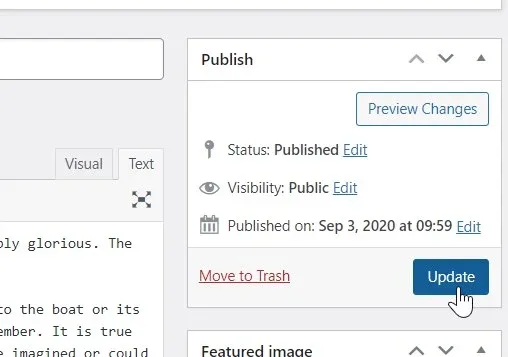
Save the listing
2. Show the Old Price on the single listing template
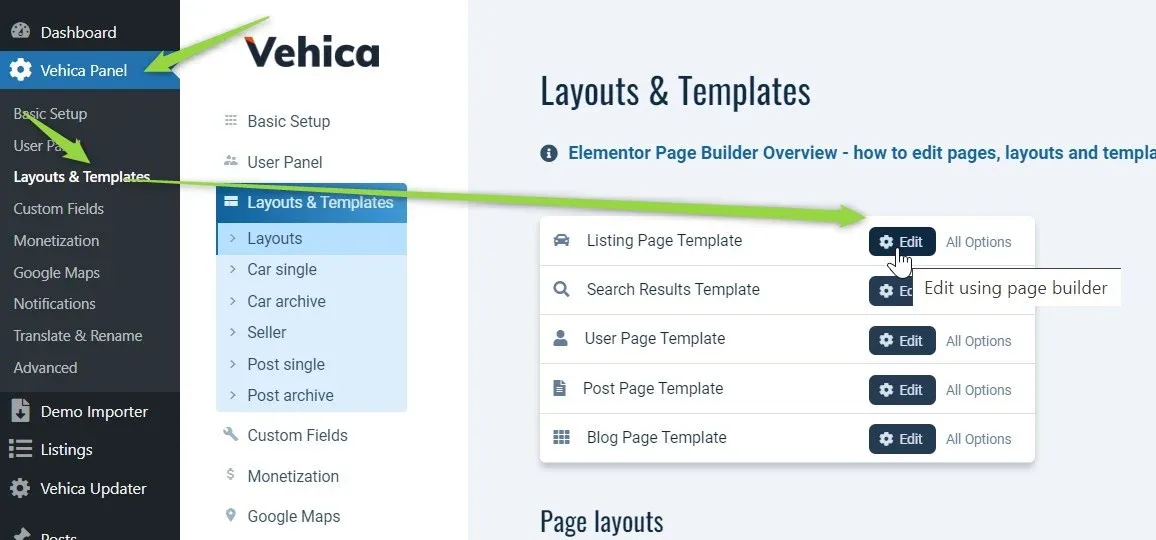
The old price is a field like any other, so it goes on the page through the single listing template — the template Vehica uses to render an individual listing.
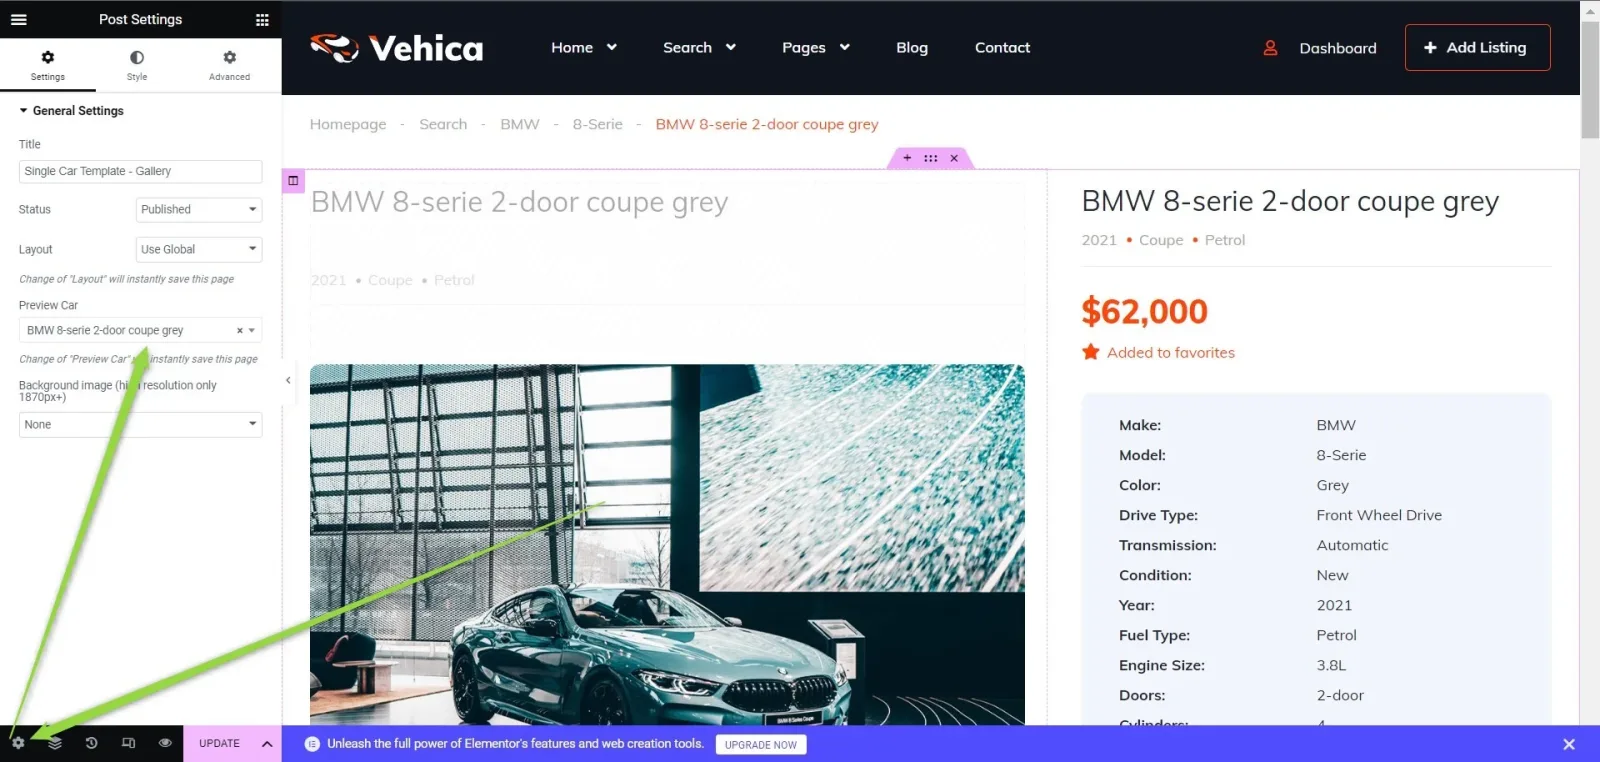
Pick a preview listing that has the Old Price field filled in, so you can see what you are styling.
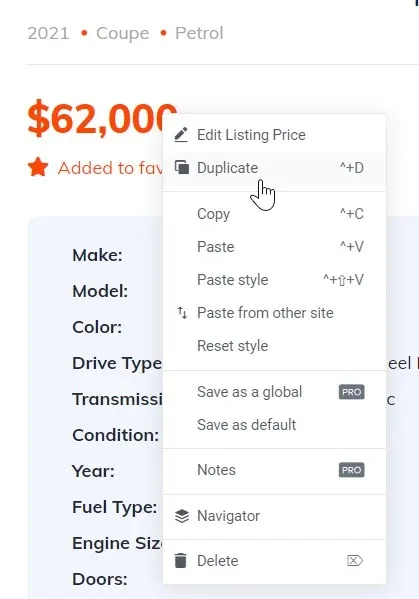
Duplicate the price element on the desktop design: right-click it and choose Duplicate. The copy becomes the old price.
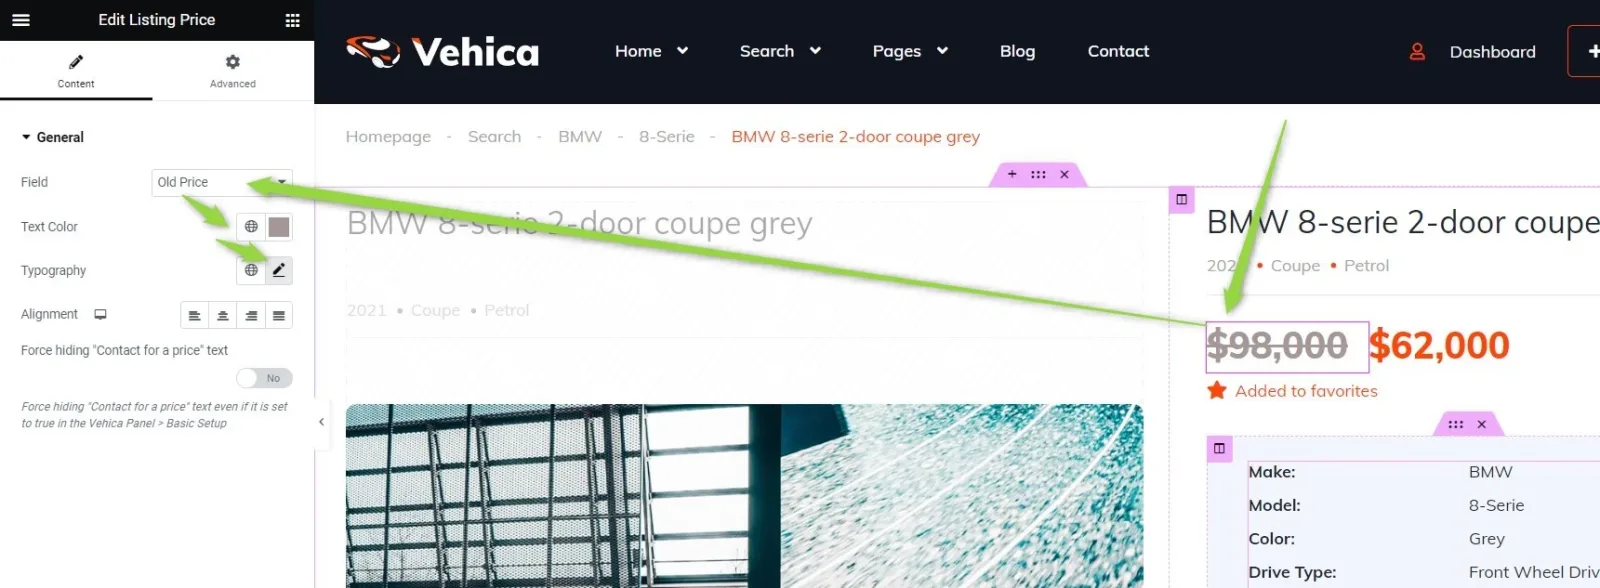
On the copy, set Field to Old Price and style it — in the example it is struck through and greyed out.
Repeat the same change for the tablet and mobile designs.
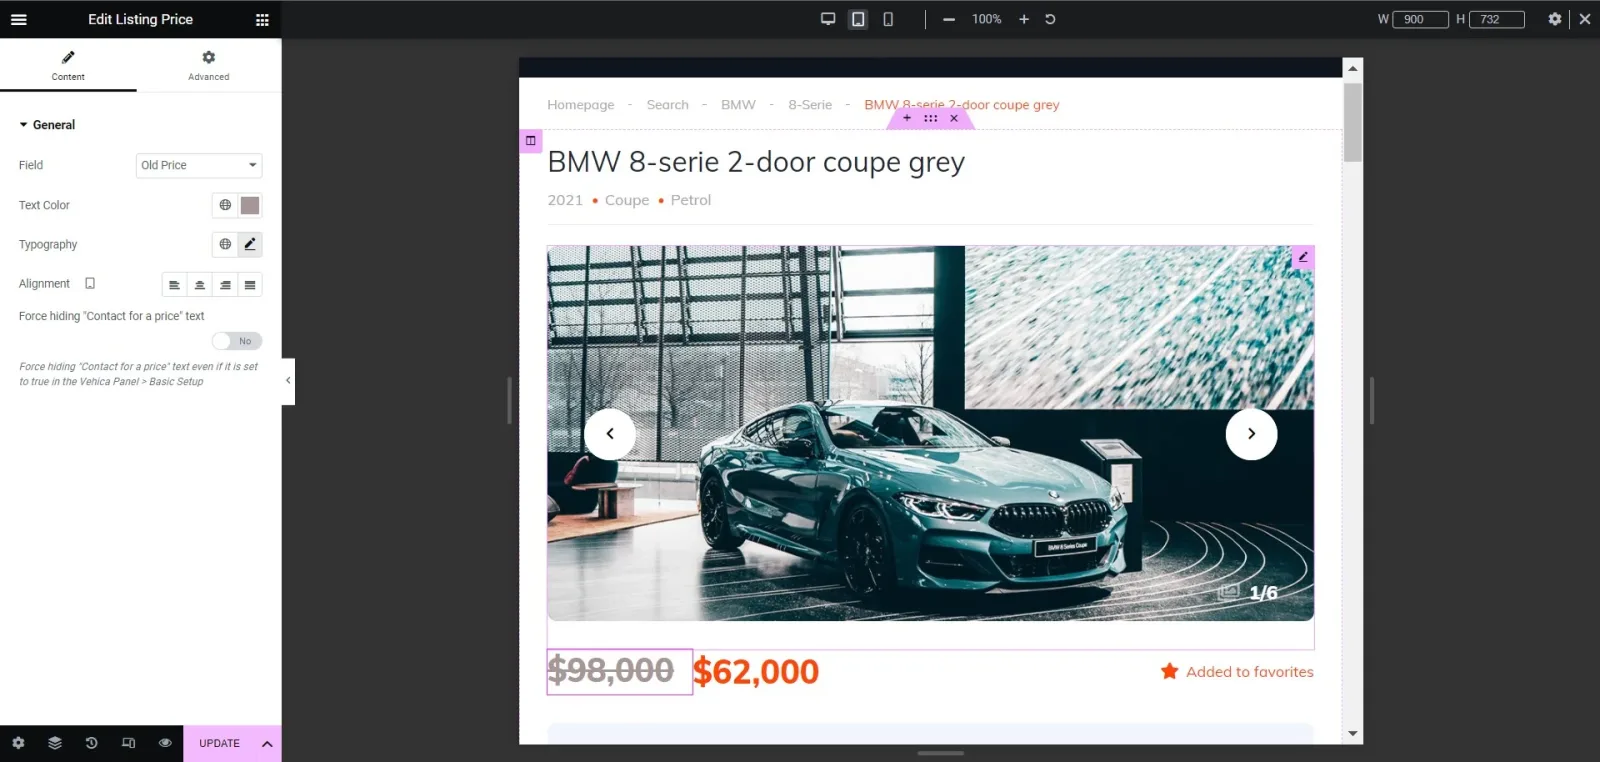
Save your changes.

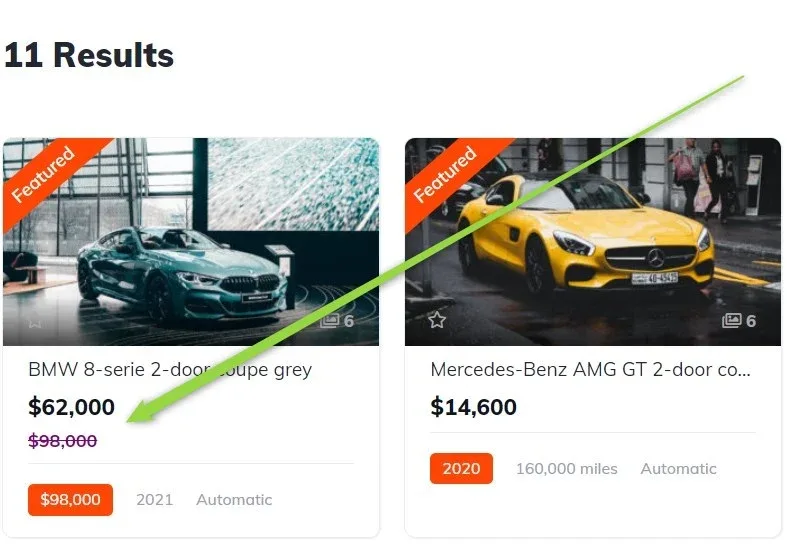
3. Add the Old Price to the card
The card is not built in the page builder, so the old price cannot be added there without editing a PHP file. This part needs basic knowledge of HTML, CSS and PHP. If you have it, follow the steps below.
A. Open the price field for editing and read its ID out of the address bar.
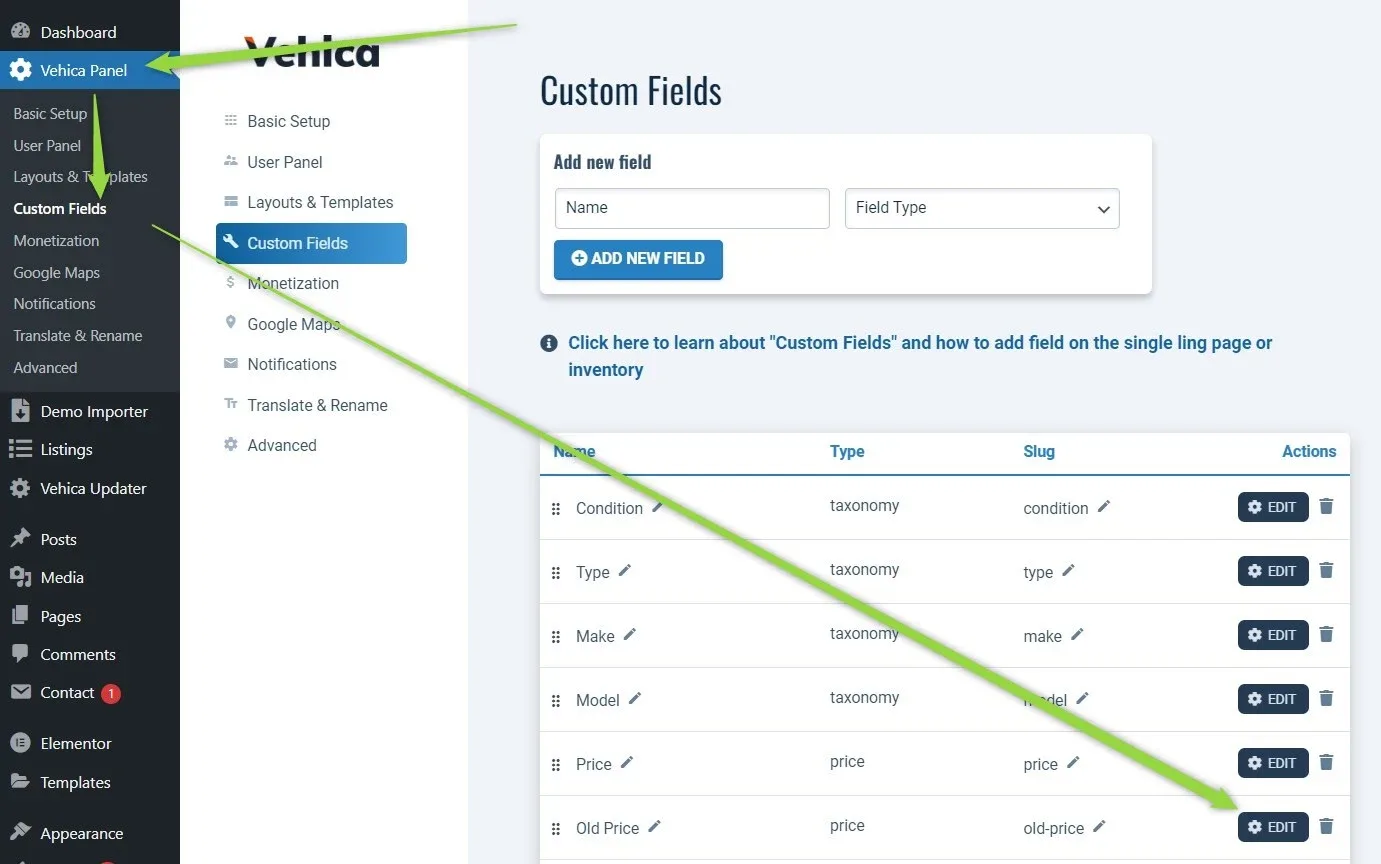
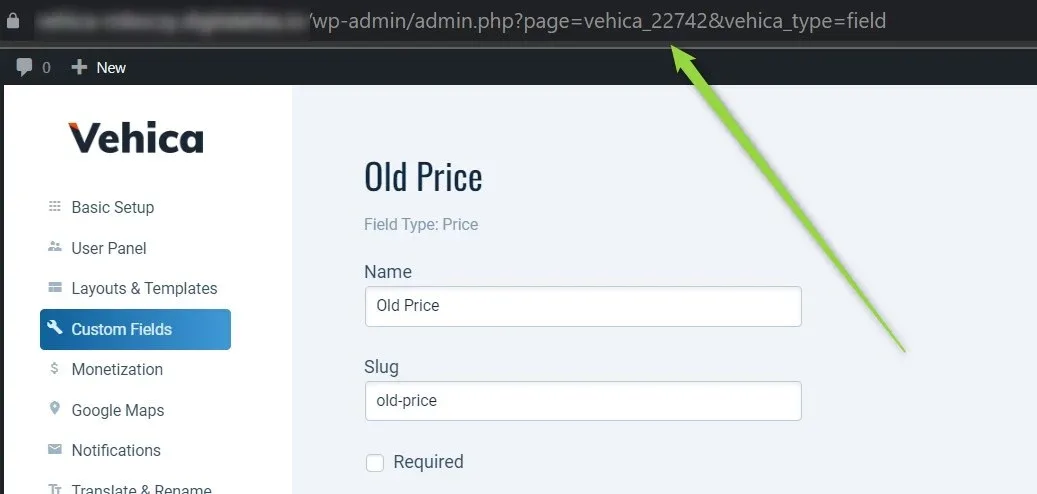
In our example it is 22742. Write it down — you will need it later.
B. The listing cards all live in /wp-content/themes/vehica/templates/card/car/, as shown below.
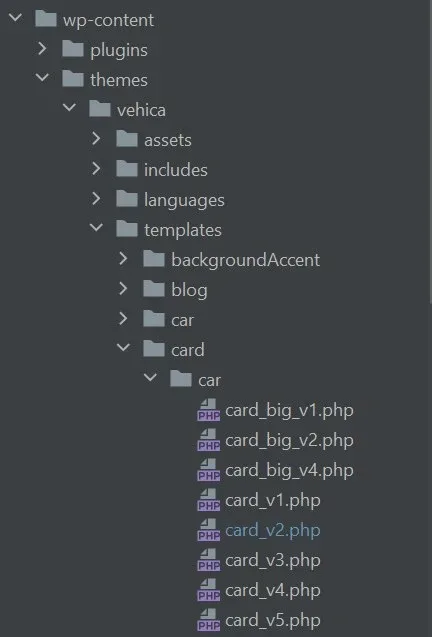
C. Open the card you want to change — for example the card with a white background, card_v2.php — and add this code:
<?php
            $priceField = vehicaApp('price_fields')->find(static function ($priceField) {
                return $priceField->getId() === 22742; // 22742 is the ID of the price field
            });
            if ($priceField instanceof \Vehica\Model\Post\Field\Price\PriceField) :
                $price = $priceField->getFormattedValueByCurrency($vehicaCurrentCar);
                if (!empty($price)) : ?>
                    <span style="
                        font-size: 16px;
                        text-decoration: line-through;
                        color: purple;
                        font-weight: 700;
                        position: relative;
                        top: -6px;
                    ">
                    <?php echo esc_html($price); ?>
                    </span>
                <?php endif;
            endif;
            ?>
Change 22742 to your own price field ID and adjust the styling to your needs. In our example it comes out like this:
Ask the people who build Vehica
We answer by email from support@tangiblewp.com. With Premium Support, we also fix your site when something breaks.
We can also run your site for you, or build a new one.
Was this guide helpful?