Stripe Configuration
Connect your Listivo site to Stripe: copy the API keys into the Listivo Panel, register the webhook endpoint Listivo gives you, and paste the signing secret back so subscription payments are reported to your site.
2 minute read
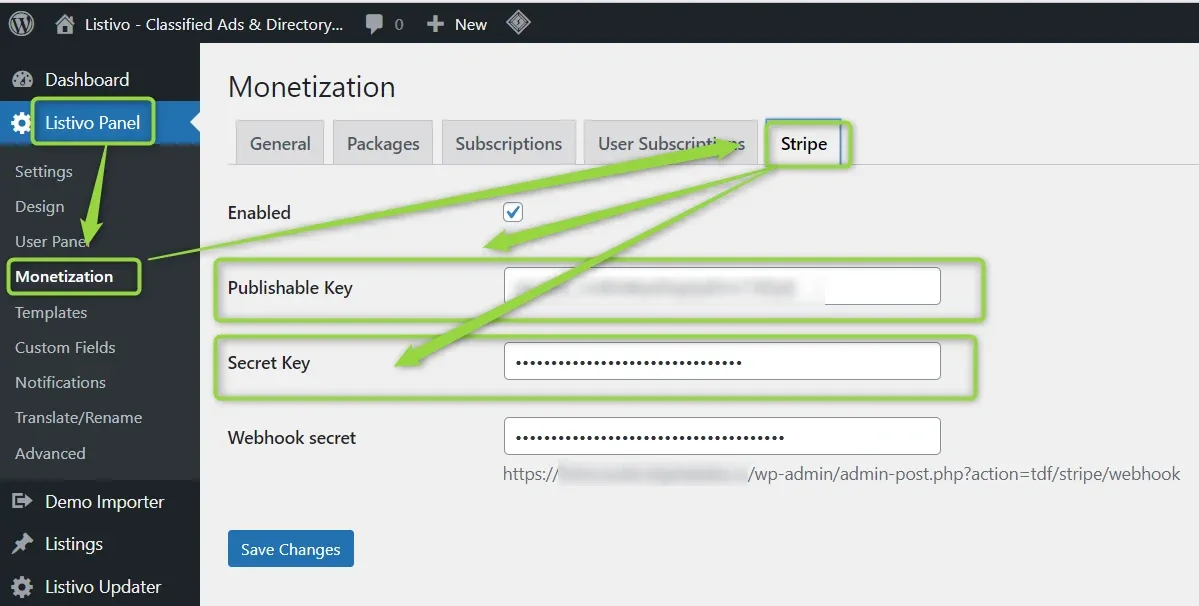
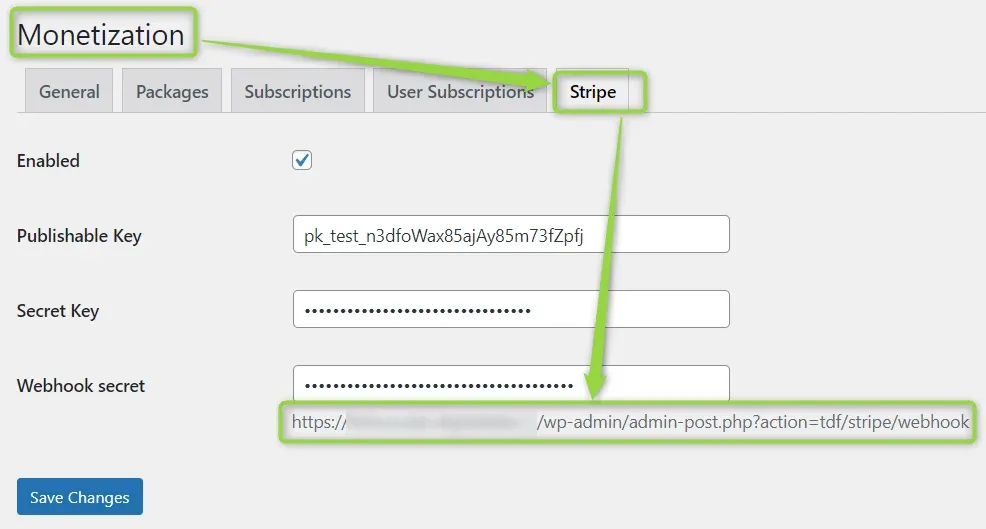
If you want to use subscriptions, you have to enable them and add Stripe credentials. You add them in Listivo Panel > Monetization > Stripe.
-
1
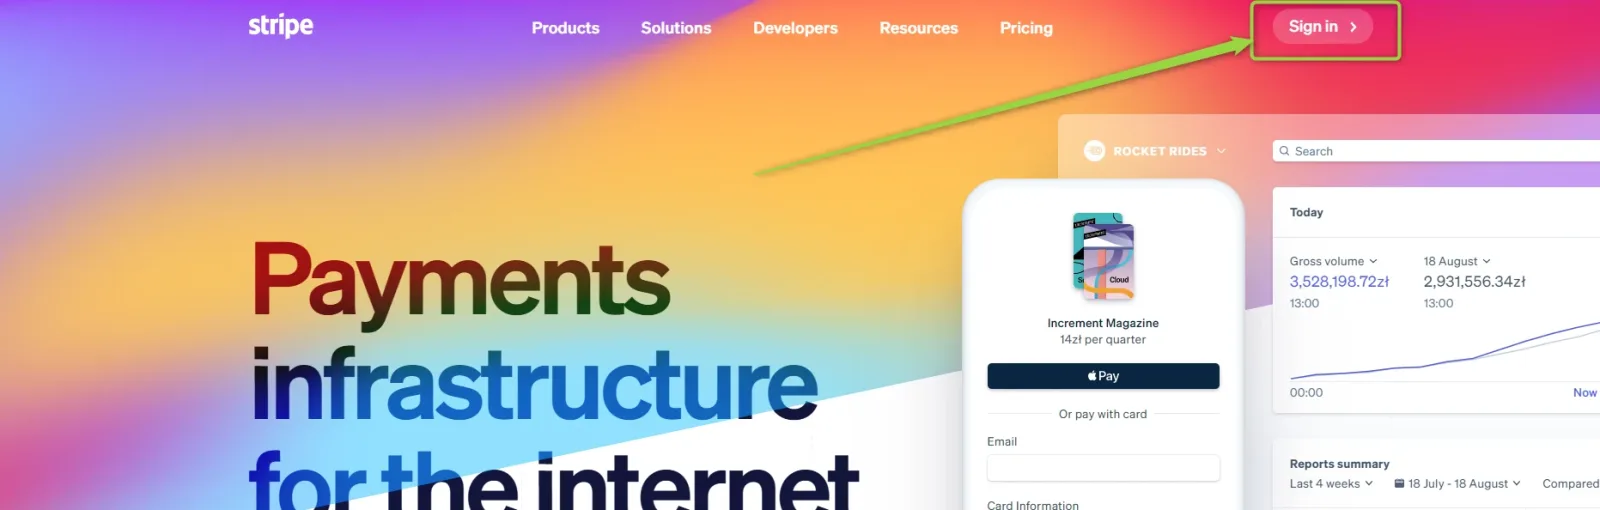
Sign in to Stripe
Sign in to your account on stripe.com or create a new account if you don't have one.
-
2
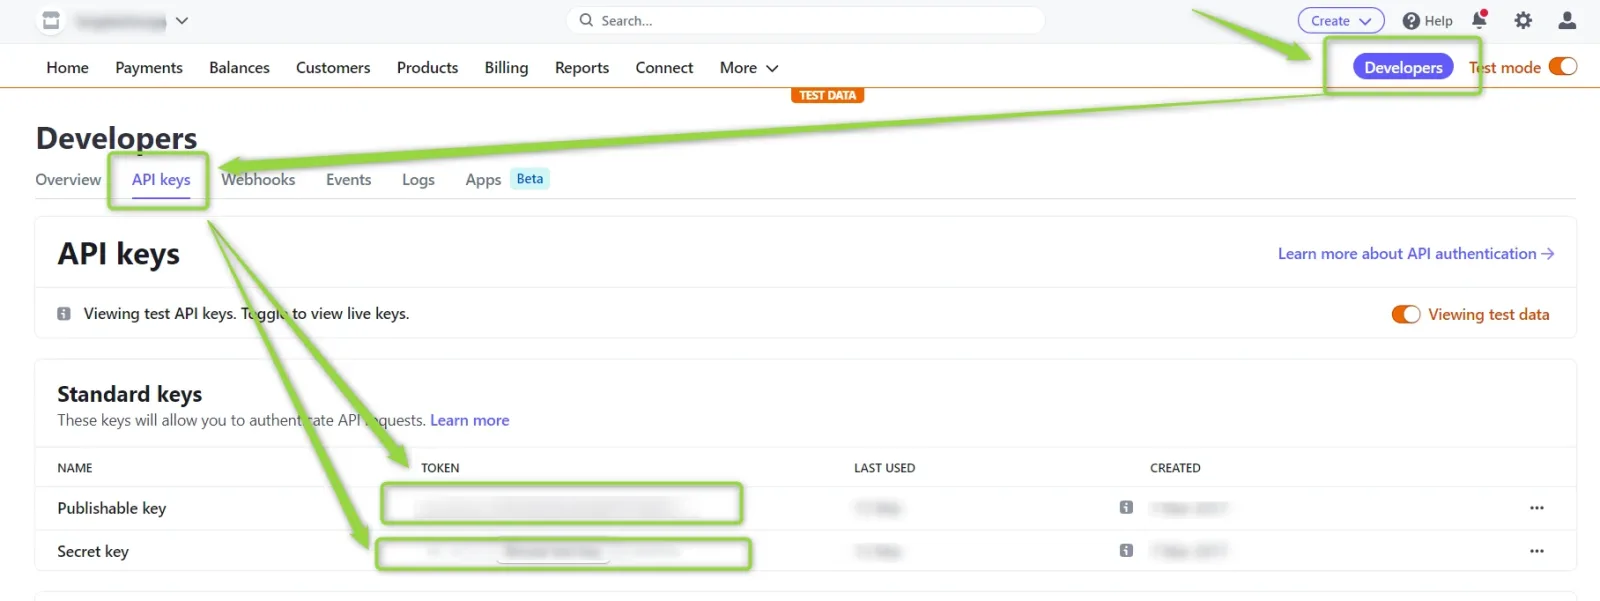
Open the Developers tab
To get the API key, go to the developers tab.
-
3
Copy the API keys into Listivo
Rewrite the publishable key and the secret key to Listivo Panel > Monetization > Stripe.
-
4
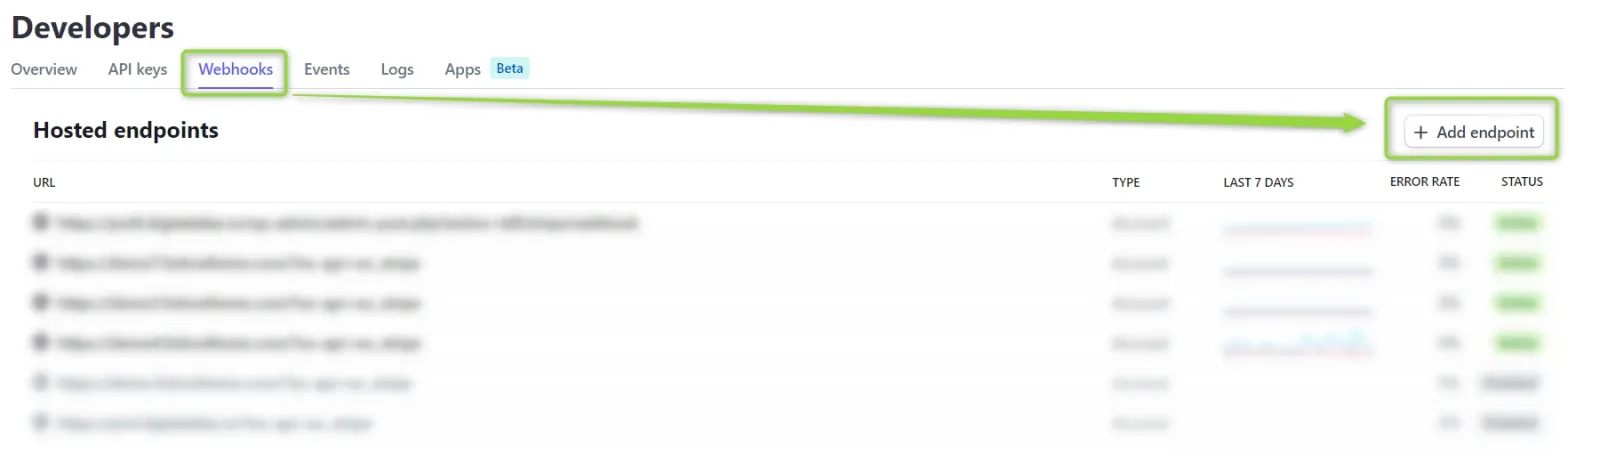
Add a webhook endpoint
To get the webhook secret, go to the webhook tab and add an endpoint.
-
5
Copy the endpoint URL from Listivo
Copy the endpoint URL from wp-admin > Listivo Panel > Monetization > Stripe…
-
6
Paste it into the Stripe dialog
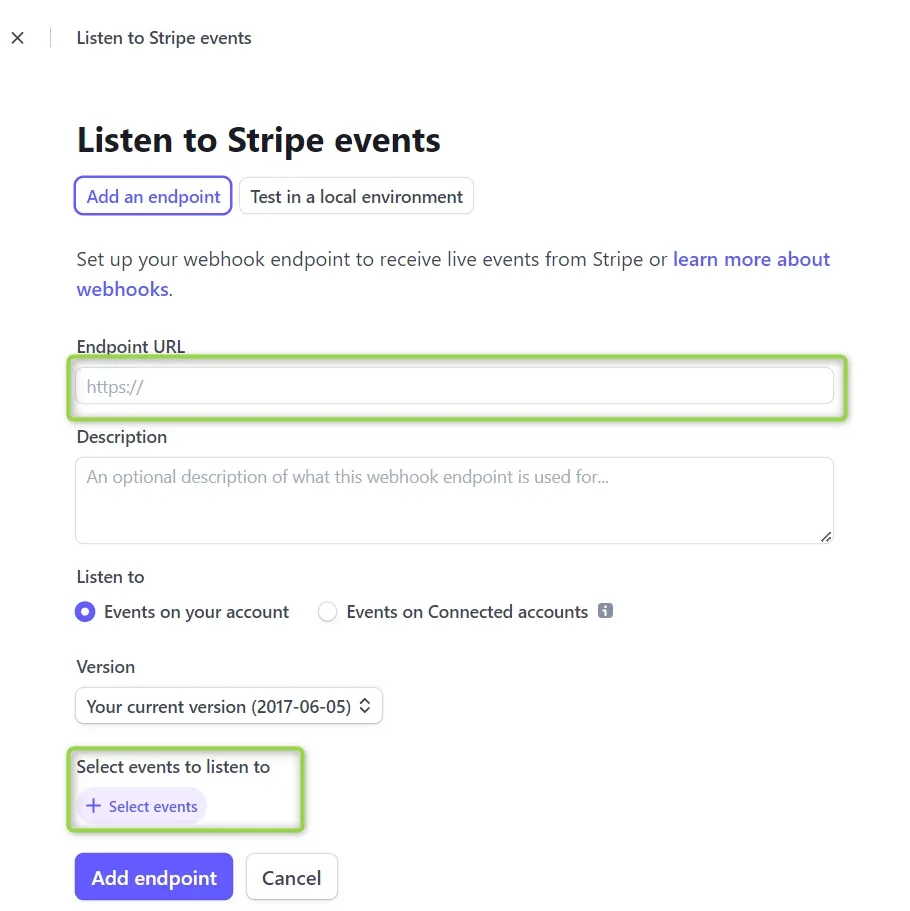
… and paste the endpoint URL into the "add endpoint" window. You can add your own description.
-
7
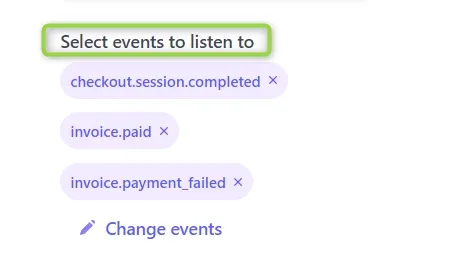
Select the events to listen to
You have to select three of them: checkout.session.completed, invoice.paid and invoice.payment_failed.
- 8 Click "Add endpoint"
-
9
Reveal the signing secret
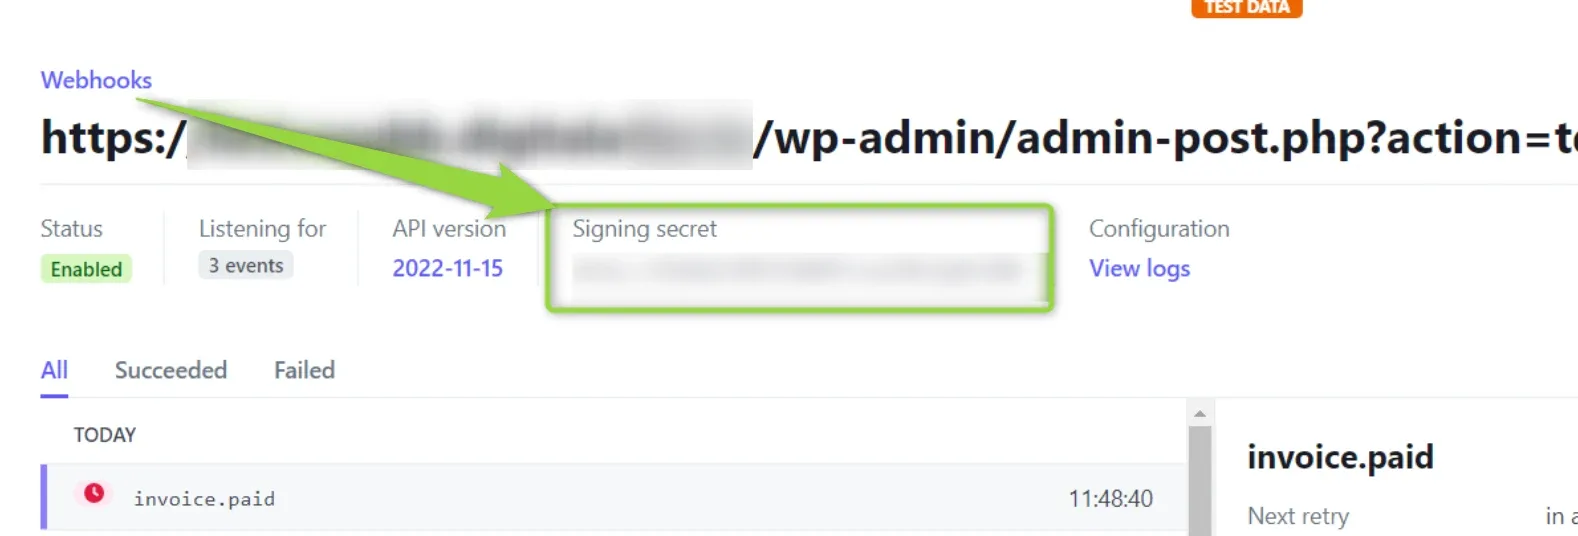
You just created the webhook for your website. Now you have to add one more piece of data to the Listivo settings: go to your webhook and "reveal" the signing secret.

-
10
Copy the signing secret
-
11
Save it as the Webhook secret
Paste the signing secret into wp-admin > Listivo Panel > Monetization > Stripe > field Webhook secret and save changes.
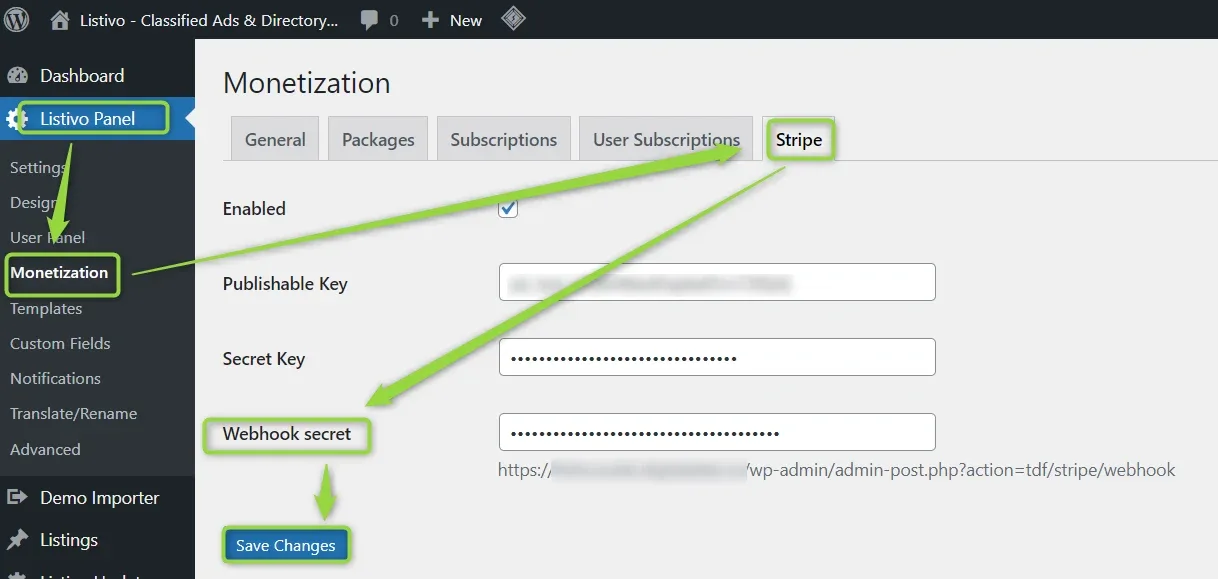
Done! Now you can create subscriptions for your users.
Ask the people who build Listivo
We answer by email from support@tangiblewp.com. With Premium Support, we also fix your site when something breaks.
We can also run your site for you, or build a new one.
Was this guide helpful?