Free Package, Free Registration, Free Subscription and WooCommerce Coupons
Give users something for free without giving the whole site away: an always-free package, a one-off package handed out at registration, a free monthly subscription, or WooCommerce coupons that discount a paid package.
3 minute read
Improve your monetization system by providing free options to users. This helps grow your ad database faster and motivates users to buy paid promotions later. Explore these options and choose the best one for your website:
- Always-Free Package - users can add an unlimited number of ads for free
- One-Time Free Registration Package - users receive a free package upon registration
- Free Monthly Subscription - users receive a free package every 30 days
- Custom WooCommerce Coupons
1. Always-Free Package
Configure the Always-Free Package with these steps:
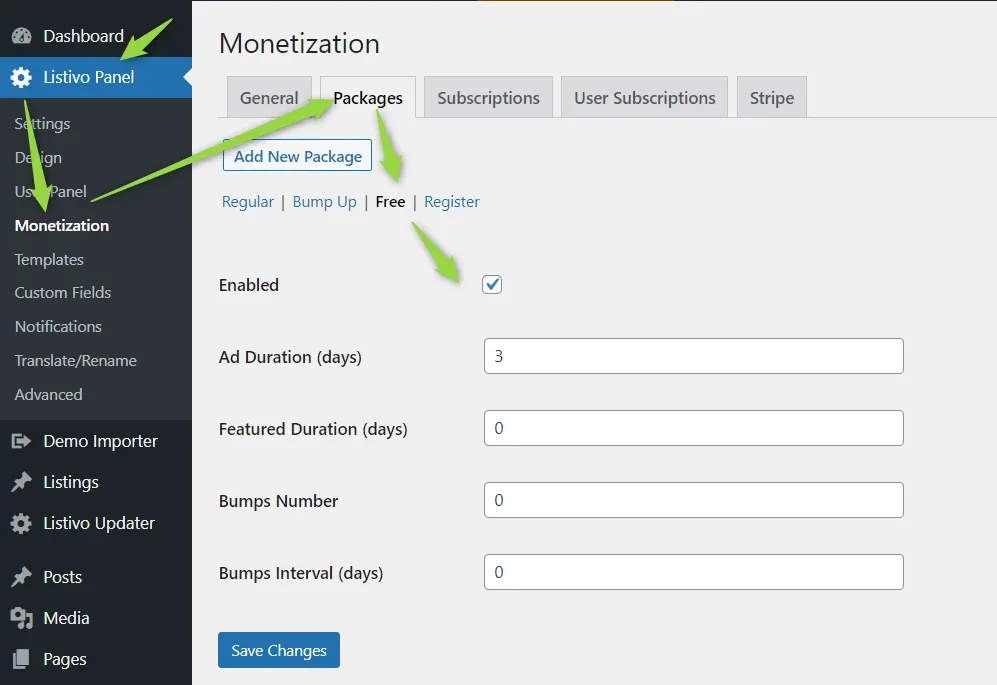
When users add ads, this option will appear first. In this example, the Ad Duration is set to 3 days, the ad is not featured, and it is not automatically bumped.
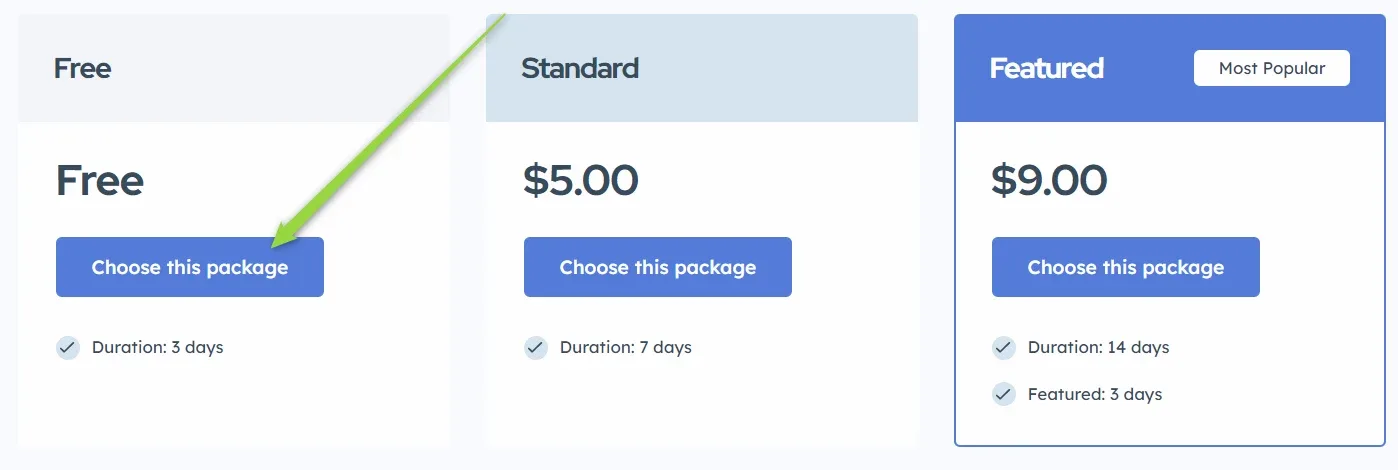
In summary, the Always-Free Package allows users unlimited access.
2. One-Time Free Registration Package
This option exclusively targets newly registered users without affecting existing accounts. As a result, upon registration, you can provide new users with a free package containing a limited number of ads.
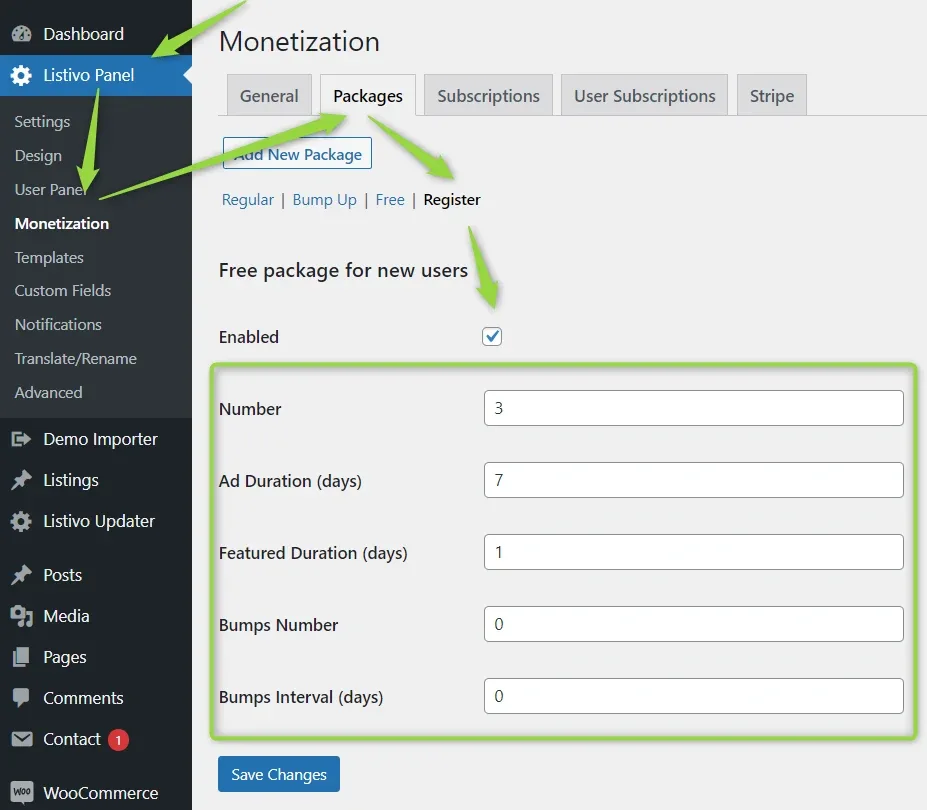
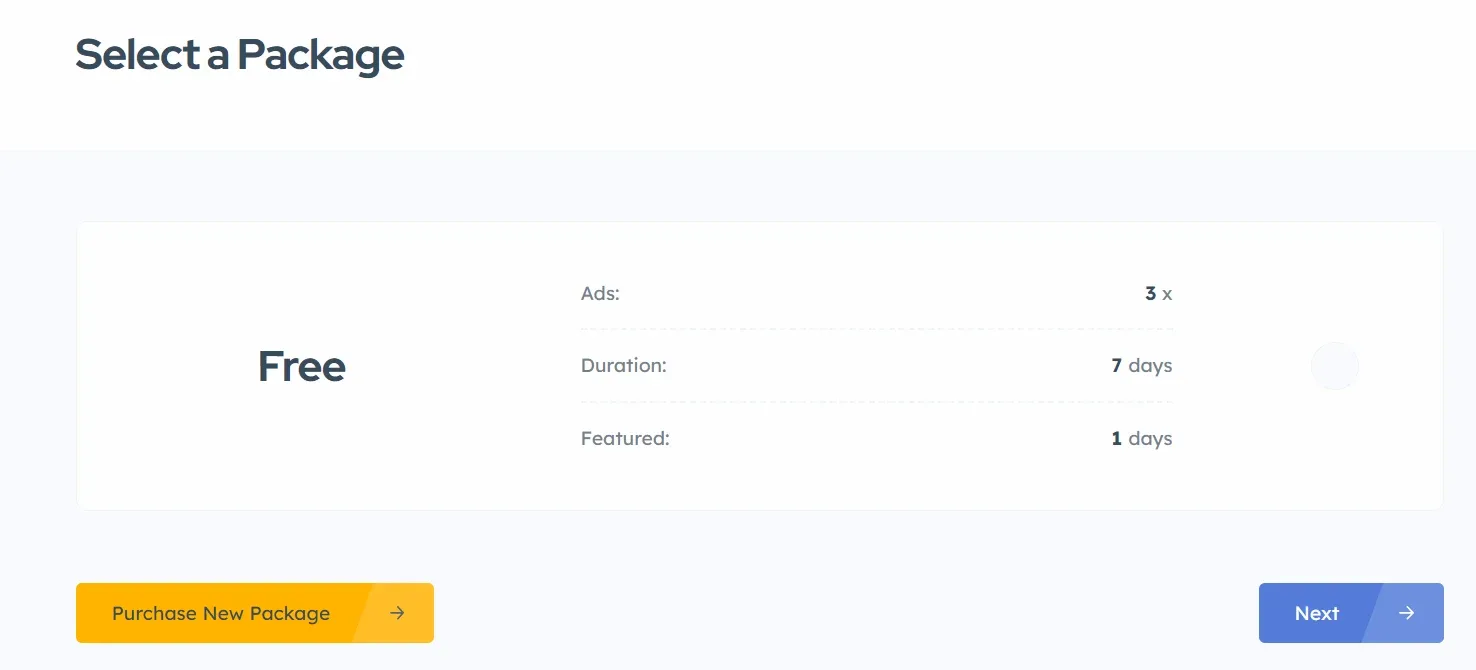
After using their free ads, users must purchase a new package to add more ads. In this case, once the three ads are added, users cannot add more listings for free. For your users, it will appear like this:
3. Free Monthly Subscription
Enable the Free Monthly Subscription option by connecting your website to Stripe (Stripe configuration). Users will receive a free package every 30 days, as shown in the configuration example below:
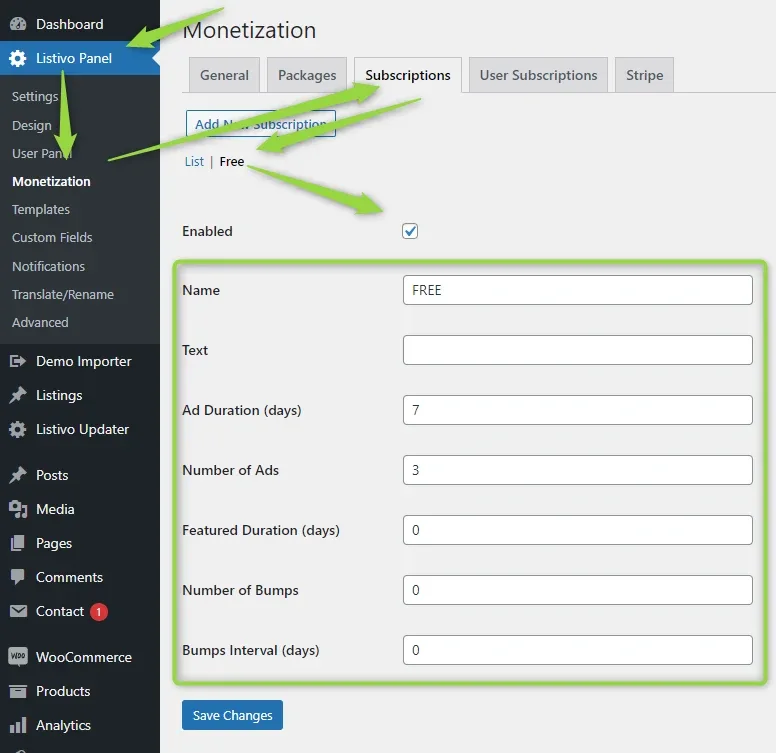
In this configuration, users receive three ads upon registration, displayed for seven days. After 30 days, they receive another three ads. If a user does not use their three ads, they will have a total of six ads to add the following month. The user panel displays the following information:
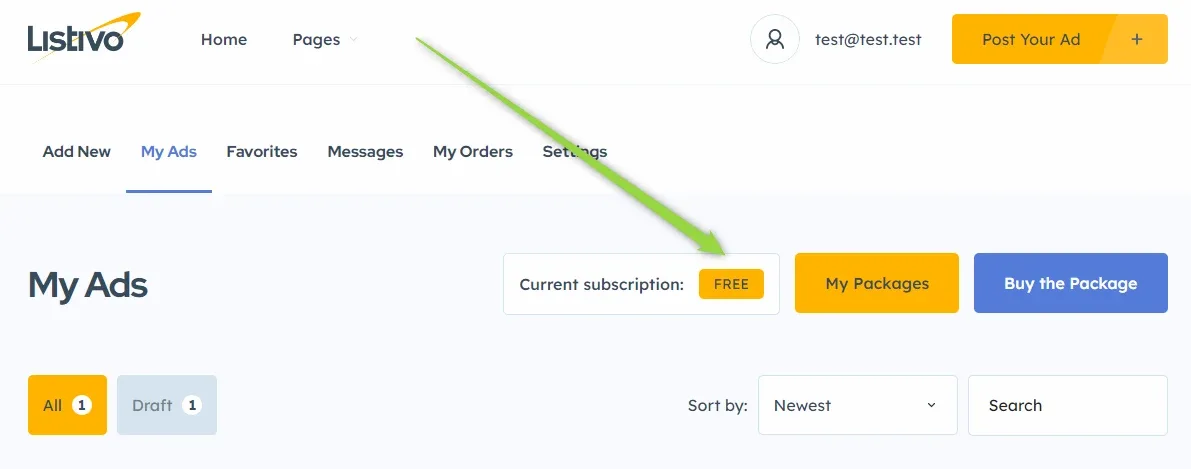
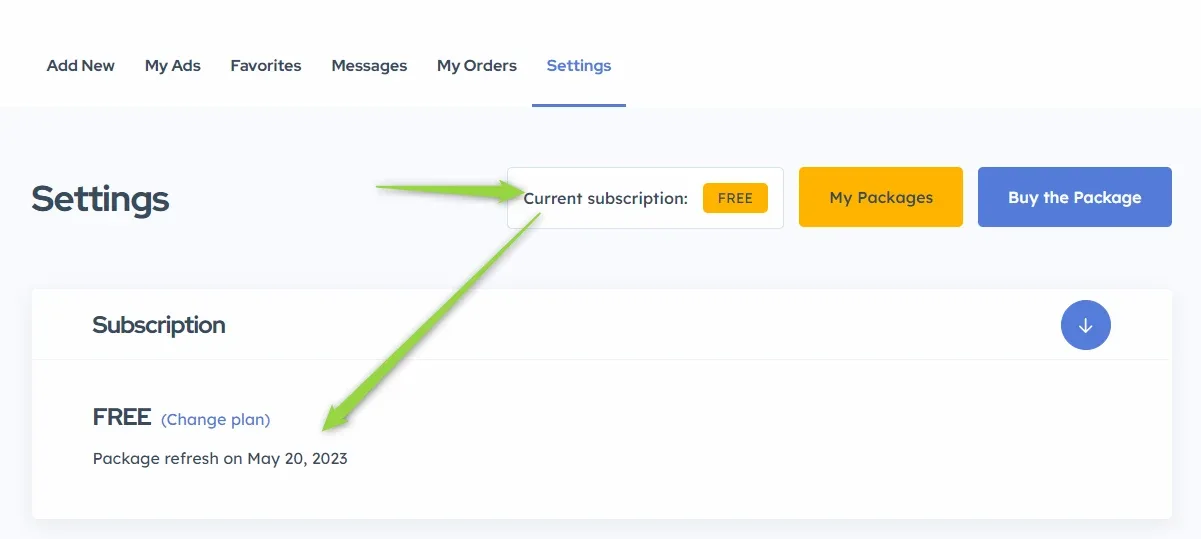
Users can view when their package will regenerate by clicking the subscription name or visiting "Settings".
4. Custom WooCommerce Coupons
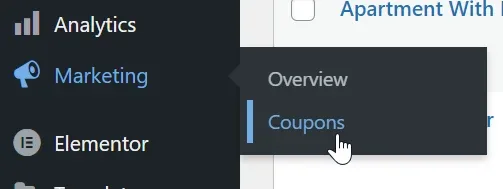
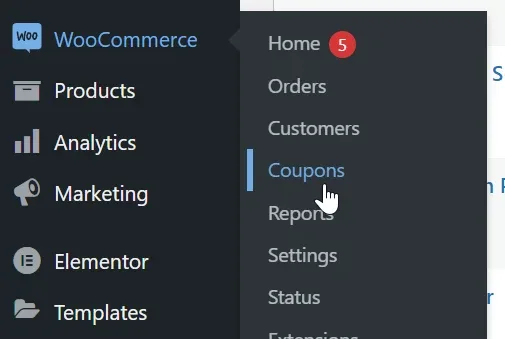
Offer your users coupons for purchasing packages as an alternative. WooCommerce recently relocated the "Coupon" tab, so check both possible locations:
a) under Marketing > Coupons
b) under WooCommerce > Coupons
-
1
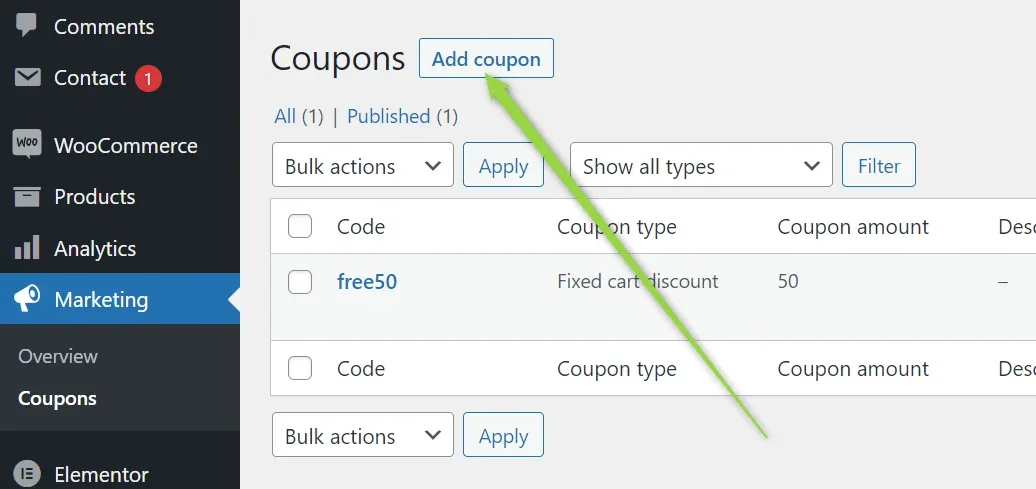
Add a coupon
In either case, the Coupons panel appears as shown below, and you can add a coupon in this manner:
-
2
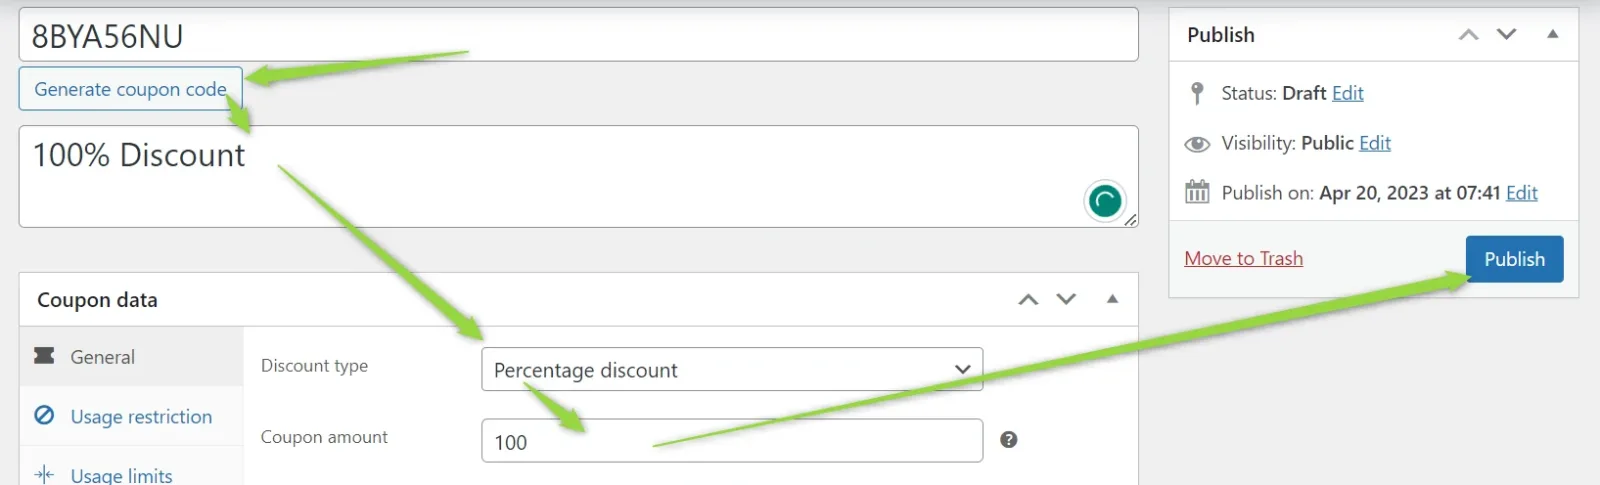
Set the discount
Set up the coupon according to your preference, such as assigning a 100% discount:
-
3
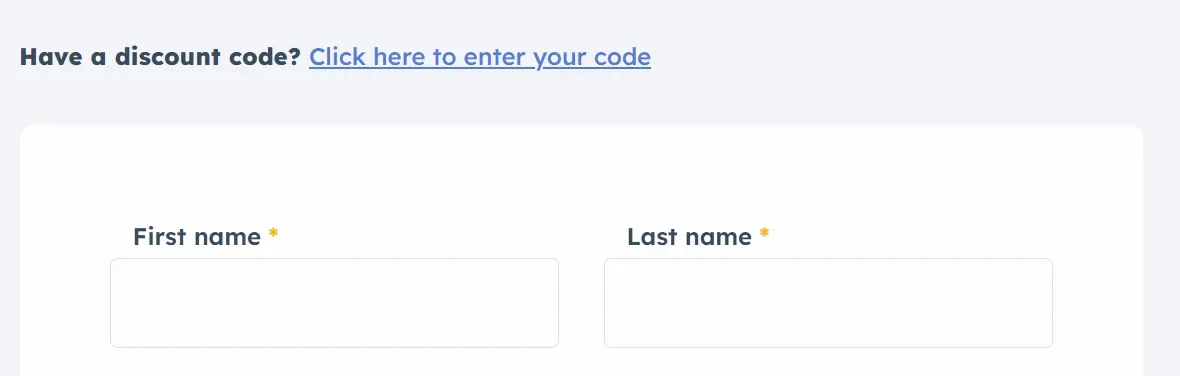
Users open the code field at checkout
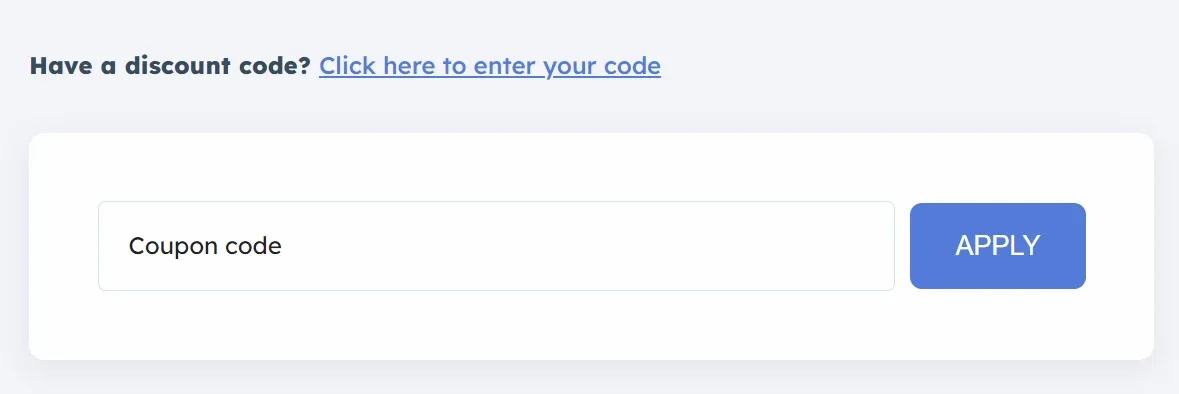
During the checkout process, users can enter the coupon code by clicking a link:
-
4
They type the code
After clicking "click here to enter your code", users will see the following window.
-
5
The coupon is confirmed
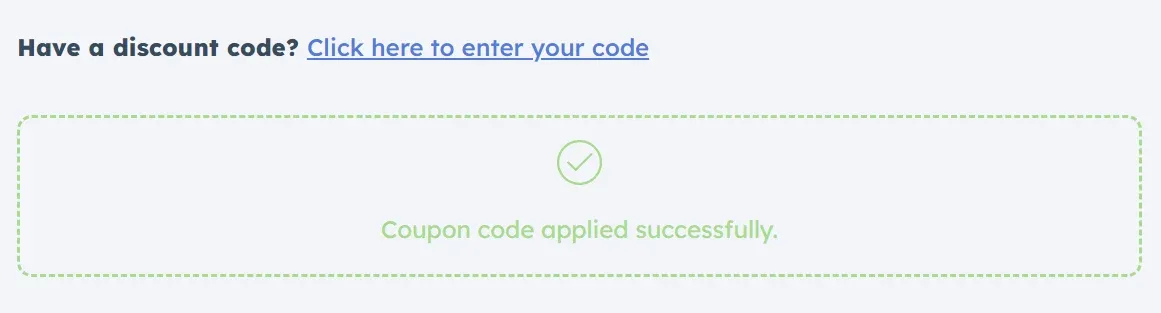
Upon entering the code, users will receive this notification:
-
6
The price updates
The pricing will update accordingly:
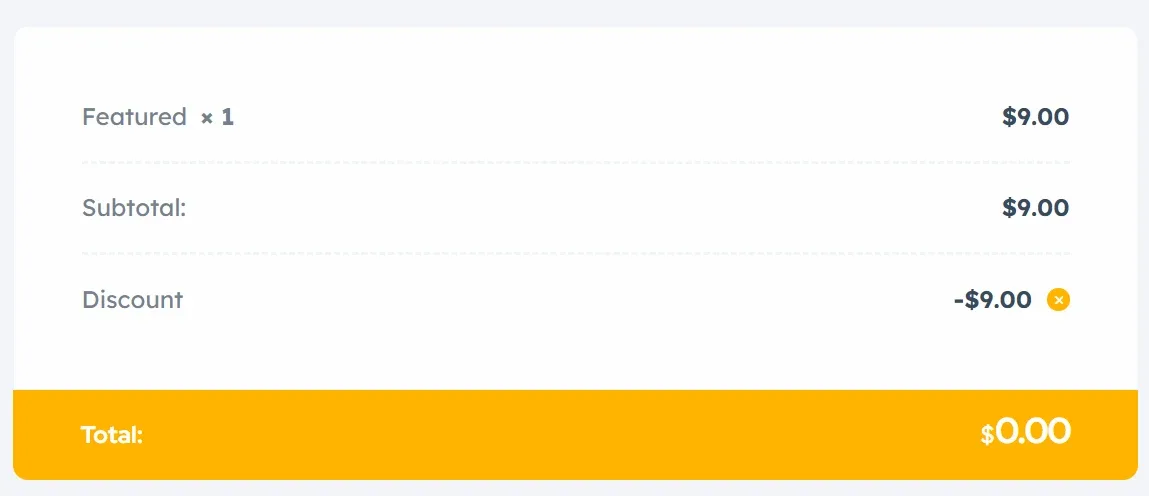
In this example, the total is 0 because the entered coupon code provided a 100% discount.
Ask the people who build Listivo
We answer by email from support@tangiblewp.com. With Premium Support, we also fix your site when something breaks.
We can also run your site for you, or build a new one.
Was this guide helpful?