Skip to content

Subscriptions (Membership) - how to configure

Offer recurring memberships in Listivo: connect Stripe, create subscription plans with their own ad limits, durations and prices, and follow what your users are subscribed to.

1 minute read

Stripe first
Subscriptions are billed through Stripe. Enable Stripe and save your credentials before you add any plan.
  1. 1 Enable Stripe

    To use the subscriptions system, go to wp-admin > Listivo Panel > Monetization > Stripe. Enable it and add all necessary credentials – here you will read more about it.
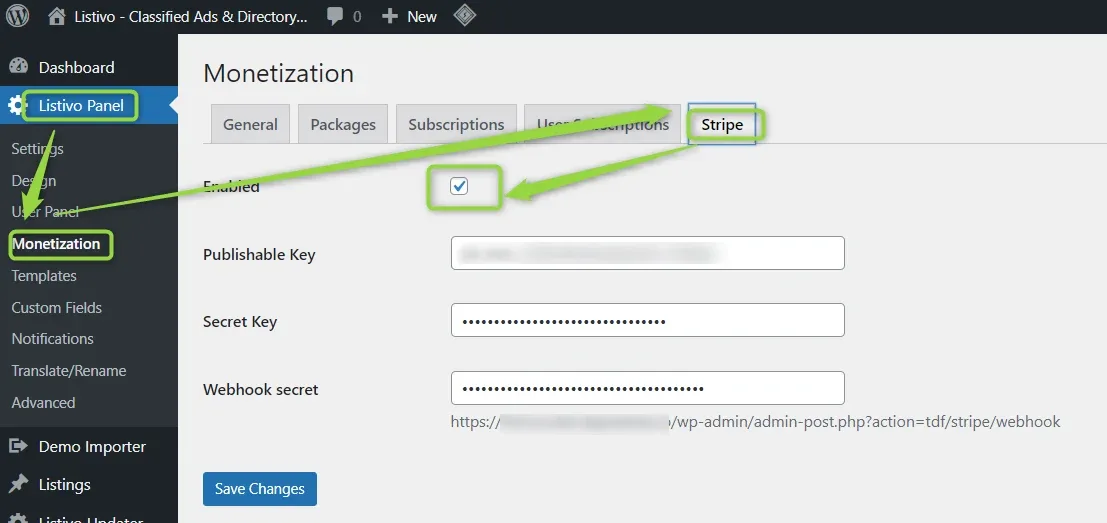
    Monetization > Stripe tab with Enabled ticked and the Publishable Key, Secret Key and Webhook secret fields filled in; the webhook endpoint URL is printed under the last field.
  2. 2 Open the Subscriptions tab

    When your Stripe configuration is completed, you can start adding subscriptions.
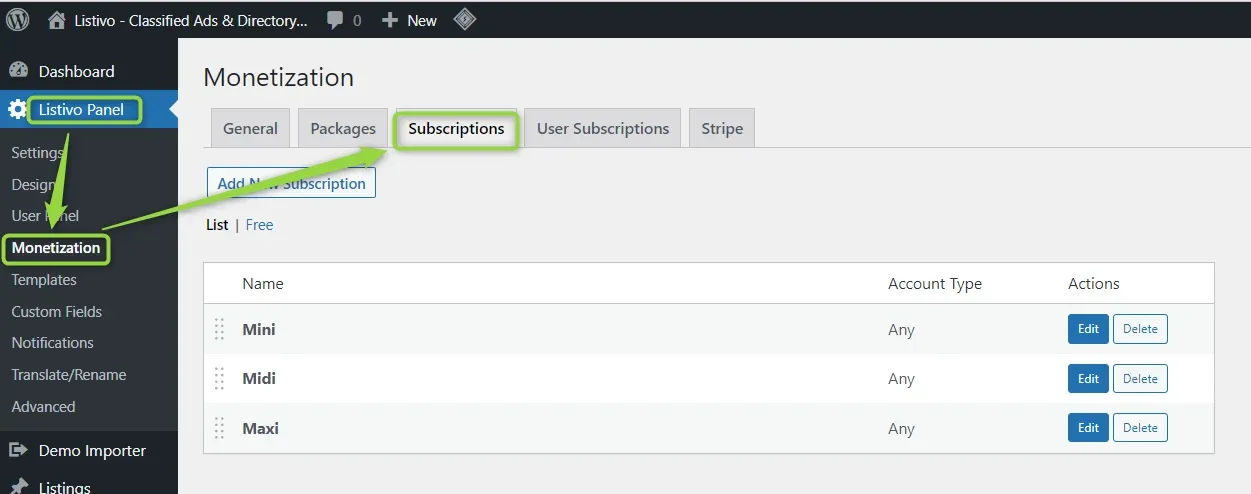
    Monetization > Subscriptions tab listing the subscriptions Mini, Midi and Maxi with Account Type "Any" and Edit and Delete buttons, under an Add New Subscription button and List | Free links.
  3. 3 Set up the free subscription

    You can set free subscriptions for your users – enable it here and put in all necessary data.
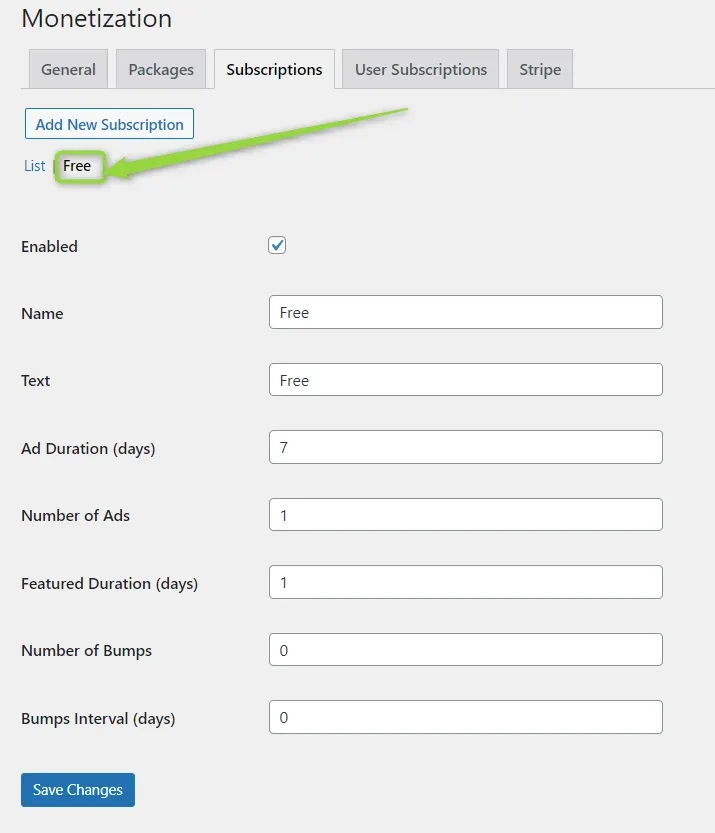
    Subscriptions tab with the Free sub-tab open: Enabled ticked, Name and Text both "Free", Ad Duration 7 days, Number of Ads 1, Featured Duration 1 day, Number of Bumps 0 and Bumps Interval 0.
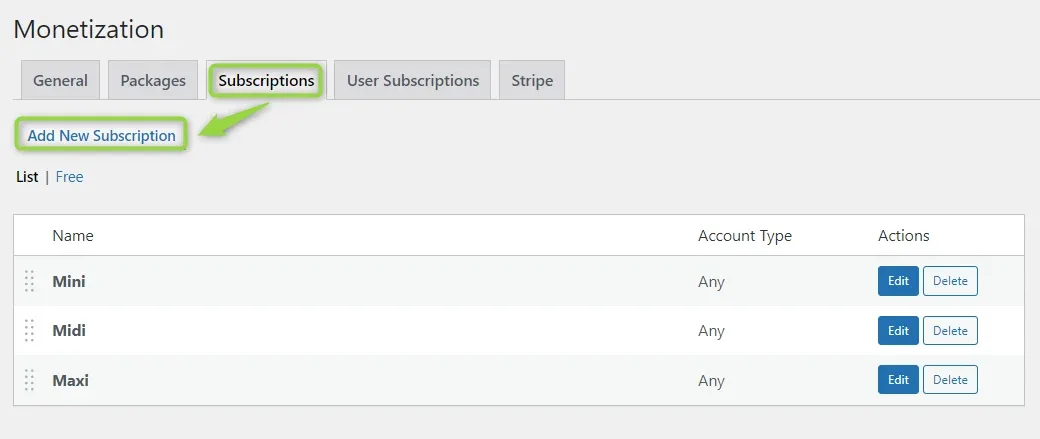
  4. 4 Click "Add New Subscription" Monetization > Subscriptions with the Add New Subscription button highlighted above the list of the Mini, Midi and Maxi subscriptions.
  5. 5 Name the new subscription

    Enter a name for the new subscription and click the "Add Subscription" button.
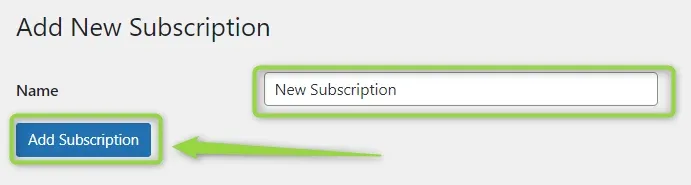
    "Add New Subscription" form with the Name field filled in as "New Subscription" and a green arrow pointing at the Add Subscription button.
  6. 6 Fill in the subscription settings

    Add all the settings for your subscription and save changes.
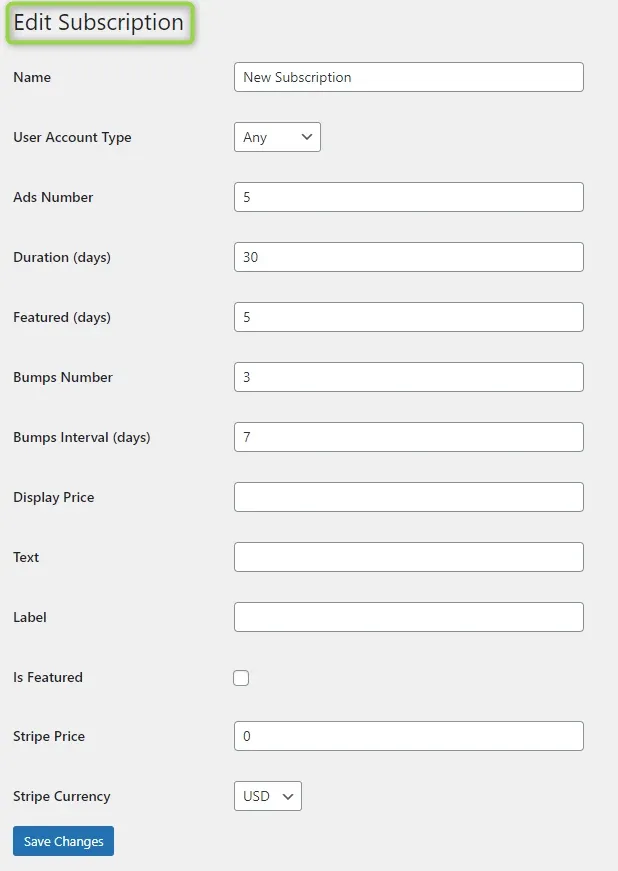
    "Edit Subscription" form: Name "New Subscription", User Account Type Any, Ads Number 5, Duration 30, Featured 5, Bumps Number 3, Bumps Interval 7, empty Display Price, Text and Label, Stripe Price 0 and Stripe Currency USD.
  7. 7 Check it on the subscriptions list

    Your "new subscription" is now visible on the subscriptions list. Here you can edit it or delete it.
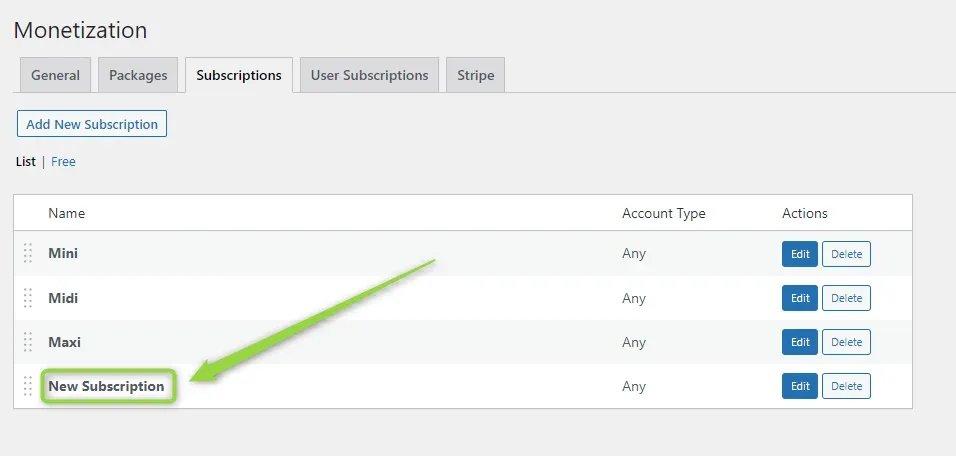
    Subscriptions list showing Mini, Midi, Maxi and the newly added "New Subscription" row highlighted at the bottom.
  8. 8 Let users pick their plan

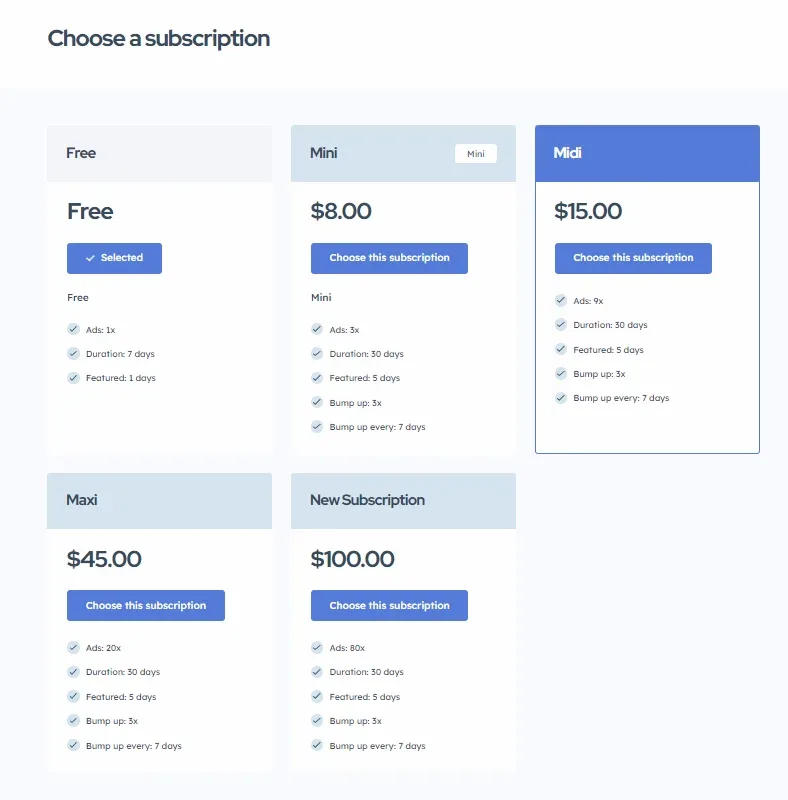
    Your users will see their subscriptions in account settings. They can change plan whenever they want to.
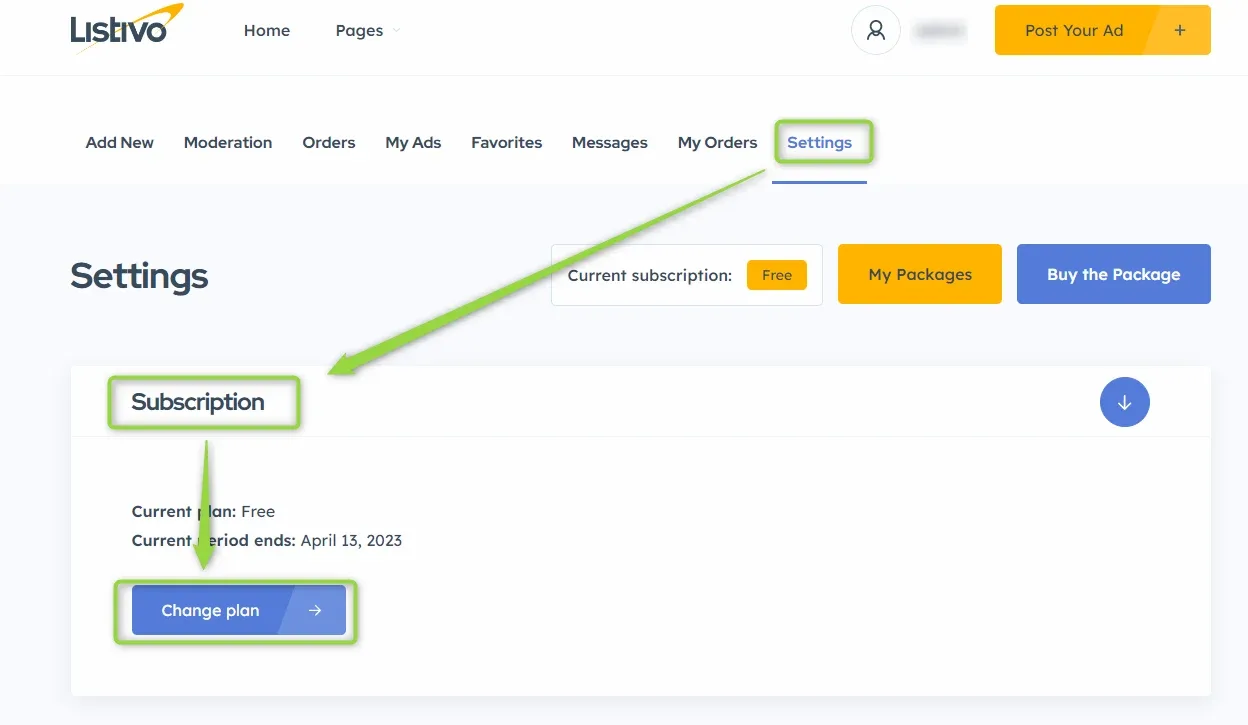
    Front-end user Settings page with a Subscription box showing "Current plan: Free", "Current period ends: April 13, 2023" and a Change plan button; the Settings tab and "Current subscription: Free" label are highlighted.
Front-end "Choose a subscription" page with Free (marked Selected), Mini $8.00, Midi $15.00, Maxi $45.00 and New Subscription $100.00 cards, each listing ads, duration, featured days and bump ups.

You can see all subscriptions on the "User Subscriptions" tab.
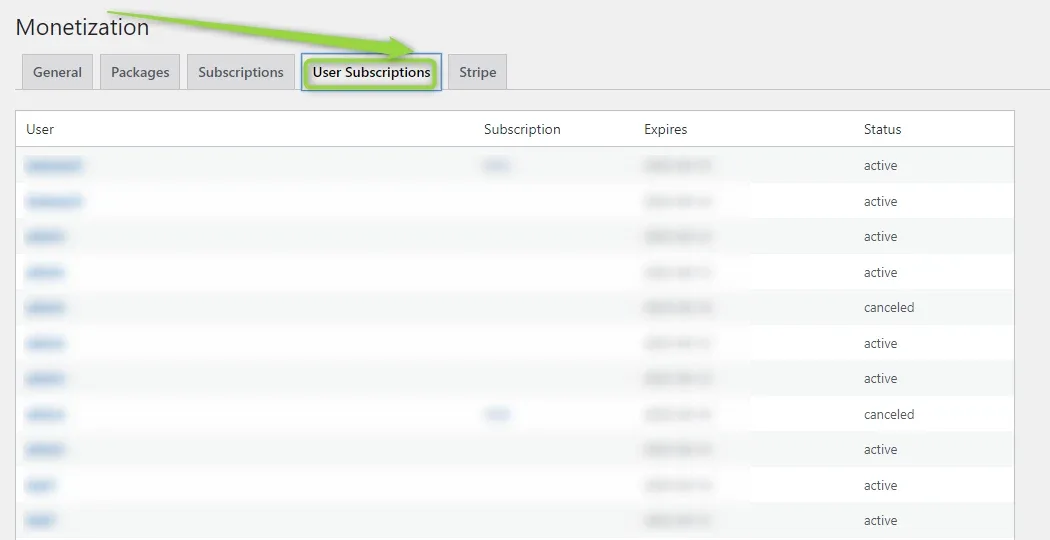
Monetization > User Subscriptions tab listing users with their subscription, expiry date and a Status column showing active or canceled; the user names and dates are blurred out.

Ask the people who build Listivo

We answer by email from support@tangiblewp.com. With Premium Support, we also fix your site when something breaks.

Was this guide helpful?