Monetization – WooCommerce Payments Gateways
Turn Listivo into a paid classifieds site: see how packages look to your users, enable monetization in the Listivo Panel, set up free and paid packages, and connect a WooCommerce payment gateway so users can pay.
2 minute read
How it works
You can use the Monetization System to earn on your website. It is displayed like this in the user panel, or at the end of the process of adding a listing:
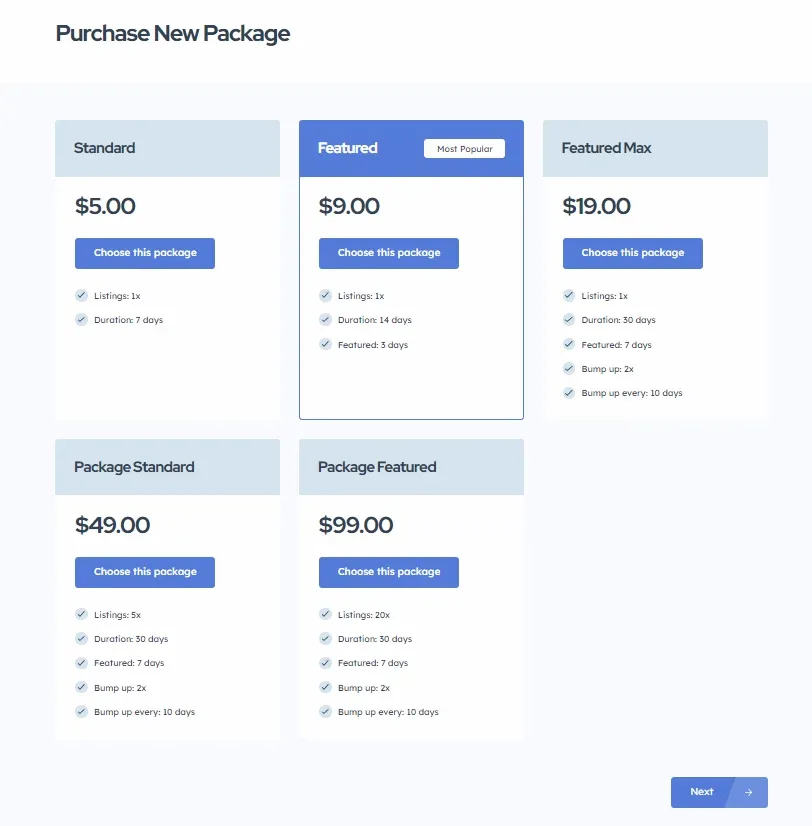
As you can see above, each package has:
- Name
- Price
- Listings – how many listings can be added via this package
- Duration (days)
- Featured (days)
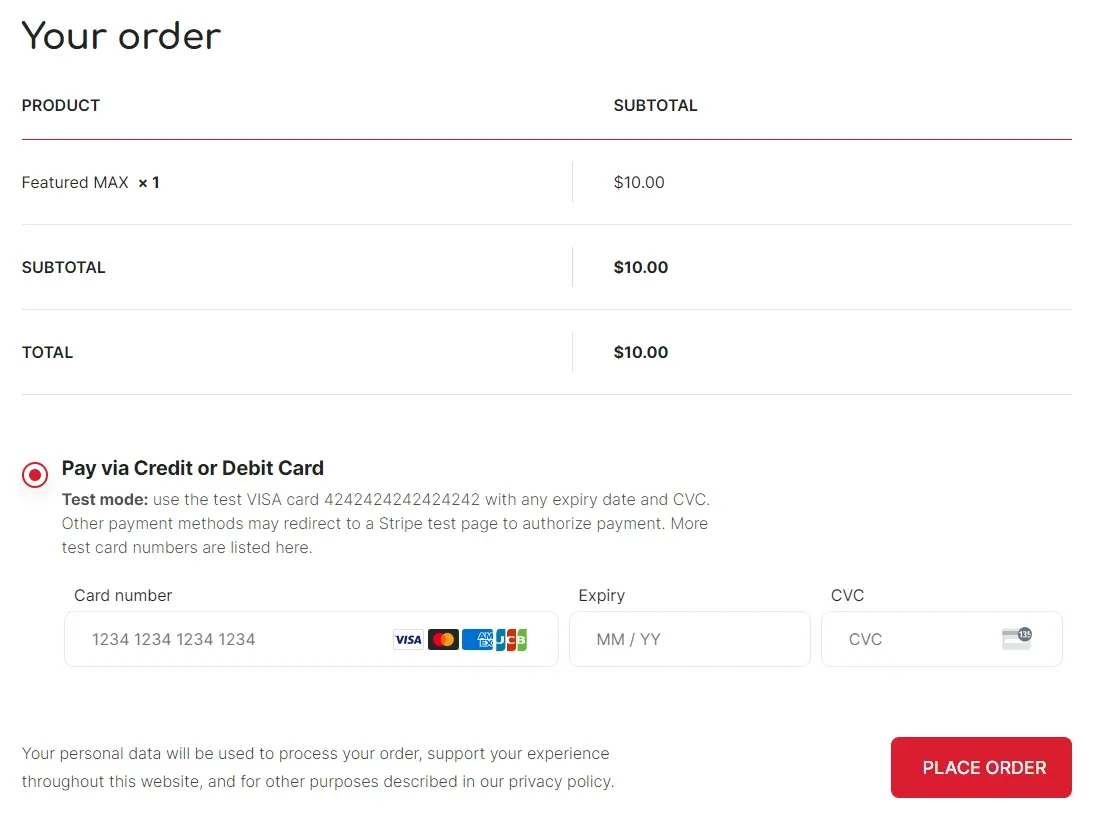
After selecting the package and clicking “Next”, the user is redirected to checkout to pay.
How to configure
-
1
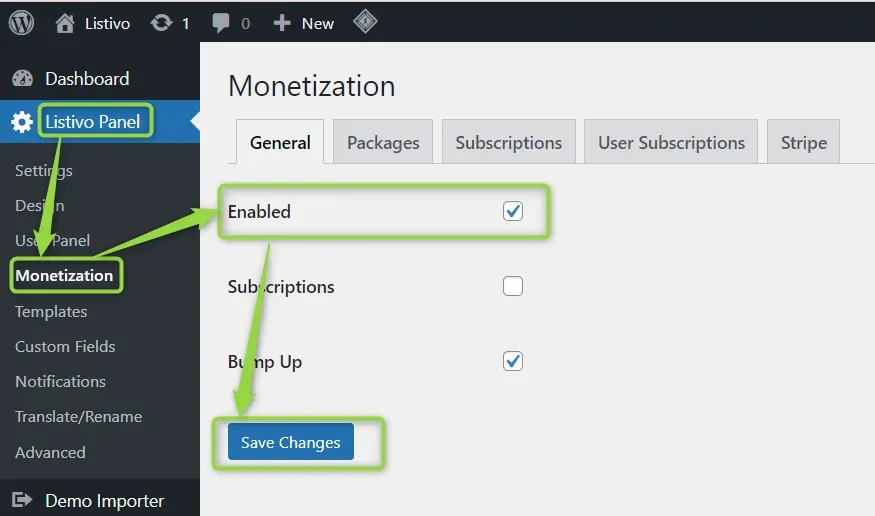
Open the Monetization panel
In wp-admin, go to Listivo Panel > Monetization.
-
2
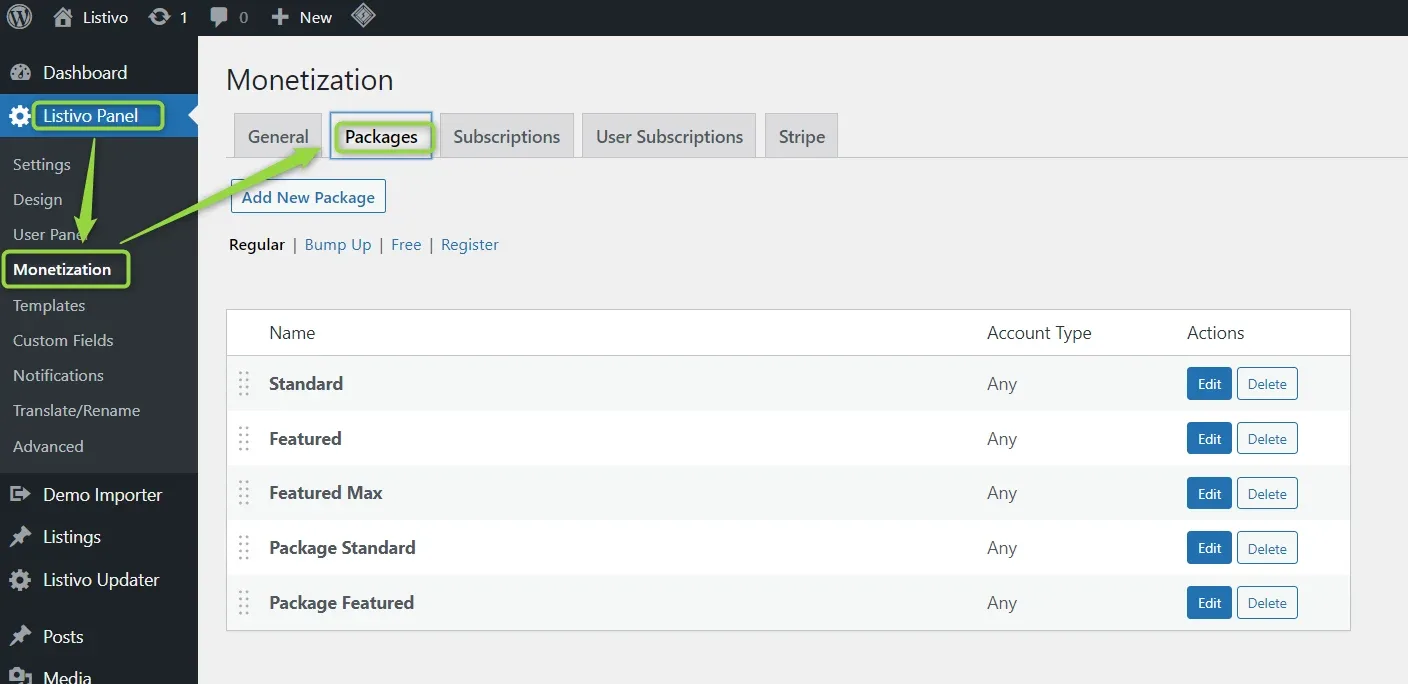
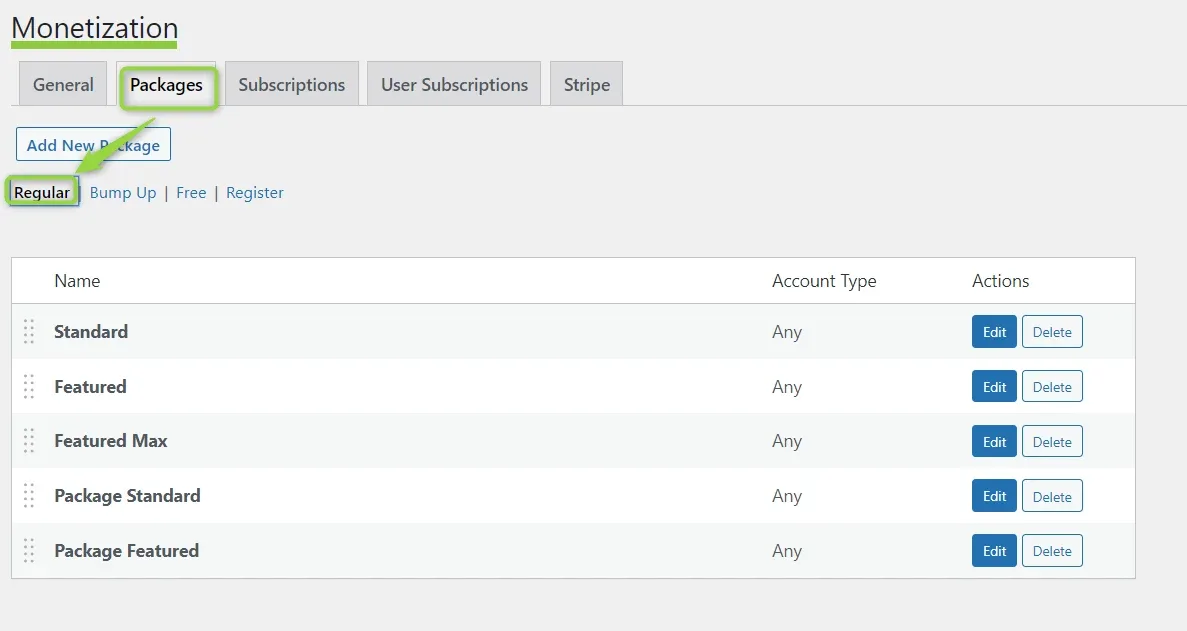
Find your packages on the Packages tab
The Packages tab holds the packages themselves, split into Regular, Bump Up, Free and Register sub-tabs.
-
3
Install WooCommerce
Listivo will ask you to install the WooCommerce plugin if you do not have it yet: wordpress.org/plugins/woocommerce
-
4
Configure the “Add for Free” option
This is the first option you set in this section.
-
5
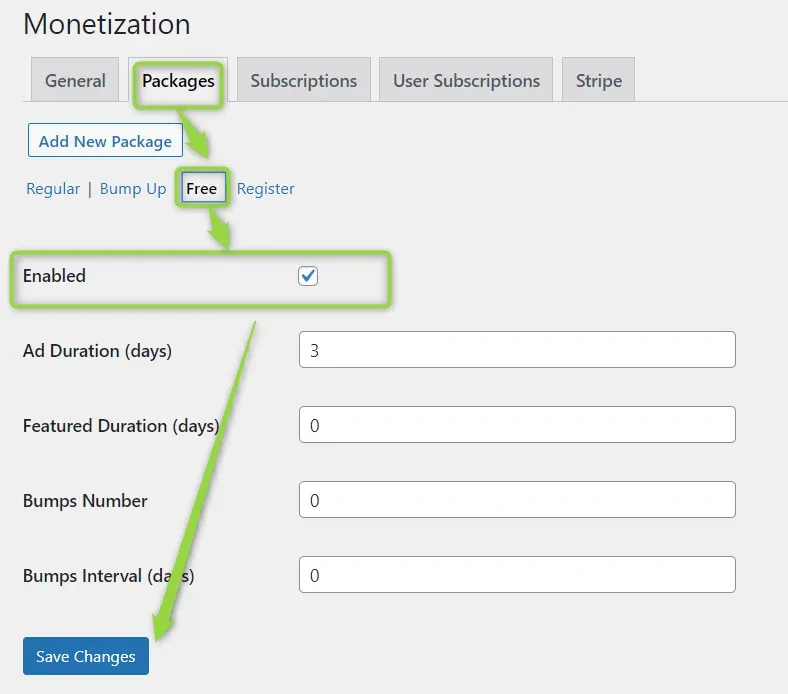
Create a free package
A free package is the package your user receives when newly registered.
-
6
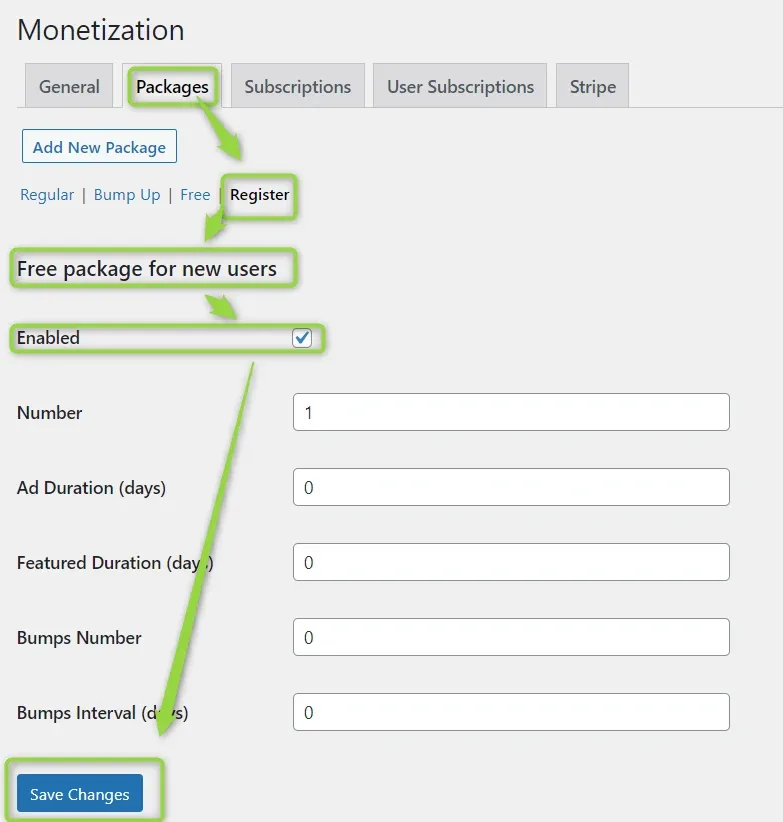
Set the package new users get on registration
Add for Free is unlimited, while the Free package in the Register section can be configured to be used a limited number of times — once, for example.
Payment packages
Scroll down and configure the Payment Packages. You can edit the existing ones or add new packages.
Payment gateways
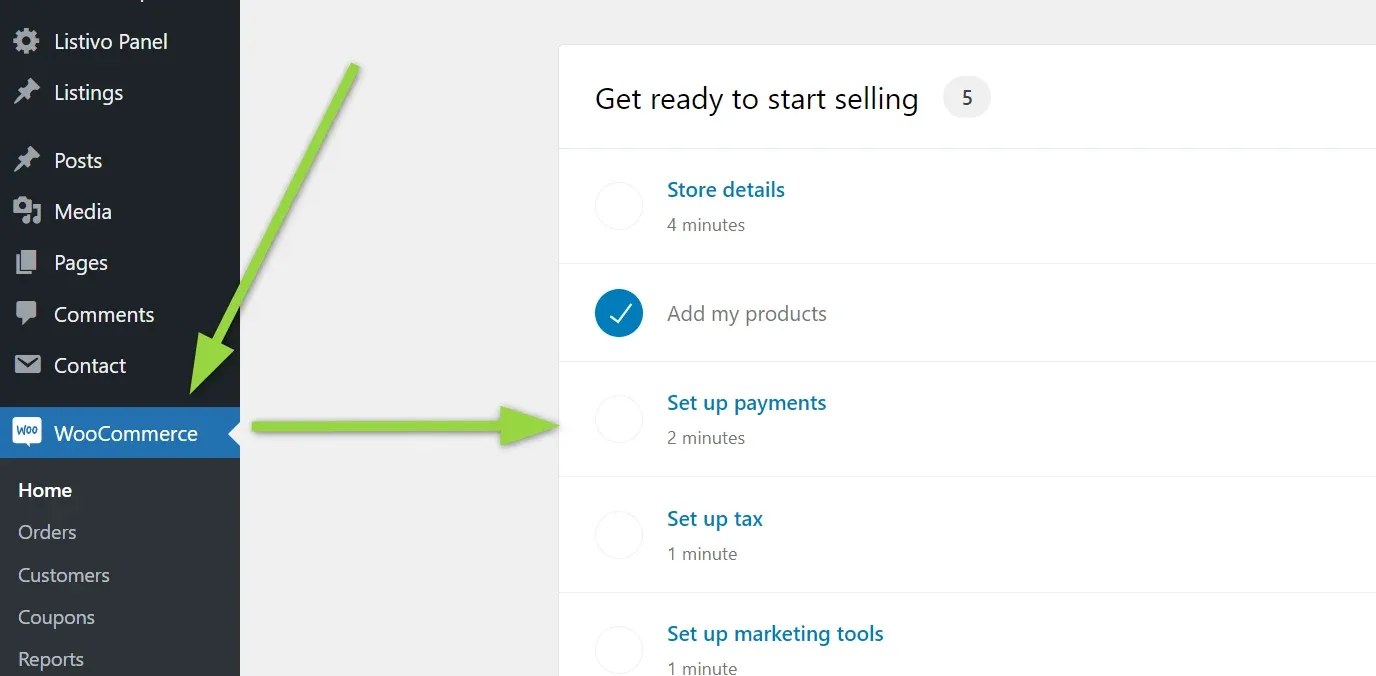
Install any payment gateway and follow its documentation to configure it. You can find payment gateways here:
- WordPress Repository (free): https://wordpress.org/plugins/search/payment+gateways/
- WooCommerce Extensions (free & paid): https://woocommerce.com/product-category/woocommerce-extensions/payment-gateways/
- CodeCanyon (paid): https://codecanyon.net/search/woocommerce%20payment%20gateway
It is also always worth searching Google for “Your Payment Gateway Name + WooCommerce Gateway Name”, e.g. authorize.net woocommerce payment gateway, because an online payments system often has more than one addon.
Sample documentation that shows how to configure a payment gateway via Stripe (used on our demo) – https://woocommerce.com/document/stripe/
Ask the people who build Listivo
We answer by email from support@tangiblewp.com. With Premium Support, we also fix your site when something breaks.
We can also run your site for you, or build a new one.
Was this guide helpful?