Skip to content

Notifications: setup, management and Twilio integration

Set up the emails and text messages your Listivo site sends: build a notification for any trigger, personalize the built-in system messages, check the log, and connect Twilio for SMS.

1 minute read

This article will walk you through the first steps of configuring notifications for your website.

1. Requirements

Notifications need WP Cron
To enable notifications, it is essential to set up the WP Cron System (cron jobs) for your WordPress theme. If you have not yet completed this process, kindly refer to the following guide for detailed instructions: WP-Cron system.

2. Adding a new notification

You can create a new notification by navigating to the Listivo Panel, selecting Notifications, and then clicking on the Add New Notification button.
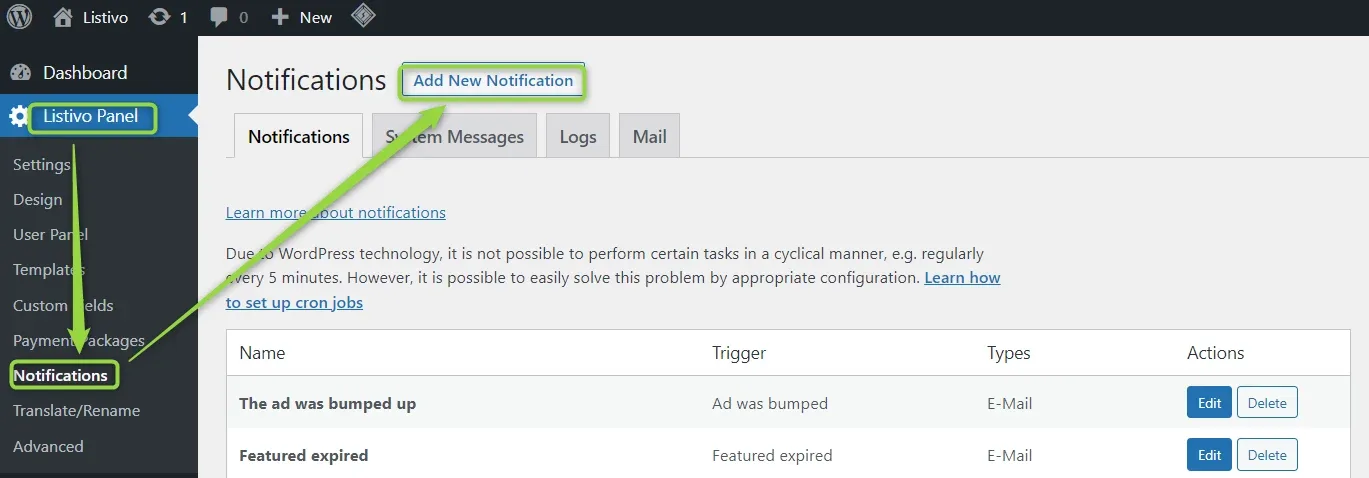
The Notifications screen in the Listivo Panel with the Add New Notification button highlighted, the Notifications, System Messages, Logs and Mail tabs, and two notifications listed — The ad was bumped up and Featured expired — with their triggers.

Assign a name to your new notification, choose the notification type (Email, SMS (Twilio), or both), select the desired trigger, and click the Add Notification button.
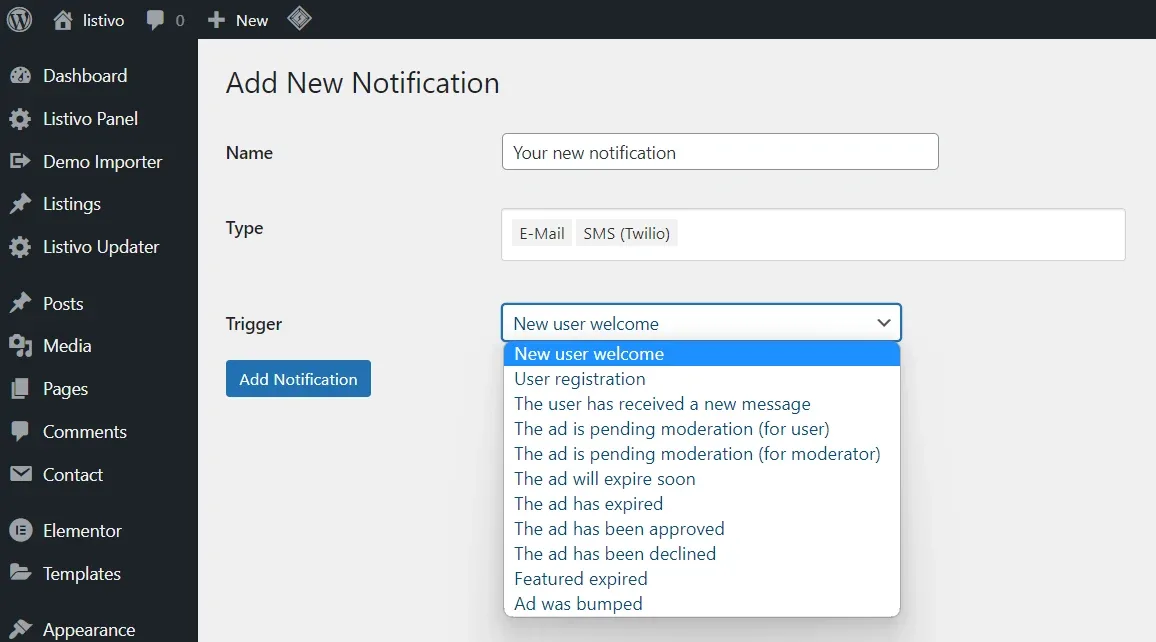
The Add New Notification form: a Name field, Type with E-Mail and SMS (Twilio) options, and the Trigger dropdown open on New user welcome, User registration, moderation, expiry, approval, decline and bump triggers.

You will now see a list of available tags associated with the chosen trigger, along with additional fields for Mail Title, Mail Body, and SMS (if selected in the previous step).
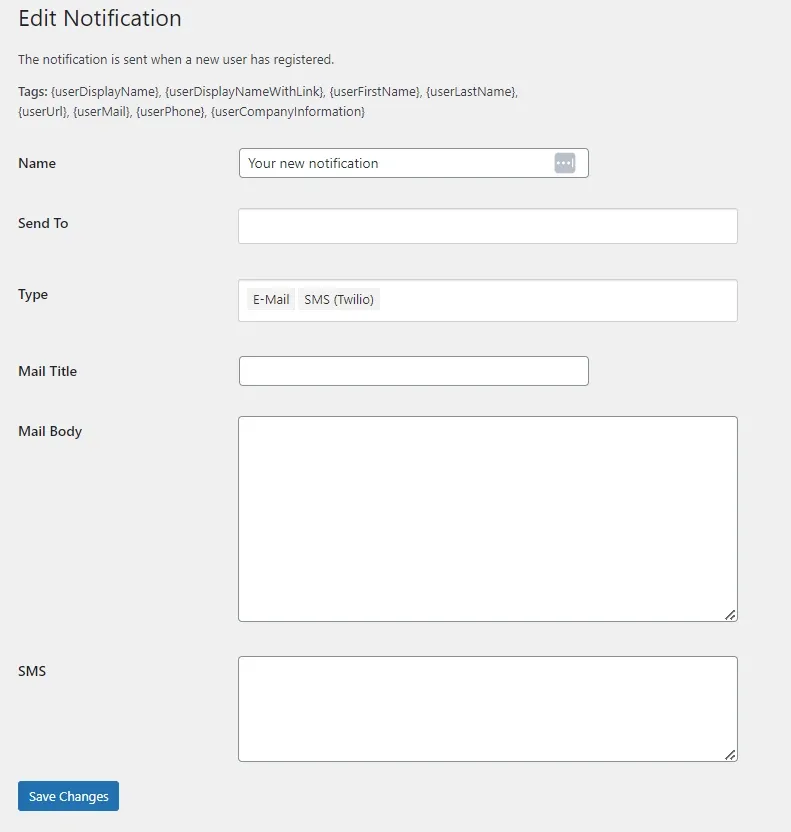
The Edit Notification screen for the new-user trigger, listing tags such as {userDisplayName}, {userFirstName}, {userMail} and {userPhone} above the Name, Send To, Type, Mail Title, Mail Body and SMS fields.

3. System Messages

Listivo features three system messages:

  • Confirmation Email
  • Reset Password
  • Change Email
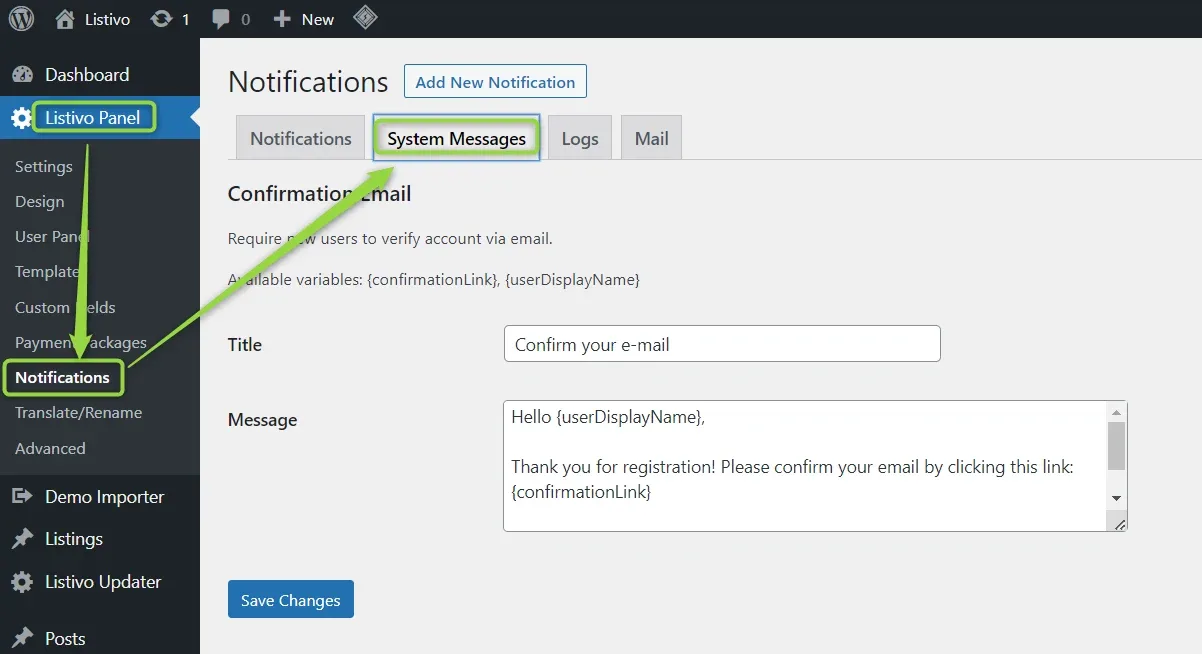
The System Messages tab showing the Confirmation Email settings — available variables {confirmationLink} and {userDisplayName}, a Title field and a Message body — with arrows from the sidebar Notifications link and the tab.

By using tags, you can personalize these messages before sending them.
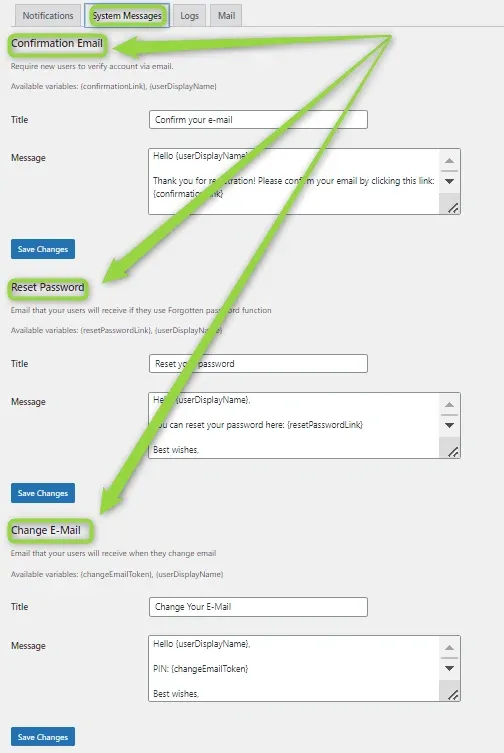
All three system messages on one tab — Confirmation Email, Reset Password and Change E-Mail — each with its available variables, a Title field, a Message body and its own Save Changes button.

4. Logs

You can monitor all notifications and check their statuses through the logs.
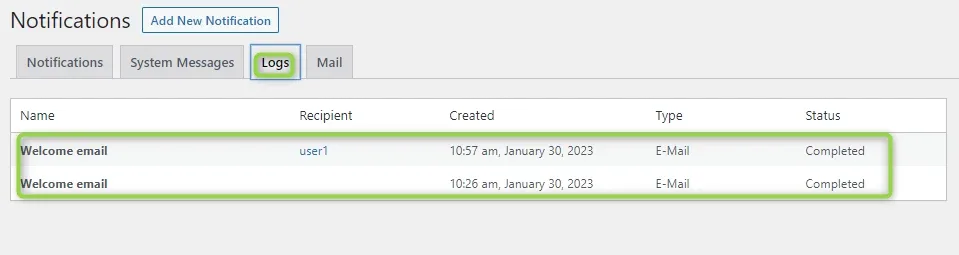
The Logs tab listing two Welcome email entries, recipient user1, created 10:57 am and 10:26 am on January 30, 2023, type E-Mail, status Completed.

5. Twilio integration

Enter your Twilio account details — only the first three fields are required for notifications. Follow this guide for instructions on obtaining these details: Twilio - first steps.
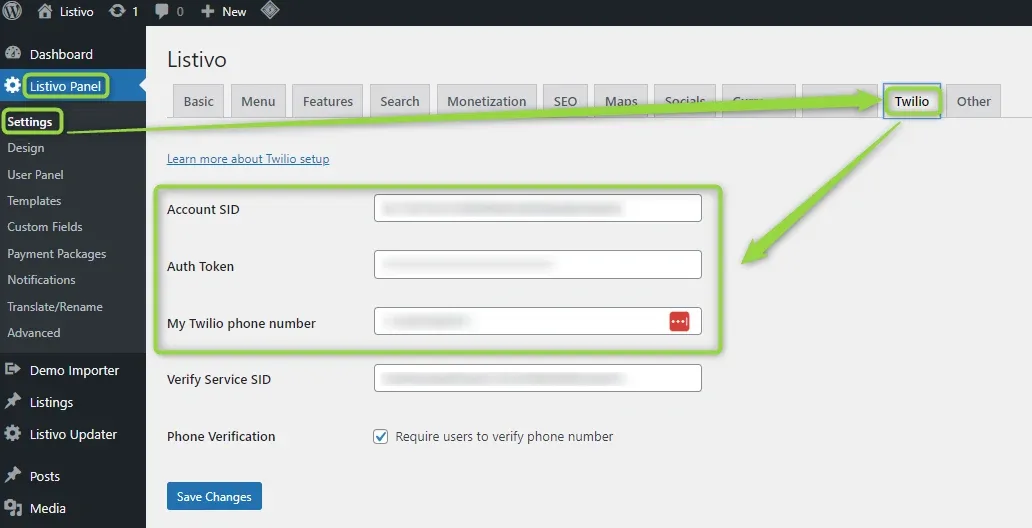
The Twilio tab of the Listivo settings with Account SID, Auth Token and My Twilio phone number framed in green, above Verify Service SID and a "Require users to verify phone number" checkbox.

Ask the people who build Listivo

We answer by email from support@tangiblewp.com. With Premium Support, we also fix your site when something breaks.

Was this guide helpful?