Skip to content

Twilio - first steps

Create a Twilio account, collect its credentials and paste them into the Listivo Panel, so your site can send SMS notifications and verify user phone numbers.

2 minute read

Listivo Theme uses the Twilio API to send SMS notifications to your users. To switch it on, you only need to provide a little information in the Listivo Panel. This article walks you through configuring your Twilio account, so that by the end you will know how to get the Twilio credentials needed to send SMS to users.

Already have a Twilio account?
Log in and jump straight to Collect your Twilio credentials below — the first six steps only cover creating a new account.

Create a Twilio account

  1. 1 Sign up for Twilio

    Go to Twilio and create an account.

    The Twilio home page with the Sign up button highlighted in the top-right corner, next to Contact sales.
  2. 2 Enter your account details

    A free account needs only the details shown below.
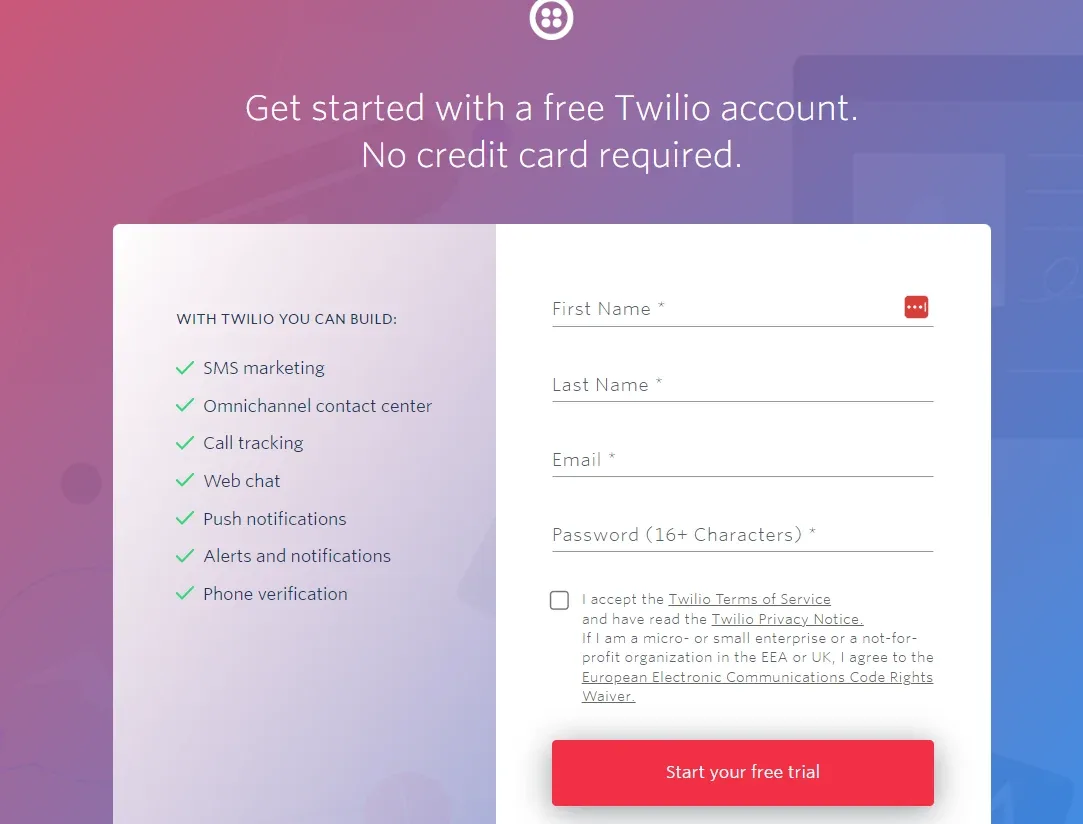
    Twilio's "Get started with a free Twilio account. No credit card required." sign-up form with first name, last name, email and password fields, a terms checkbox, and a red "Start your free trial" button.
  3. 3 Confirm your email address

    Twilio sends you a confirmation email — open it and confirm your account.
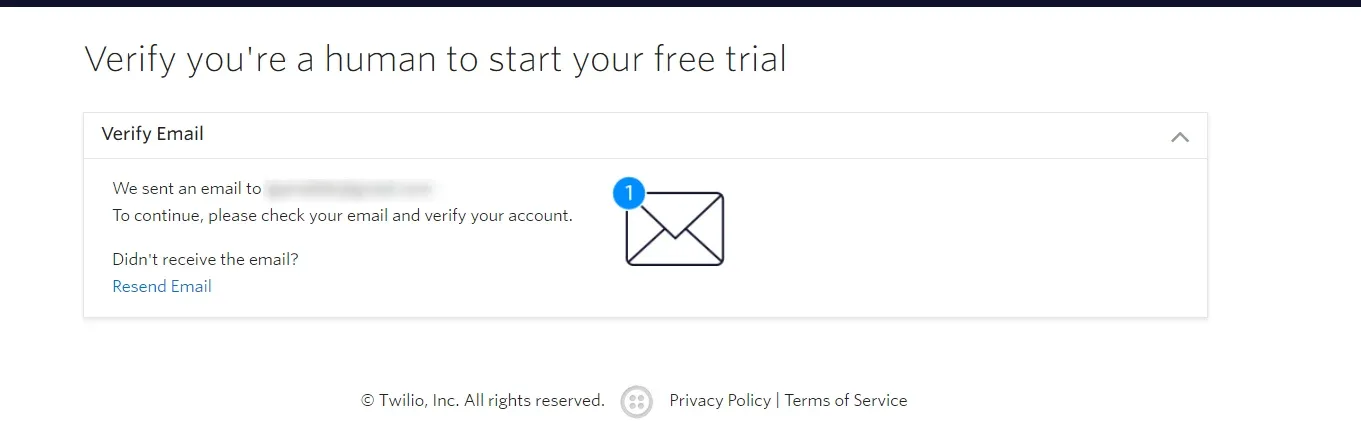
    Twilio's "Verify you're a human to start your free trial" page with the Verify Email panel open, saying an email was sent, and a "Resend Email" link.
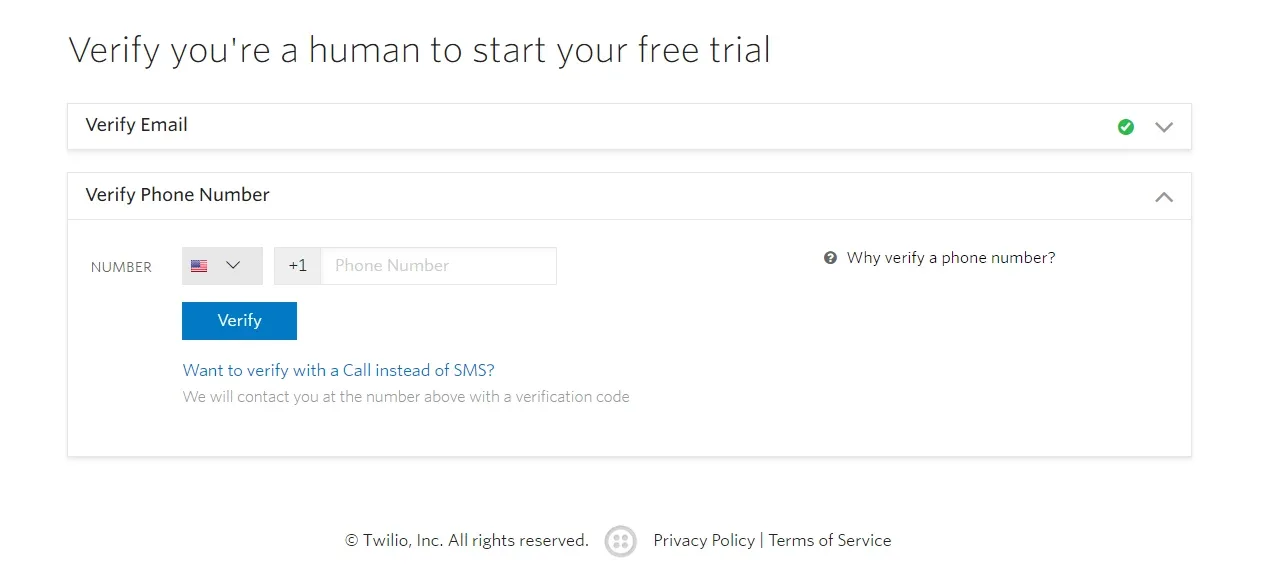
  4. 4 Verify your phone number The same verification page with Verify Email ticked green and the Verify Phone Number panel open, showing a country selector, a phone number field and a blue Verify button.
  5. 5 Get a Twilio phone number

    This is the number your website will send SMS from.
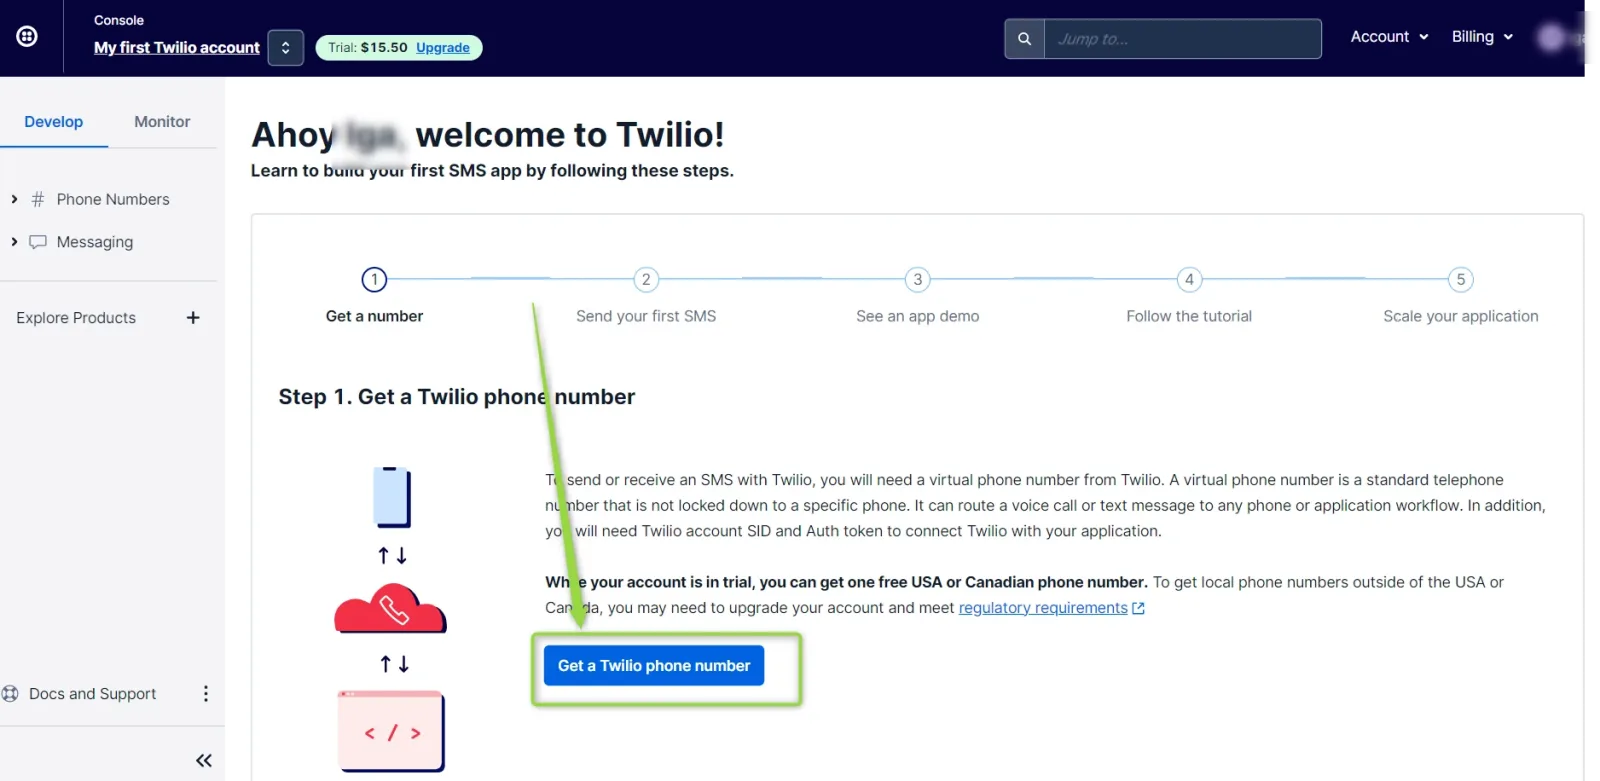
    The Twilio console onboarding page "Ahoy, welcome to Twilio!" at Step 1, Get a Twilio phone number, with the blue "Get a Twilio phone number" button highlighted.
  6. 6 Check that the number was assigned

    You now have all the credentials needed to configure the SMS gateway for your website.
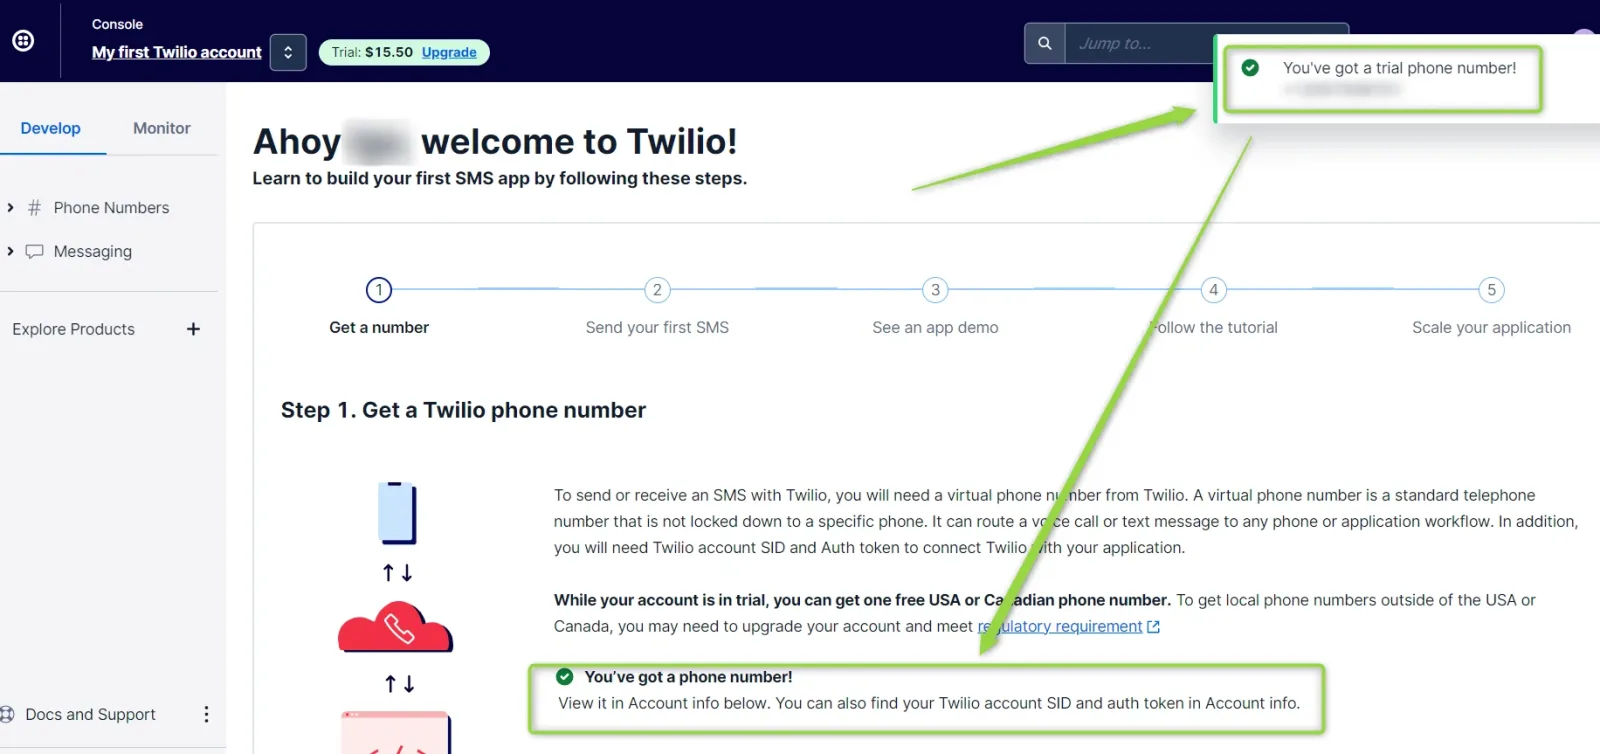
    The same onboarding page with a green confirmation reading "You've got a trial phone number!" and a note that the number is listed in Account Info.

Collect your Twilio credentials

  1. 1 Open your Twilio account info

    Your Account SID, Auth Token and Twilio phone number are all in the Account Info panel of the console.
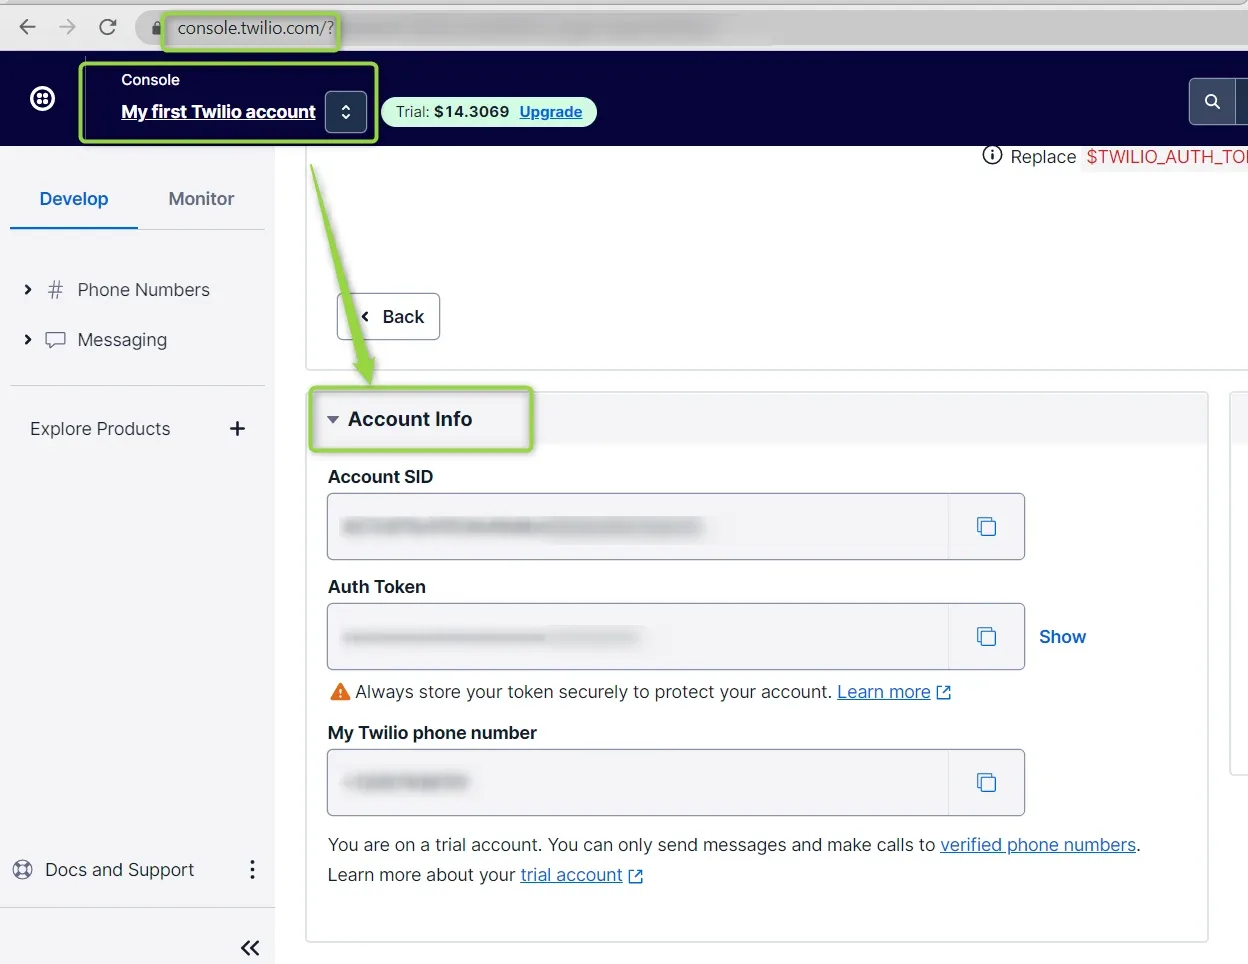
    The Twilio console with the account switcher at the top highlighted and the Account Info panel open below it, listing Account SID, a masked Auth Token with a Show link, and My Twilio phone number.
  2. 2 Search the console for Verify

    To use phone verification for your users, you need a Verify Service SID from Twilio. Type verify into the console search box and select the first result.
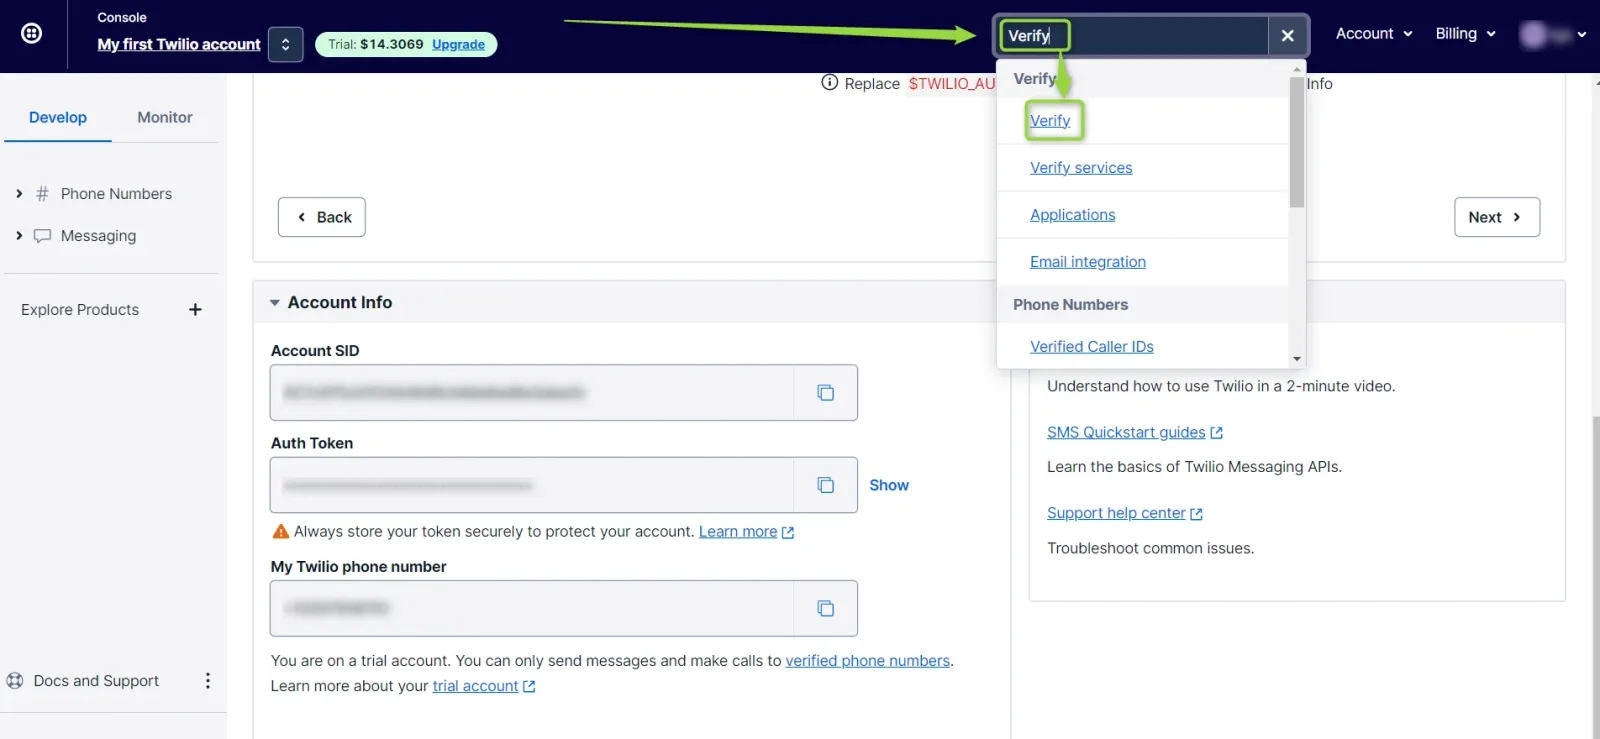
    The Twilio console search box at the top of the page with "verify" typed in and a results dropdown open; the first entry, Verify, is highlighted.
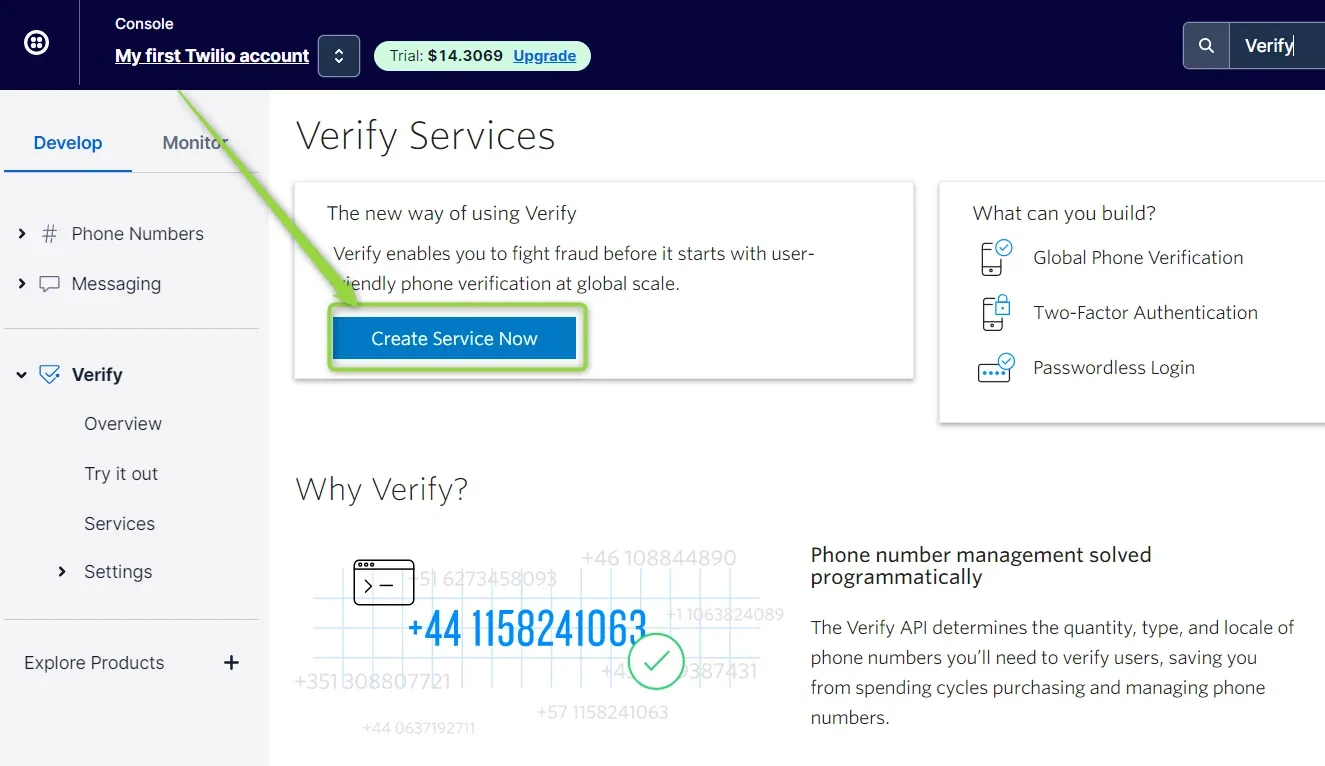
  3. 3 Create a new service The Verify Services page in the Twilio console with the blue "Create Service Now" button highlighted.
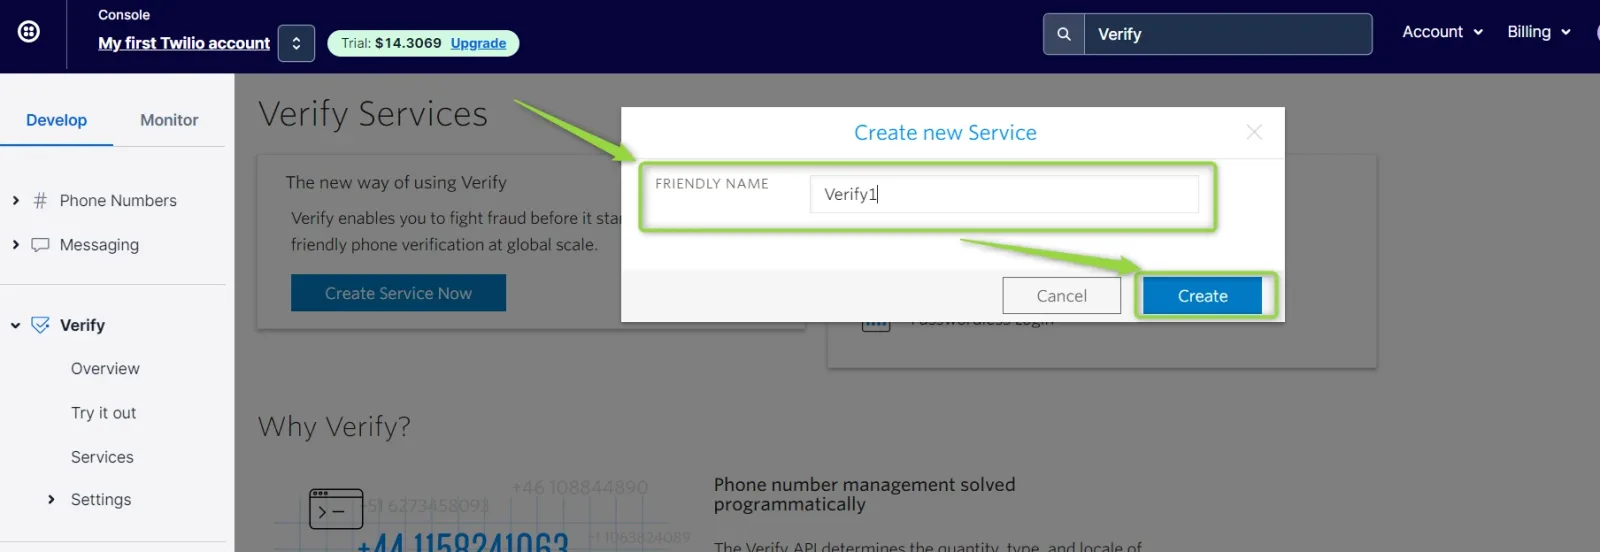
  4. 4 Name the service The "Create new Service" dialog with a friendly-name field filled in and Cancel and Create buttons; the Create button is highlighted.
  5. 5 Copy the Service SID

    Your service SID is ready. No need to go any further.
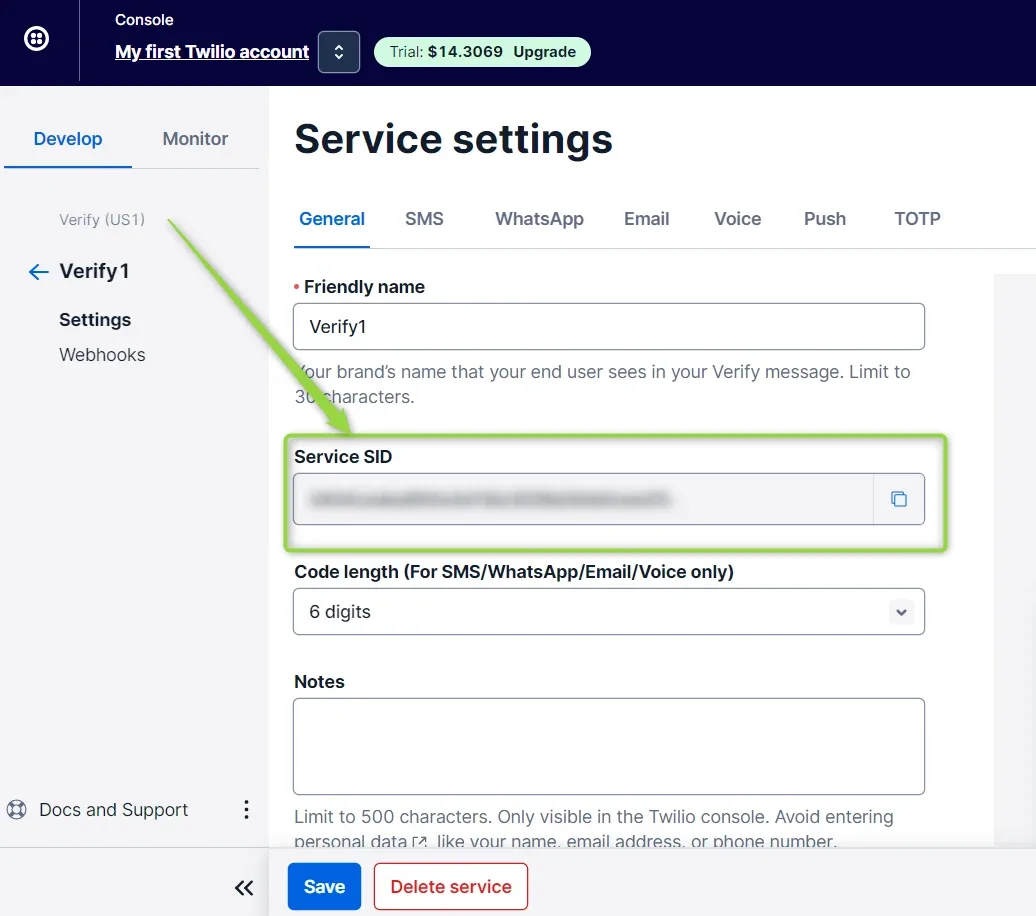
    The Verify service settings page showing the Friendly name field and, highlighted below it, the masked Service SID with a copy button beside it.

Add the credentials to Listivo

  1. 1 Copy your account info into the Listivo Panel

    Paste the credentials into wp-admin -> Listivo Panel -> Notification -> Twilio and save changes.
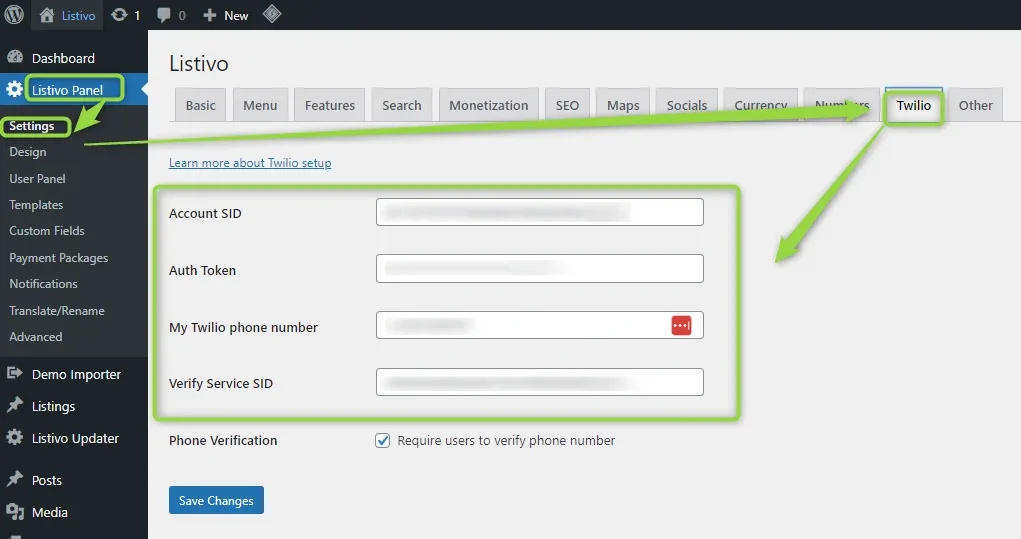
    The Listivo Panel Settings screen in wp-admin with the Twilio tab selected, showing empty Account SID, Auth Token, My Twilio phone number and Verify Service SID fields, a "Require users to verify phone number" checkbox, and a Save Changes button.
  2. 2 Send a test notification

    Your SMS notifications now work. Remember that while your Twilio account is still a trial account, you can only send notifications to verified phone numbers.
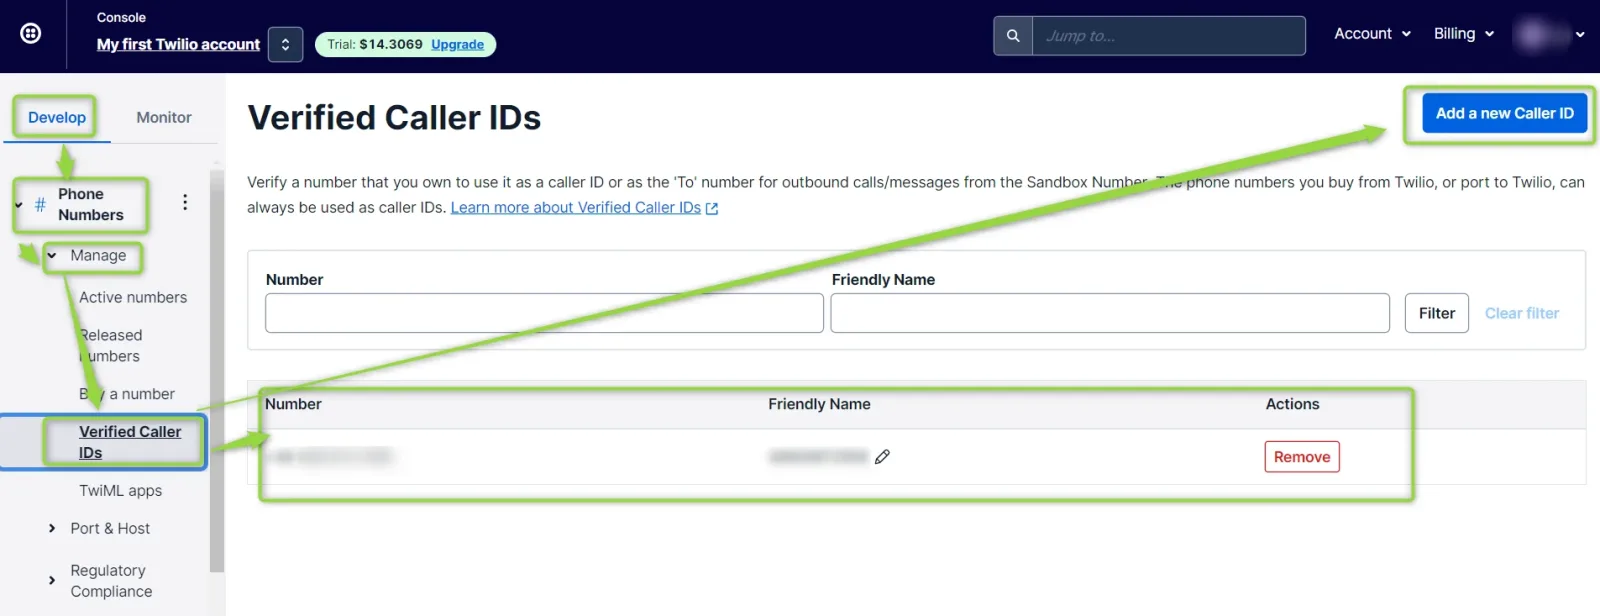
    Twilio's Verified Caller IDs page with the "Add a new Caller ID" button highlighted and one verified number listed in the table below.
  3. 3 Ask users to save a phone number with its country code

    It is essential that the user has their phone number in their profile, including the country code, in order for the service to function correctly.
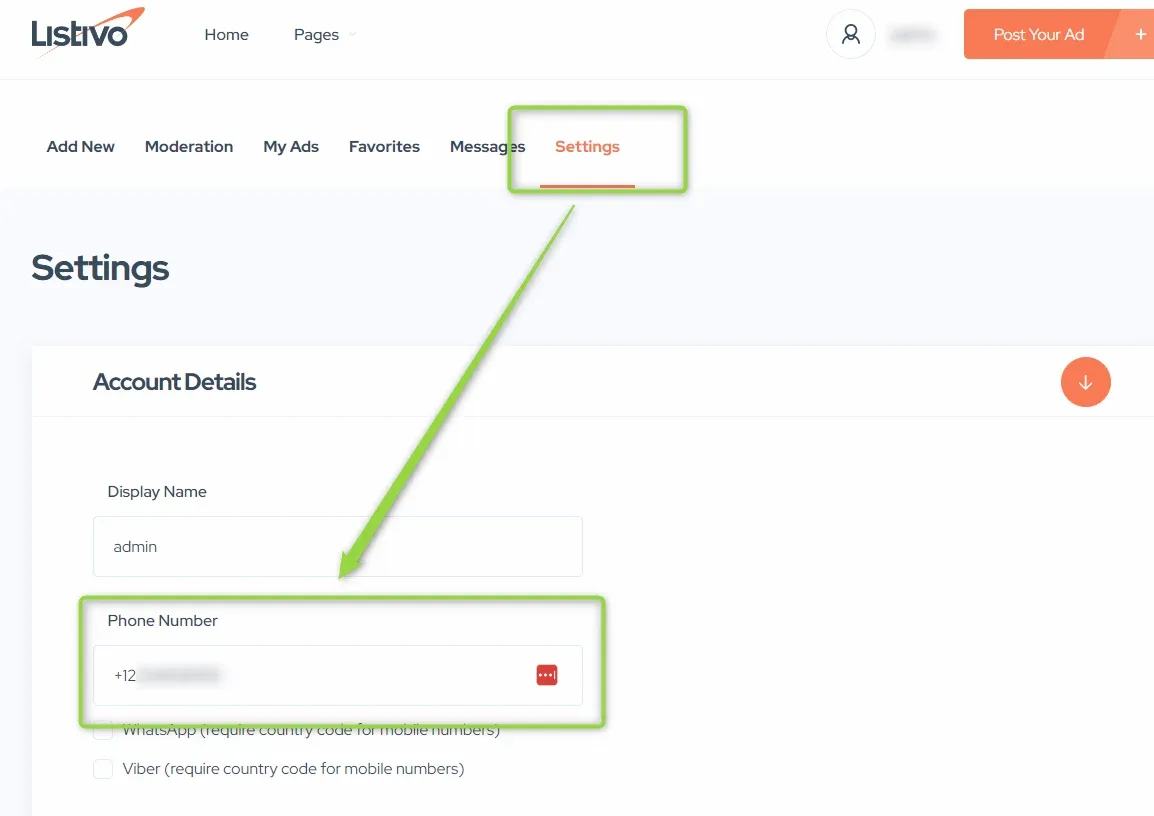
    The Listivo front-end user Settings page with the Settings tab highlighted and the Phone Number field under Account Details highlighted, above WhatsApp and Viber checkboxes that note a country code is required.

Ask the people who build Listivo

We answer by email from support@tangiblewp.com. With Premium Support, we also fix your site when something breaks.

Was this guide helpful?