Location Field based on predefined list (taxonomy) instead of Google Maps
Replace Listivo's Google Maps location field with a taxonomy dropdown of places you define yourself, then show that field on ad cards, the ad page, search results and the homepage.
3 minute read
Google Maps integration can be useful, but not all websites need it. In some cases, a simple list of cities is sufficient. This article will show you how to remove the default Location Map and replace it with a dropdown list.
Step 1: Removing the Location Field
-
1
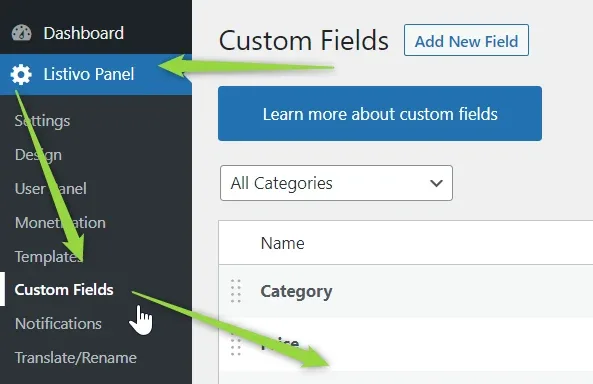
Open Custom Fields
In WordPress, go to Listivo Panel > Custom Fields.
-
2
Delete the Location field
Find the Location row and click Delete.

-
3
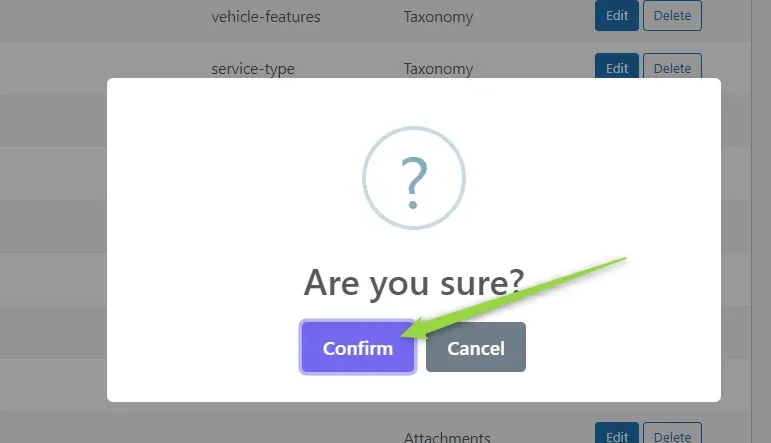
Confirm the deletion
Step 2: Adding a New Location Field
-
1
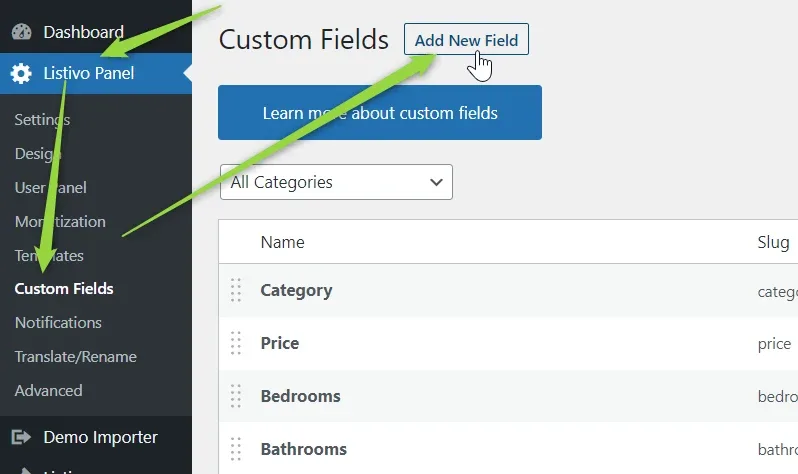
Start a new field
Go to Listivo Panel > Custom Fields and click Add New Field.
-
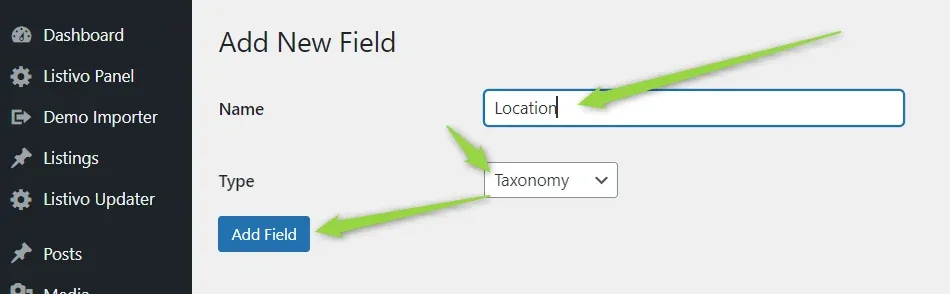
2
Name it "Location" and choose the "Taxonomy" type
-
3
Set multilevel and search logic
In the next window, choose whether you want it to be multilevel (e.g. Province > City) and set the Search Logic to "OR" so that users can search for multiple locations at the same time.

-
4
Save the field
Scroll down to the bottom of the settings.

Step 3: Create a predefined list of locations
-
1
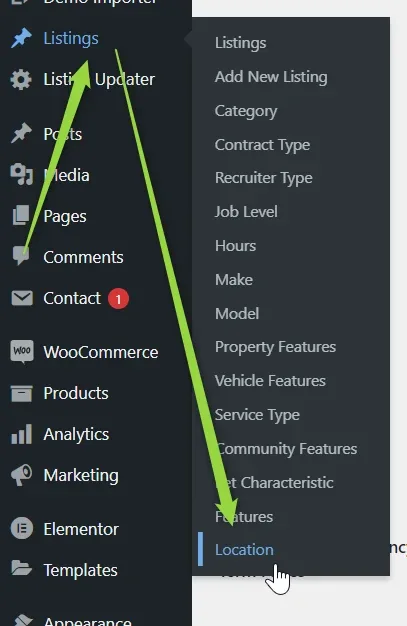
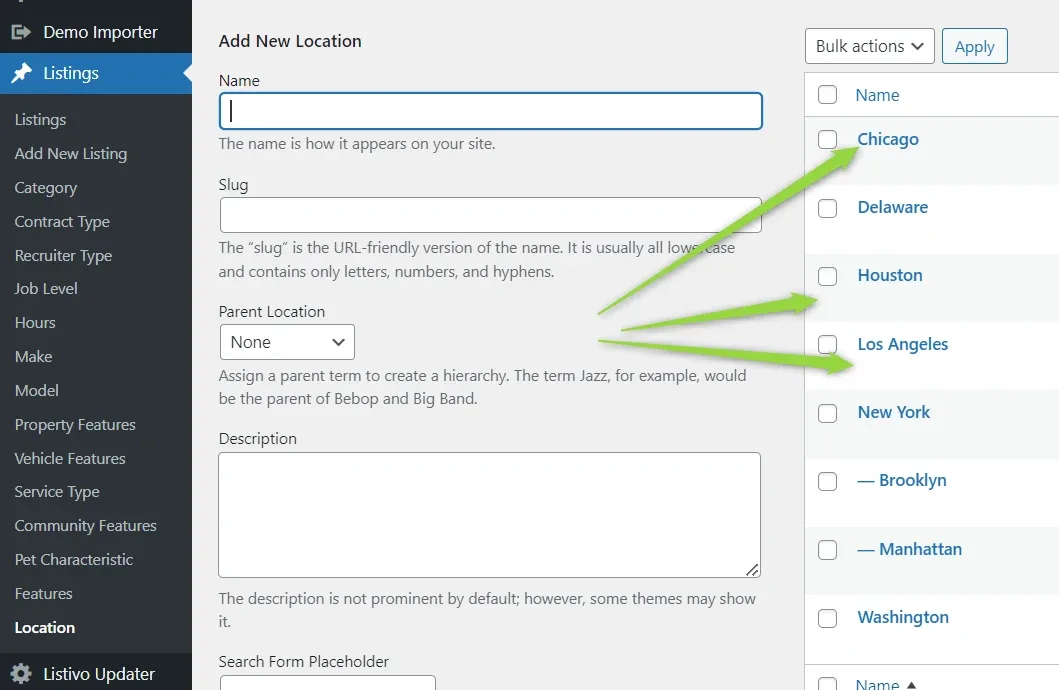
Open the Location taxonomy
Hover over Listings and select Location.
-
2
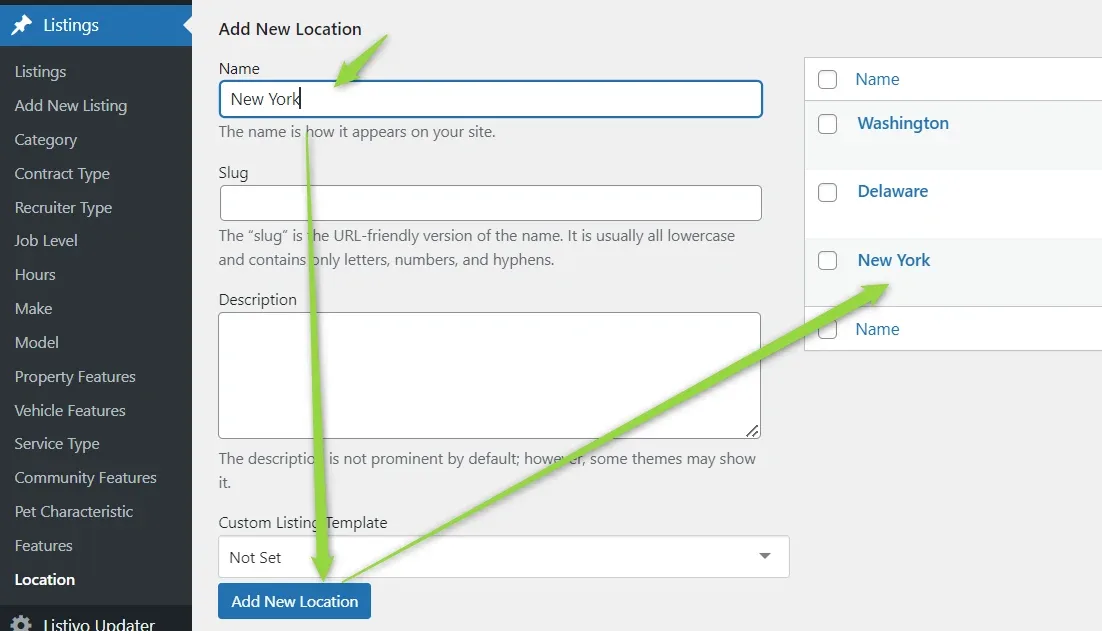
Add your values
-
3
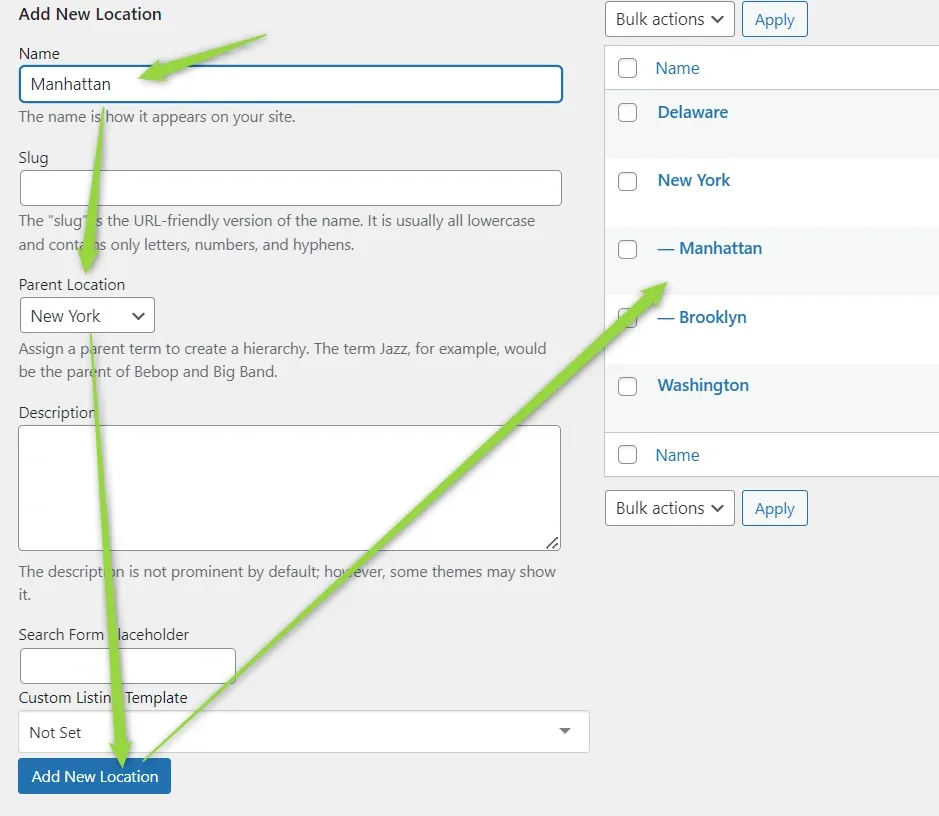
Add subregions
If you turned on Multilevel in the Location field's settings, you can also create subregions.
To import a large list of cities from plain text, go to Listivo Panel > Advanced > Term Importer and type each city on a new line. Then, click the import button.
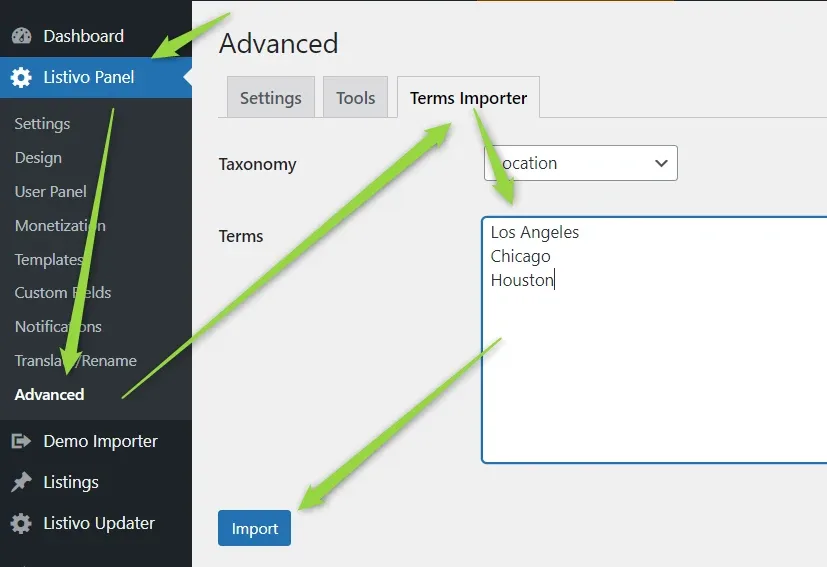
The newly added locations will be included in your Location Field list.
Step 4: Adding the Location Field to the Ad Card
-
1
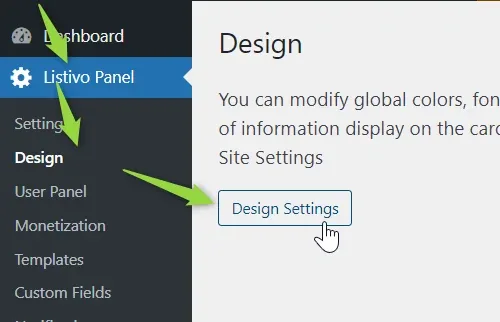
Open Design Settings
Go to Listivo Panel > Design > Design Settings.
-
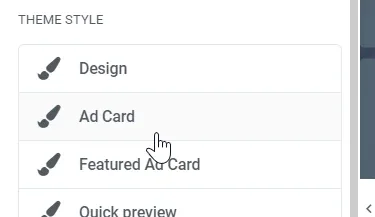
2
Select Ad Card
-
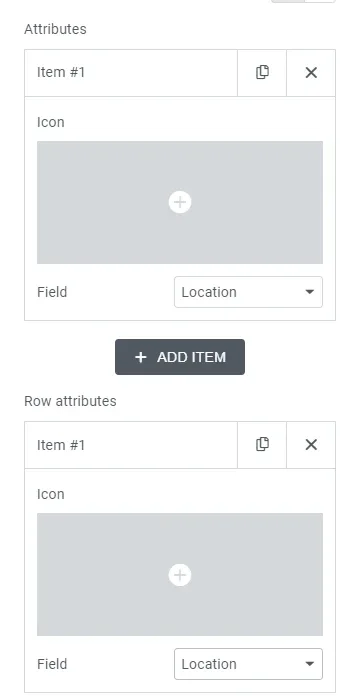
3
Add it to Attributes and Row attributes
Adding it in both places makes it show up in your cards.
Below is an example of how the Location field will be displayed. Note that the colors and design may vary depending on your global settings.

Since the Location field is usually an important one, we recommend that you go to Listivo Panel > Custom Fields and drag and drop it higher in your hierarchy.
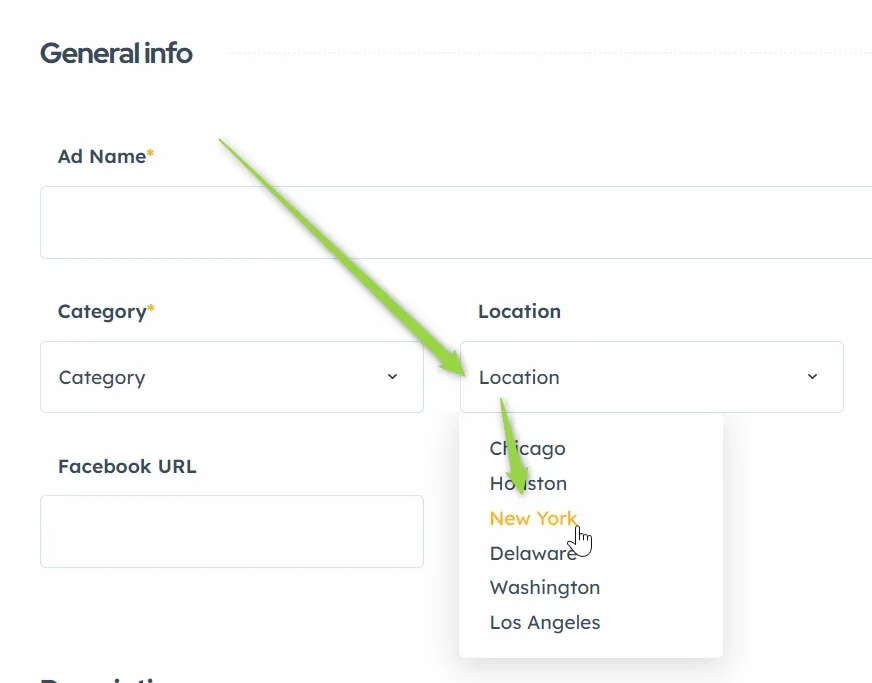
Now, when you visit the front-end add ad page, the Location field will be available and displayed as shown below:
Step 5: Editing the Ad Page Template
To add the Location Field to your single ad page, go to Listivo Panel > Templates and edit the Ad Page template.
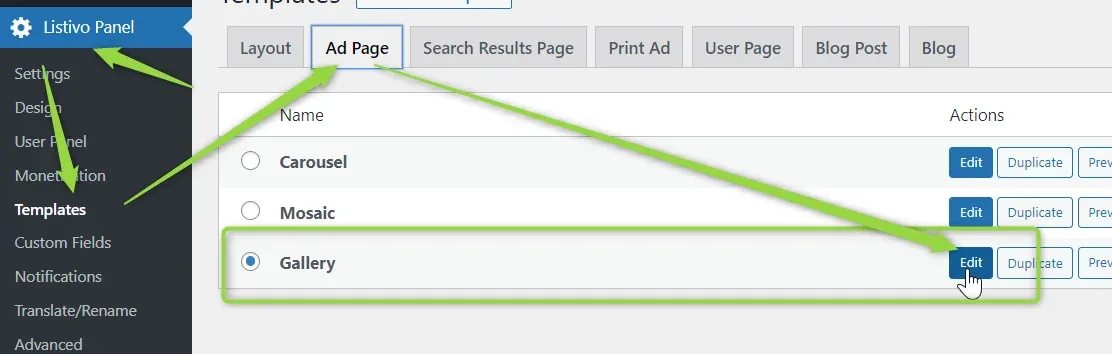
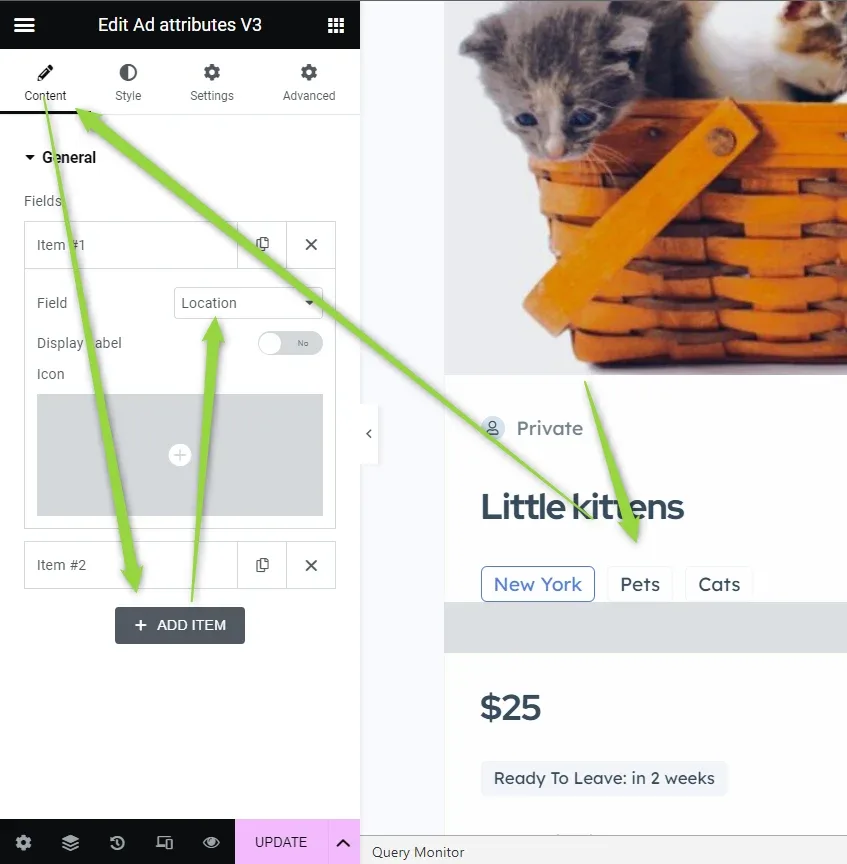
You can place it anywhere you like, either as one of the existing widgets or by creating a new widget.
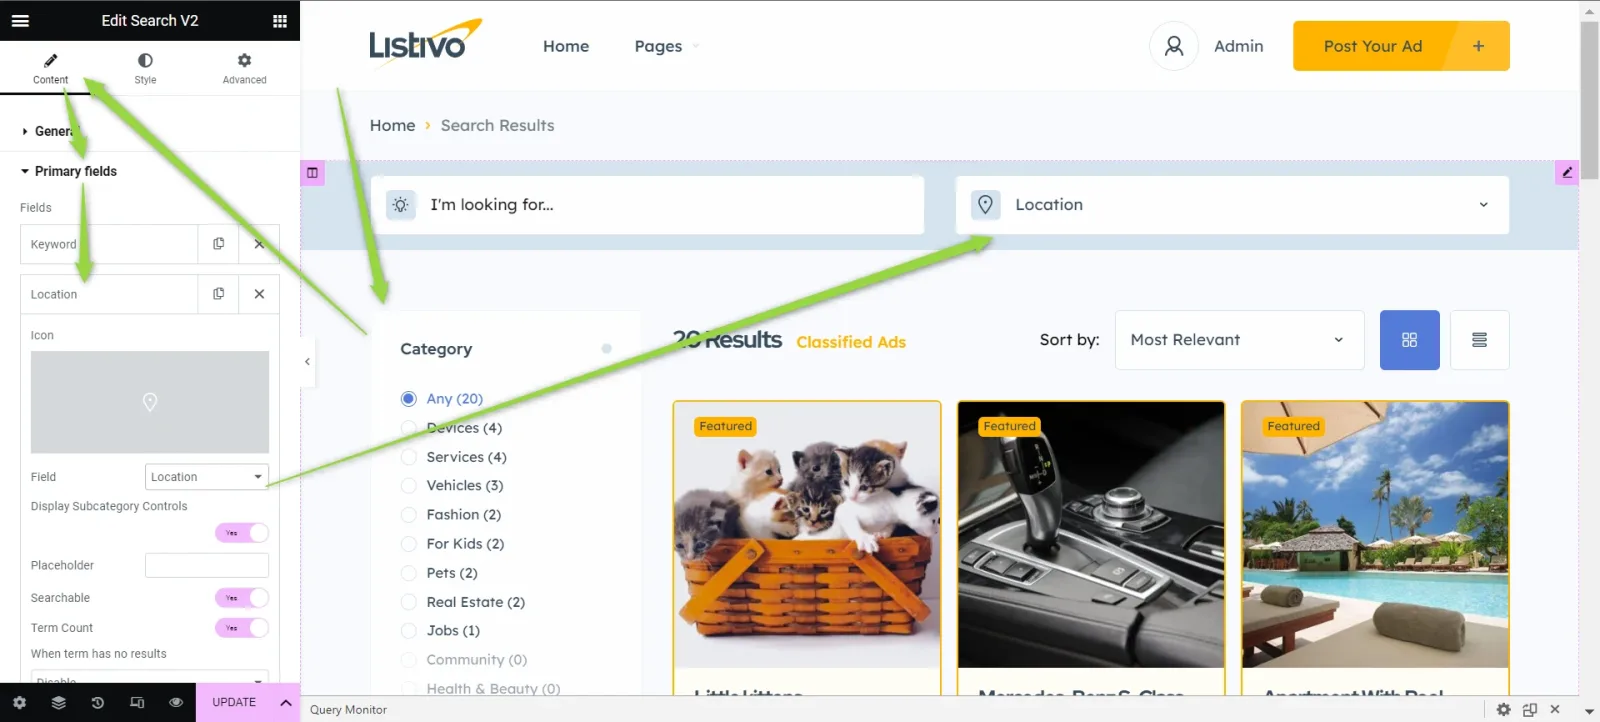
Step 6: Editing the Search Results Template
To add the Location Field to your search results page, edit the template here
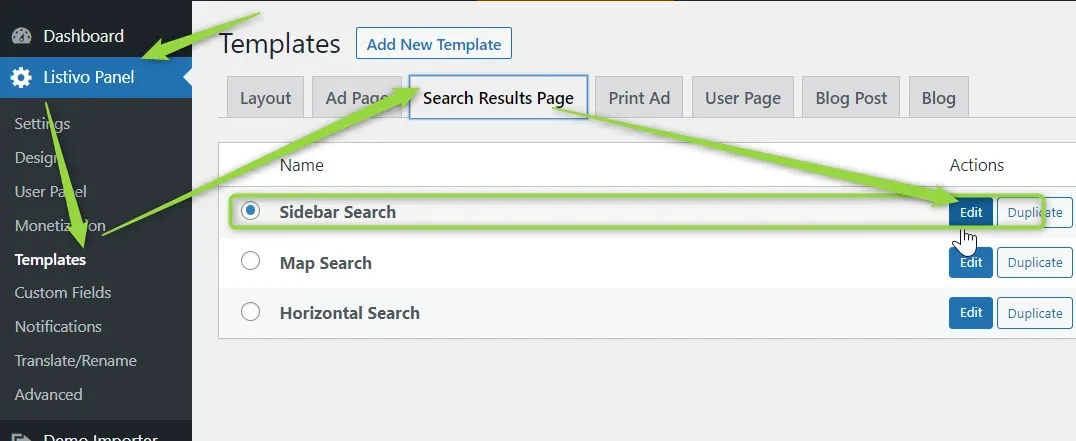
and place it in the Primary or Secondary Fields section.
Step 7: Editing the Homepage
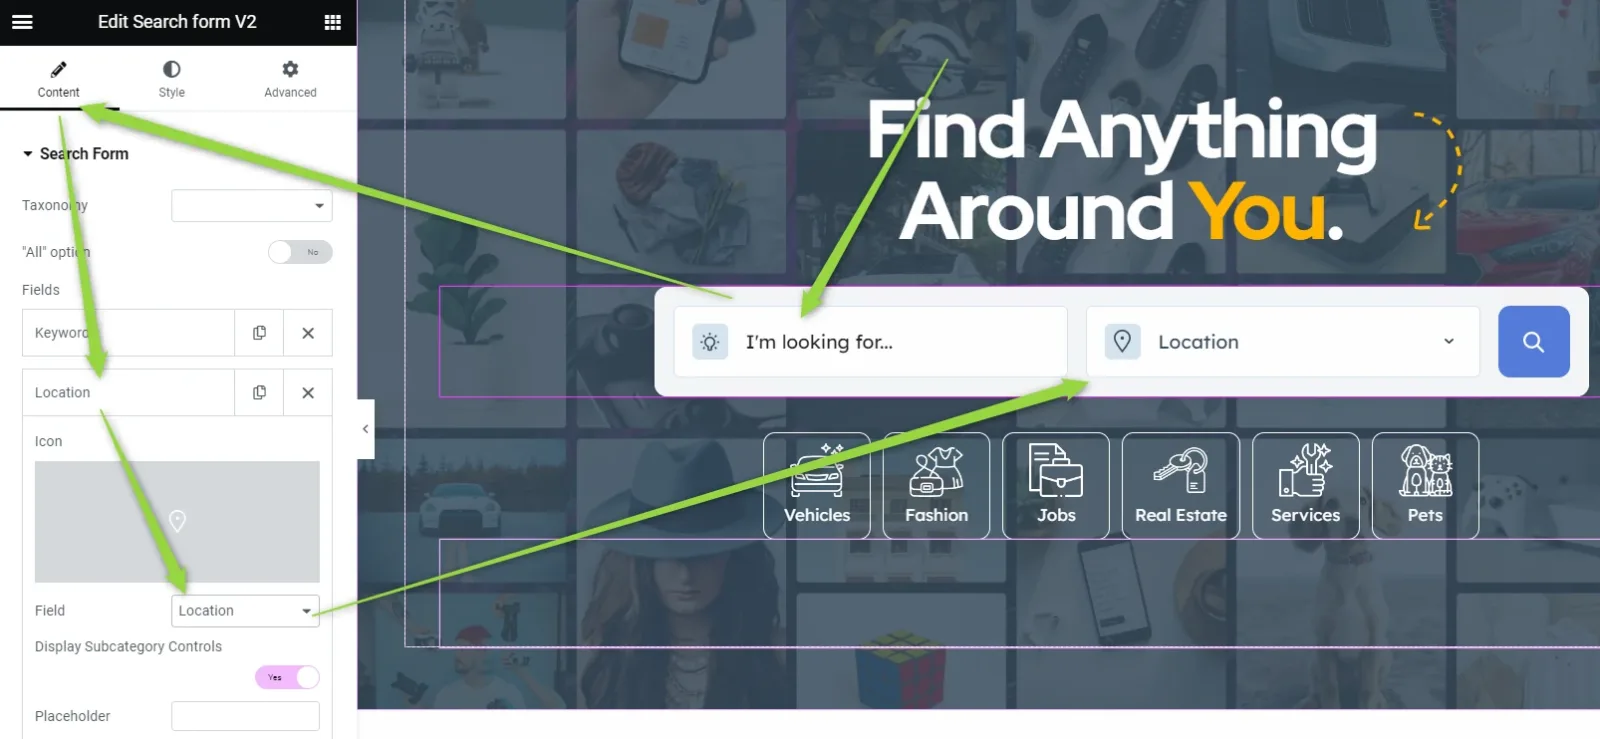
Finally, to add the Location Field to your homepage, simply edit the homepage
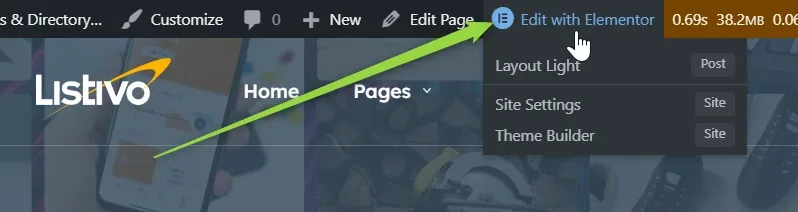
and add it the same way you added it to the Search Results Template.
By following these steps, you can easily replace the default Location Map with a dropdown list of cities on your Listivo-powered website.
Ask the people who build Listivo
We answer by email from support@tangiblewp.com. With Premium Support, we also fix your site when something breaks.
We can also run your site for you, or build a new one.
Was this guide helpful?