Skip to content

Enhancing your Listivo Demo user page with advanced search forms

Replace the plain ad grid on the Listivo demo user page with a real search form — either built from scratch with a search widget, or imported from your search results page template.

2 minute read

The Listivo demo comes with a simple default user page, but you can customize it to include advanced search forms. This guide walks you through replacing the standard "User Ads" widget with a more advanced search form.

The starting point looks like this:
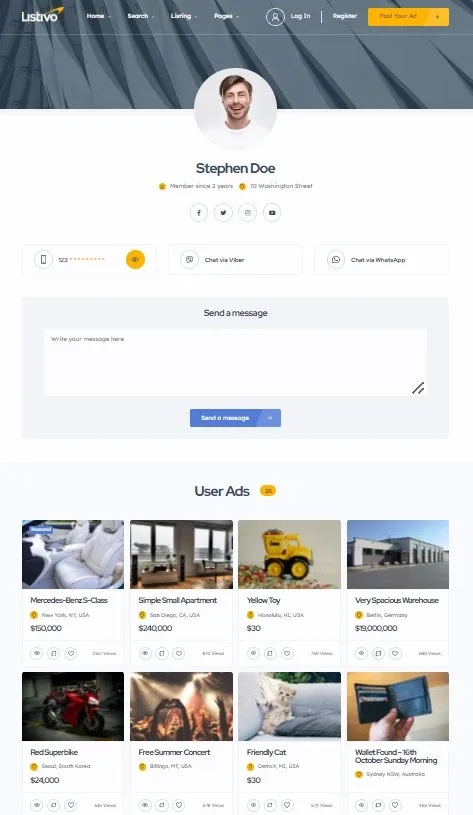
The default Listivo user page: a cover image, the avatar and name Stephen Doe, member since 2 years, social icons, a phone reveal and Chat via Viber and WhatsApp buttons, a Send a message box, and a User Ads grid of eight listings.
Before you start
Make sure you are running the latest version of Listivo. To update your theme, follow Updating Listivo: what to expect and how to do it.

Modifying the user page template

  1. 1 Open the user page template

    Navigate to Listivo Panel > Templates > User Page and click Edit.
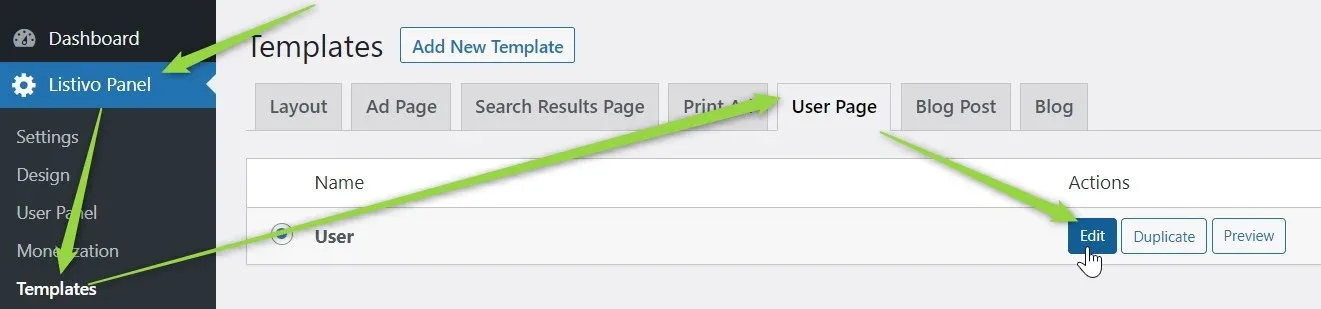
    Listivo Panel > Templates with the User Page tab selected; a single template named User is listed, and arrows point to Templates in the sidebar, to the User Page tab and to the Edit button.
  2. 2 Wait for the builder to load

    The Elementor Page Builder will open with the user page template.
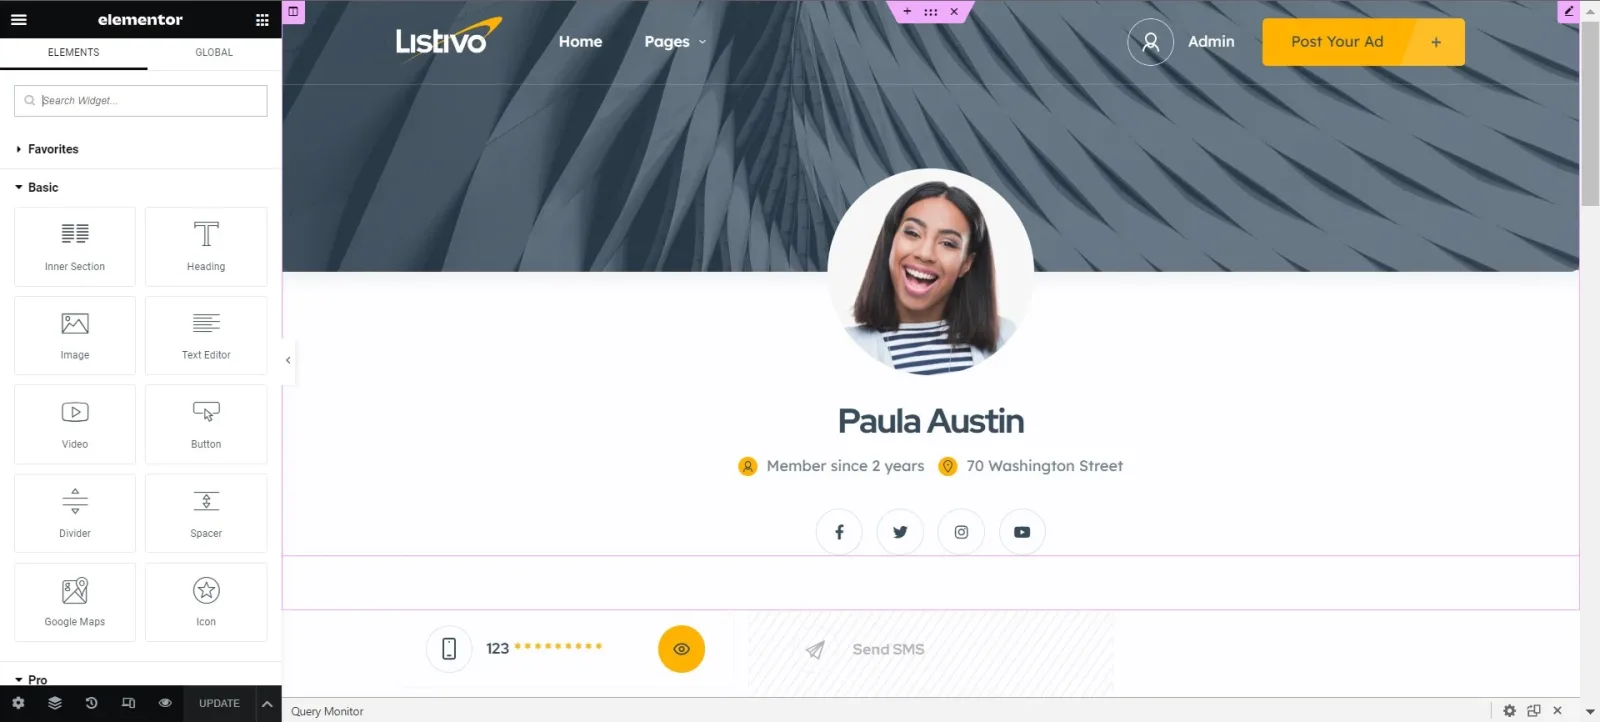
    The user page template open in Elementor: the widget panel on the left, and the preview showing the profile of Paula Austin with her avatar, "Member since 2 years", social icons and a phone reveal button.
  3. 3 Delete the demo section

    Remove the demo section that holds the user ads.
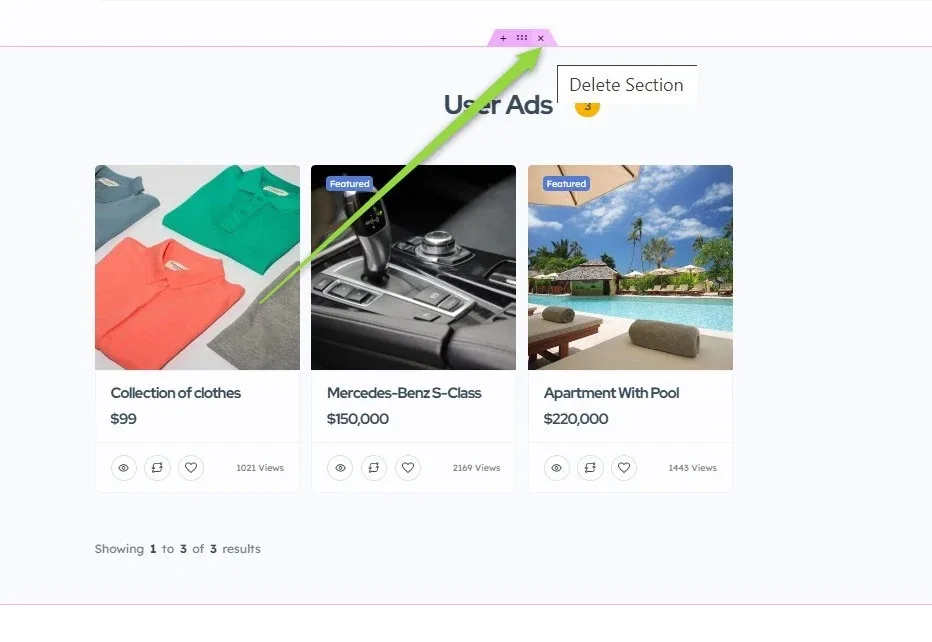
    The User Ads section in the editor with three ad cards — Collection of clothes, Mercedes-Benz S-Class and Apartment With Pool — and an arrow pointing to the section toolbar, where the Delete Section tooltip is shown.

Now you have two options: build a new search form from scratch, or import an existing one.

Option 1: Building a new search form

To create a new search form, add one of the following widgets in the space vacated by the "User Listings" widget:

  • Search (horizontal)
  • Search V2 (sidebar)
  • Search Map

Type "Search" in the widget search bar and select the relevant widget.
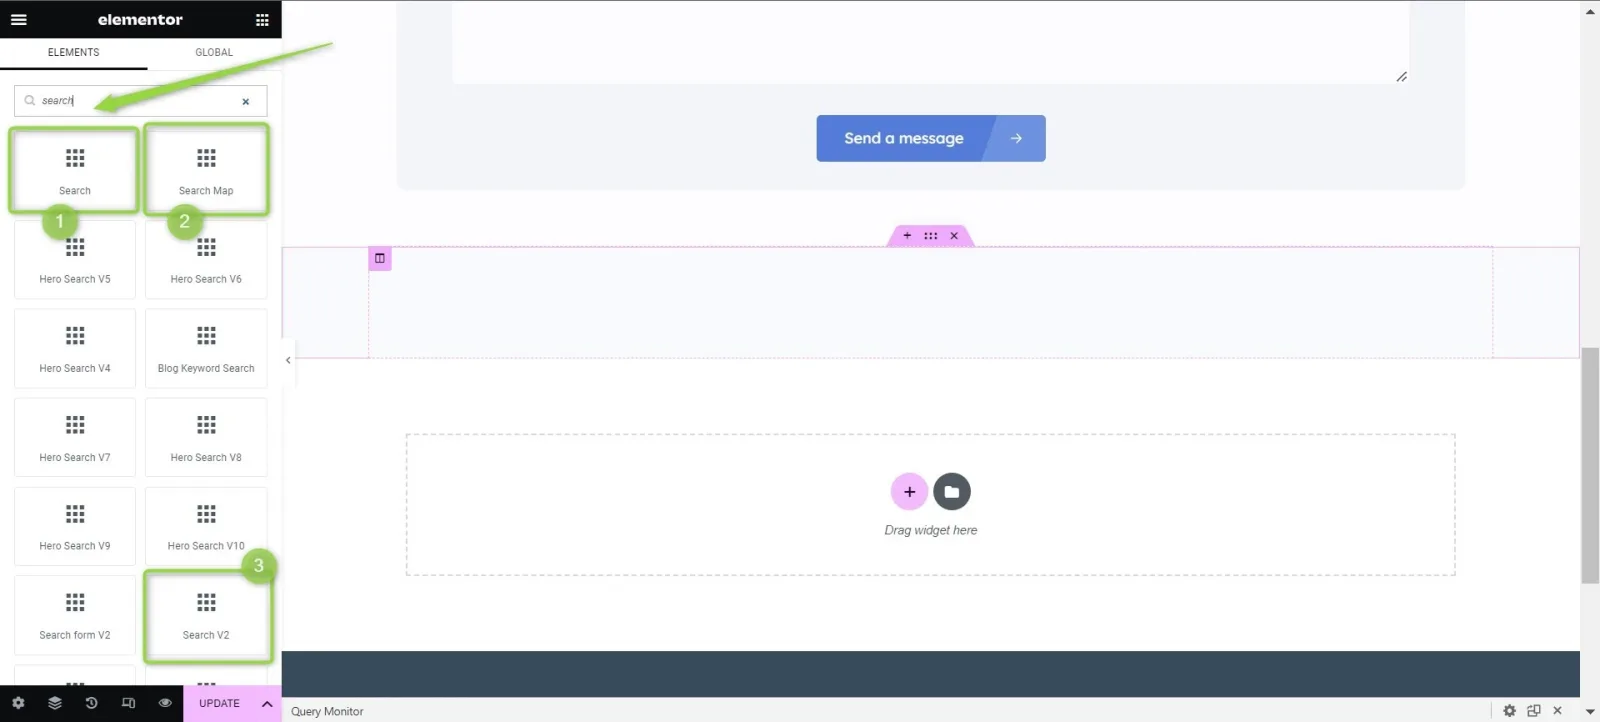
The Elementor Elements panel with "search" typed into the widget search box; the results are a grid of Listivo search widgets, three of which are marked with green dots.

For this example, we'll add the "Search V2" widget.
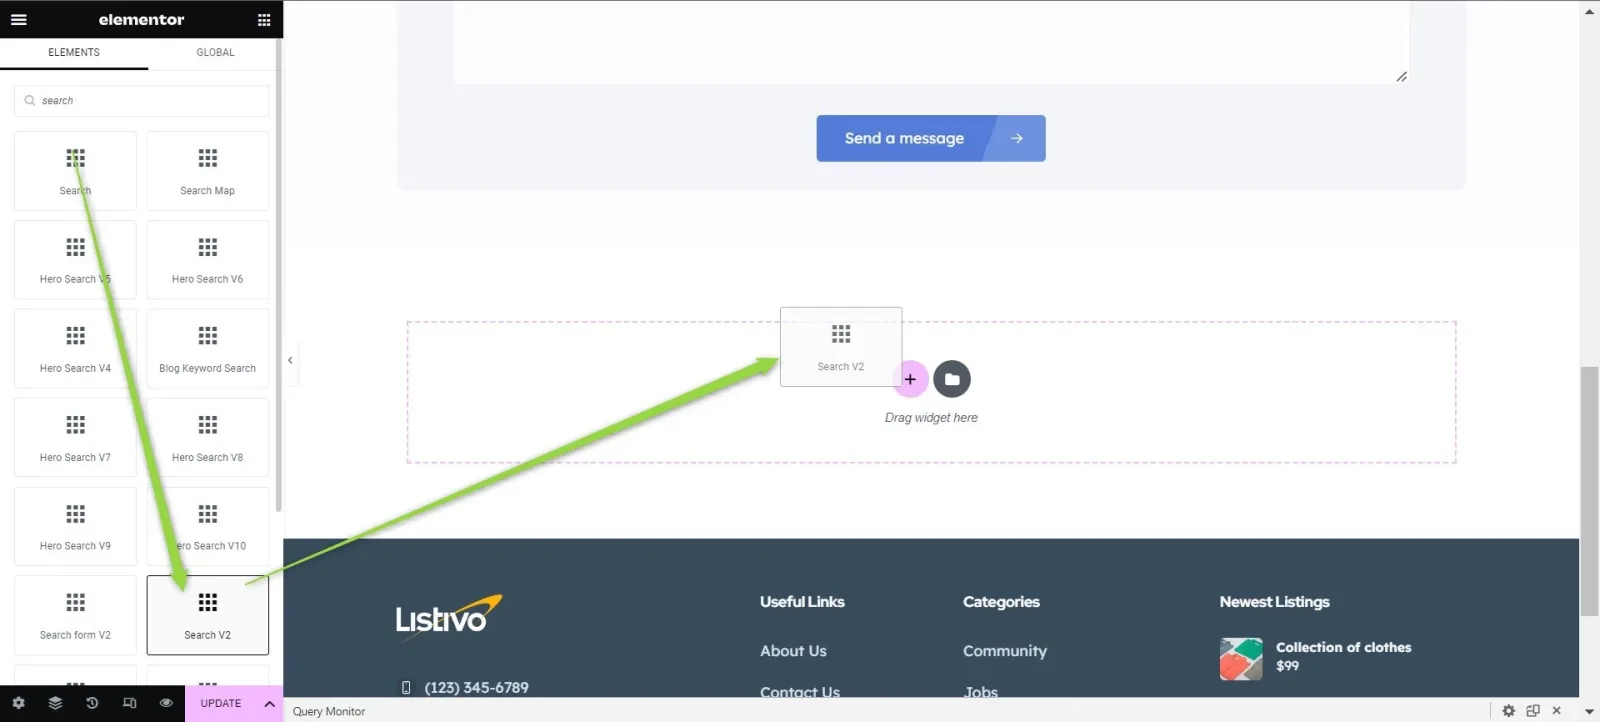
A search widget being dragged from the Elements panel into the empty "Drag widget here" area of the user page template, just above the site footer.

Next, customize the search form by adding styles and custom fields and adjusting the settings in the left sidebar. When the configuration is done, click Save to apply the changes.
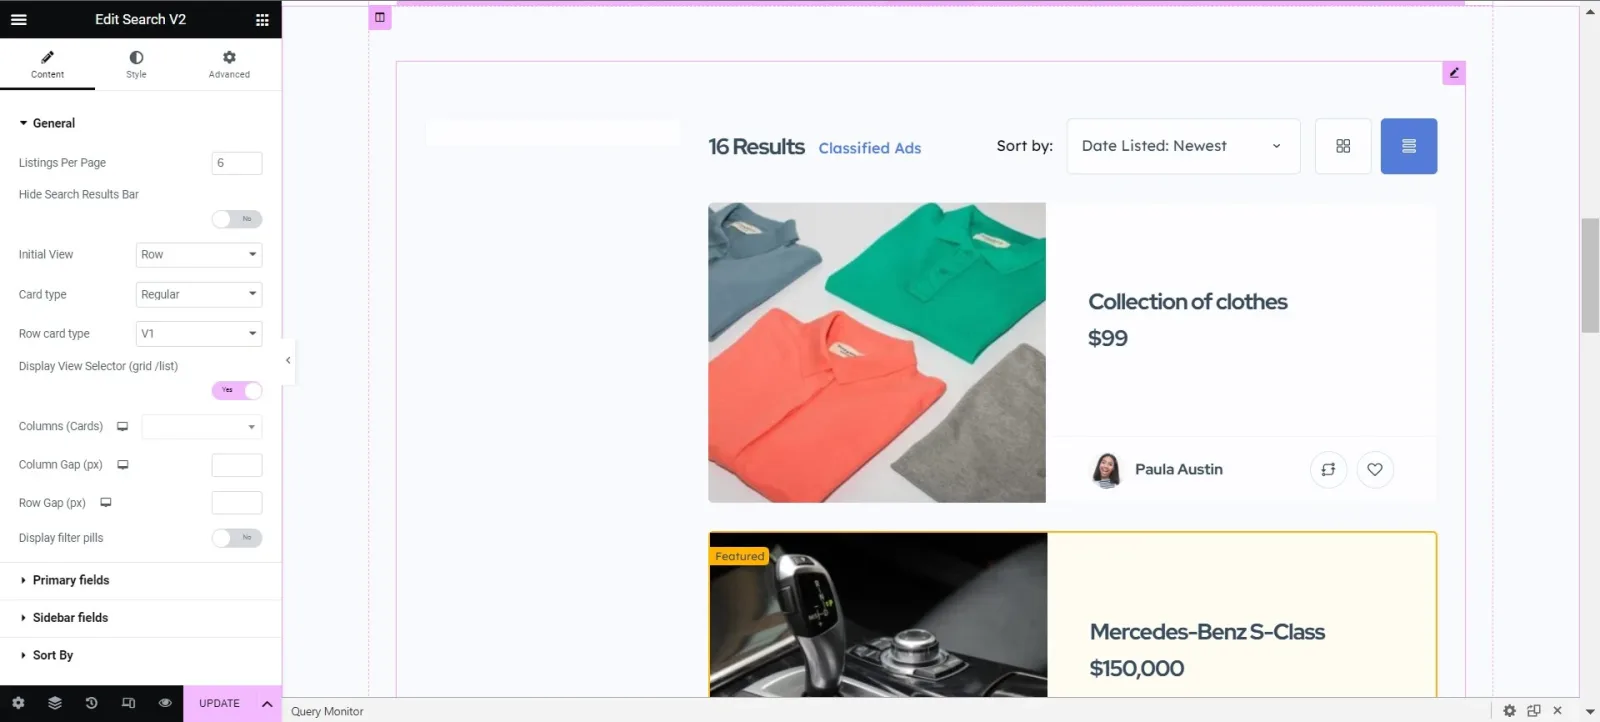
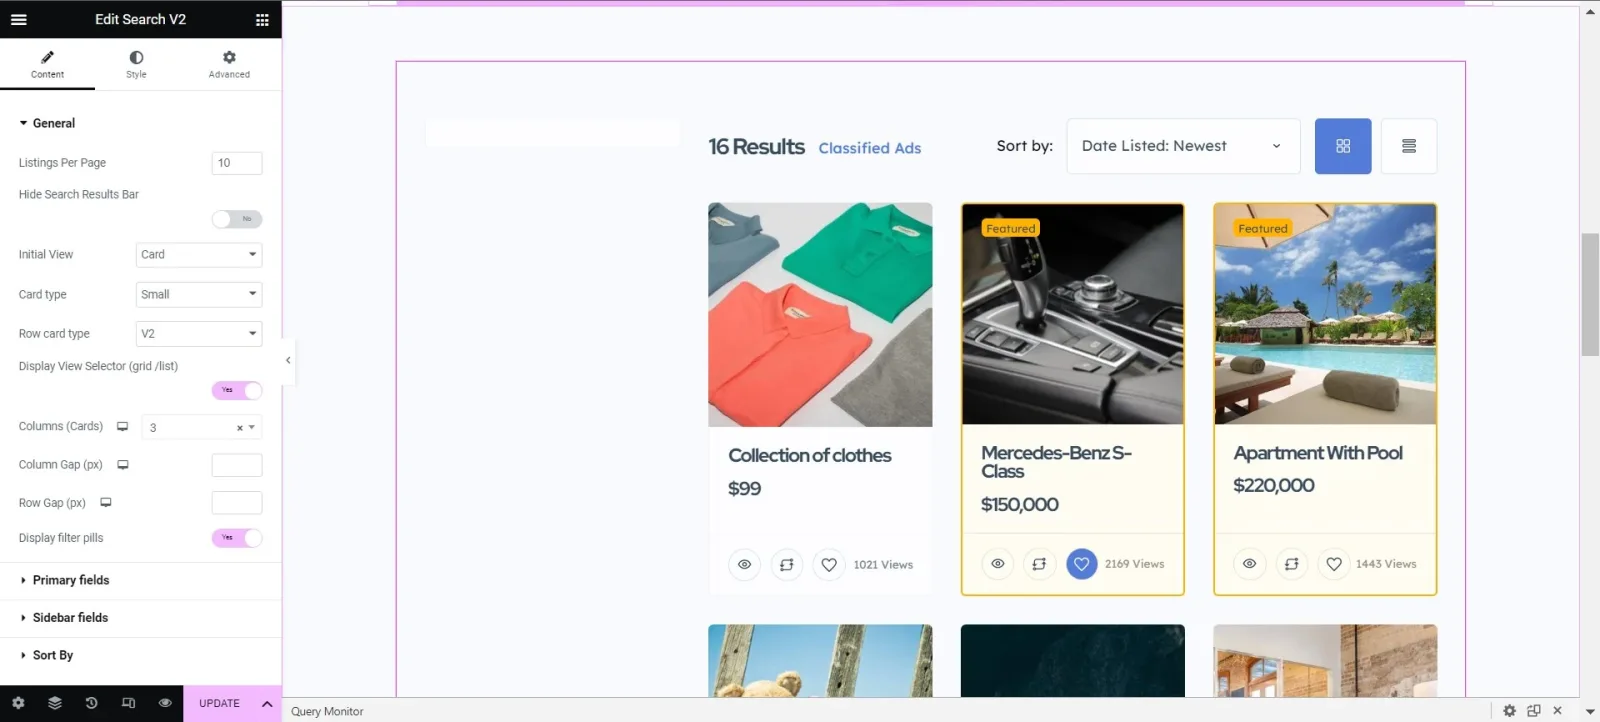
The "Edit Search V2" panel open on the left with its General settings, next to a preview of the search results listing 16 results with the first ad cards below.

For example:

The same template after styling: the results area now shows three ad cards in a row — Collection of clothes, Mercedes-Benz S-Class and Apartment With Pool — with the widget settings still open on the left.
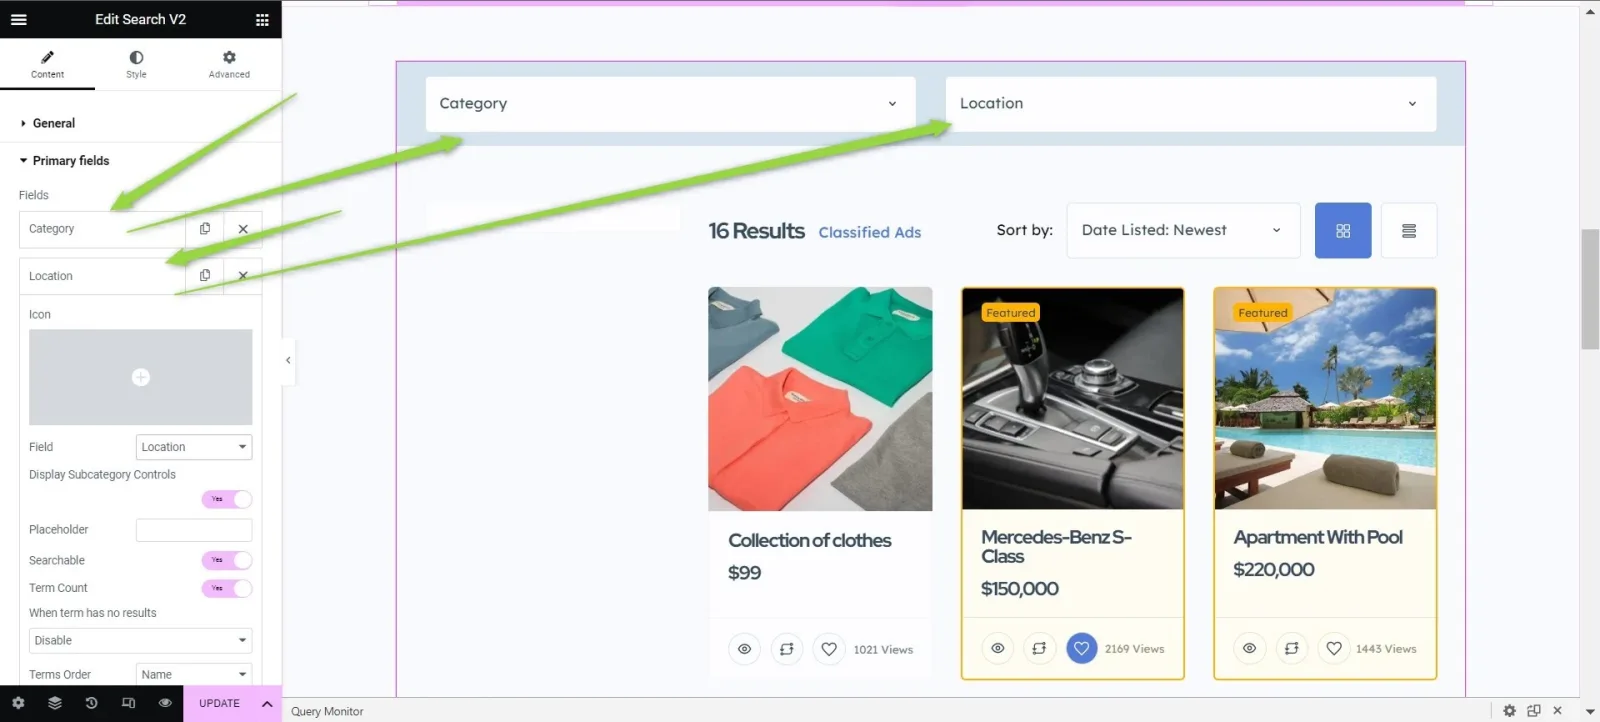
The Primary fields section of the widget settings listing a Category and a Location field; arrows point to the Category and Location dropdowns rendered across the top of the search form in the preview.
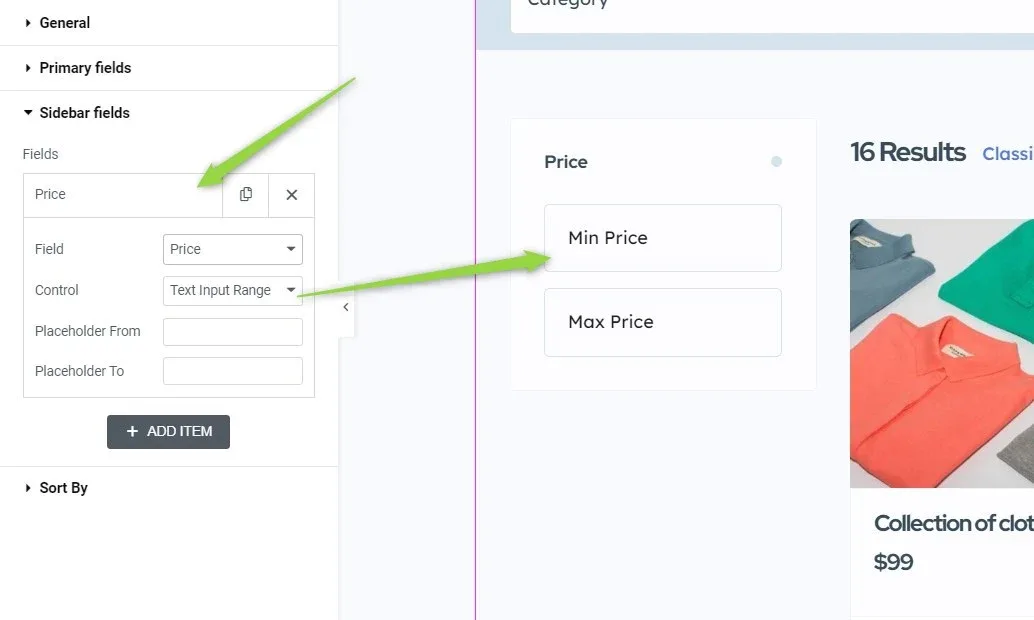
The Sidebar fields section with a Price item expanded — Field set to Price, Control set to Text Input Range — and an arrow pointing to the Min Price and Max Price inputs it produces in the preview.

Once you've completed the setup, click Save.

Option 2: Importing an existing search form

If you prefer to import an existing search results page template instead, follow these steps:

  1. 1 Open the search results page template

    In the Listivo Panel, go to Templates > Search Results Page and edit the template you want to reuse.
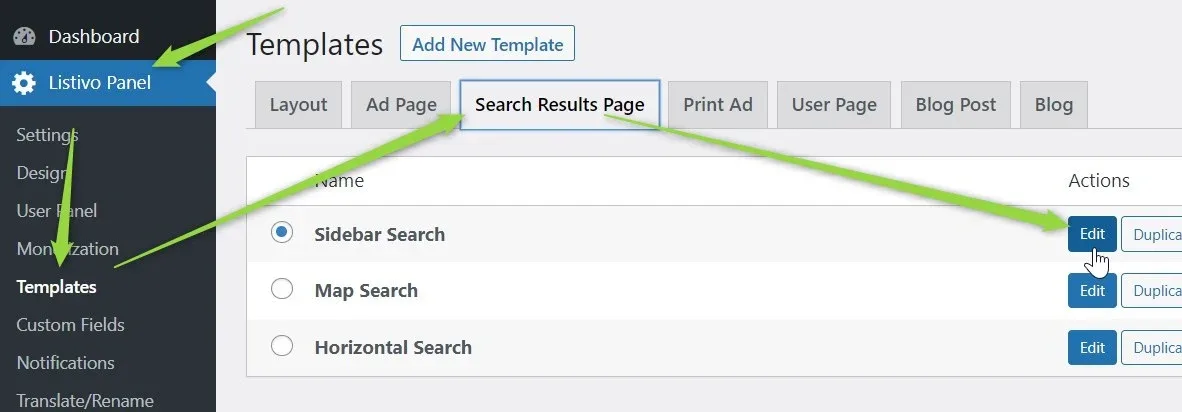
    Listivo Panel > Templates on the Search Results Page tab, listing Sidebar Search (selected), Map Search and Horizontal Search; arrows point to the tab and to the Edit button of Sidebar Search.
  2. 2 Reveal "Save as Template"

    The Elementor Page Builder will open. Click the arrow next to the update button to reveal the Save as Template option, as shown below.
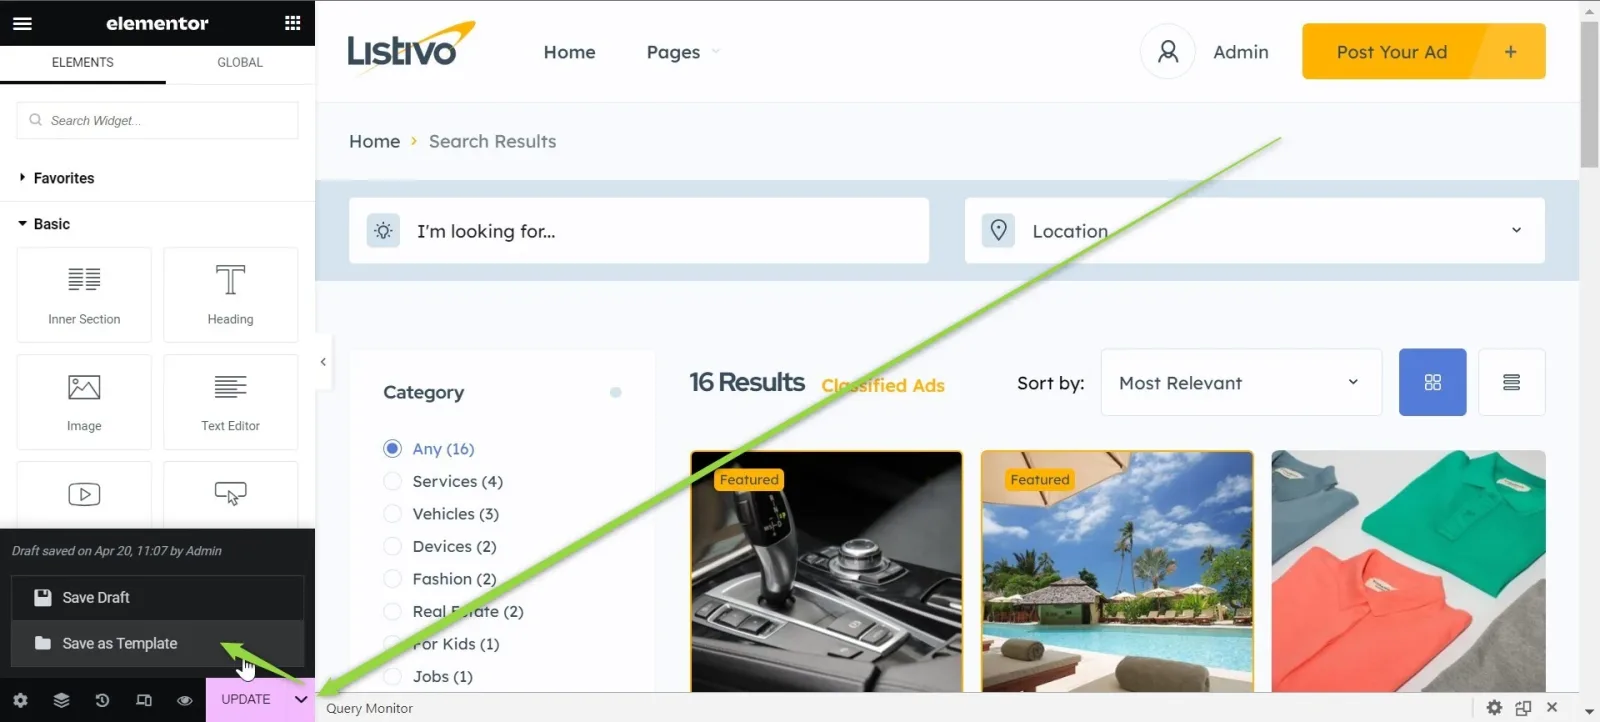
    The search results template in Elementor with the menu beside the update button expanded, showing Save Draft and Save as Template; an arrow points to Save as Template.
  3. 3 Name and save the template

    Type a template name, such as "My Sidebar Search", then click Save to store it.
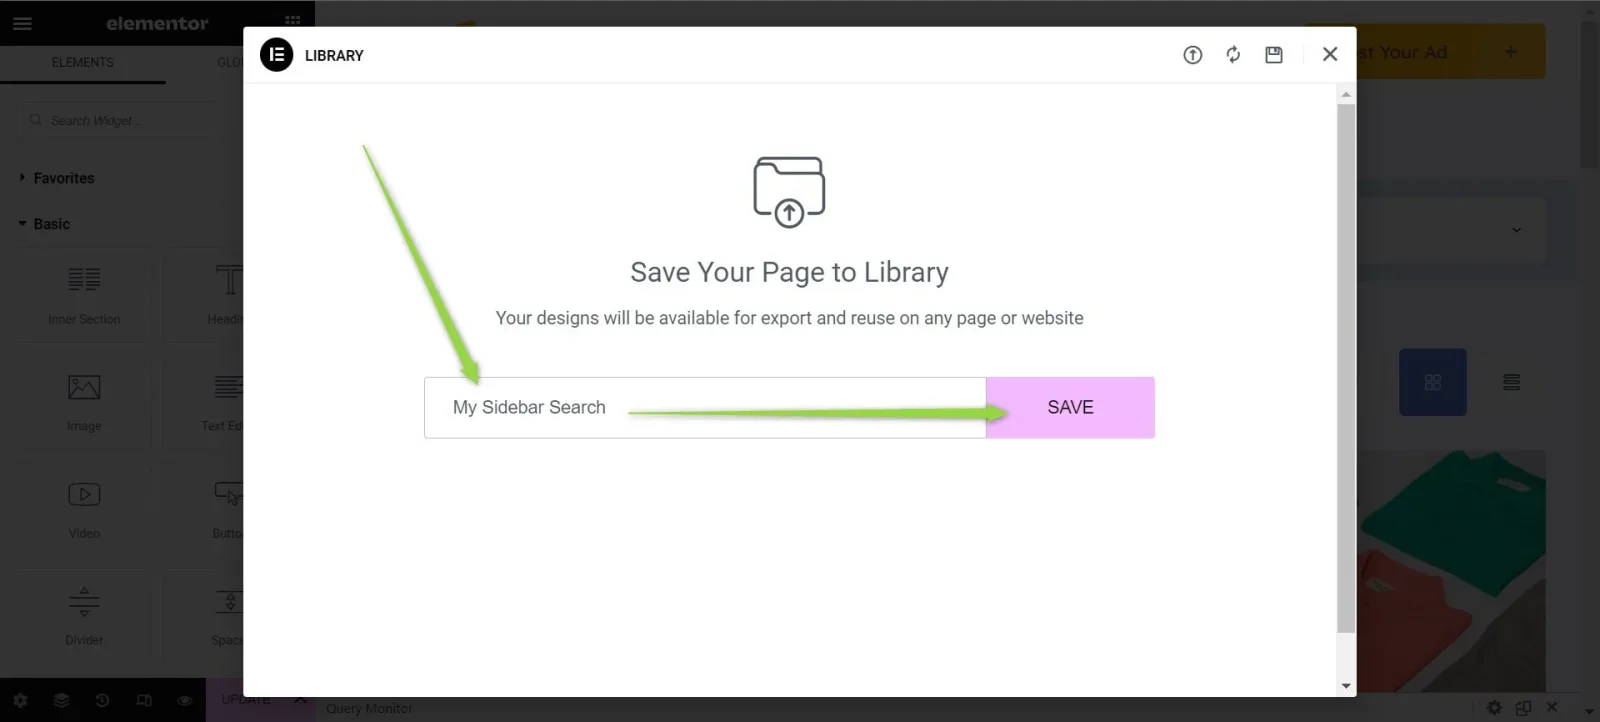
    The "Save Your Page to Library" dialog with "My Sidebar Search" typed into the name field and an arrow pointing to the highlighted SAVE button.
  4. 4 Go back to the user page template

    Return to the user page template and open it for editing again.

    Listivo Panel > Templates with the User Page tab selected and the User template listed, with arrows pointing to the tab and to its Edit button.
  5. 5 Open the template library

    Scroll down the page and click the Add Template icon, the one shaped like a folder.

    An empty section in the Elementor canvas showing the plus icon for adding a widget and the folder-shaped Add Template icon, with an arrow pointing at the folder.
  6. 6 Insert your saved template

    Go to My Templates and click Insert.
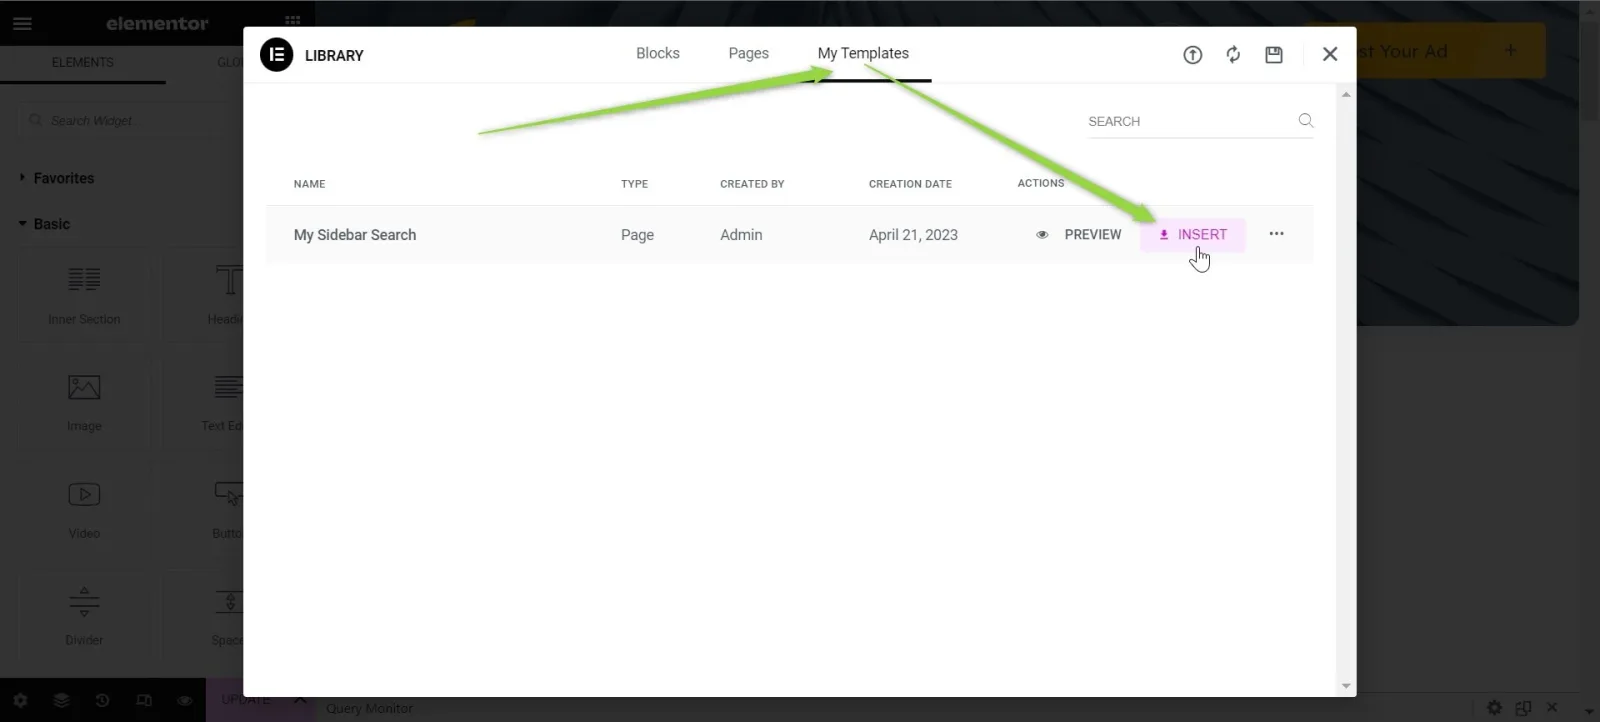
    The Elementor Library dialog on the My Templates tab, listing the page template "My Sidebar Search" created by Admin, with Preview and Insert actions; an arrow points to Insert.
  7. 7 Skip the page settings

    When the popup appears, click Don't Apply.
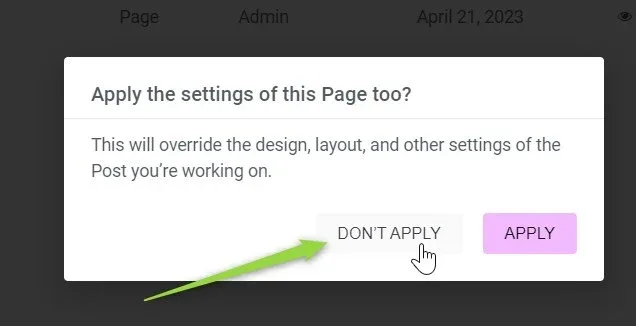
    The dialog "Apply the settings of this Page too?", warning that it will override the design, layout and other settings of the post, with the cursor on the DON'T APPLY button next to APPLY.

Your advanced search form will now be added to your user page.

Ask the people who build Listivo

We answer by email from support@tangiblewp.com. With Premium Support, we also fix your site when something breaks.

Was this guide helpful?