Skip to content

How to rename field names e.g. Make / Model / Price on search form

Vehica's search form labels — Make, Model, Price — and the options behind them come from your custom fields and their terms. This shows where to rename both, so the search form reads in your own language.

1 minute read

This article explains how to translate fields (e.g. Make) and their options (e.g. New, BMW, Coupe) — the wording your visitors see on the search form:

The Vehica search bar over a car photo: All, New and Used tabs above a white bar with All Makes, All Models and Max Price dropdowns and an orange search button.

Rename a field, e.g. Make or Price

  1. 1 Open Custom Fields

    In the WordPress admin go to Vehica Panel > Custom Fields and click the pencil icon next to the field you want to rename.
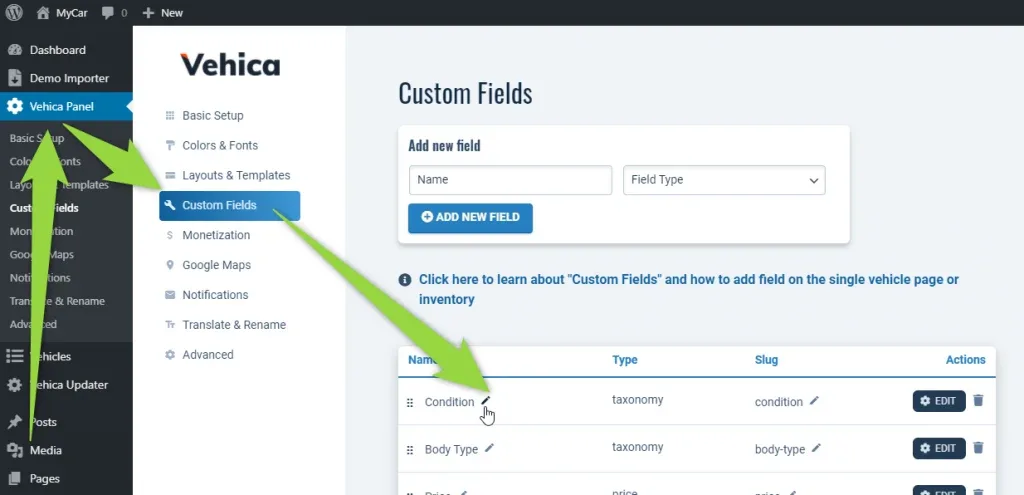
    Vehica Panel > Custom Fields in the WordPress admin. Green arrows point to the Vehica Panel menu, the Custom Fields tab and the small pencil icon next to Condition in a table with Name, Type, Slug and Actions columns.
  2. 2 Change the name and save

    Type the new name and click Save.
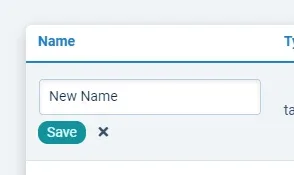
    A close-up of the inline rename box in the Custom Fields table: a text input containing "New Name", with a green Save button and a close (x) icon beneath it, under the Name column heading.

Rename the options (terms), e.g. BMW or Coupe

The values inside a field — the makes in the dropdown, the New / Used tabs, the body types under the search bar — are terms, and they are renamed somewhere else:
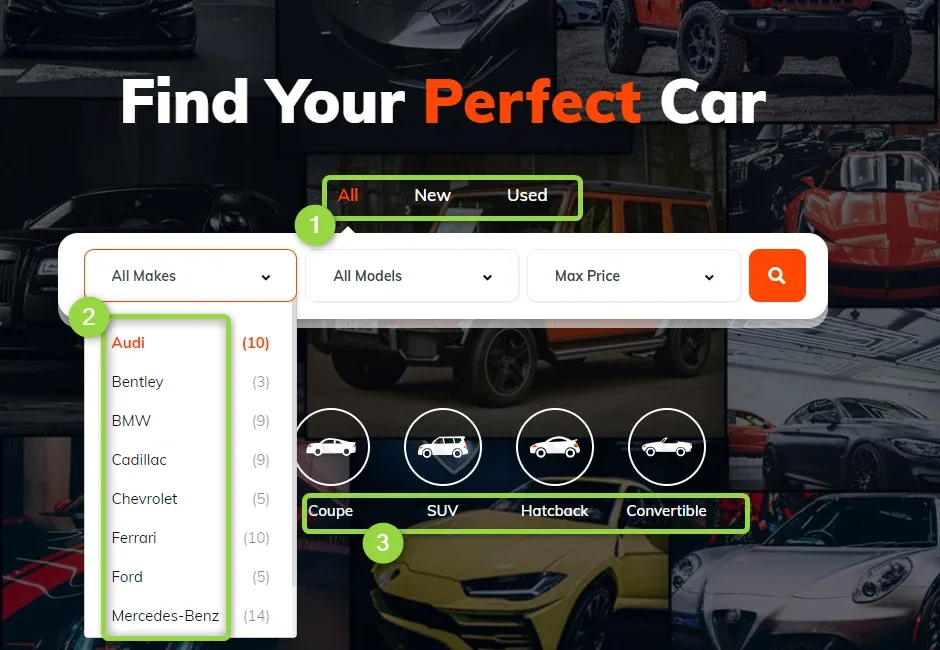
The "Find Your Perfect Car" hero with three numbered green frames: (1) the All / New / Used tabs, (2) the open All Makes dropdown listing Audi, Bentley, BMW, Cadillac, Chevrolet and more, (3) the labels Coupe, SUV, Hatchback and Convertible.
  1. 1 Open the field under Vehicles

    Hover over Vehicles in /wp-admin/ and pick the field you want to change, e.g. Body Type.
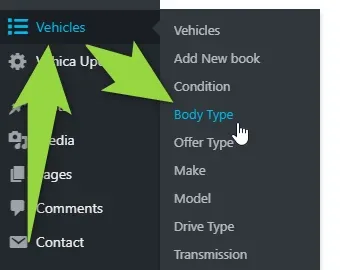
    The WordPress admin sidebar with the Vehicles menu open. Green arrows point to Vehicles and to the highlighted Body Type entry, listed among Vehicles, Add New book, Condition, Offer Type, Make, Model, Drive Type and Transmission.
  2. 2 Pick the option to edit

    You will find a list of all the options for that field. Hover one and click Edit, or use the form on the left to add a new one.
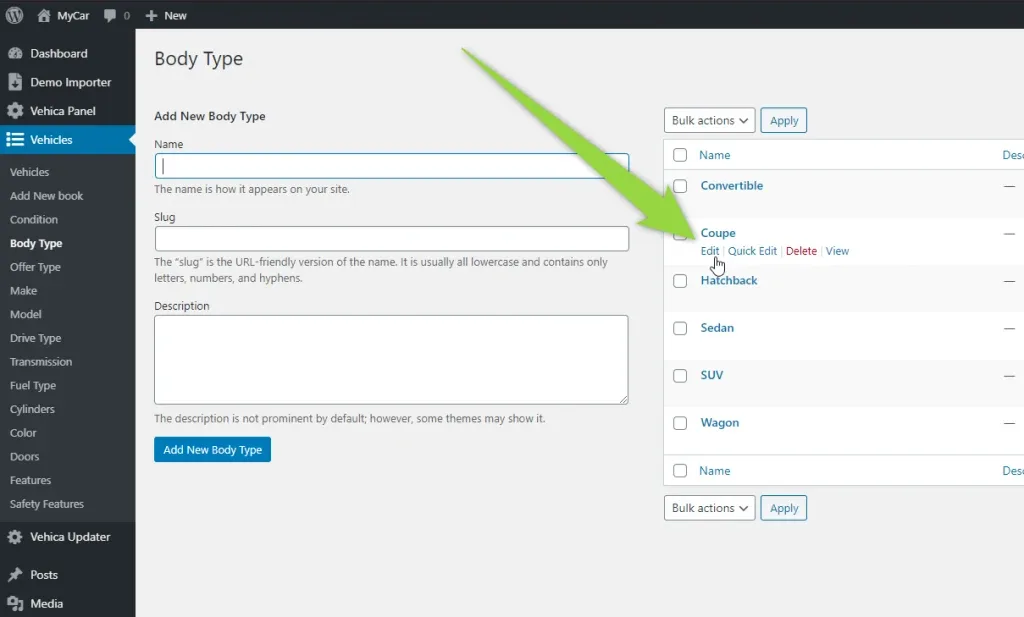
    The Body Type screen: an "Add New Body Type" form with Name, Slug and Description on the left, and the term list on the right. A green arrow points to the Edit / Quick Edit / Delete / View actions under Coupe, above Hatchback, Sedan, SUV and Wagon.
  3. 3 Change the name and update

    Enter the translated wording in Name and click Update.
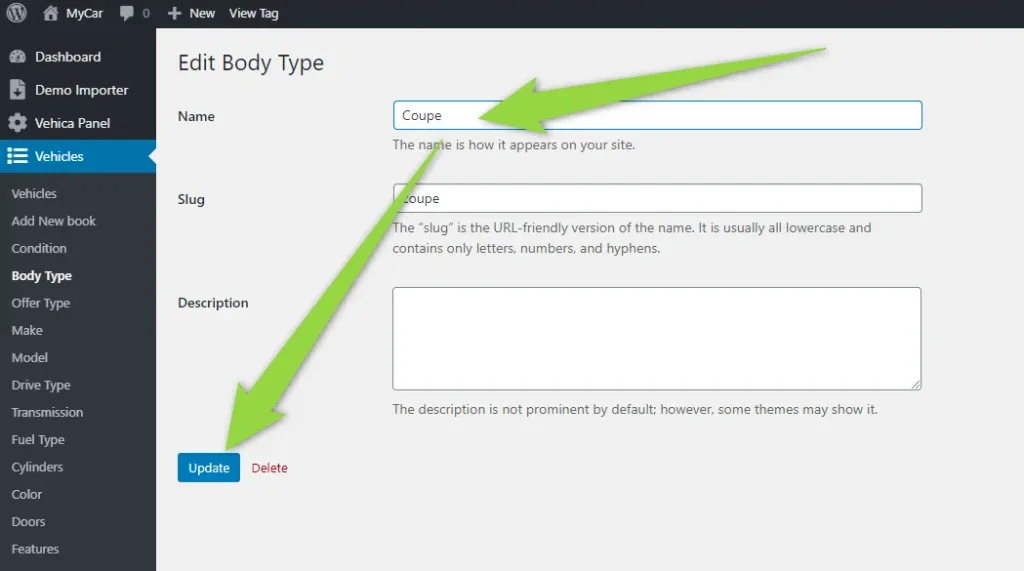
    The Edit Body Type screen with Name and Slug both set to "Coupe" and an empty Description. Green arrows point to the Name box and to the blue Update button next to a red Delete link.
Name and slug are not the same thing
Name is how the option appears on your site; the slug is the URL-friendly version of it. Translate the name and leave the slug alone unless you also want the addresses of your filtered pages to change.

Ask the people who build Vehica

We answer by email from support@tangiblewp.com. With Premium Support, we also fix your site when something breaks.

Was this guide helpful?