Skip to content

Field Dependency Option – how to hide fields e.g. when you select “Vehicle Type” -> Bike – hide “Doors” field

Set up a Vehica taxonomy field so that picking one of its options hides the fields that do not apply — choose “Bike” as the Vehicle Type, and “Doors” disappears from the search form and the submit form.

1 minute read

In this walkthrough we create a new “Vehicle Type” taxonomy field, add a “Bike” option to it and hide the fields that make no sense for a bike — “Doors”, for example.

Taxonomy fields only
Field dependency is available only for fields of the Taxonomy type.

Create the field and turn on field dependency

  1. 1 Create the “Vehicle Type” field

    In Vehica Panel > Custom Fields, type the field name in the Add new field box, choose Taxonomy as the type and click ADD NEW FIELD.
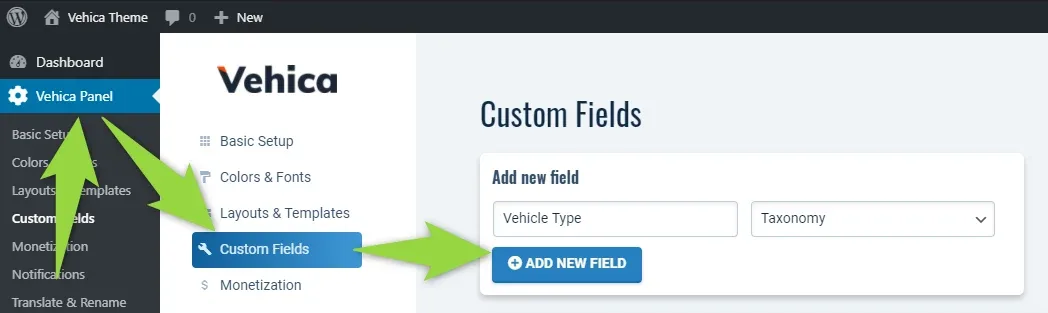
    Vehica Panel Custom Fields screen with “Vehicle Type” typed into the Add new field box, the type select set to Taxonomy, and the ADD NEW FIELD button highlighted.
  2. 2 Move the field to the top and edit it

    Drag the new field to the top of the list with the handle on its left, then click EDIT on its row.
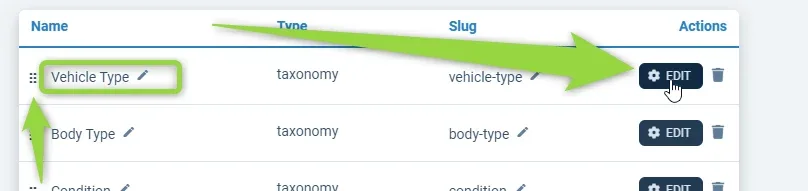
    Custom fields table listing Vehicle Type, Body Type and Condition; arrows point at the drag handle next to Vehicle Type and at the EDIT button in its Actions column.
  3. 3 Tick “Fields dependency”

    In the field settings, enable Fields dependency and save.
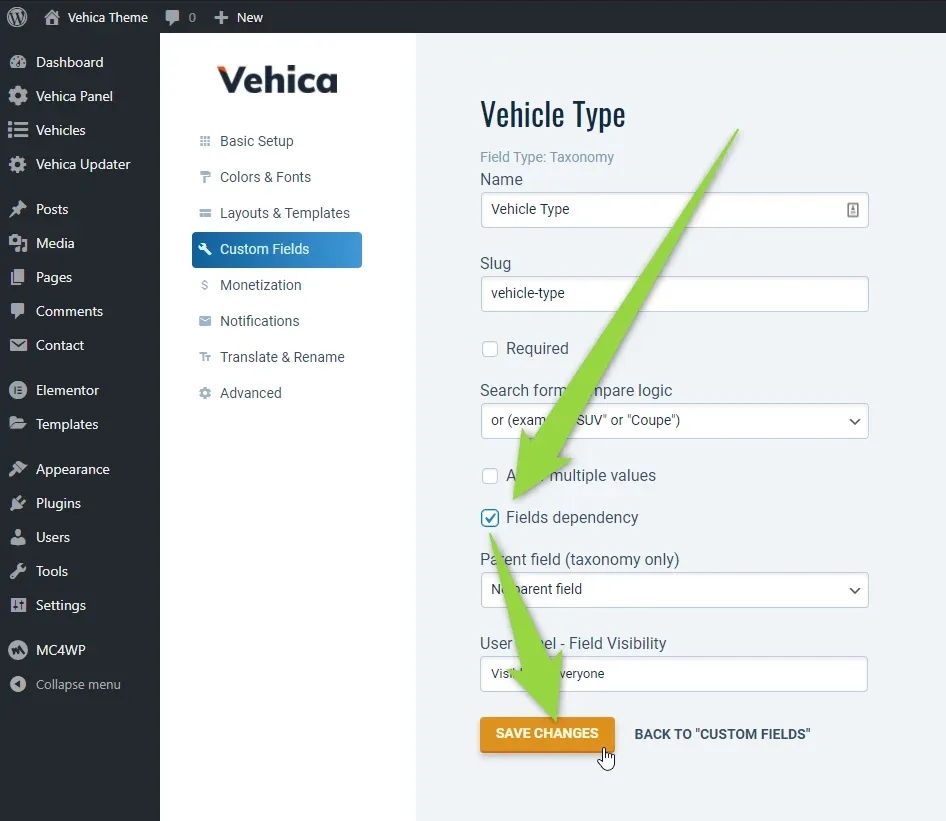
    Vehicle Type field settings with the Fields dependency checkbox ticked, above the Parent field and User Panel – Field Visibility selects and the SAVE CHANGES button.
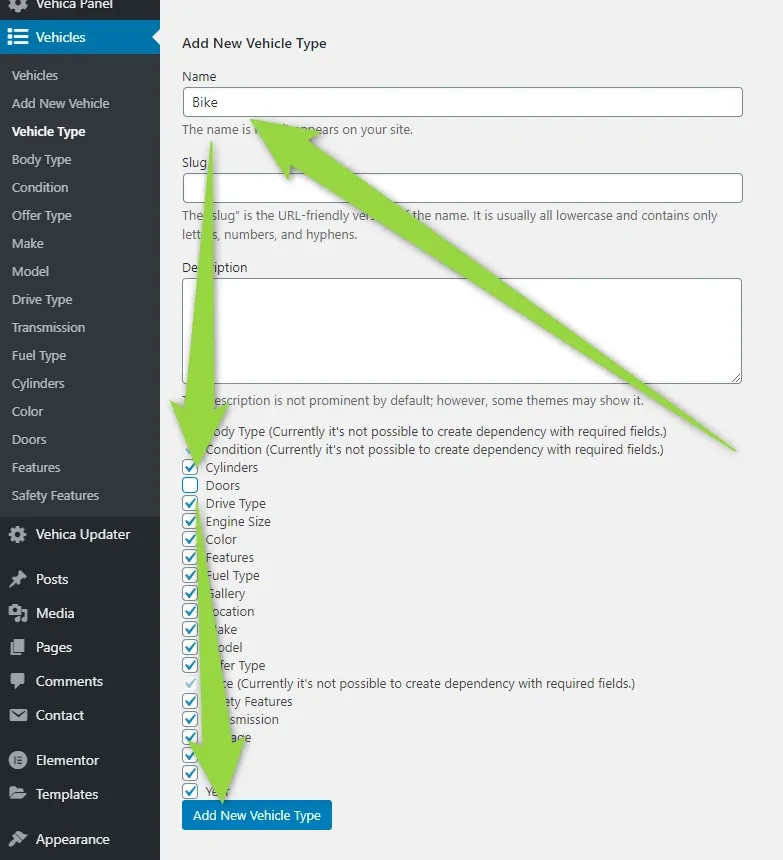
  4. 4 Open the taxonomy and add the “Bike” option

    The field now has its own entry under Vehicles in the WordPress menu.
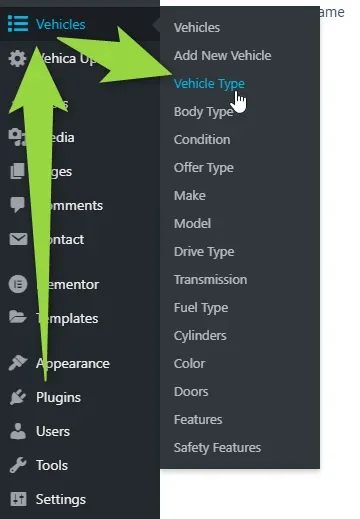
    WordPress admin menu with Vehicles expanded, showing the submenu Vehicles, Add New Vehicle, Vehicle Type, Body Type, Condition, Offer Type, Make, Model and the rest, with Vehicle Type hovered.
Add New Vehicle Type form with Bike typed in the Name box and, underneath, a checklist of every field; Doors is the one left unticked. The Add New Vehicle Type button sits at the bottom.
Untick the fields that should disappear for this option. Required fields — here Body Type and Condition — are greyed out, because a dependency cannot be built on them.

Add the field to the search form and the inventory

Now add the field to the main search form:
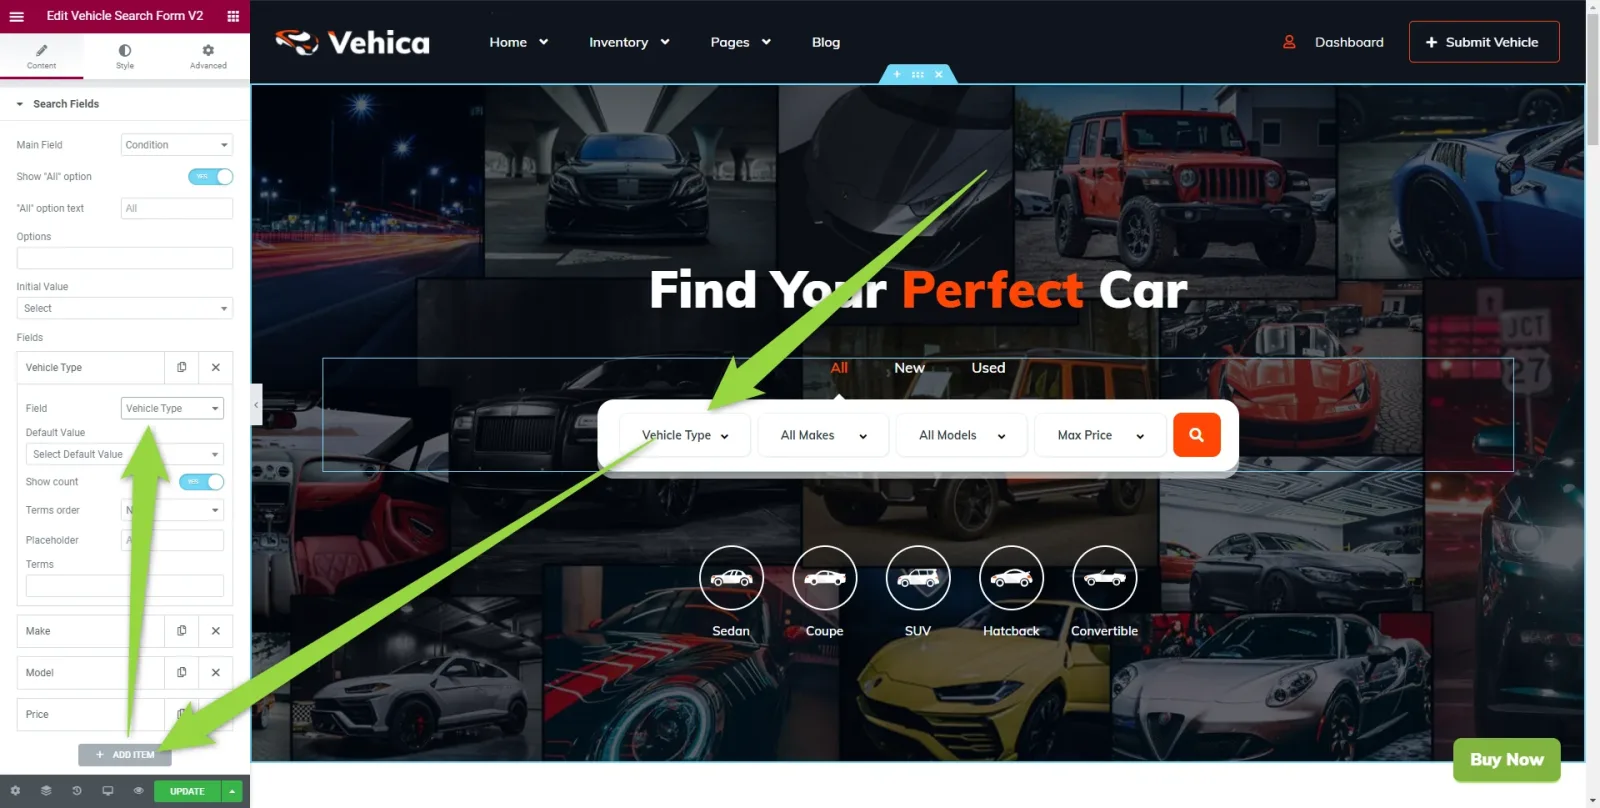
The homepage hero open in Elementor. The left panel lists the search form fields with Vehicle Type added, and the preview shows the “Find Your Perfect Car” search bar with a Vehicle Type dropdown.

Repeat the same on the inventory search form:
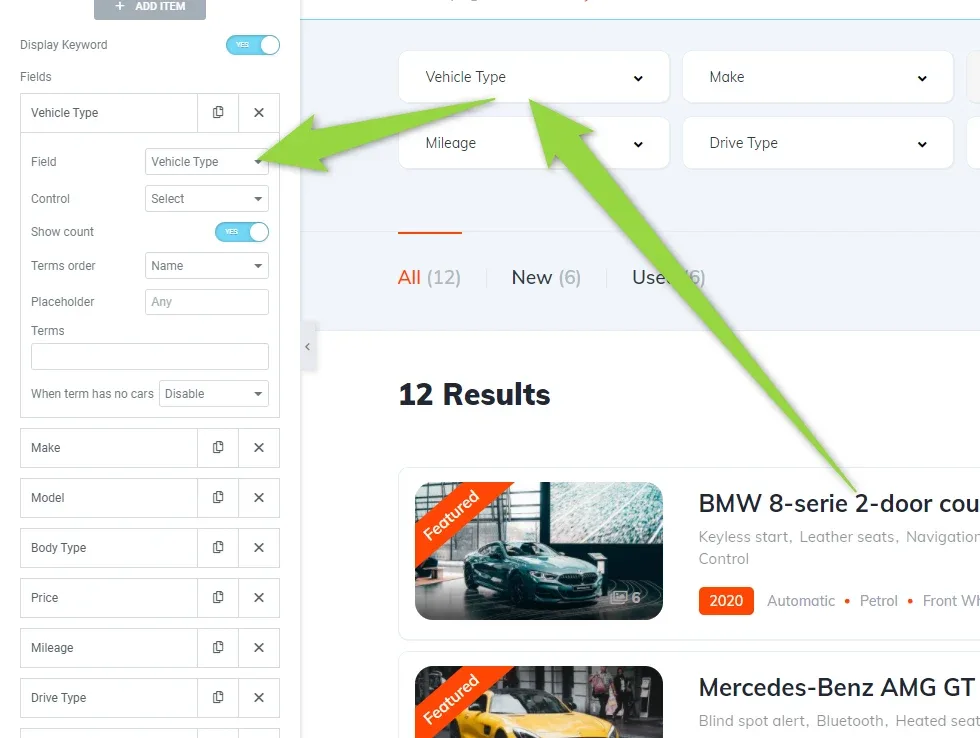
The inventory page in Elementor. The left panel shows the Vehicle Type field settings and the list of search fields; the preview shows Vehicle Type, Make, Mileage and Drive Type dropdowns above “12 Results”.

Add a bike and test it

Add your first bike and set its Vehicle Type to Bike:
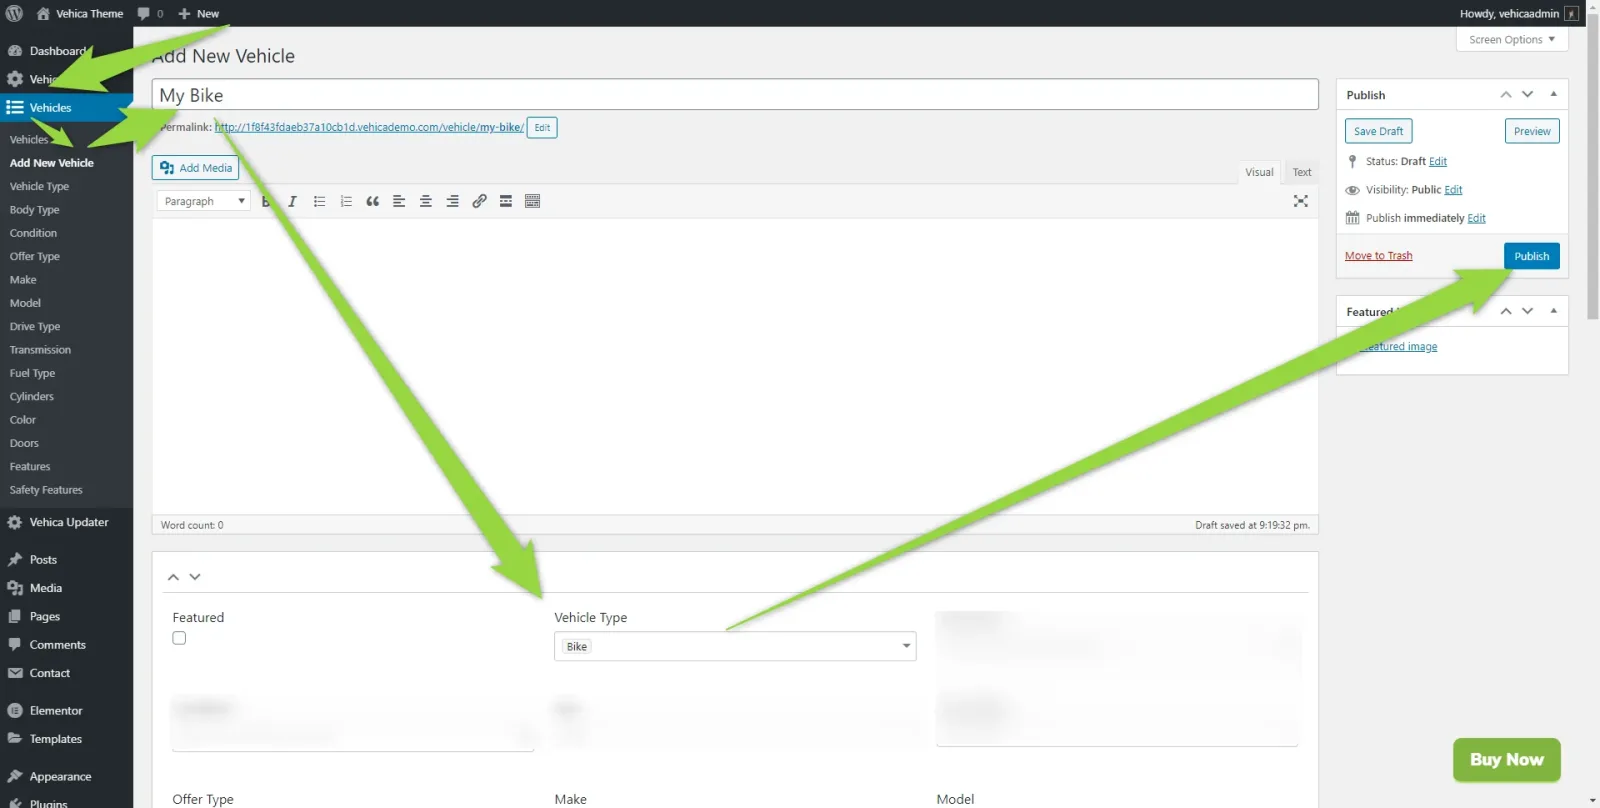
The WordPress Add New Vehicle screen for a listing titled “My Bike”, with the Vehicle Type box below the editor set to Bike and the Publish panel on the right.

Then test the new type on the search form:
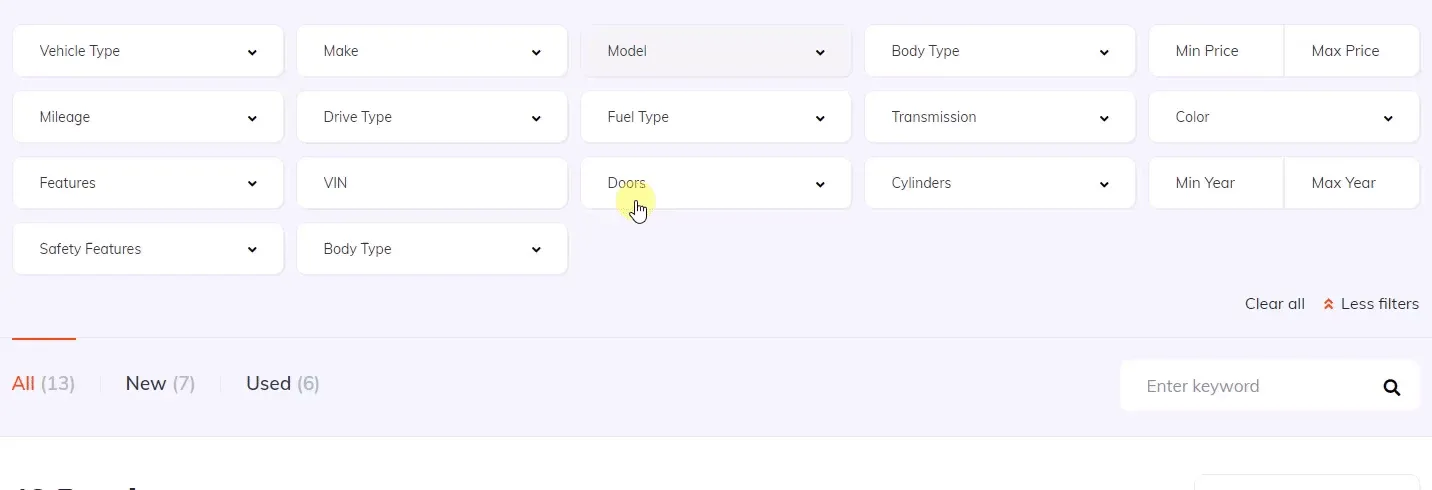
The inventory filter bar with every field still visible — Vehicle Type, Make, Model, Body Type, Mileage, Drive Type, Fuel Type, Transmission, Colour, Features, VIN, Doors, Cylinders and the price and year ranges — with the pointer resting on Doors.

And on the front-end Submit Vehicle panel:
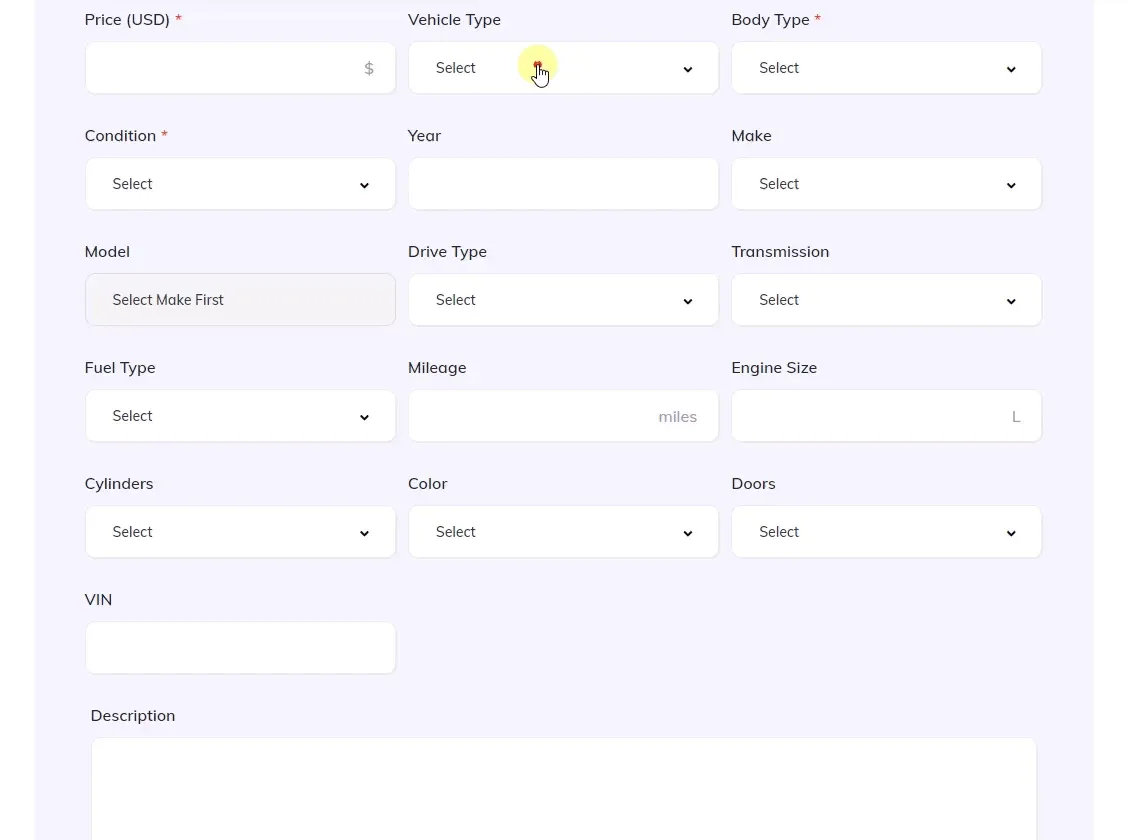
The front-end Submit Vehicle form showing Price, Vehicle Type, Body Type, Condition, Year, Make, Model, Drive Type, Transmission, Fuel Type, Mileage, Engine Size, Cylinders, Colour, Doors and VIN, with the pointer on the Vehicle Type dropdown.

Ask the people who build Vehica

We answer by email from support@tangiblewp.com. With Premium Support, we also fix your site when something breaks.

Was this guide helpful?