Featured option – how to move featured listings to the top of the inventory and display in the special sections
Featured listings can be pinned to the top of your Vehica inventory and pulled into dedicated sections such as a homepage grid or carousel. This article shows how to flag a listing as featured, how to sort the inventory so featured cars always lead, and how to narrow an element to featured vehicles only.
1 minute read
The Featured option was designed to move selected listings to the top of the Inventory list. You choose which listing is featured by opening it and ticking a single checkbox.
Mark a listing as featured
-
1
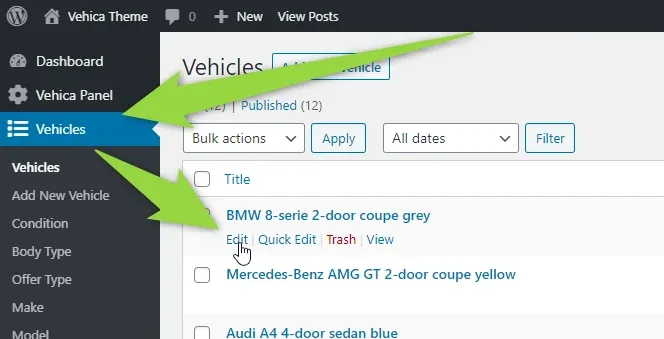
Open the listing
In wp-admin go to Vehicles, find the vehicle you want to promote and click Edit under its title.
-
2
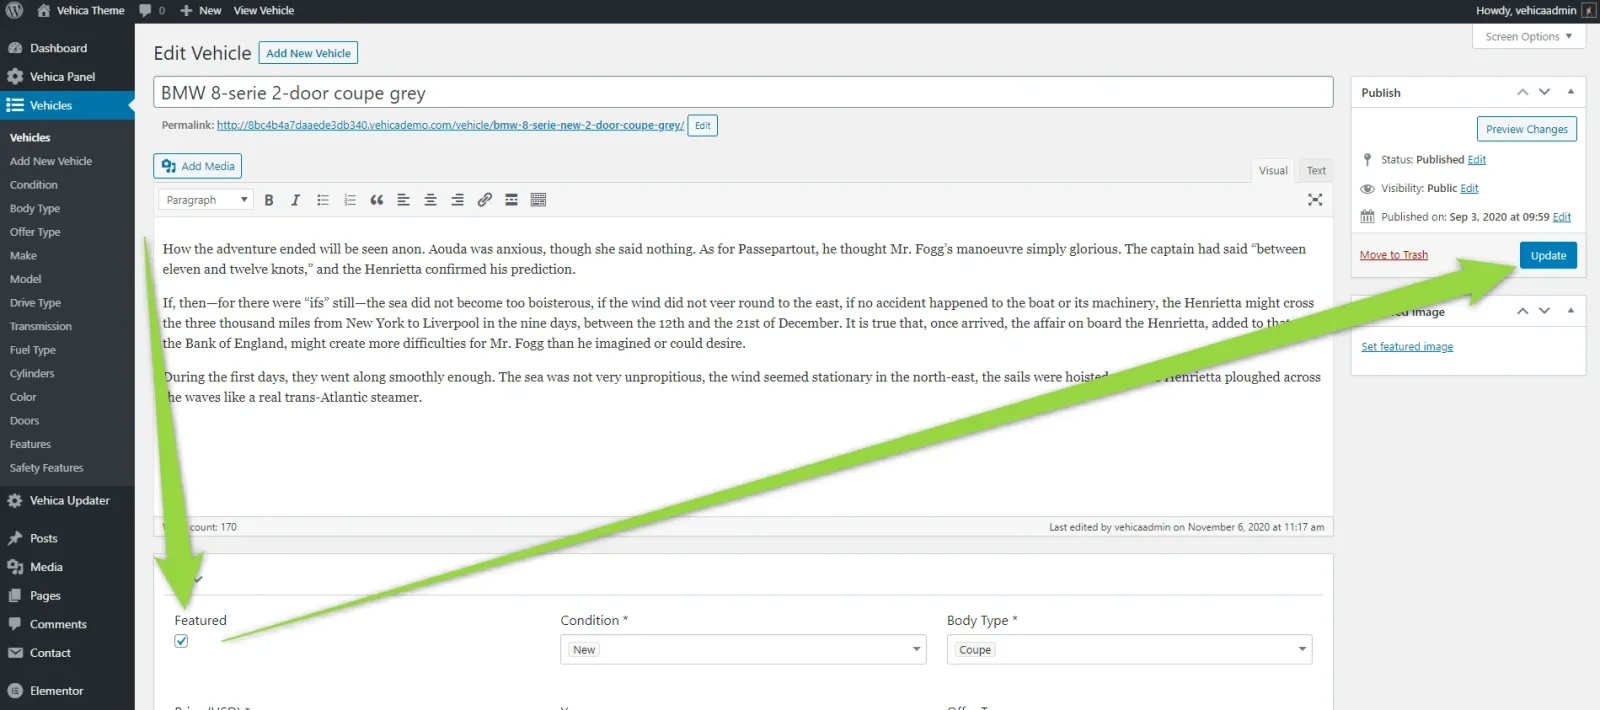
Tick Featured and update
Scroll below the description editor to the Featured checkbox, tick it, then save the listing with Update.
Keep featured listings on top of the inventory
Now edit the Inventory page and change its “Sort by” option to “Relevant” — that forces featured listings to always show first.
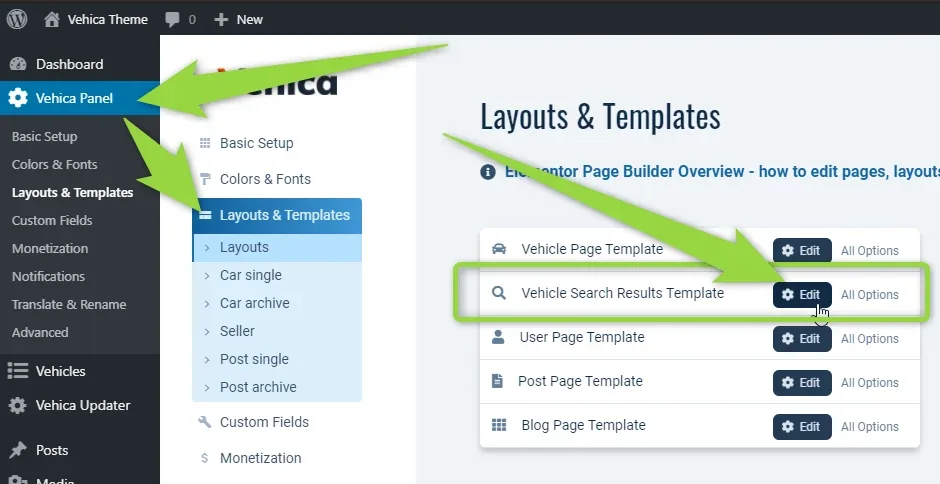
Then edit Inventory > Sort By > Initial Sort By and set it to Relevant.
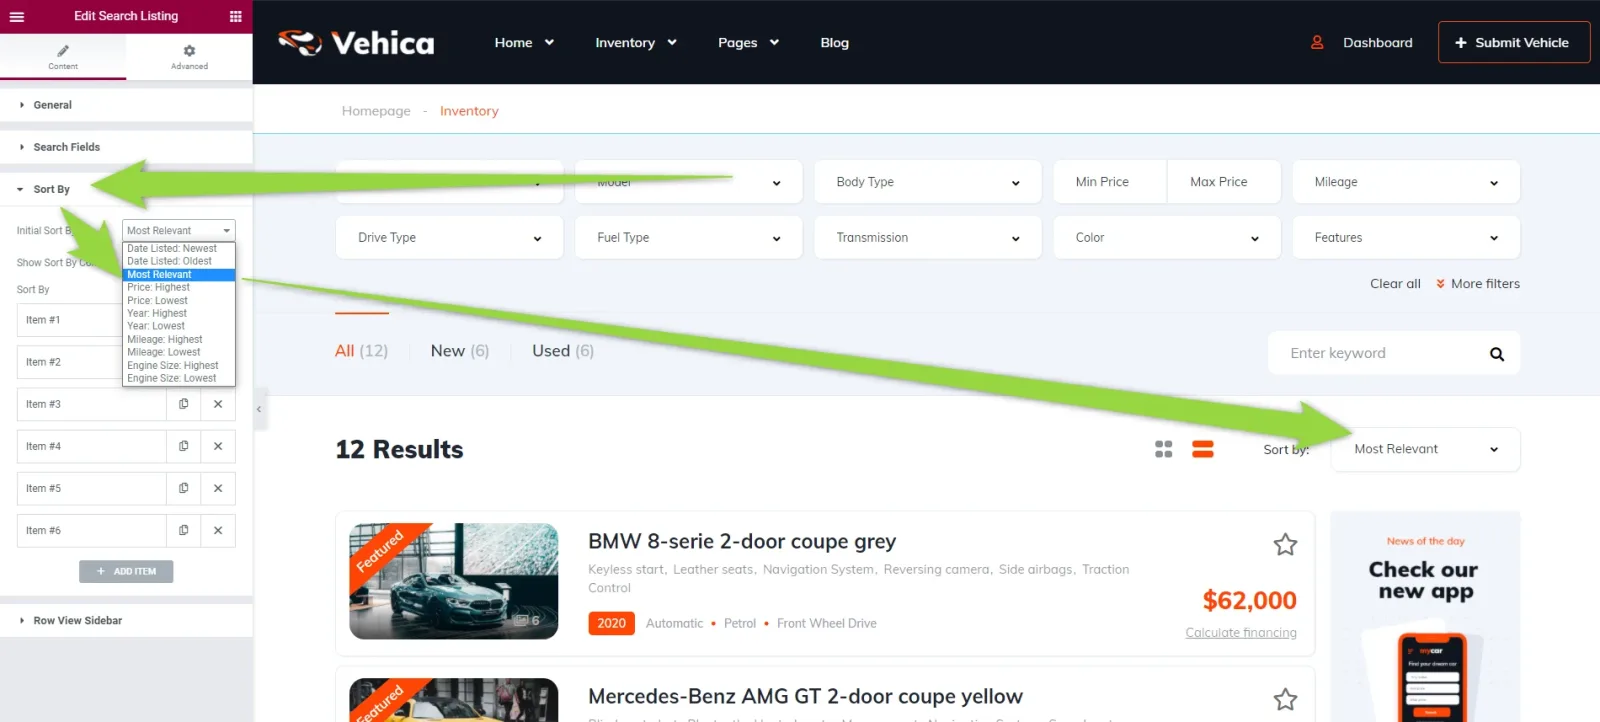
This way featured listings will always be on top.
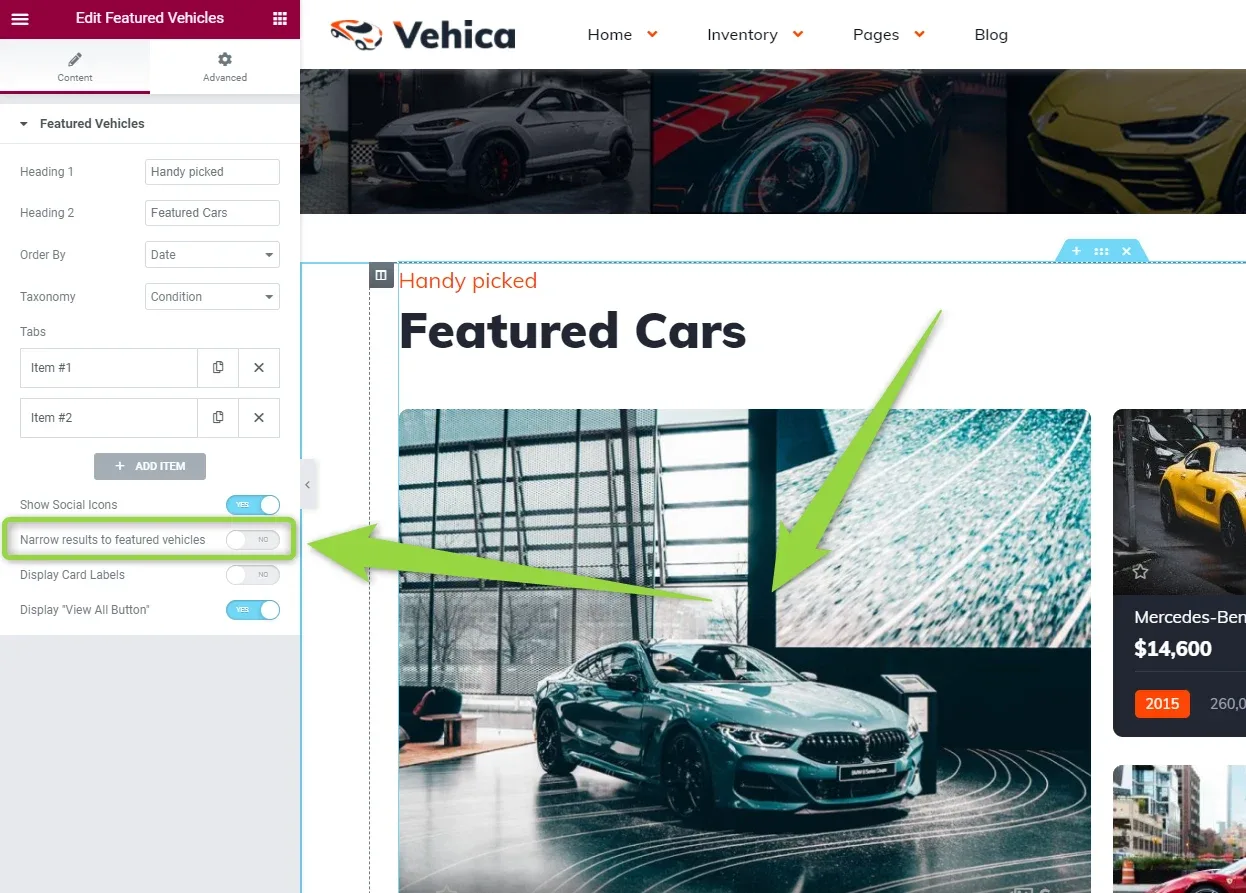
Show only featured listings in a section
You can also narrow some elements so they display featured listings only — for example the Grid or Carousel on your homepage:
Ask the people who build Vehica
We answer by email from support@tangiblewp.com. With Premium Support, we also fix your site when something breaks.
We can also run your site for you, or build a new one.
Was this guide helpful?