Skip to content

Export / Import elementor templates and how to bring back demo page (e.g. trashed)

Move any Elementor page from one WordPress site to another by saving it as a template, exporting the file and importing it on the other side — the way to bring back a demo page you trashed.

1 minute read

This article shows how to import and export Elementor pages. It is useful if you lost one of the demo pages and need to bring it back.

  1. 1 Create a free demo

    Start a fresh demo at vehica.com/try-free-demo — this is the site you copy the page from.

  2. 2 Find the page you need

    For example, the Sold page.

  3. 3 Save the page to the library

    Open the page in Elementor and save it as a template from the save options at the bottom of the panel.
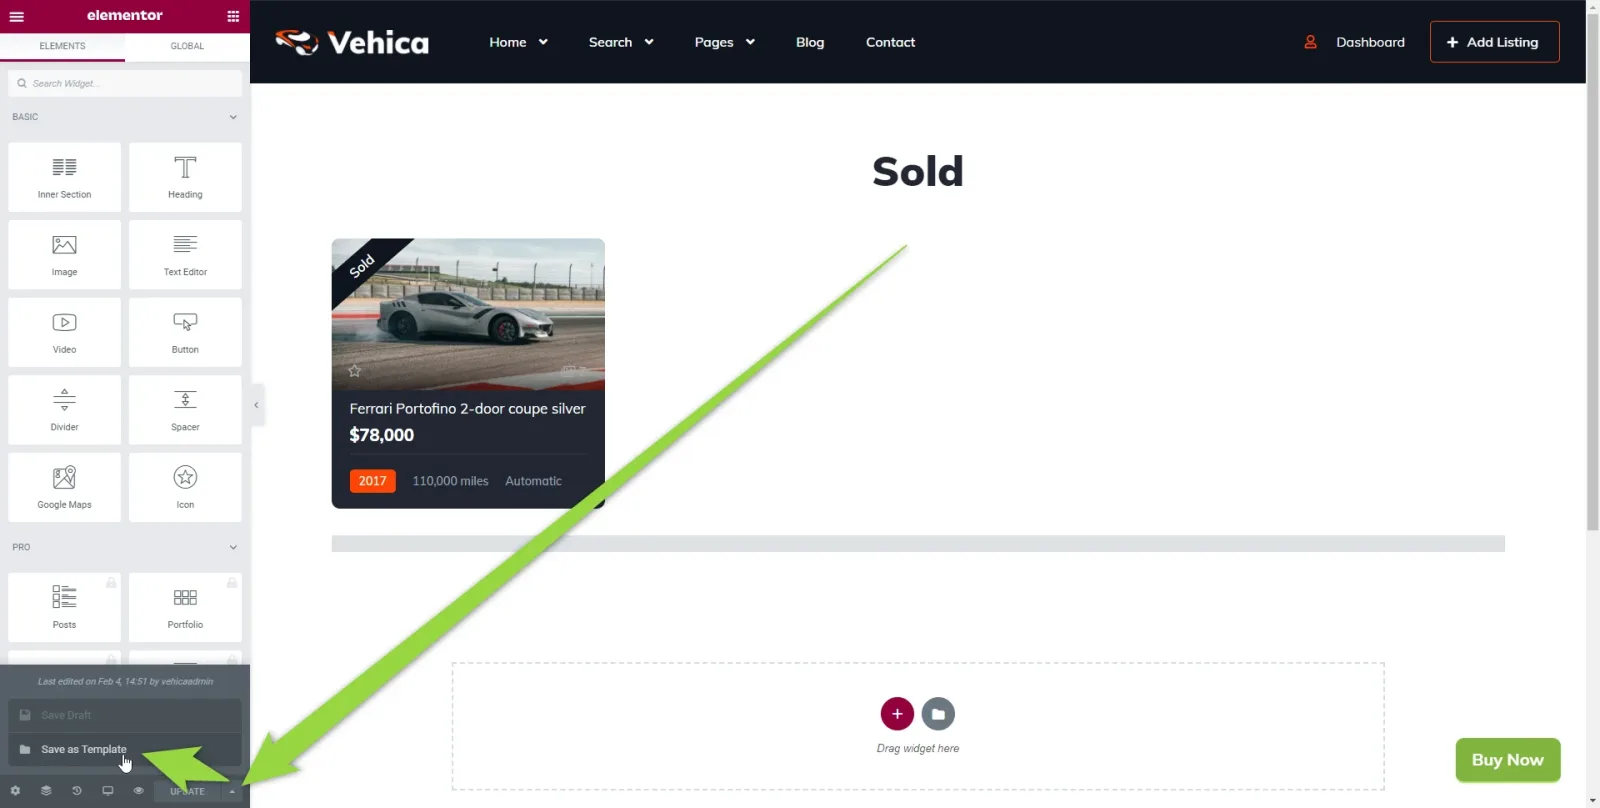
    Elementor open on the demo “Sold” page, which shows one Ferrari Portofino listing card at $76,000; an arrow points to the save options next to the Update button at the bottom of the left panel.
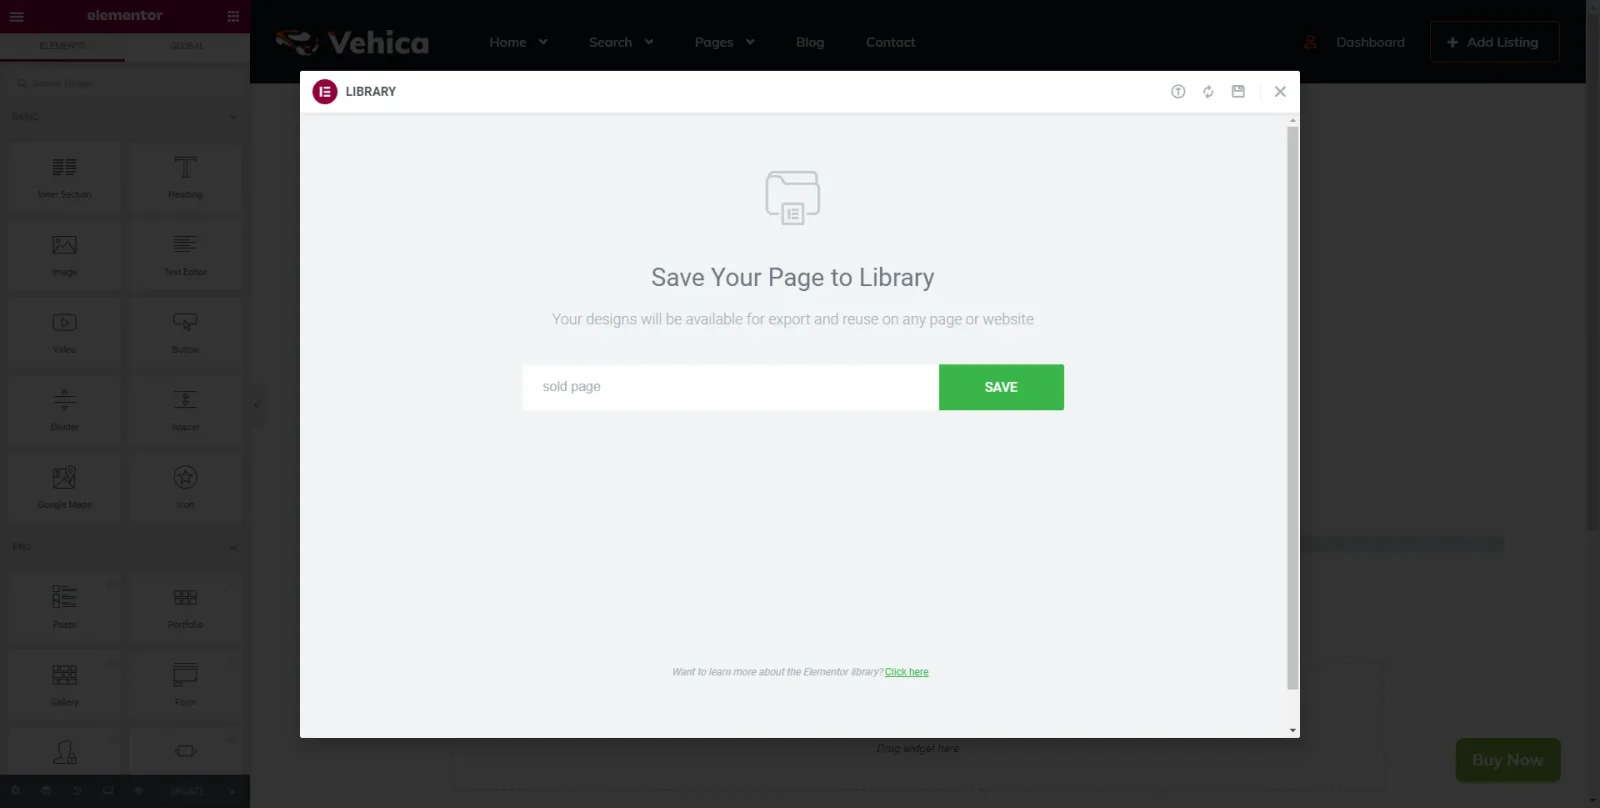
  4. 4 Name the template Elementor’s “Save Your Page to Library” dialog with an “Enter Title” field and a green SAVE button.
  5. 5 Export it

    Open the template’s actions menu and choose Export. The template downloads as a JSON file.
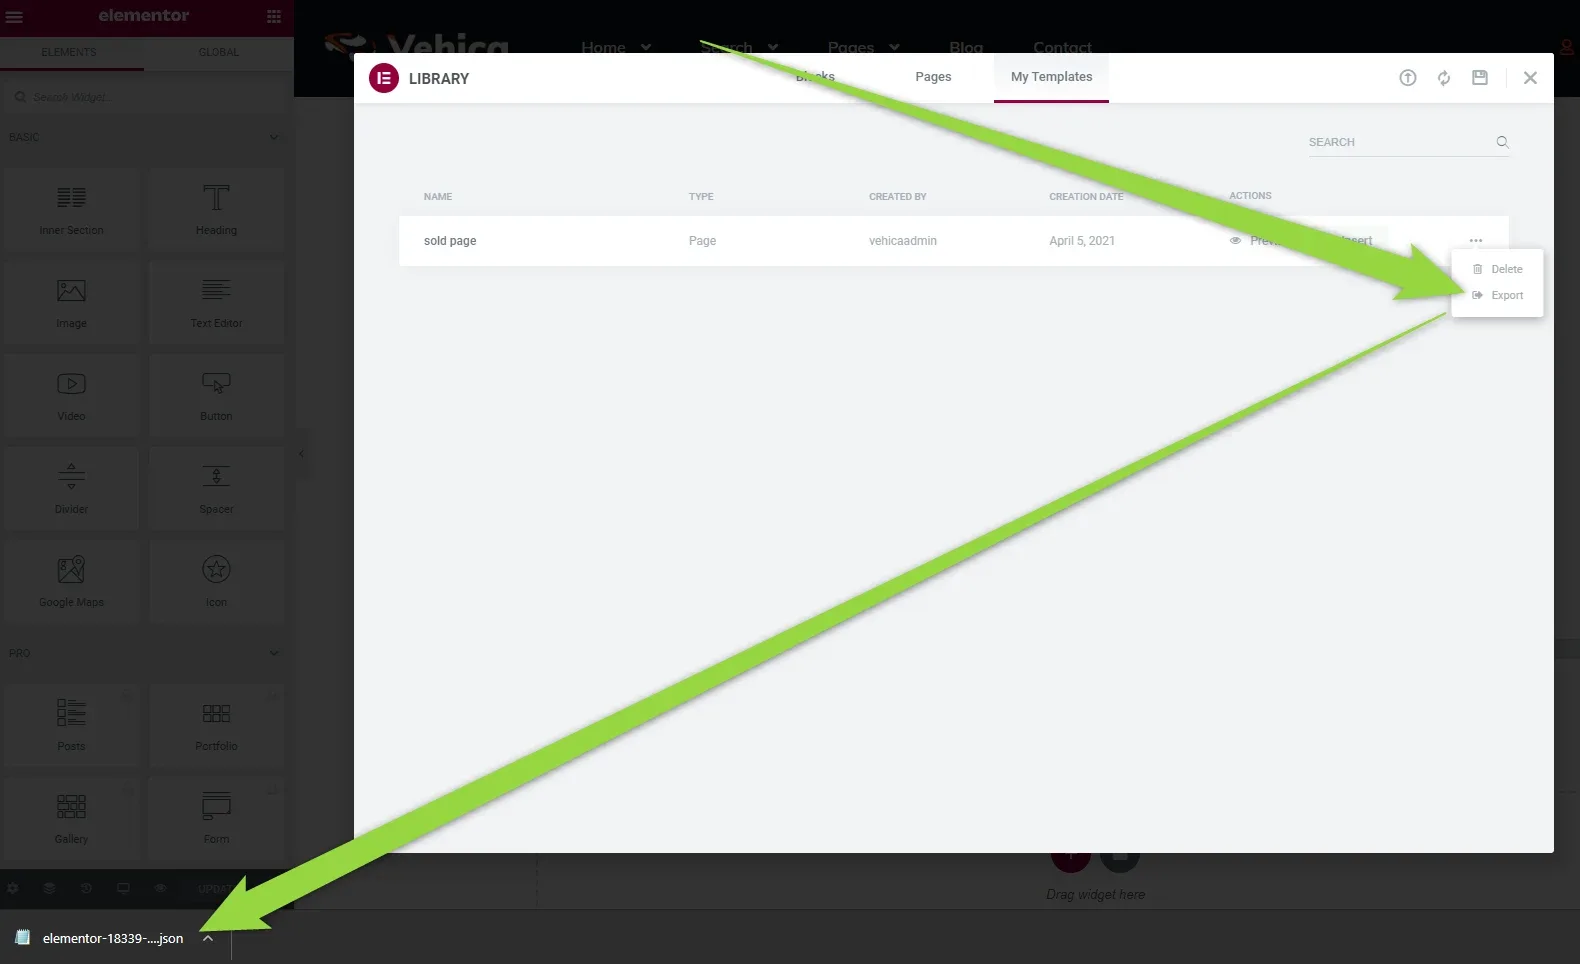
    The Elementor Library on the My Templates tab, with one saved template of type Page; an arrow points to its Delete / Export menu, and another to the downloaded elementor-….json file in the browser’s download bar.
  6. 6 Open Saved Templates on your site

    In your own WordPress admin, go to Templates → Saved Templates and click Import Templates.
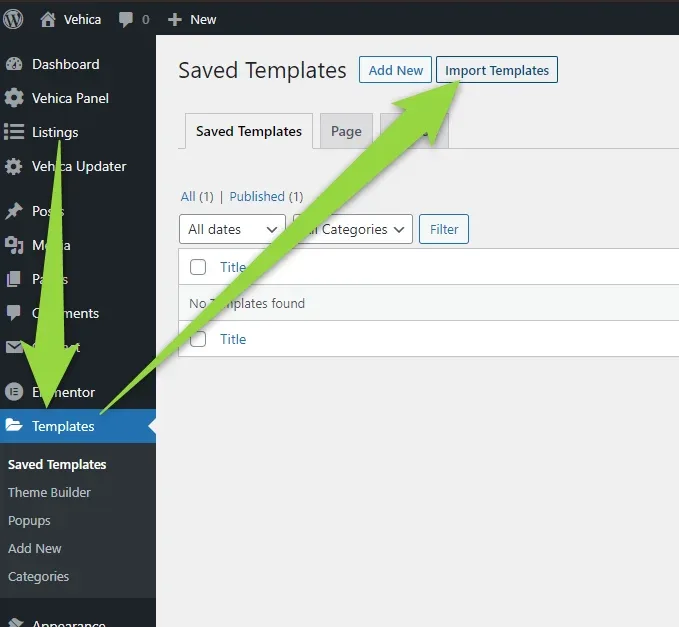
    WordPress admin on Templates → Saved Templates, reading “No templates found”; arrows point to the Templates item in the sidebar and to the “Import Templates” button next to Add New.
  7. 7 Upload the file

    Pick the JSON file you exported and click Import Now.
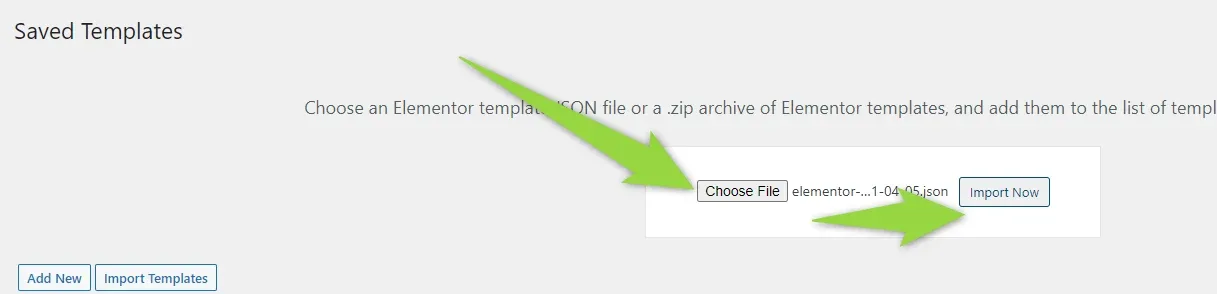
    The Saved Templates import panel: “Choose an Elementor template JSON file or a .zip archive of Elementor templates”, with a Choose File button holding a selected .json file and arrows pointing to it and to “Import Now”.
  8. 8 Create the page

    Add a new page for the imported design.

    The WordPress sidebar with the Pages menu open and the cursor on “Add New”, next to “All Pages”.
  9. 9 Edit it with Elementor

    Give the page a title and switch to the Elementor editor.
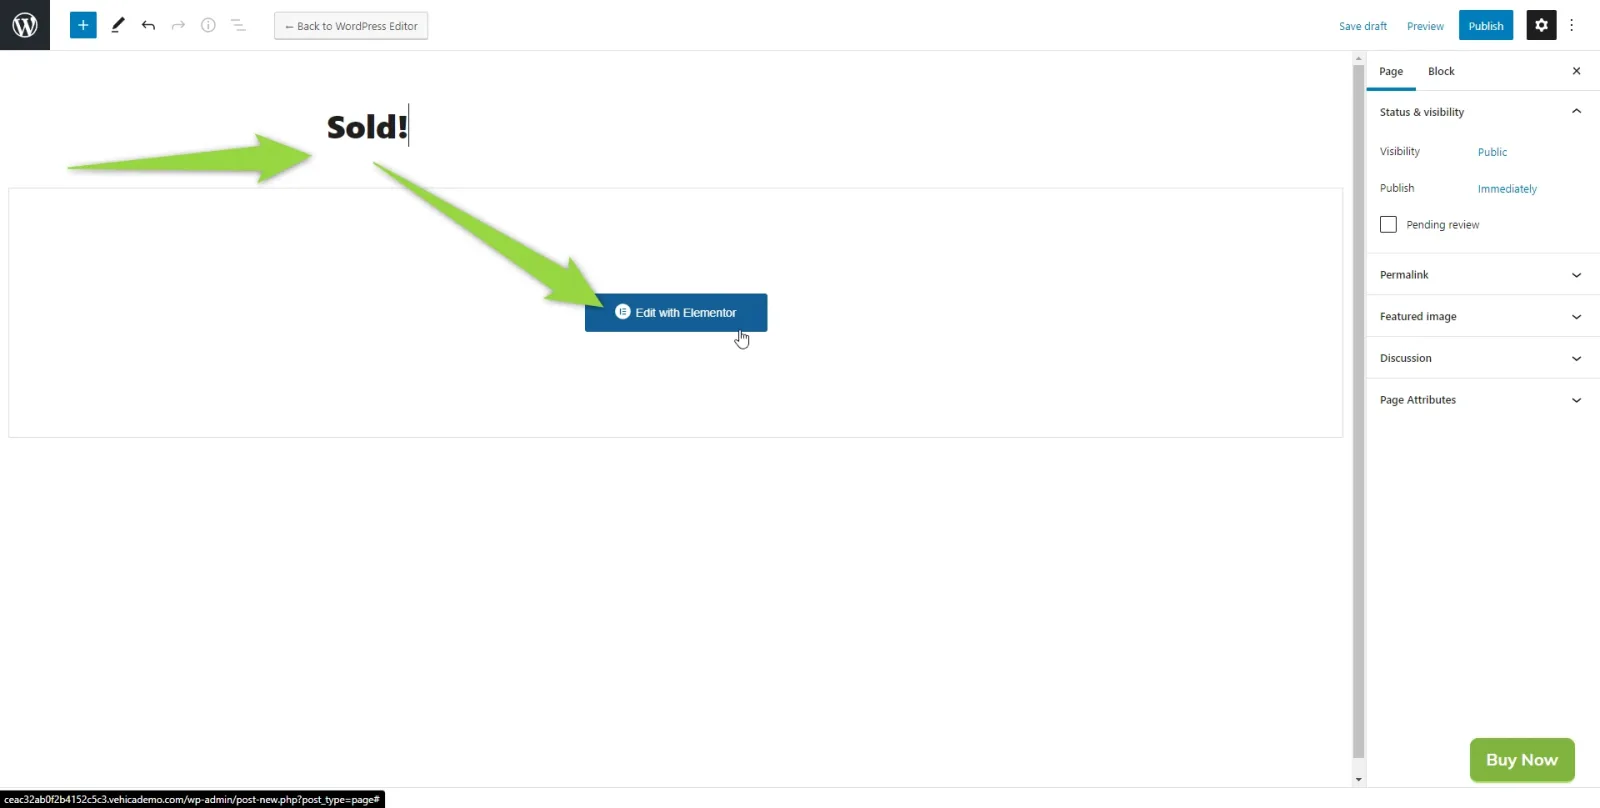
    A new page in the WordPress editor titled “Sold!” with the document settings on the right; arrows point to the title and to the blue “Edit with Elementor” button on the empty canvas.
  10. 10 Add the template

    On the empty canvas, click the folder icon — Add Template.
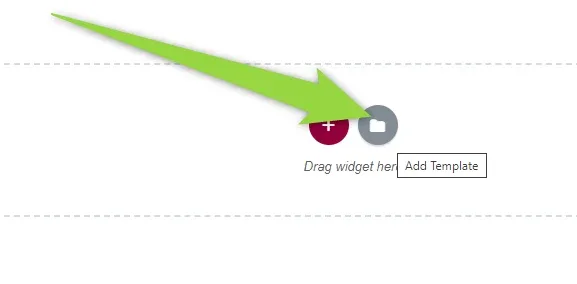
    An empty Elementor canvas with the pink plus button and the grey folder button labelled “Add Template” above “Drag widget here”, with an arrow pointing at the folder button.
  11. 11 Insert it from My Templates

    Switch to My Templates, find the template you imported and click Insert.
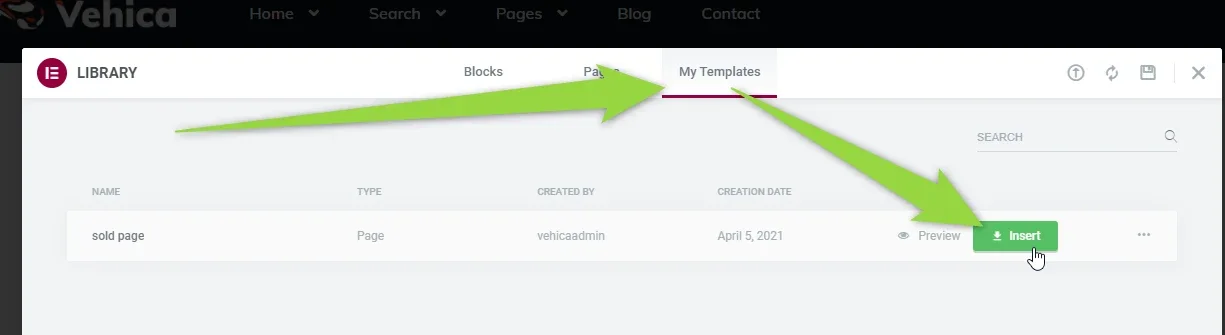
    The Elementor Library dialog on the My Templates tab, listing the imported “sold page” template of type Page; arrows point to the tab and to the green Insert button.
  12. 12 Done

    The page is back, exactly as it was on the demo.
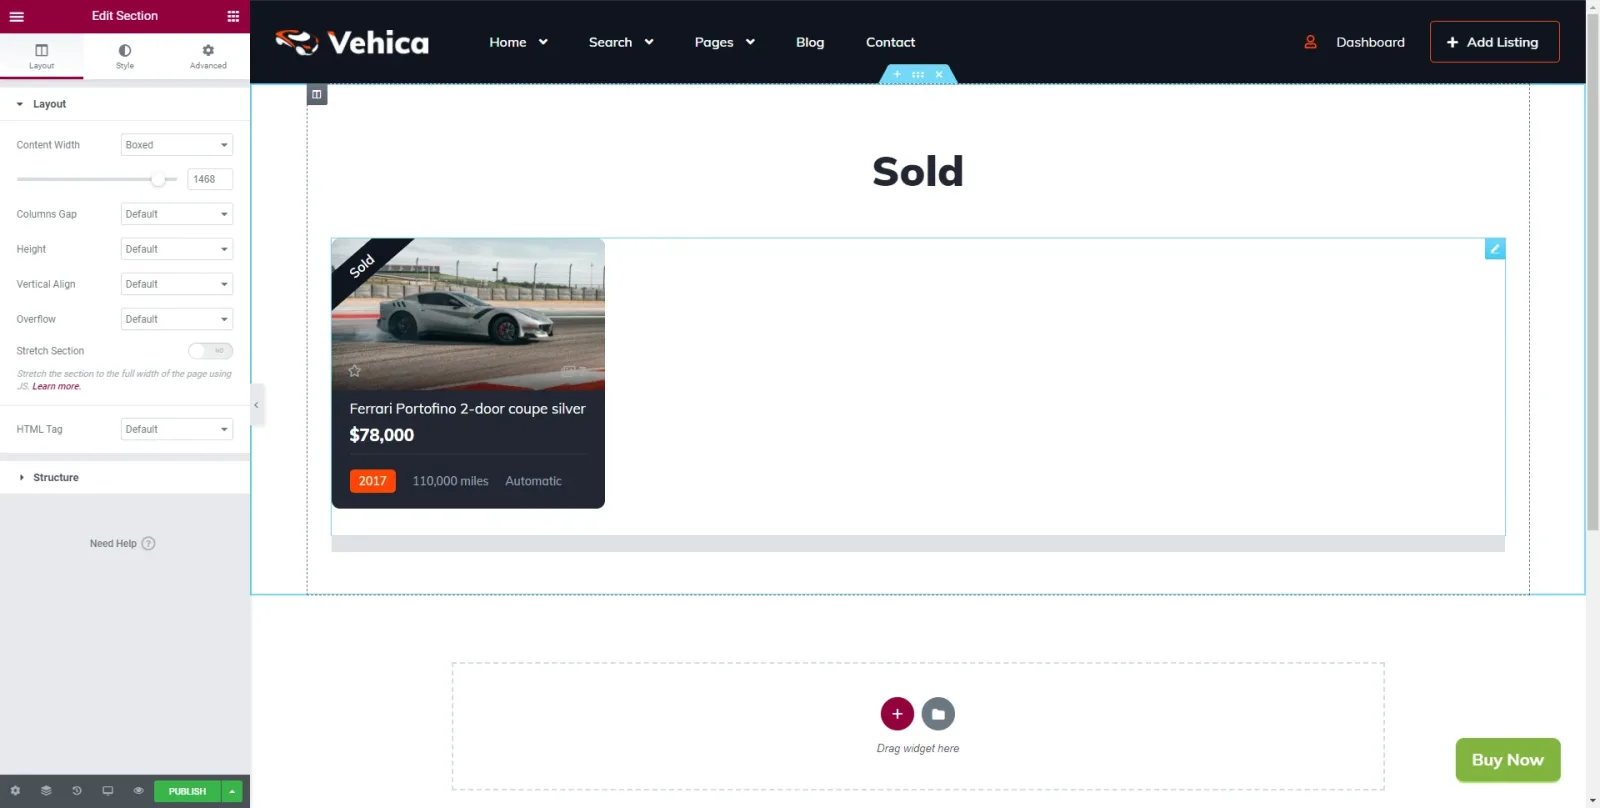
    The rebuilt page open in Elementor: the “Sold” heading with the Ferrari Portofino listing card at $76,000 below it, and the Edit Section panel on the left.

Ask the people who build Vehica

We answer by email from support@tangiblewp.com. With Premium Support, we also fix your site when something breaks.

Was this guide helpful?