Taxonomy - Multilevel
Turn a taxonomy custom field into a multilevel one, so visitors pick a top-level category and then narrow down to a subcategory — both when they add a listing and when they search.
1 minute read
Create the multilevel field
-
1
Open the custom fields list
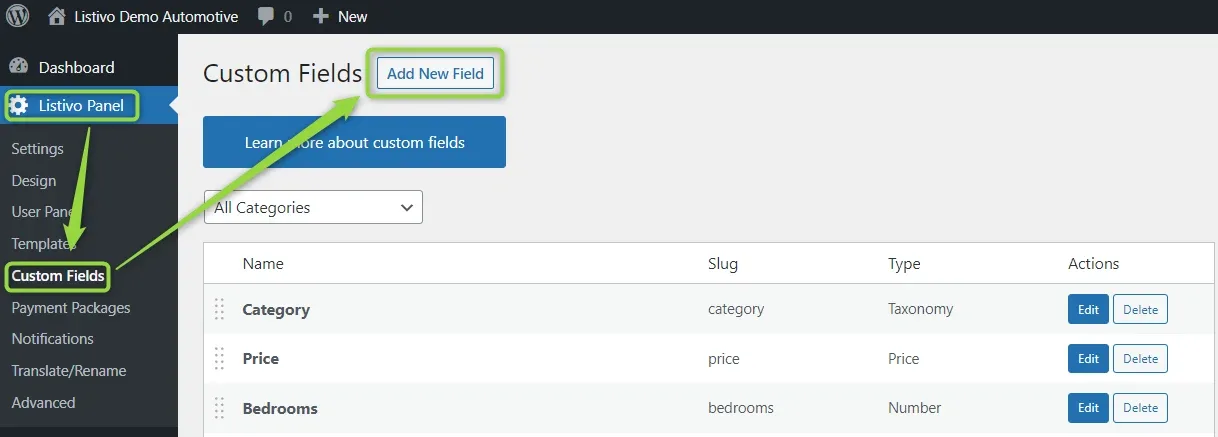
Go to Listivo Panel → Custom Fields and click Add New Field. If the field already exists, skip ahead to editing it.
-
2
Name the field and set its type
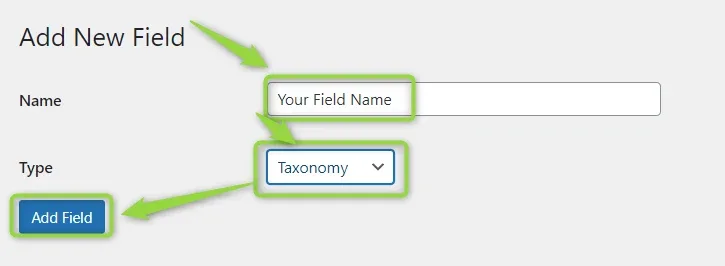
Enter your field name and set Type to Taxonomy. Only this field type offers the multilevel option.
-
3
Edit the new field
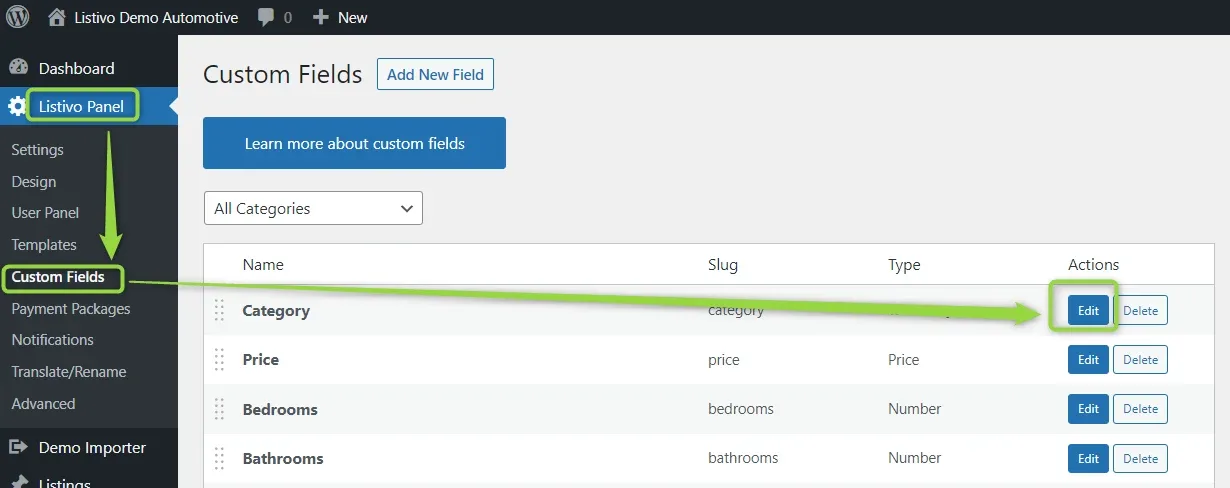
Find your new field in the custom fields list and click Edit.
-
4
Tick Multilevel
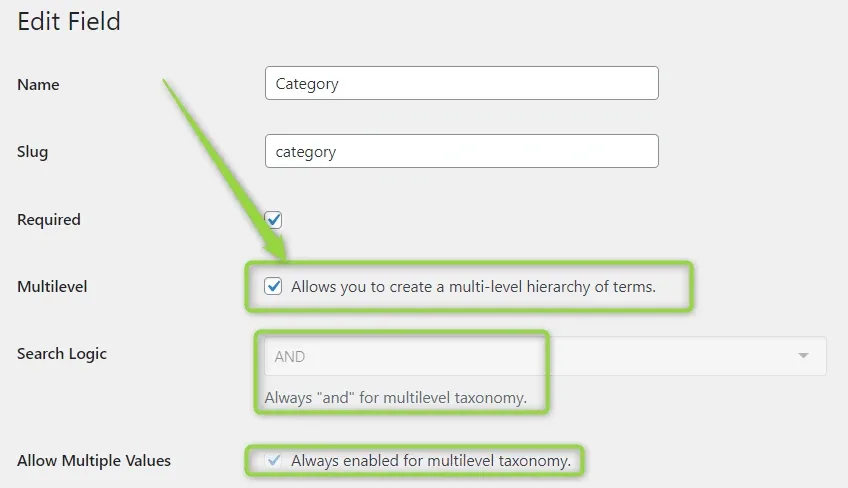
Select the Multilevel checkbox and save. Search Logic is then locked to "and" and Allow Multiple Values is switched on — both are required by a multilevel taxonomy and are set for you.
What visitors see
When the category field is set as Multilevel, a visitor can choose the category Electronics and then pick a subcategory such as Computers.

When the category field isn't set as Multilevel, the visitor chooses Electronics and there is nothing further to select.

Keep reading
Ask the people who build MyHome
We answer by email from support@tangiblewp.com. With Premium Support, we also fix your site when something breaks.
We can also run your site for you, or build a new one.
Was this guide helpful?