Taxonomy - allow multiple values
Let a taxonomy custom field hold several terms at once, so one listing can carry a whole list of features — and recognise the fields that should stay single-value.
1 minute read
Turn on multiple values
-
1
Open the custom fields list
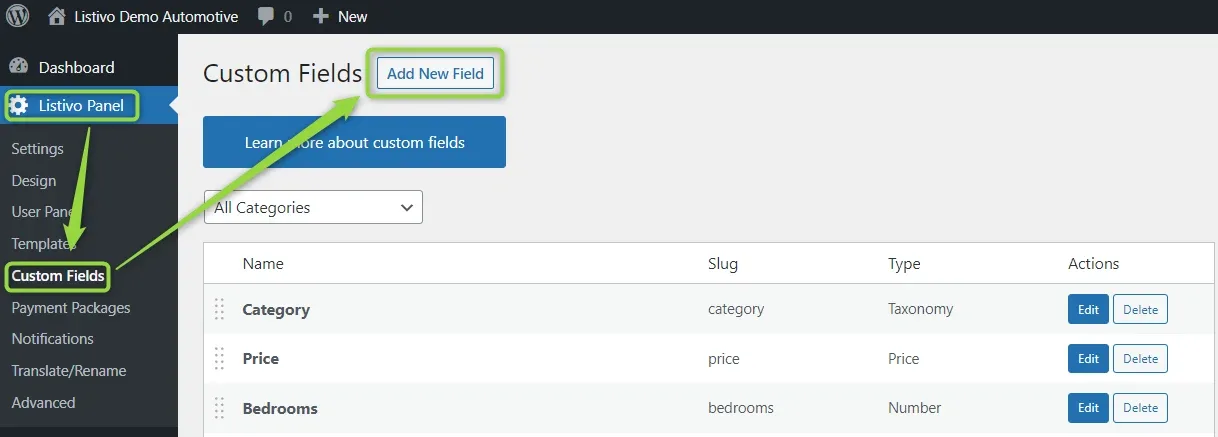
Go to Listivo Panel → Custom Fields and click Add New Field. If the field already exists, skip ahead to editing it.
-
2
Name the field and set its type
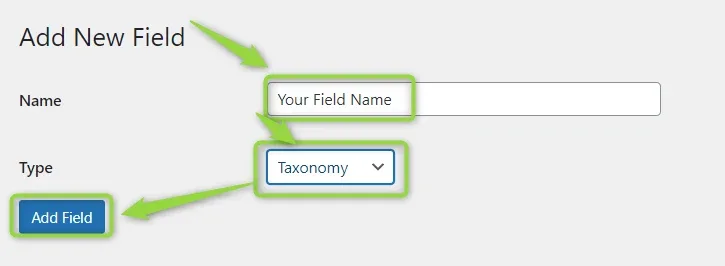
Enter your field name and set Type to Taxonomy. Only this field type can hold multiple values.
-
3
Edit the new field
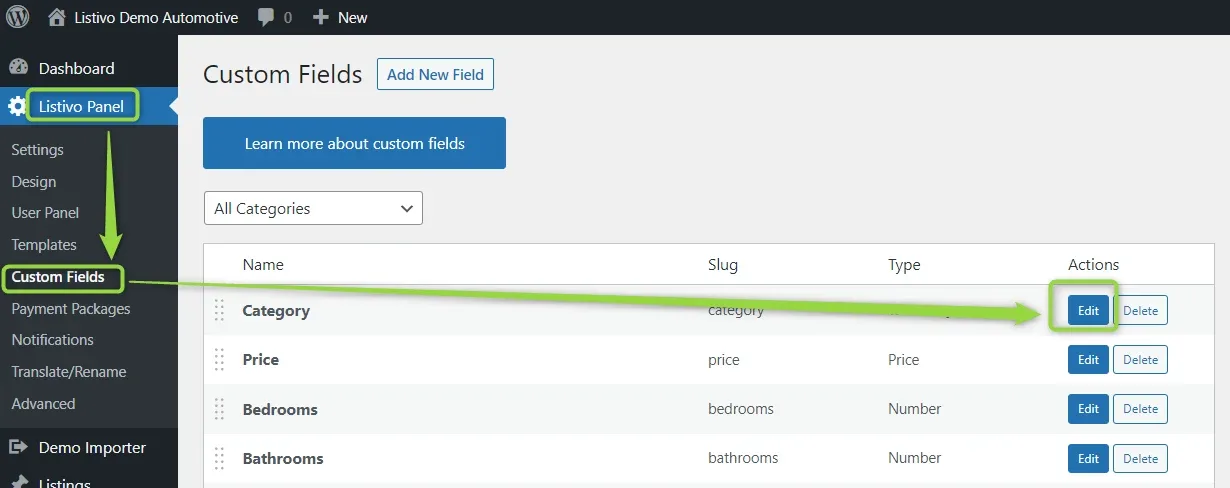
Find your new field in the custom fields list and click Edit.
-
4
Tick Allow Multiple Values
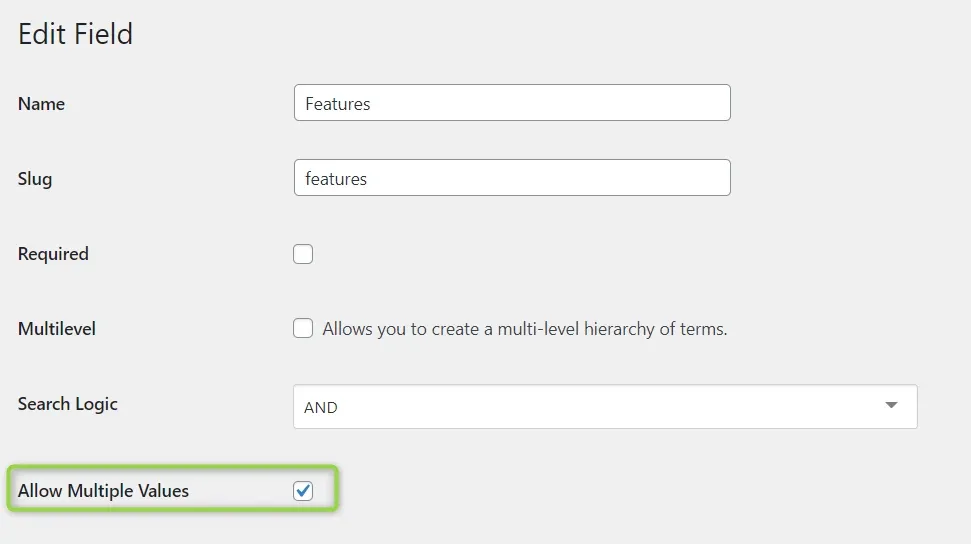
Mark the Allow Multiple Values checkbox and save. The field can now hold more than one value at a time. For a multilevel taxonomy it is always enabled.
On the add-listing form
When you add a new listing, you can then pick more than one feature.

When to leave it off
For fields like Car Make, multiple values are unsuitable — two makes on the same listing are confusing for customers.

With the checkbox clear, only one make can be chosen for the listing.

Keep reading
Ask the people who build MyHome
We answer by email from support@tangiblewp.com. With Premium Support, we also fix your site when something breaks.
We can also run your site for you, or build a new one.
Was this guide helpful?