WP All Export
Install the free WP All Export plugin and export your Listivo listings to an XML or CSV file, choosing exactly which fields end up in it.
1 minute read
You can use the WP All Export plugin to create XML / CSV files out of your listings. Listivo has an integration with the free version of this plugin.
Install the plugin
-
1
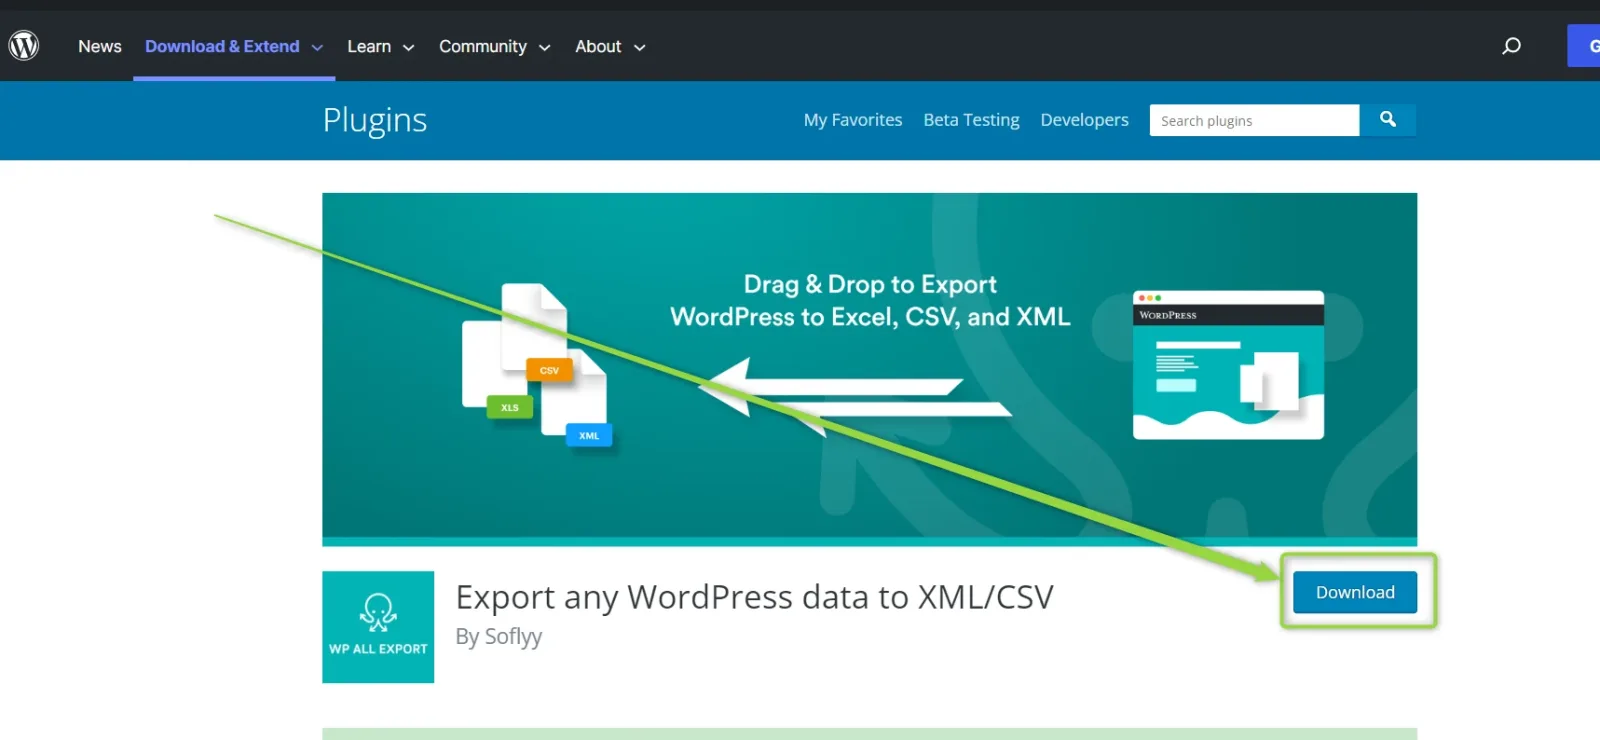
Download the plugin
Use this link to download it: wordpress.org/plugins/wp-all-export.
-
2
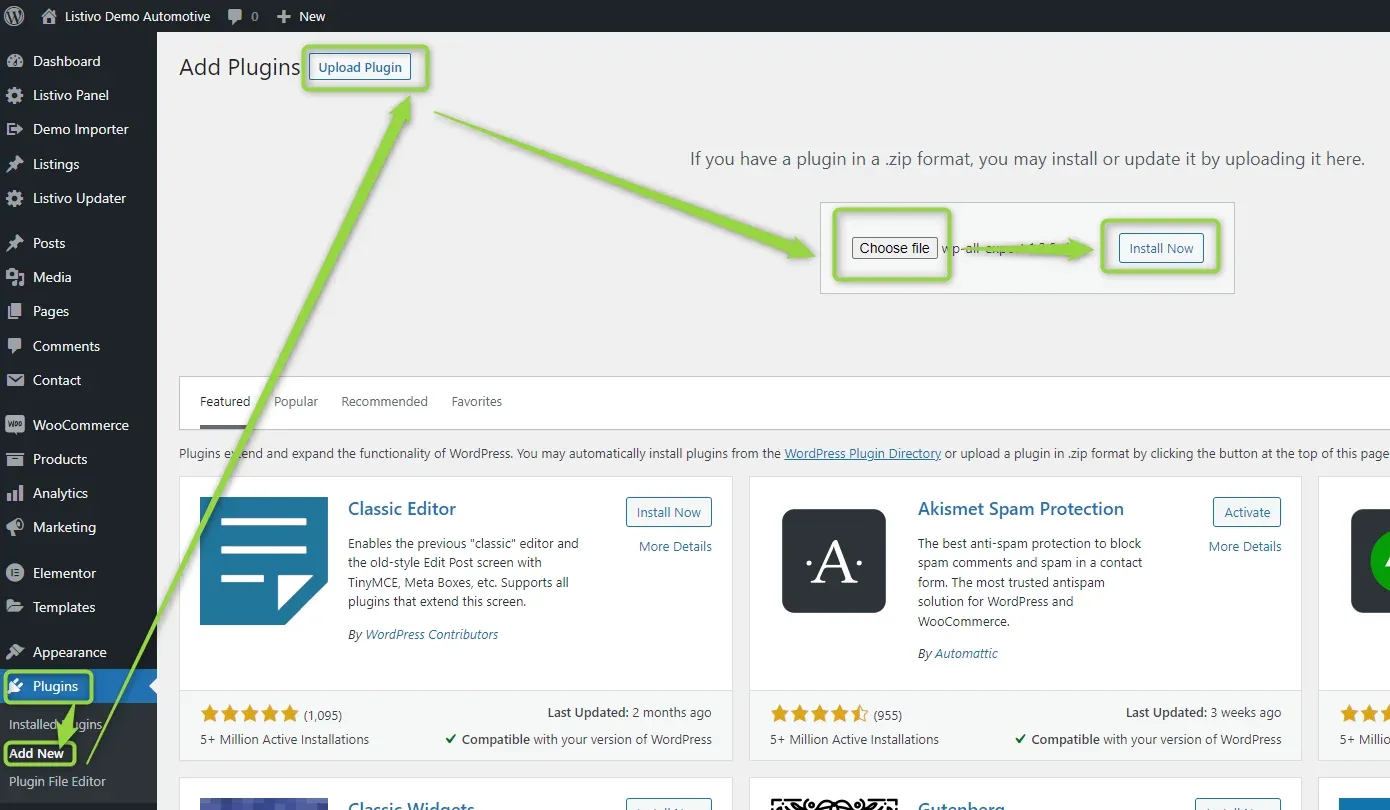
Upload and install it
Go to wp-admin > Plugins > Add New > Upload Plugin > Choose file, find the file you just downloaded, and click Install Now.
-
3
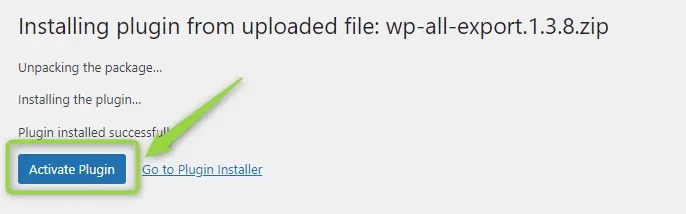
Activate it
Remember to activate the plugin once it is installed.
Export your listings
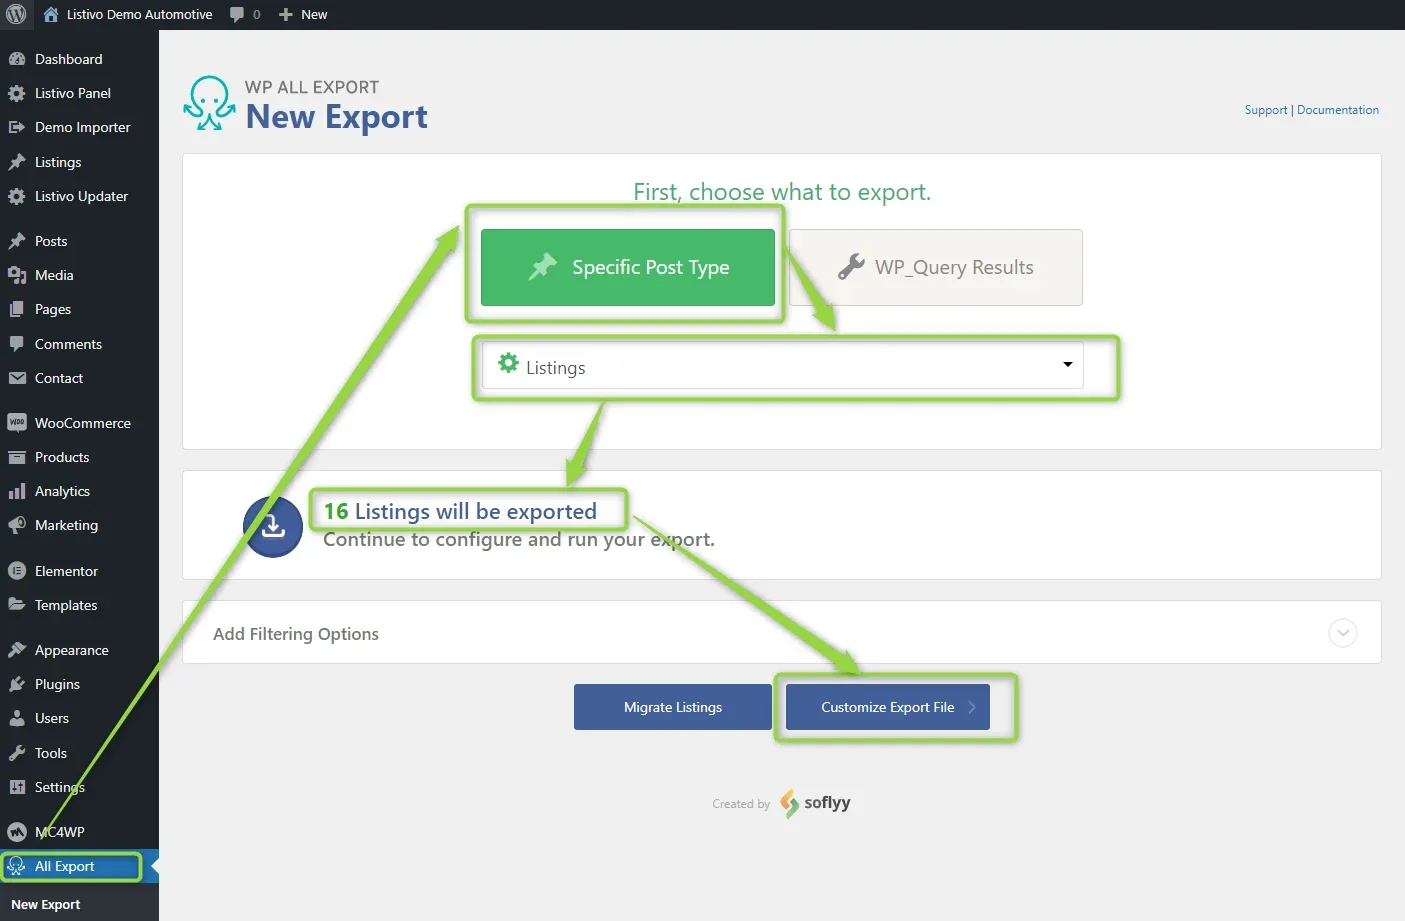
Now you can export the “Listings” as in the image below. Please consider it may also have another name than “Listing”, e.g. “Ads”, or any other name if you translated it via the Listivo Panel > Translate/Rename module.
-
1
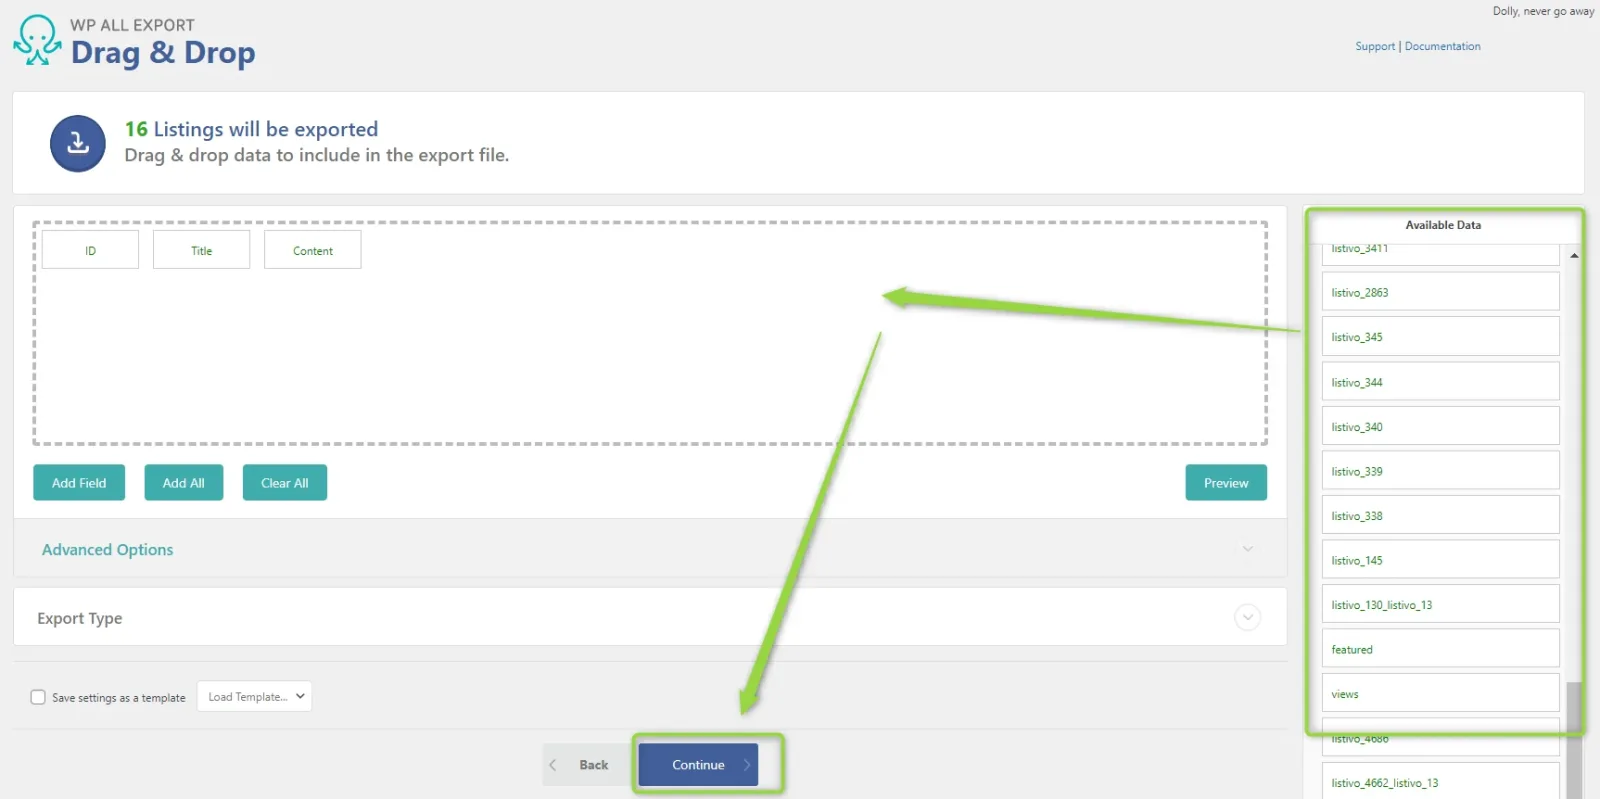
Choose the data for the file
Drag and drop the kind of data you need into the file. When you finish, click Continue.
-
2
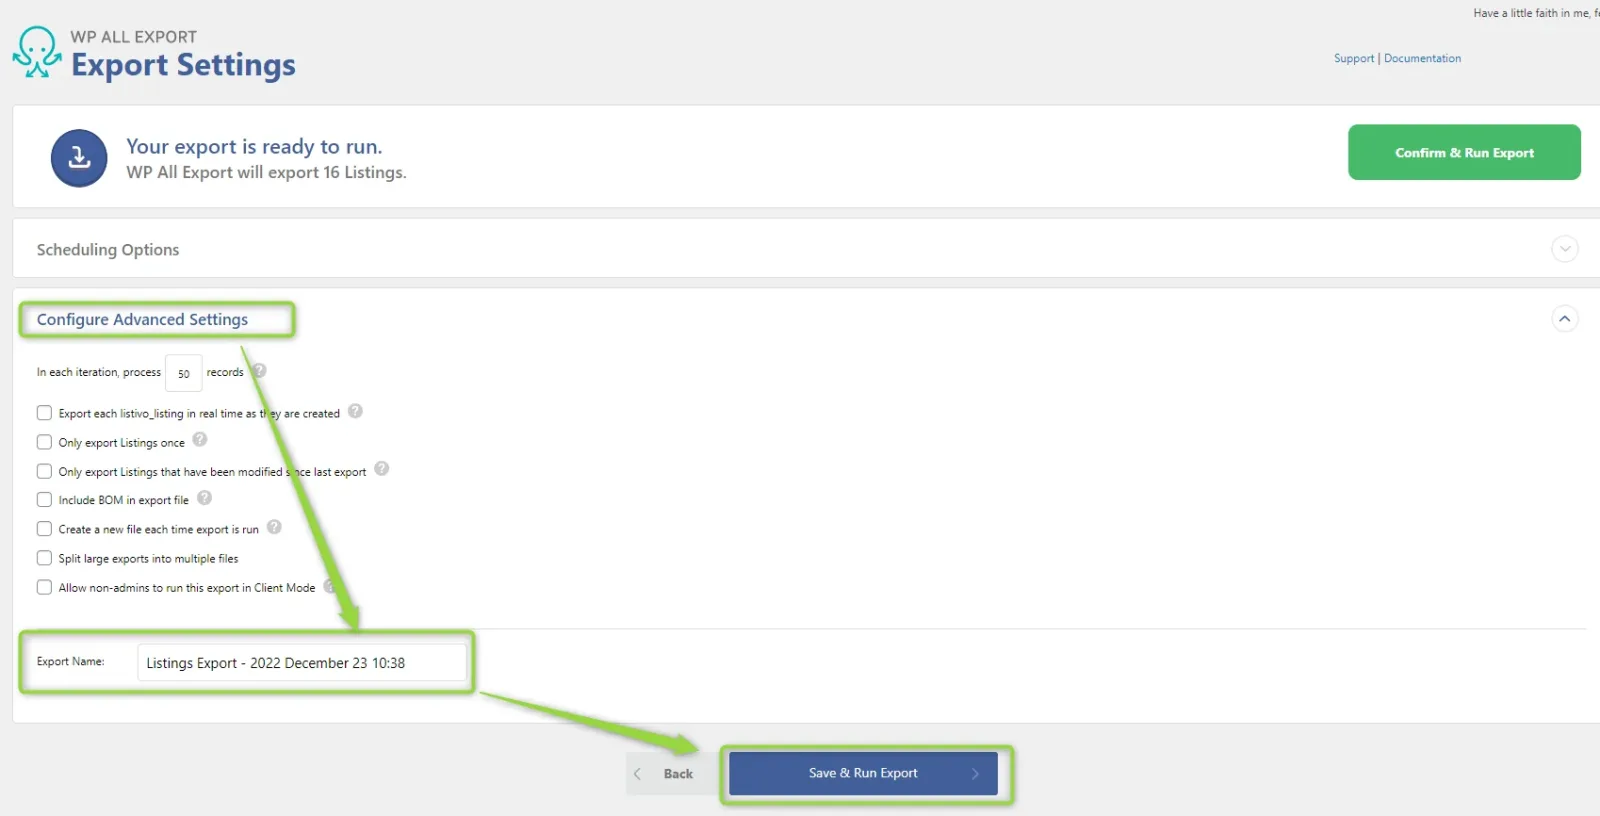
Name the export and run it
In the last step you can add advanced settings and name your export. When everything is set, click Save & Run Export.
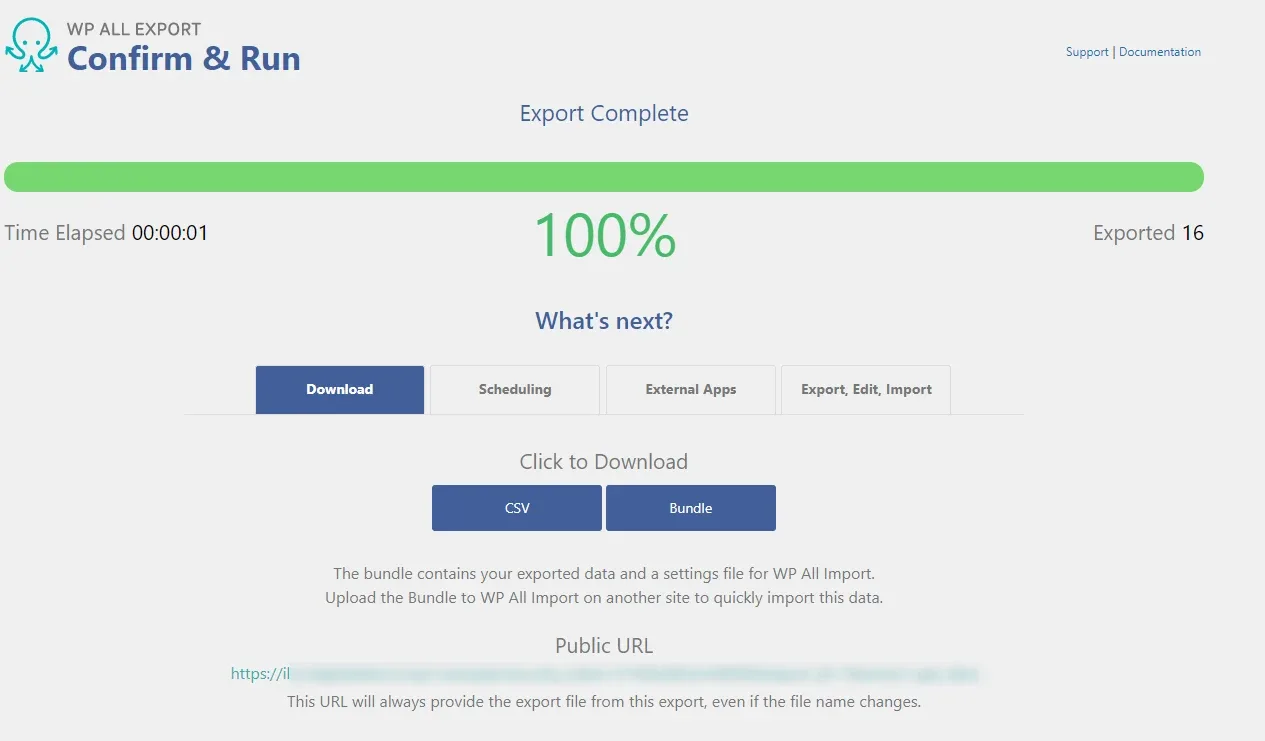
Congratulations, your database has been successfully exported.
Ask the people who build Listivo
We answer by email from support@tangiblewp.com. With Premium Support, we also fix your site when something breaks.
We can also run your site for you, or build a new one.
Was this guide helpful?