Renaming custom fields in Listivo
Rename any custom field in Listivo — and update its slug to match — from the Custom Fields list in the Listivo Panel.
1 minute read
This article will guide you through the process of renaming custom fields in Listivo. To rename a field, follow these steps:
-
1
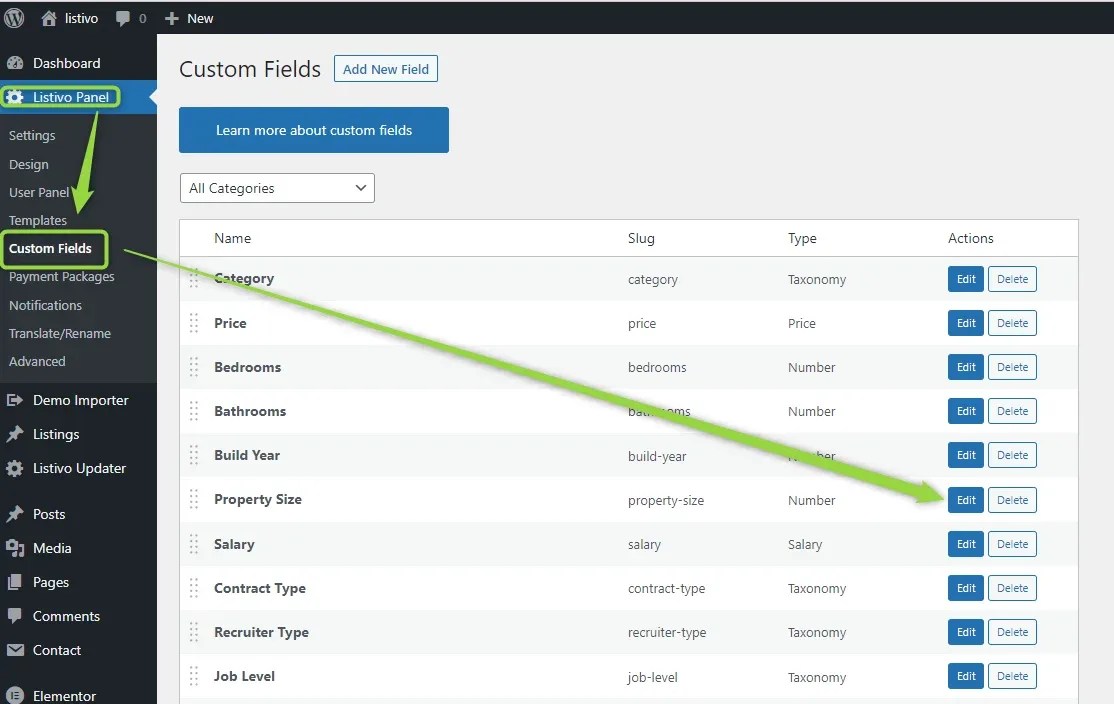
Open the Listivo Panel
Log in to your WordPress admin account and navigate to the Listivo Panel.
-
2
Edit the field
Click on "Custom Fields" to access the list of your custom fields. Locate the custom field you wish to rename and click the "Edit" button beside it.
-
3
Change the field name
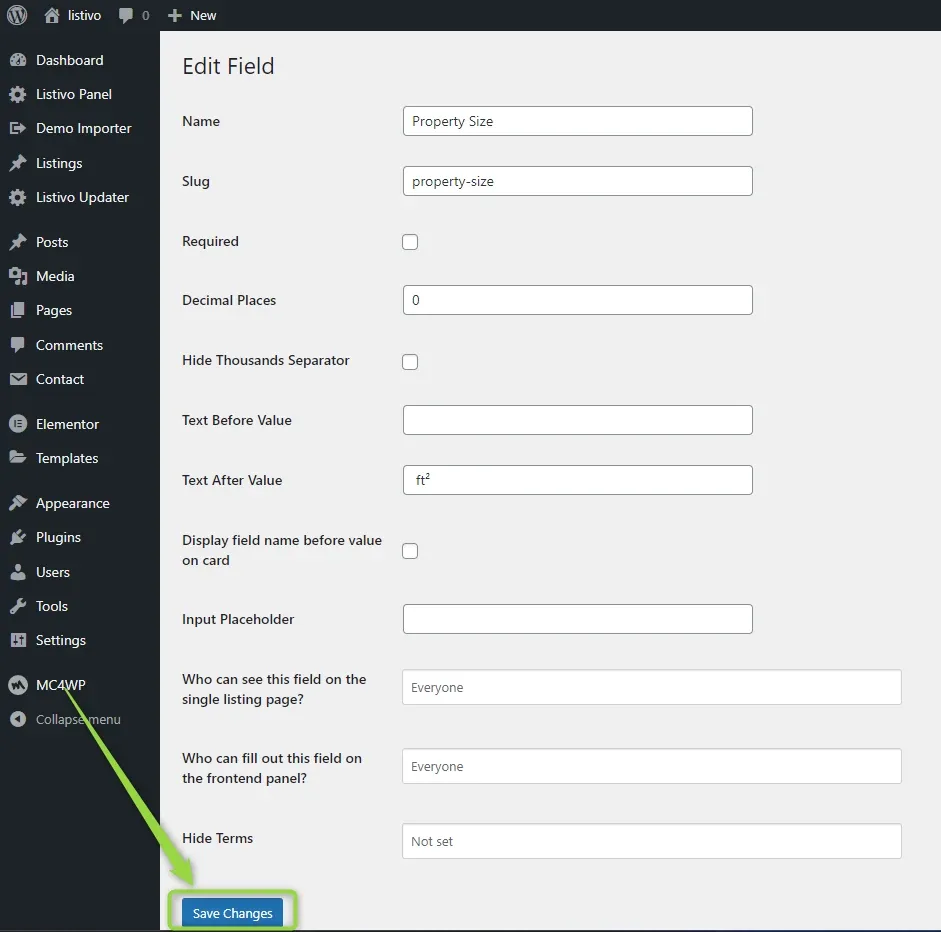
Now, you can change the field name as desired.
-
4
Update the slug
Don't forget to modify the slug as well.
-
5
Save your changes
Once you've made the necessary changes, click "Save Changes" to apply them.
Ask the people who build Listivo
We answer by email from support@tangiblewp.com. With Premium Support, we also fix your site when something breaks.
We can also run your site for you, or build a new one.
Was this guide helpful?