Customizing Texts in Contact Form 7
Every word on the Listivo contact form — the labels, the placeholders, the email that reaches you and the messages the visitor sees — is stored in Contact Form 7. This article shows you where each of them lives.
2 minute read
Listivo uses Contact Form 7 (https://pl.wordpress.org/plugins/contact-form-7/), the most popular plugin for contact forms.
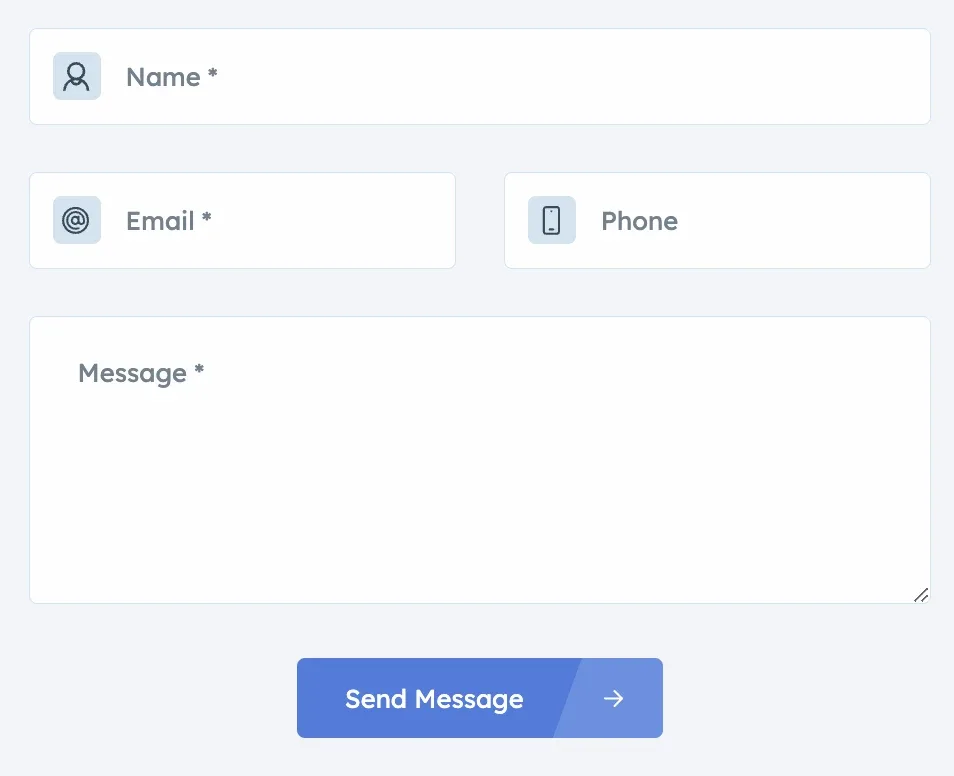
We chose this plugin because it is very stable and has many great add-ons that can be beneficial, such as plugins to save emails in WordPress or integrations with external systems. Because of this, all texts you see on the contact form and its notifications are managed by this plugin. You can access and edit these texts by following these steps:
-
1
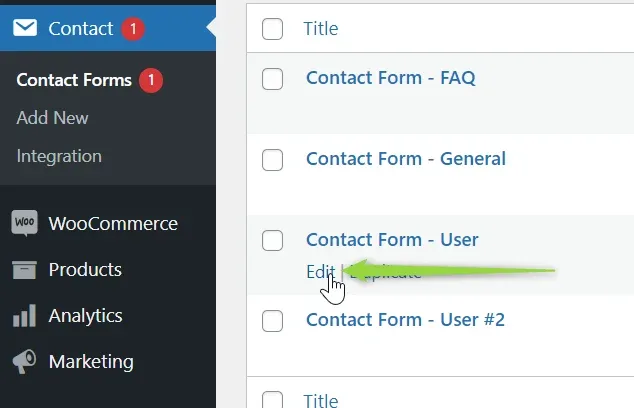
Open the contact form
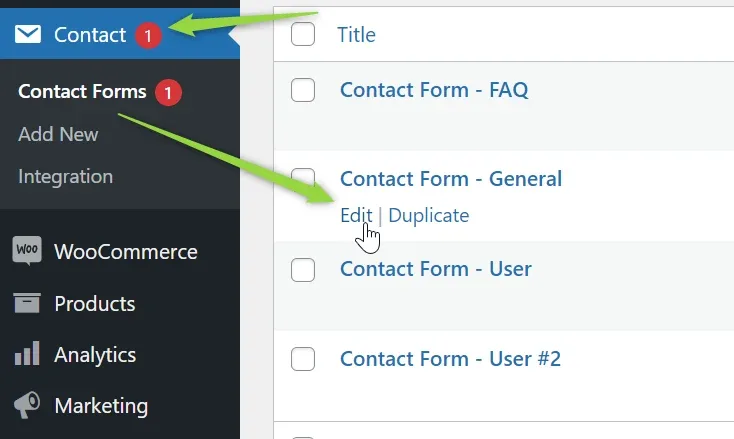
Edit the contact form you want to modify via wp-admin > Contact Forms and click Edit — for example, on "Contact Form - General", which is used on the contact page.
-
2
Open the form editor
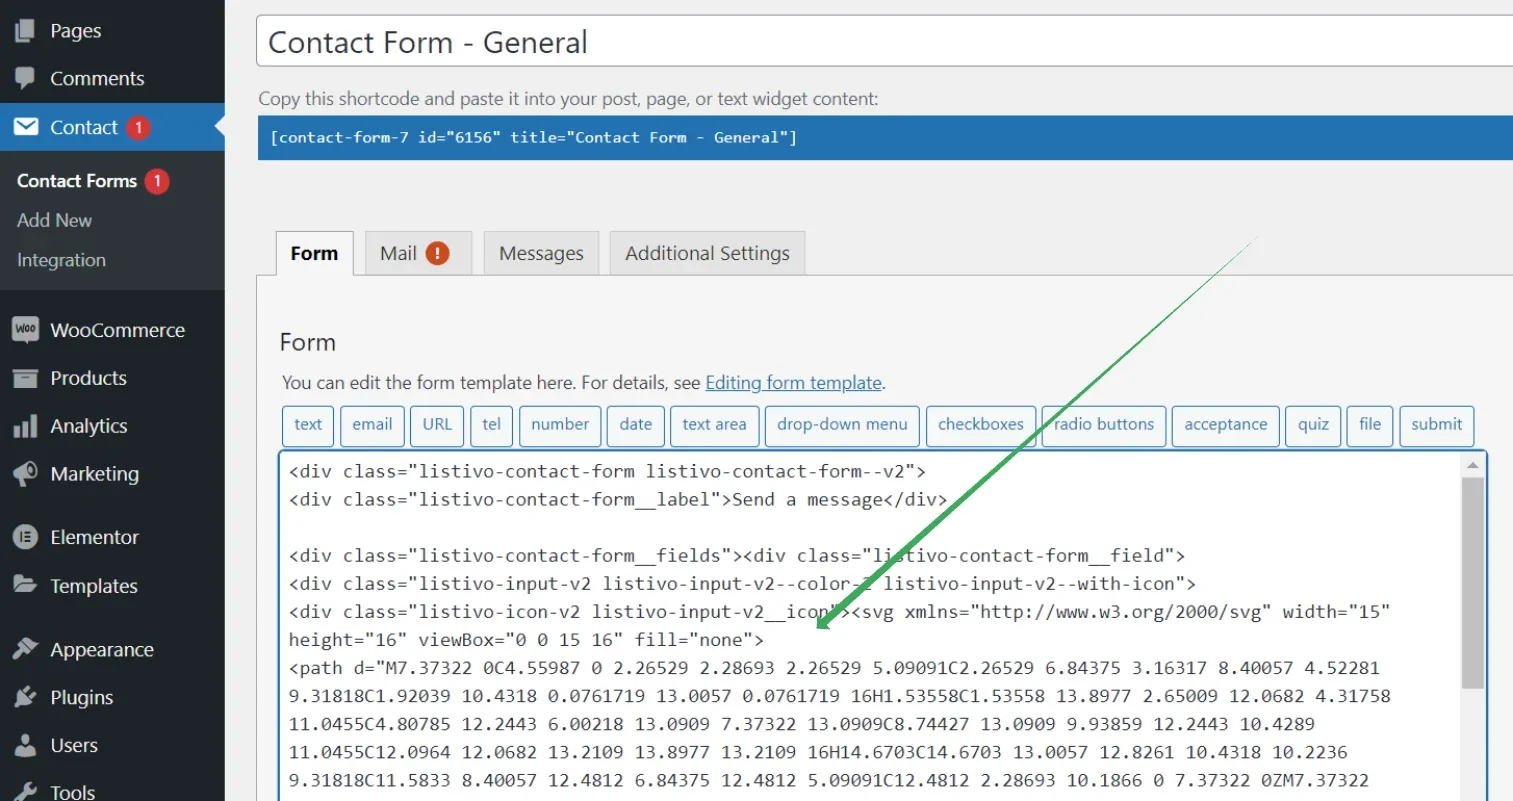
You will see an editor like this.
Find the texts in the form editor
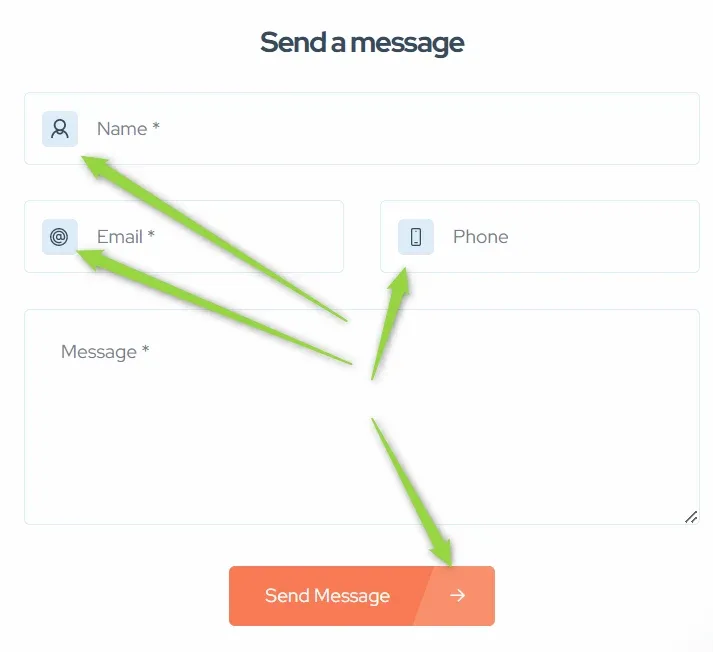
Locate the texts you want to edit by using Ctrl + F
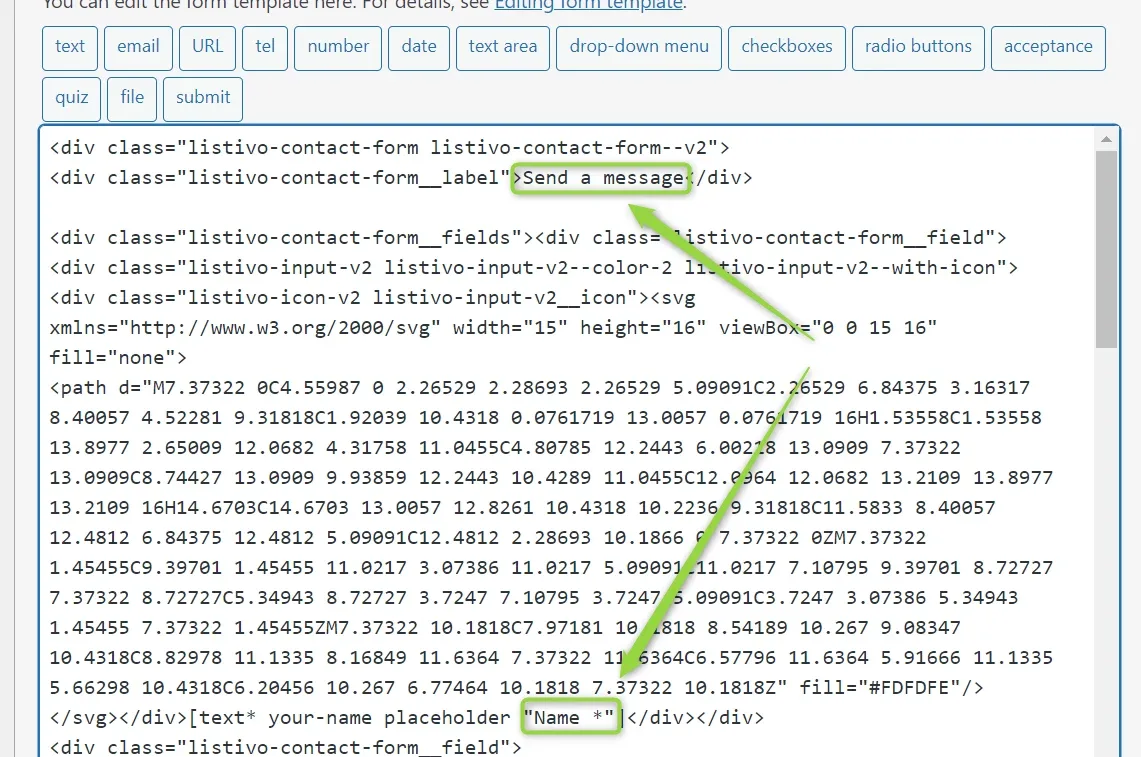
or by scrolling:
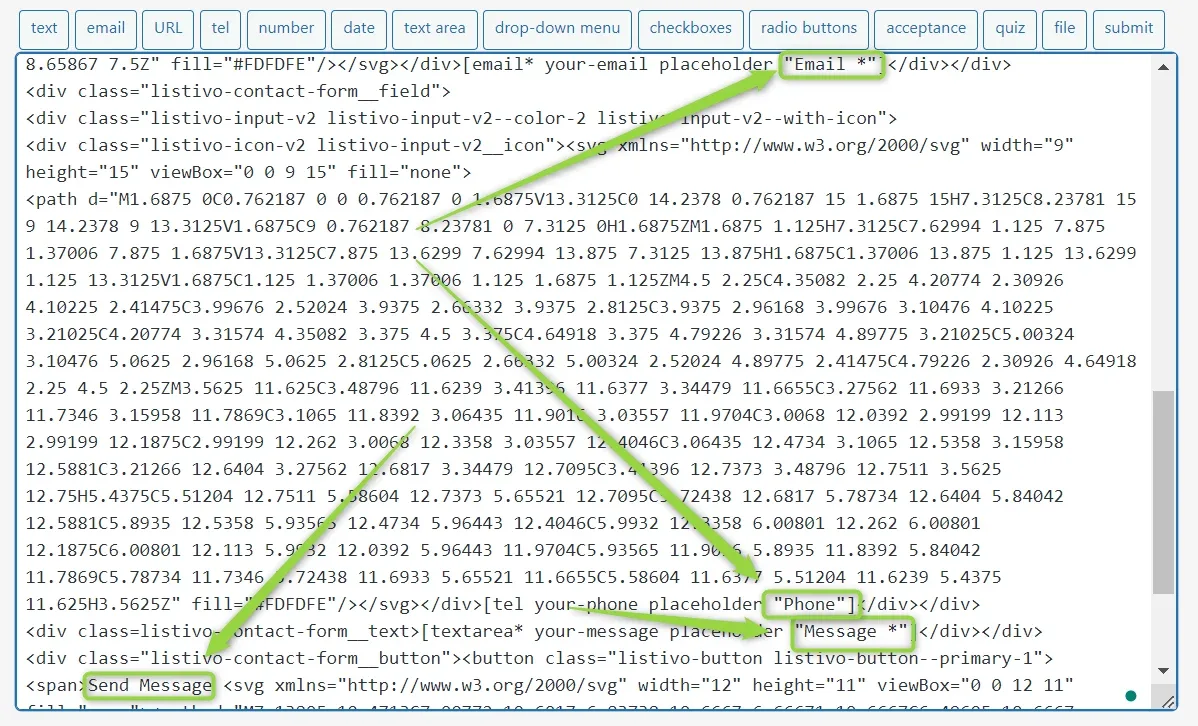
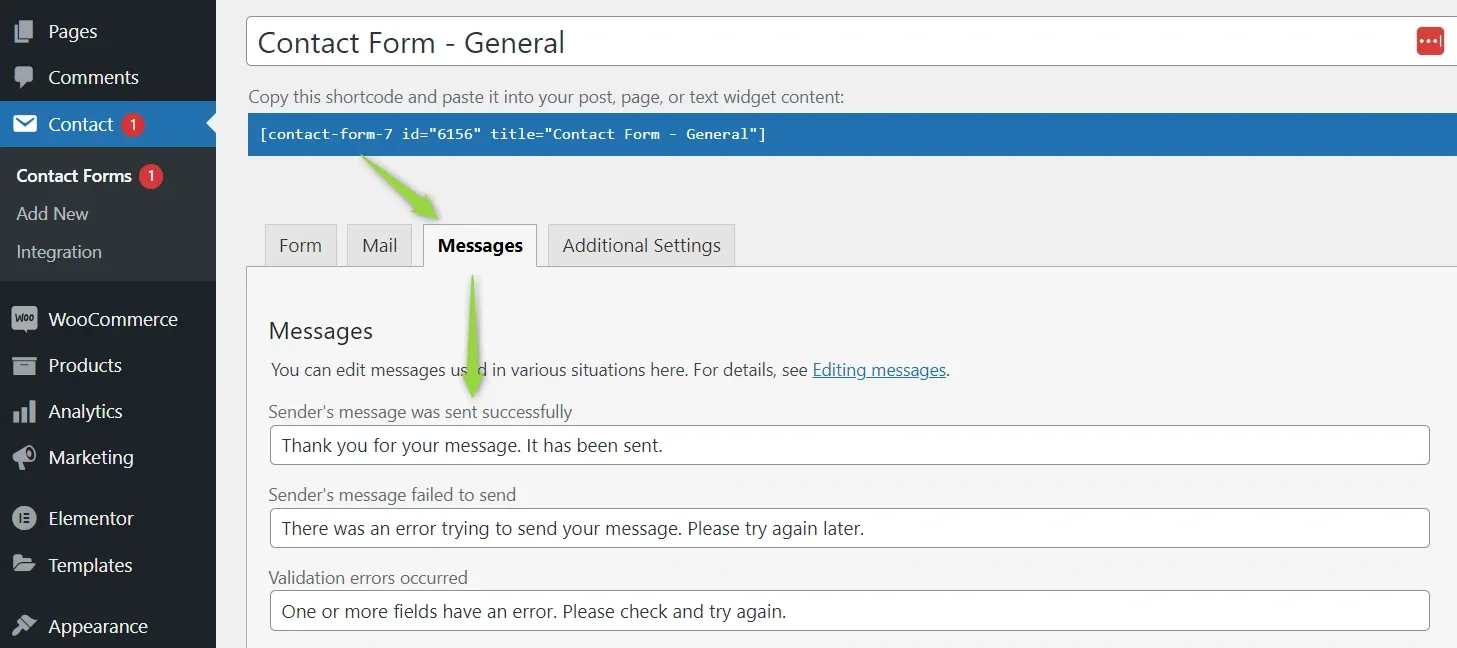
Edit the email and the messages
Next, you can modify the email structure on the Mail tab
![The Mail tab of Contact Form 7 with the To, From, Subject, Additional headers and Message body fields, built from mail-tags such as [your-name] and [your-email].](https://assets.tangiblewp.com/media/129/conversions/01KZXBH7N1WH69PR03RG1R6FAY-display-1024.webp)
and messages:
Ask the people who build Listivo
We answer by email from support@tangiblewp.com. With Premium Support, we also fix your site when something breaks.
We can also run your site for you, or build a new one.
Was this guide helpful?