Customizing footer logo, description, color and copyright information
Open the Listivo footer in Elementor and change the parts you care about — logo, description, colours, copyright line — by selecting an element on the page and editing its settings.
1 minute read
In the Listivo theme you use Elementor to customize your website, footer included.
-
1
Open the layout in Elementor
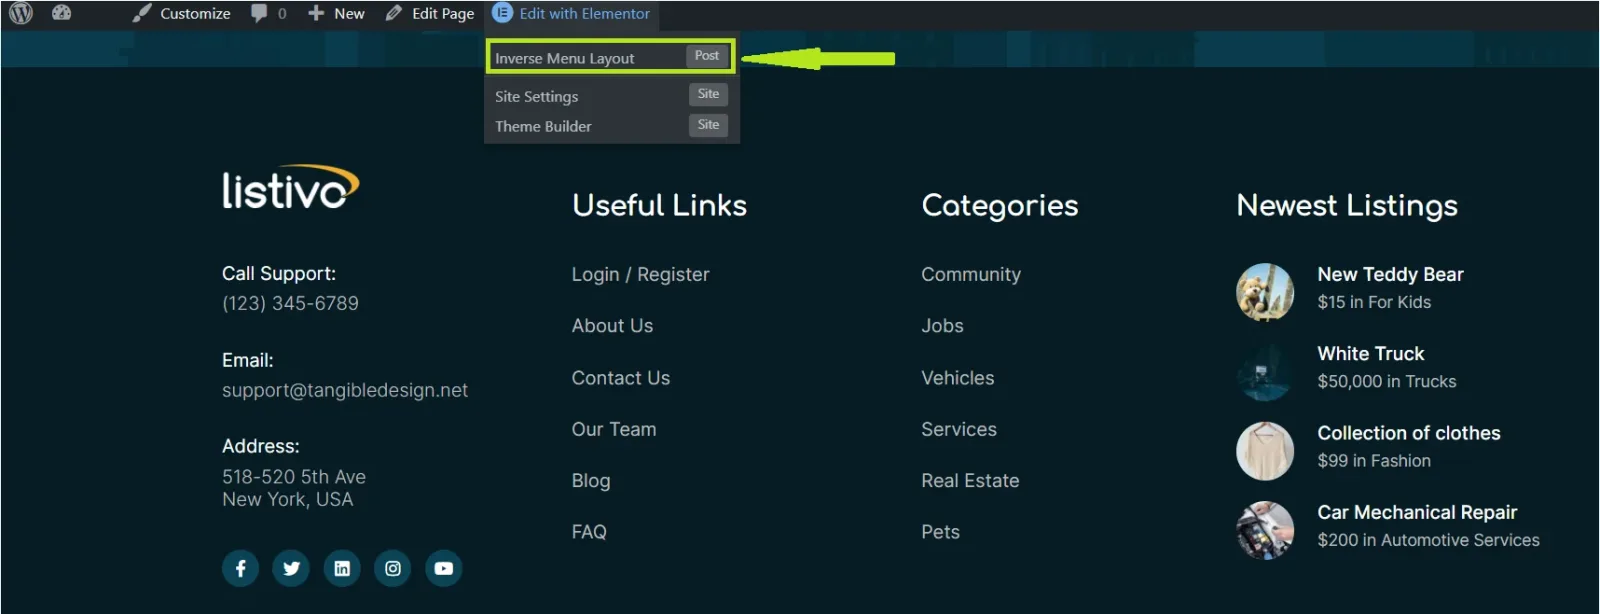
Log in to your WordPress admin panel and open your website. In the top bar, choose Edit with Elementor and then Inverse Menu Layout, as below.
-
2
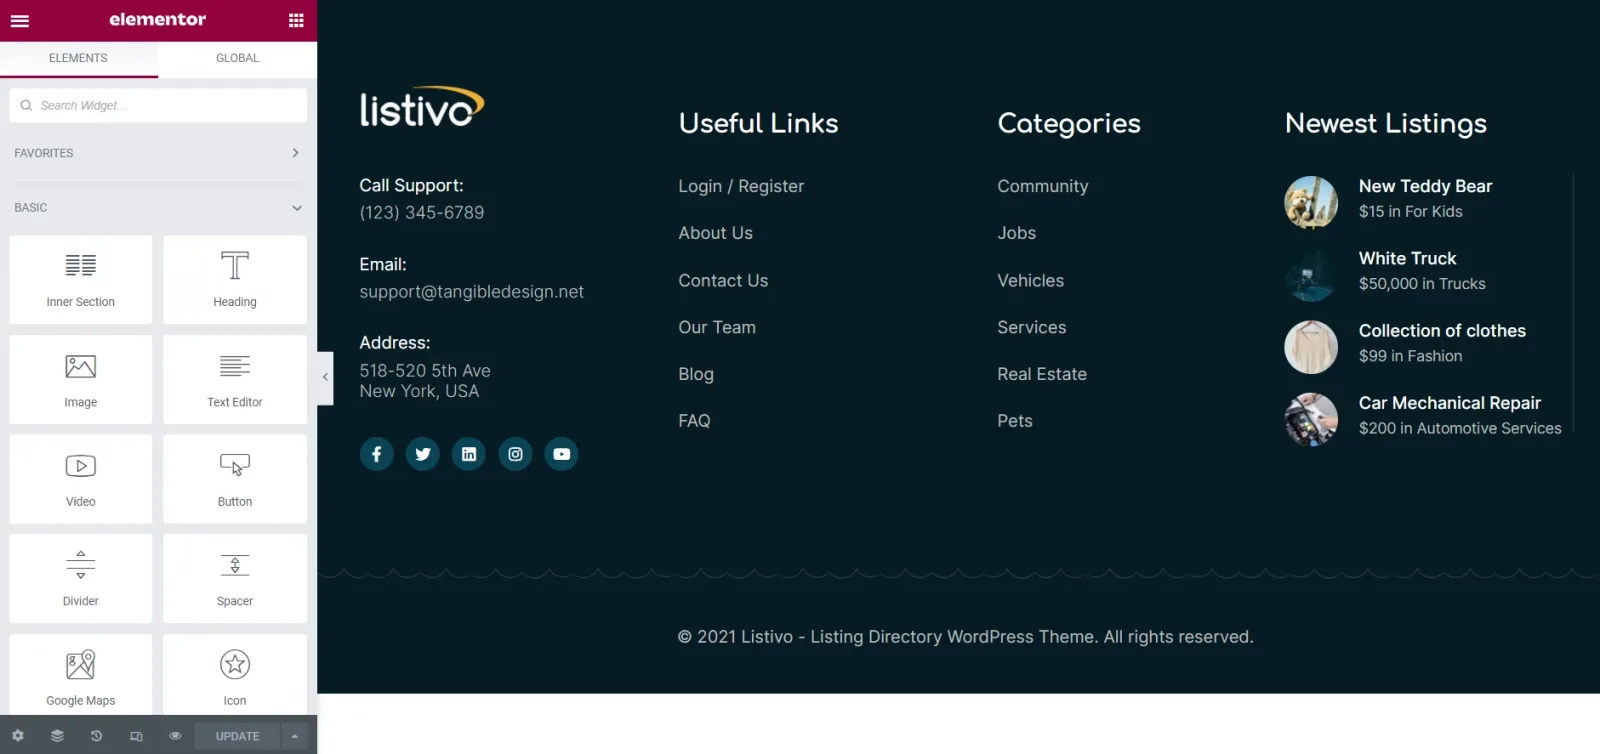
Switch to edit mode
Your website is now in edit mode, and you can change the settings according to your needs.
-
3
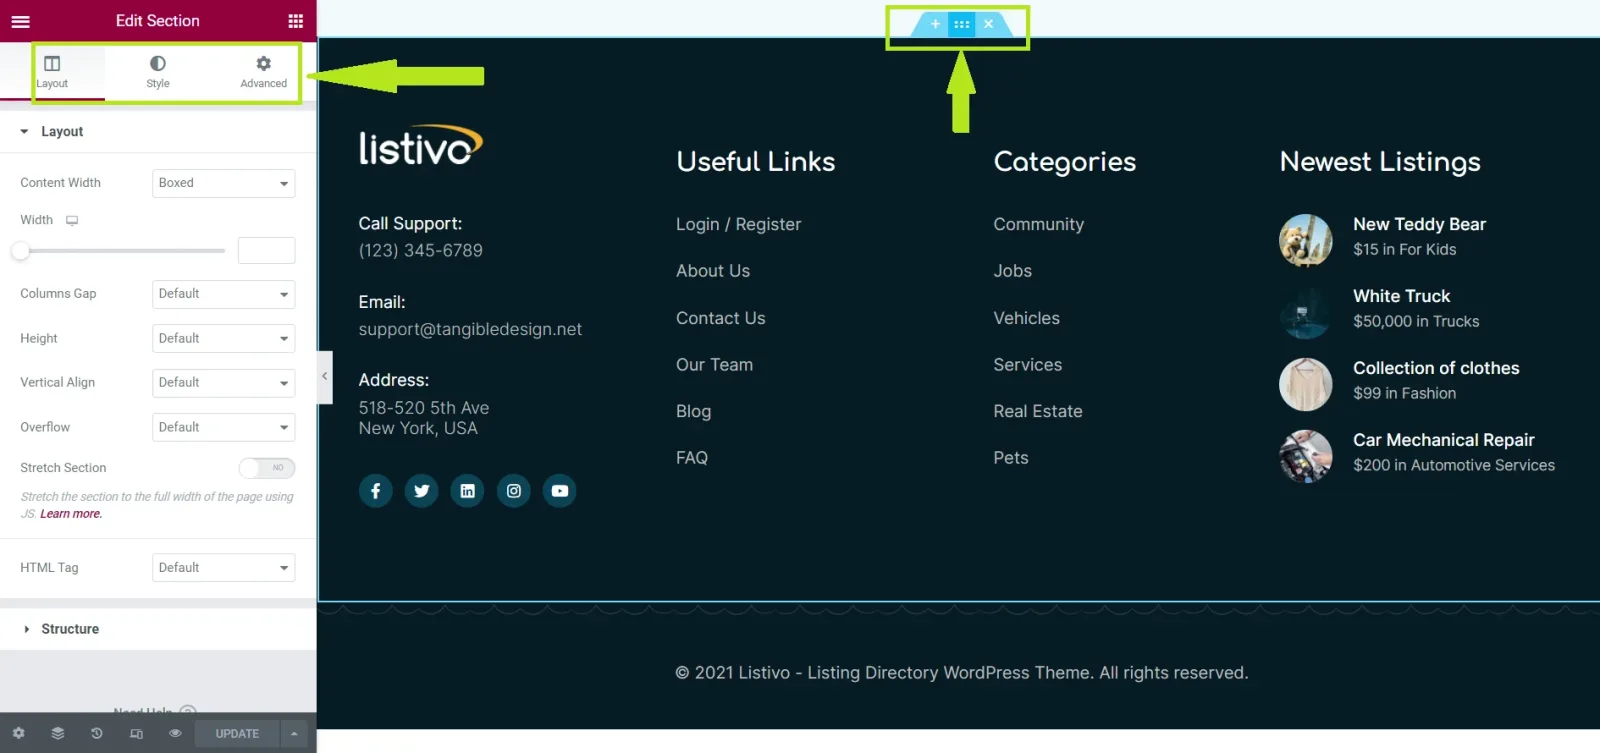
Select the element you want to change
Select the item you want to change, then set the appropriate parameters in the menu on the left.
-
4
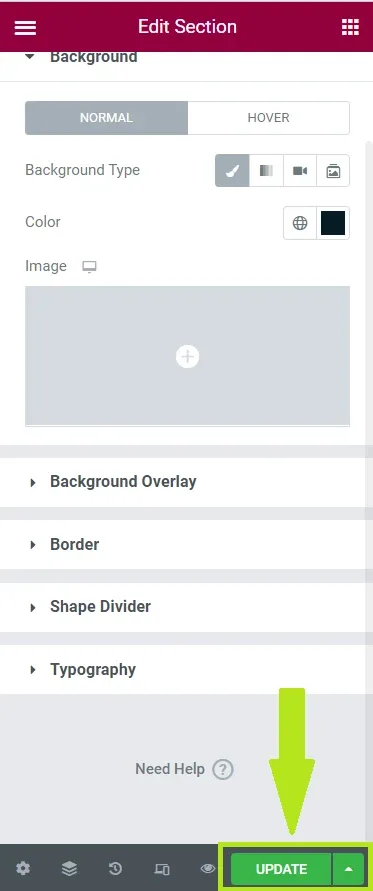
Update the page
After finishing your work, select Update at the bottom of the panel and it's ready.
Keep reading
Ask the people who build Listivo
We answer by email from support@tangiblewp.com. With Premium Support, we also fix your site when something breaks.
We can also run your site for you, or build a new one.
Was this guide helpful?