Menu Configuration
Menu work in MyHome happens in two places: the look of the navigation bar is set on the Menu widget in Elementor, and the links themselves are built with WordPress's own menu screen. This article shows where each one lives.
1 minute read
MyHome offers a variety of flexible menu options, making it easy to customize your site's navigation. You can adjust colours, typography and logo size, as well as enable a sticky menu and configure a call-to-action (CTA) button.
1. Editing the Menu widget in Elementor
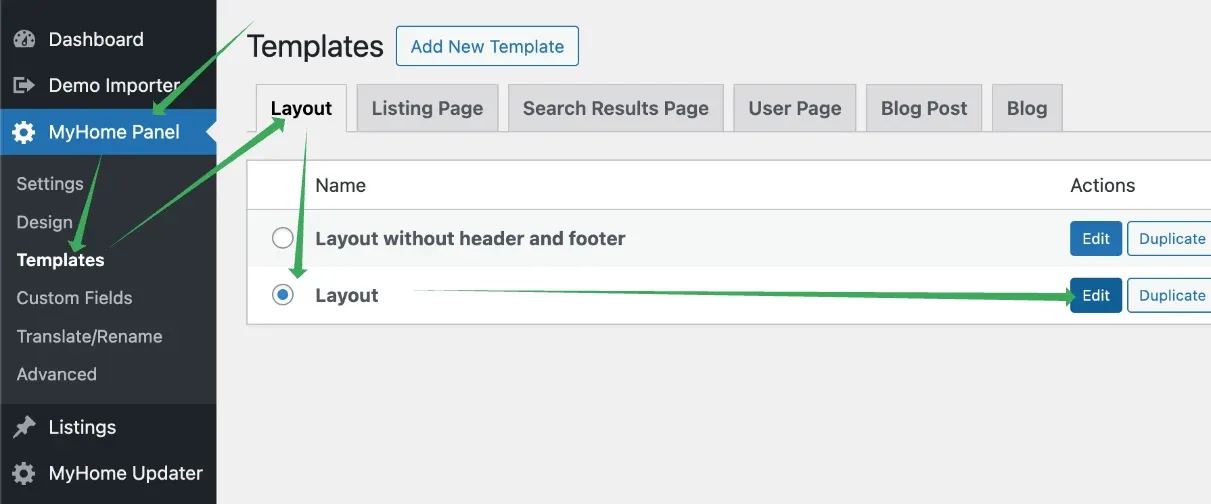
Go to MyHome Panel → Templates → Layout and edit the layout.
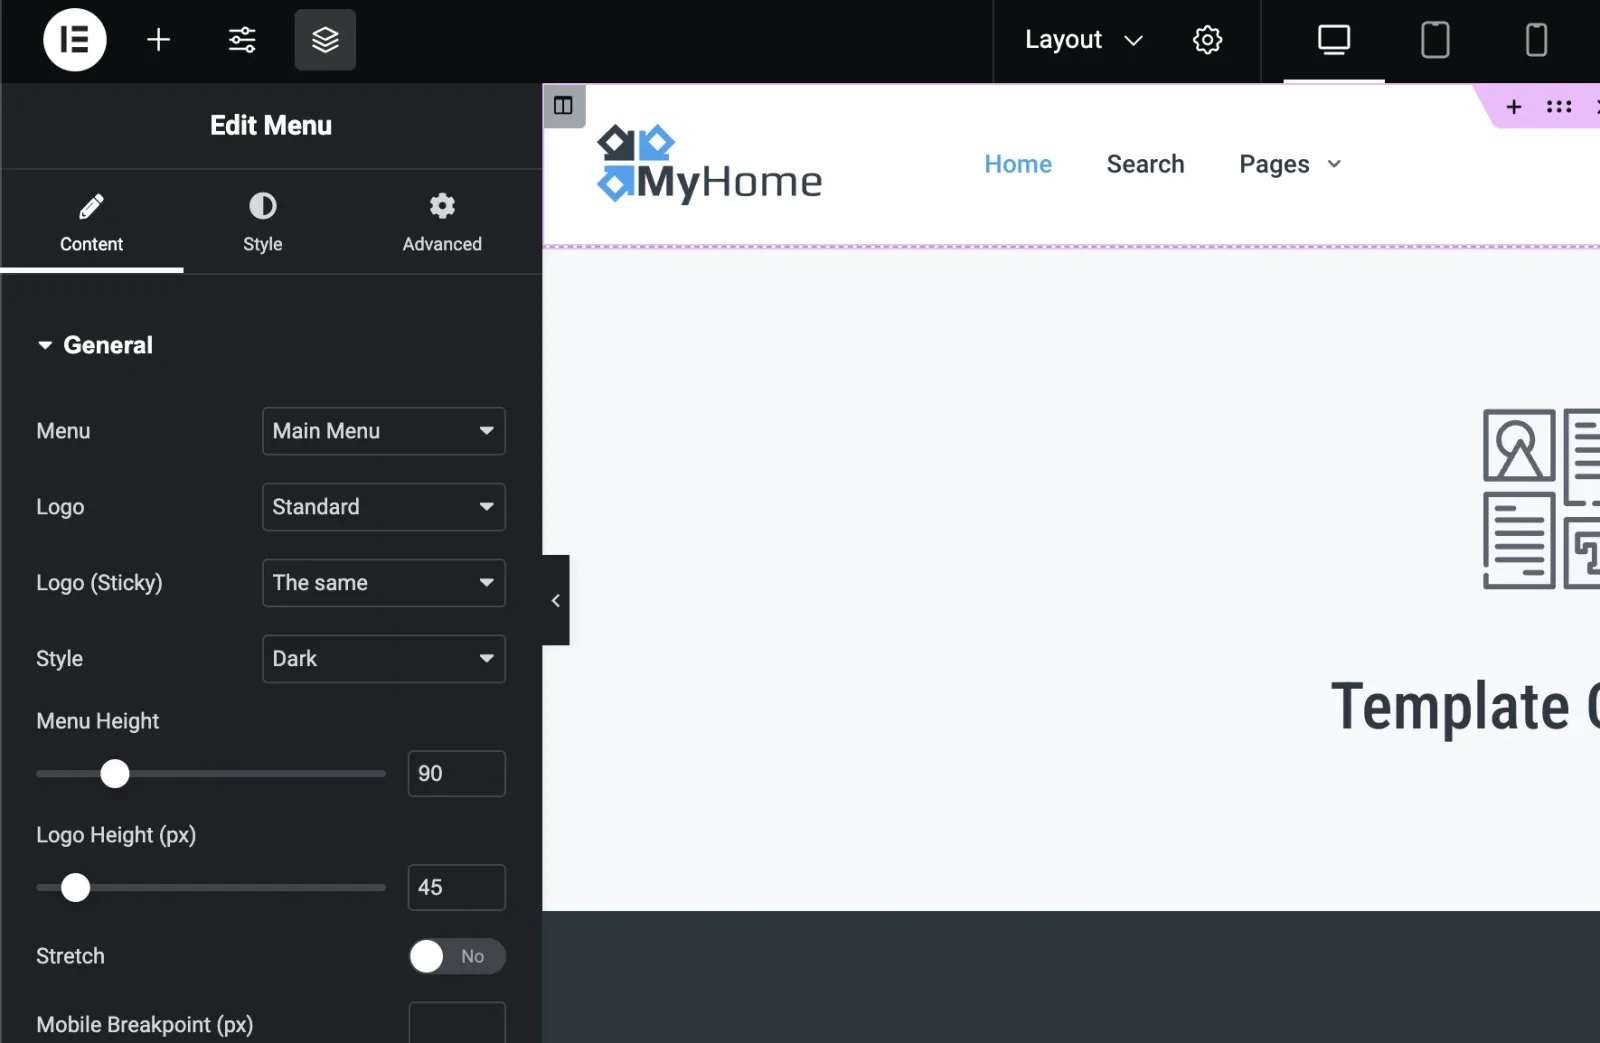
Edit the Menu widget to reach its options.
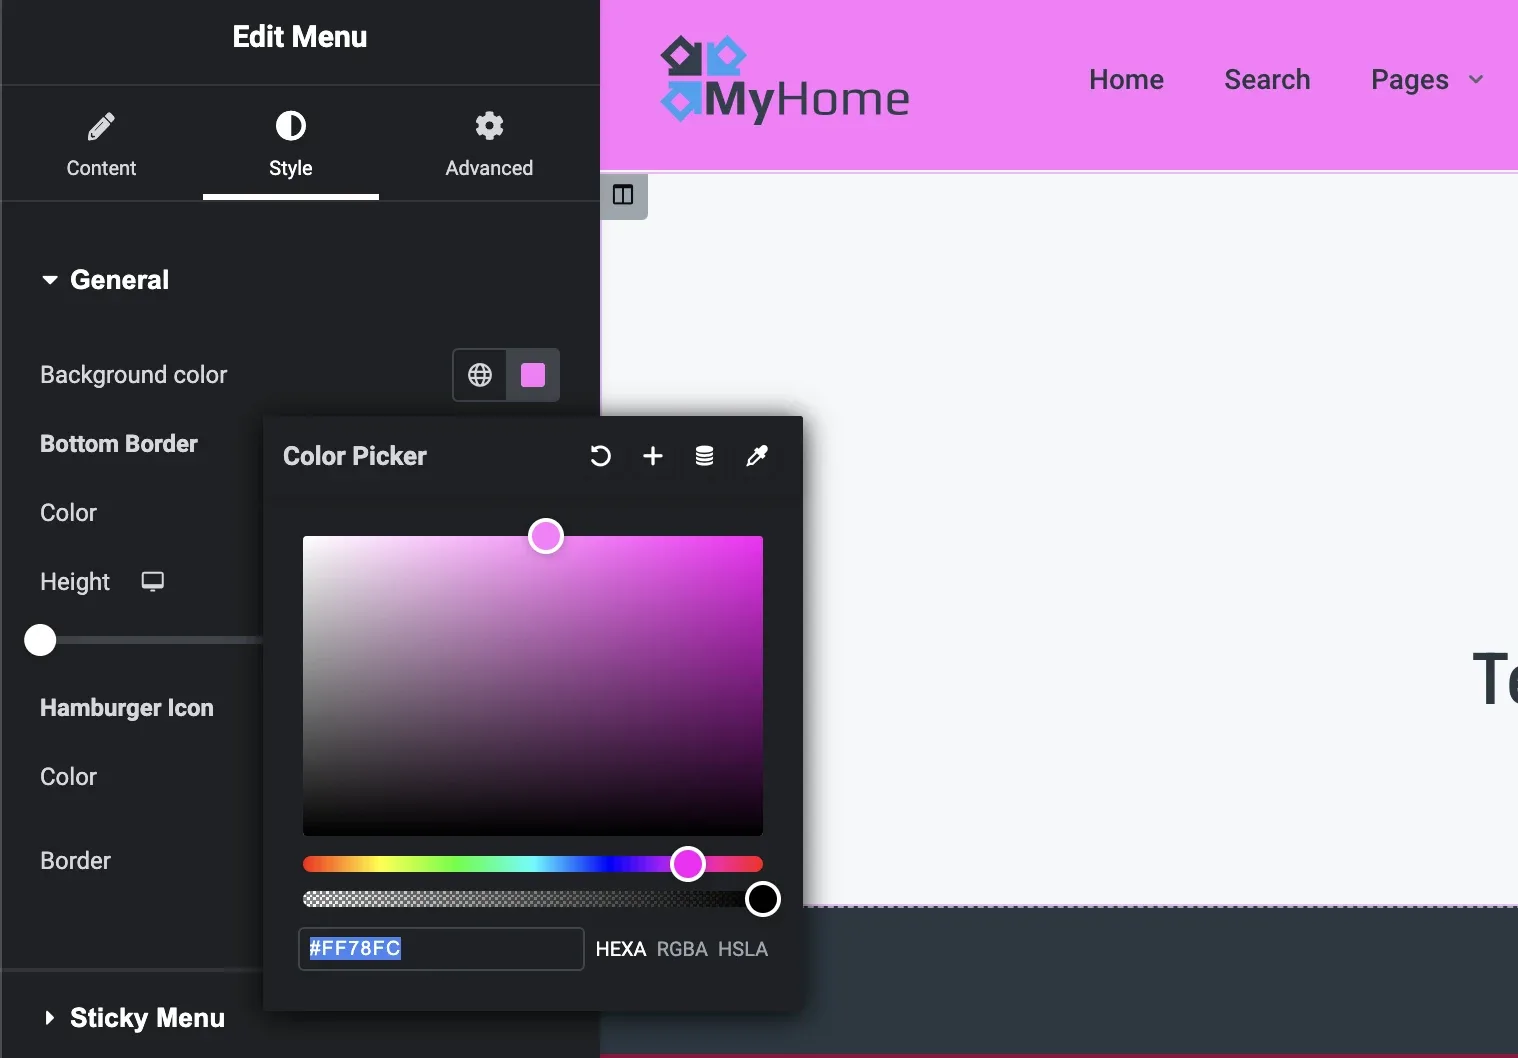
In the Style tab you can customize colours and typography.
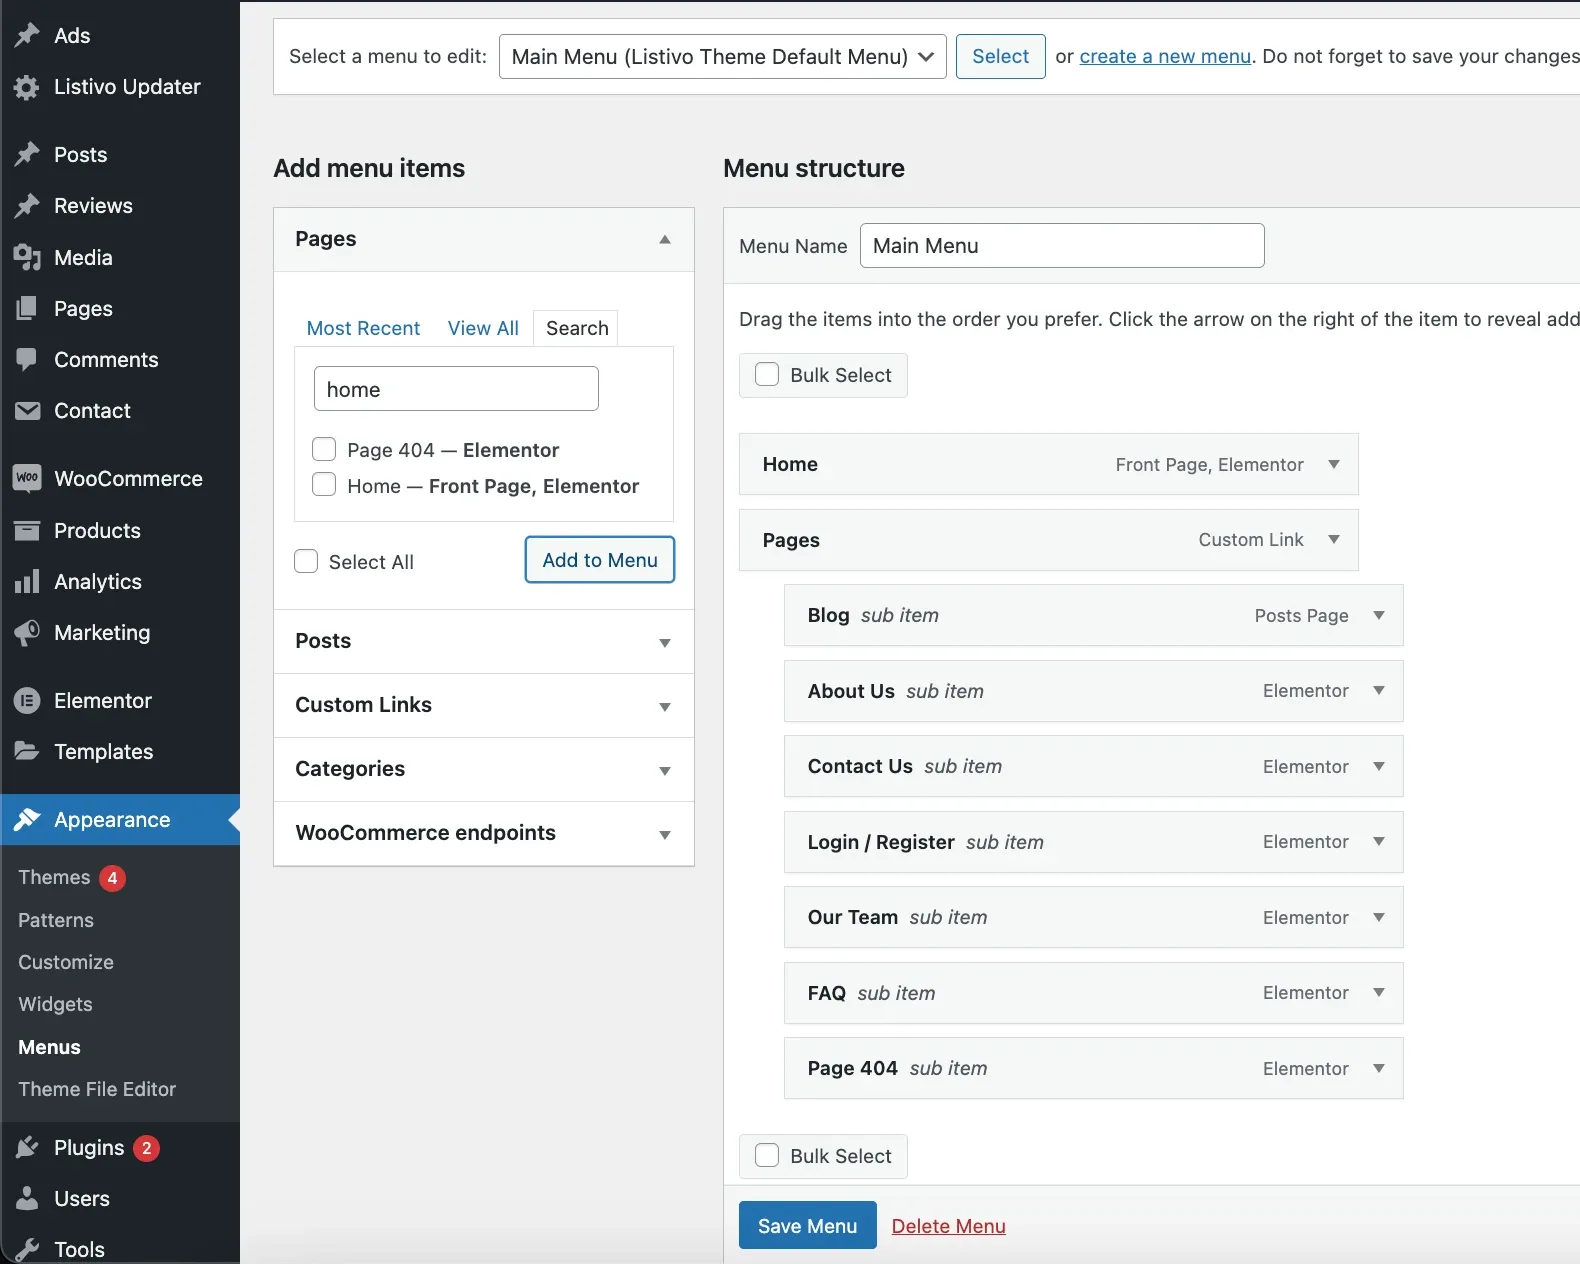
2. Building the link structure in Appearance → Menus
This is the default WordPress module for managing menus. Here you can add, edit, remove and reorder links to build your menu structure. It lives under Appearance → Menus because it is part of the WordPress core — as theme developers we do not duplicate functions WordPress already provides.
Keep reading
Ask the people who build MyHome
We answer by email from support@tangiblewp.com. With Premium Support, we also fix your site when something breaks.
We can also run your site for you, or build a new one.
Was this guide helpful?