Getting Started with IDX/MLS Using IDX Plugin and IDX Broker
Connect your MyHome site to IDX Broker and IDX Plugin so visitors can search and browse live MLS listings without leaving your website — and so IDX pages and widgets match your own design.
3 minute read
What is IDX / MLS Integration?
In the United States, Canada, Mexico, Jamaica, and the Bahamas, real estate agents share property listings through MLS (Multiple Listing Service) databases. IDX (Internet Data Exchange) is a system that allows you to display these MLS listings directly on your website.
MyHome 4.2 lets you connect your site to this ecosystem through IDX Broker and IDX Plugin, so your visitors can search and browse live MLS listings without leaving your website.
Live Demos: Modern Demo | Luxury Demo
What you need
- IDX Broker account (paid) — a third-party service that connects to your local MLS, hosts property search and detail pages, and captures visitor leads (names, emails, phone numbers, saved searches). All listing data and leads are managed by IDX Broker, not stored in WordPress. Don't have an account yet? Sign up here — the $100 setup fee is waived for MyHome users.
- IDX Plugin account (free Partnership Plan) — provides additional page templates and search widgets for your IDX Broker account. You can create a free account and explore the available widgets right away. To unlock the page templates, connect your IDX Broker account and opt in to their free developer partnership; once that is done, the additional templates appear in your IDX Broker account automatically.
Connecting MyHome to IDX Plugin
-
1
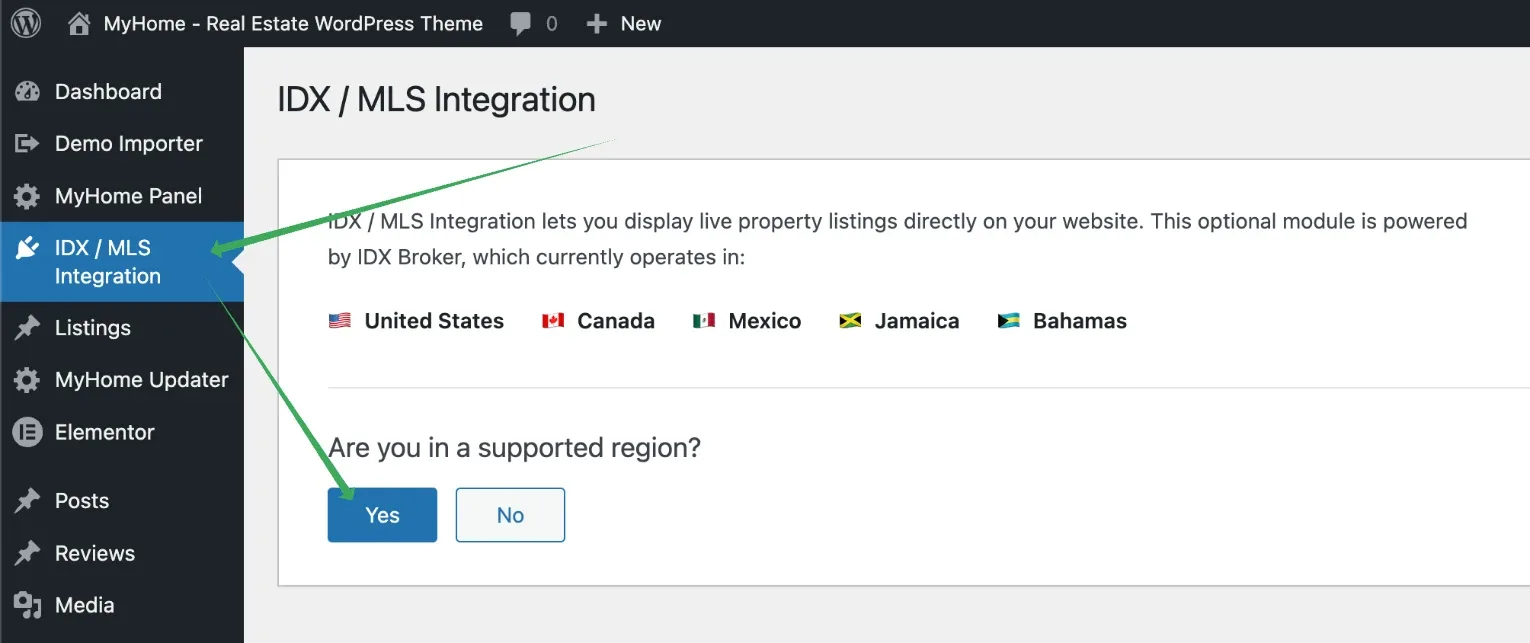
Open IDX / MLS Integration
Go to IDX / MLS Integration in your WordPress admin. On first visit, confirm you are in a supported region — a one-time check.
-
2
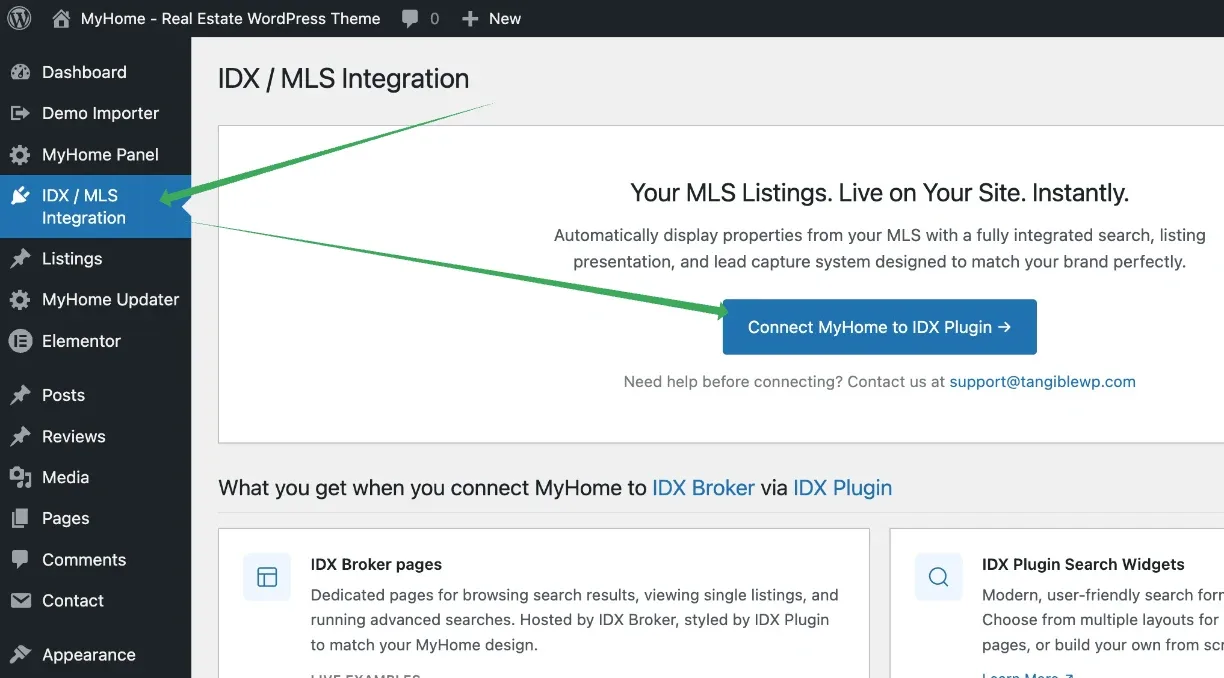
Connect MyHome to IDX Plugin
Click Connect MyHome to IDX Plugin. You will be redirected to idxplugin.com.
-
3
Finish the connection on idxplugin.com
What happens next depends on whether your IDX Broker API key is already added to your IDX Plugin account.
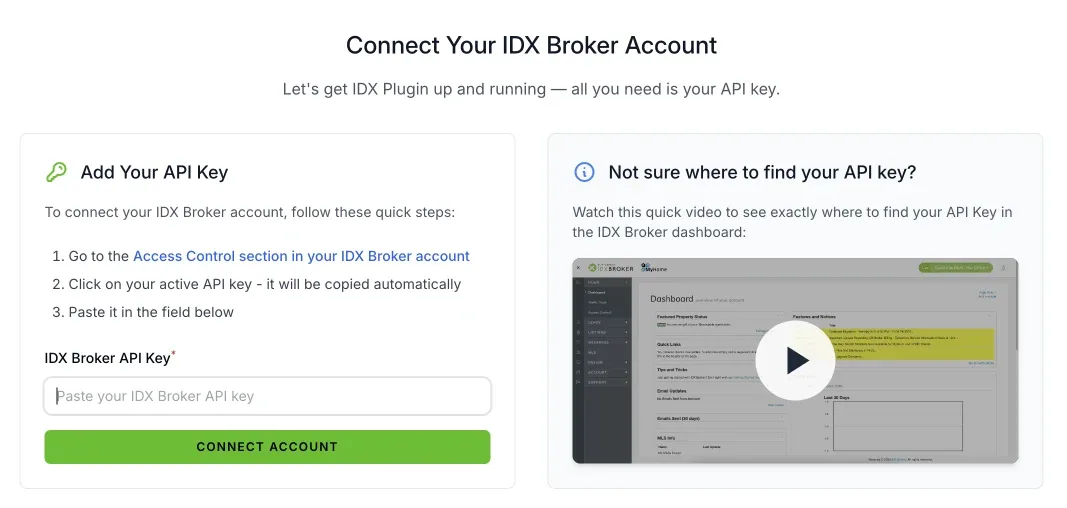
IDX Broker API key not added yet: you will be asked to enter your IDX Broker API key. Follow the on-screen instructions to find it in your IDX Broker account.
IDX Broker API key already added: you will see a confirmation screen. Click Confirm Connection.
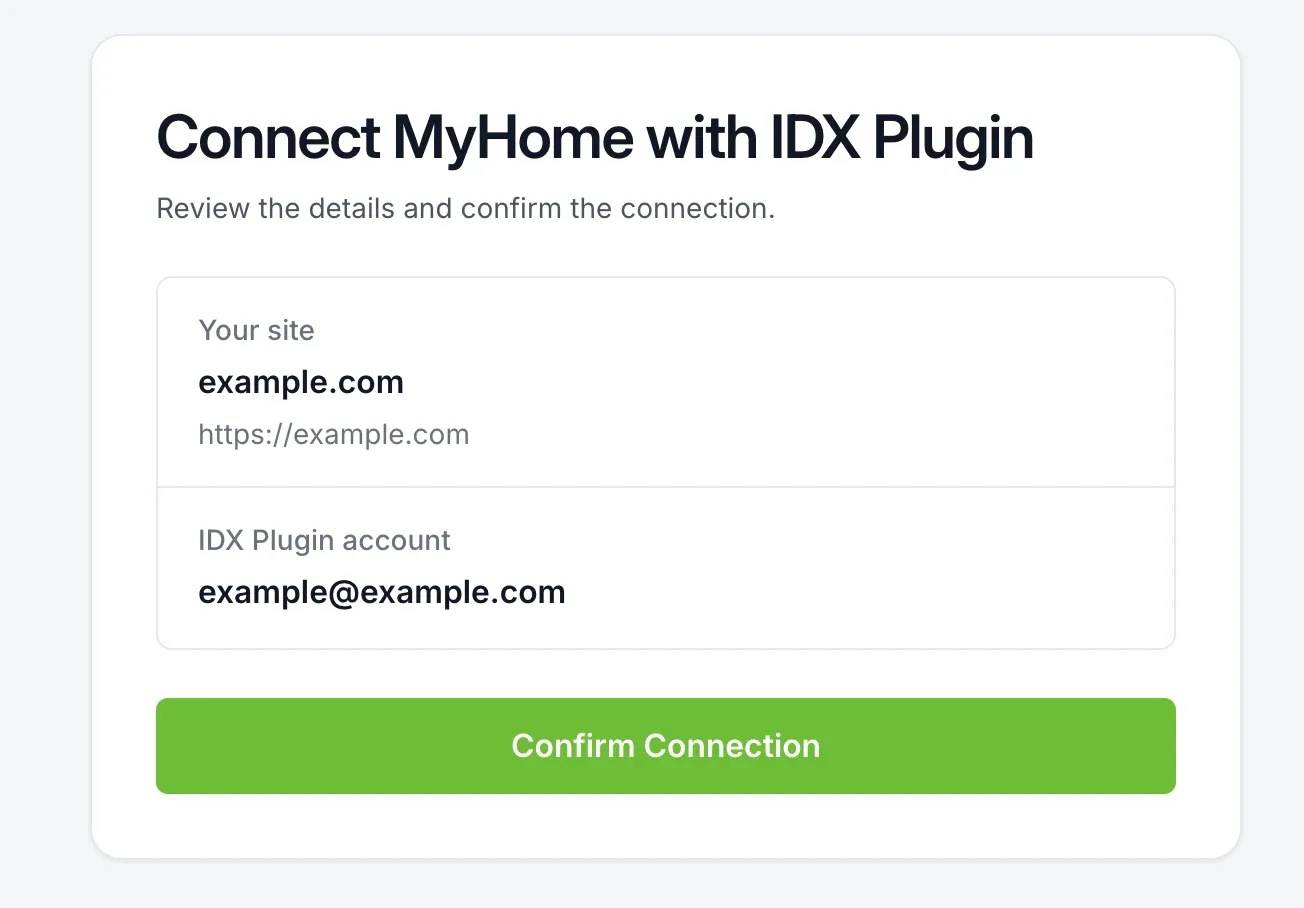
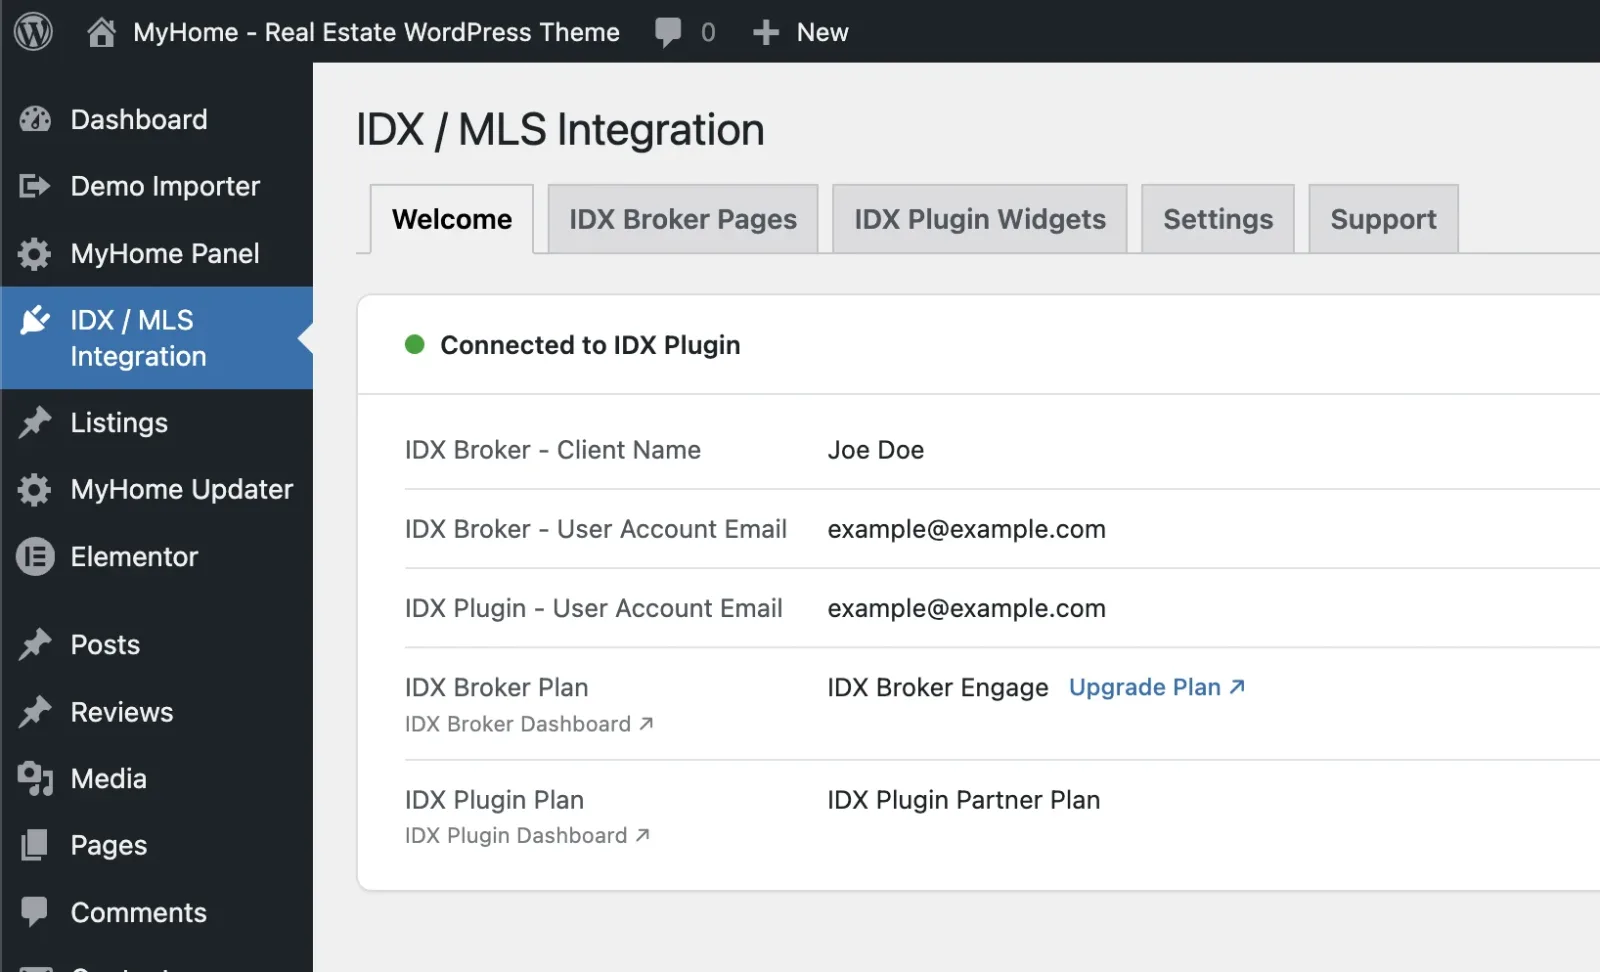
In both cases you are redirected back to MyHome with a connected status once the step is finished.
IDX Broker Pages
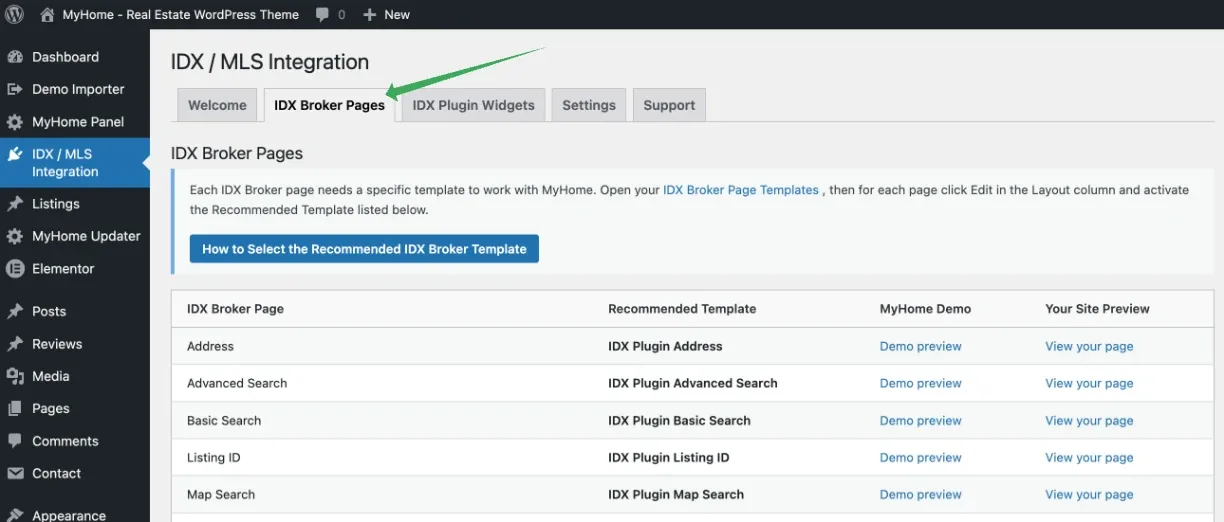
IDX Broker hosts many page types — search results, single listing details, advanced search, map search, mortgage calculator, contact, user login/signup, agent roster, and more. Each page needs a template, and the IDX Broker Pages tab shows all available pages with their recommended templates.
To set up the recommended templates, follow the guide: How to Select the Recommended IDX Broker Template.
IDX Plugin Widgets
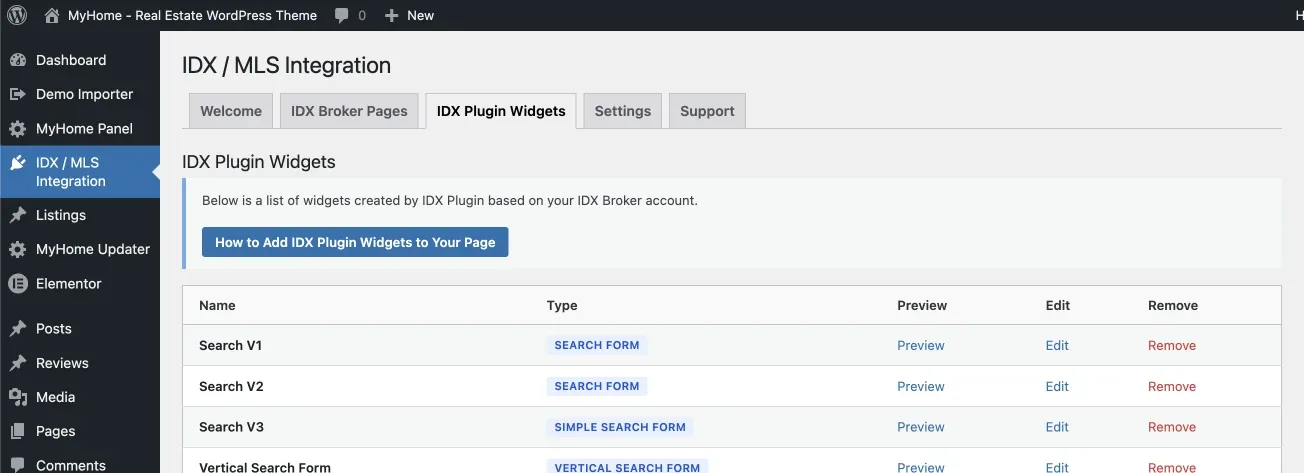
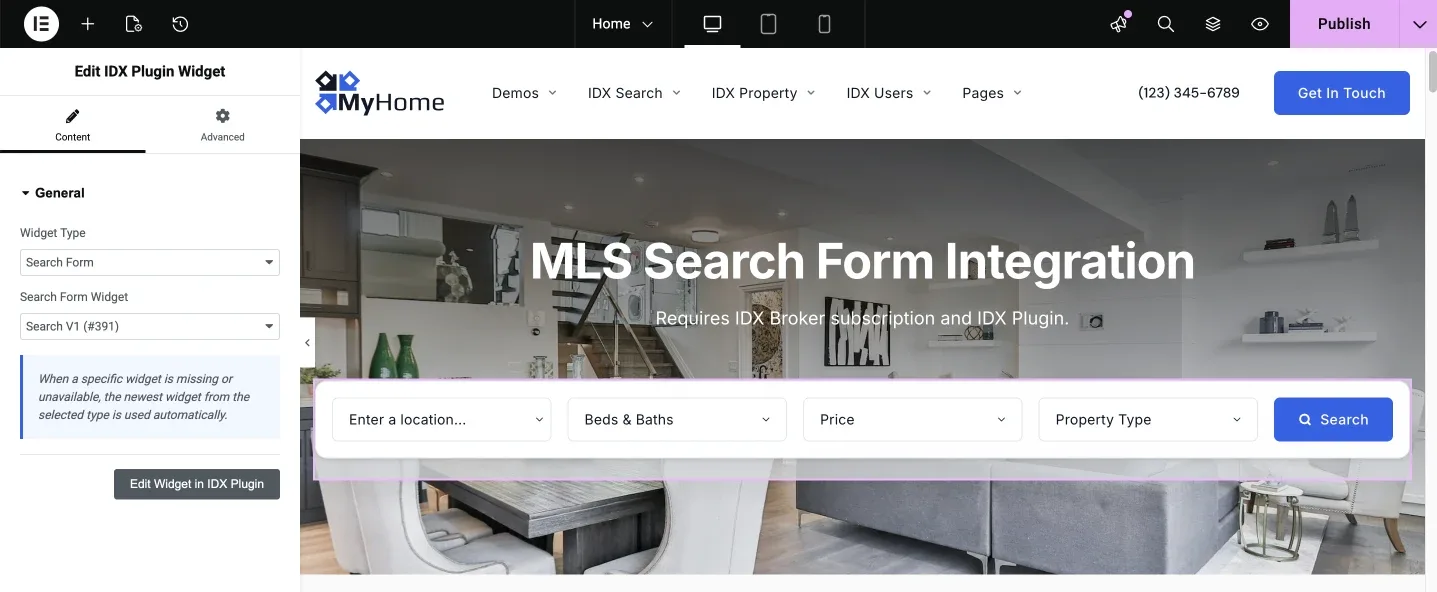
IDX Plugin adds a single Elementor widget that lets you place any IDX Plugin widget on your page — search forms (horizontal, vertical, simple), AI-powered search, listing showcases, and listing carousels. To add one:
-
1
Drag the IDX Plugin widget onto the page
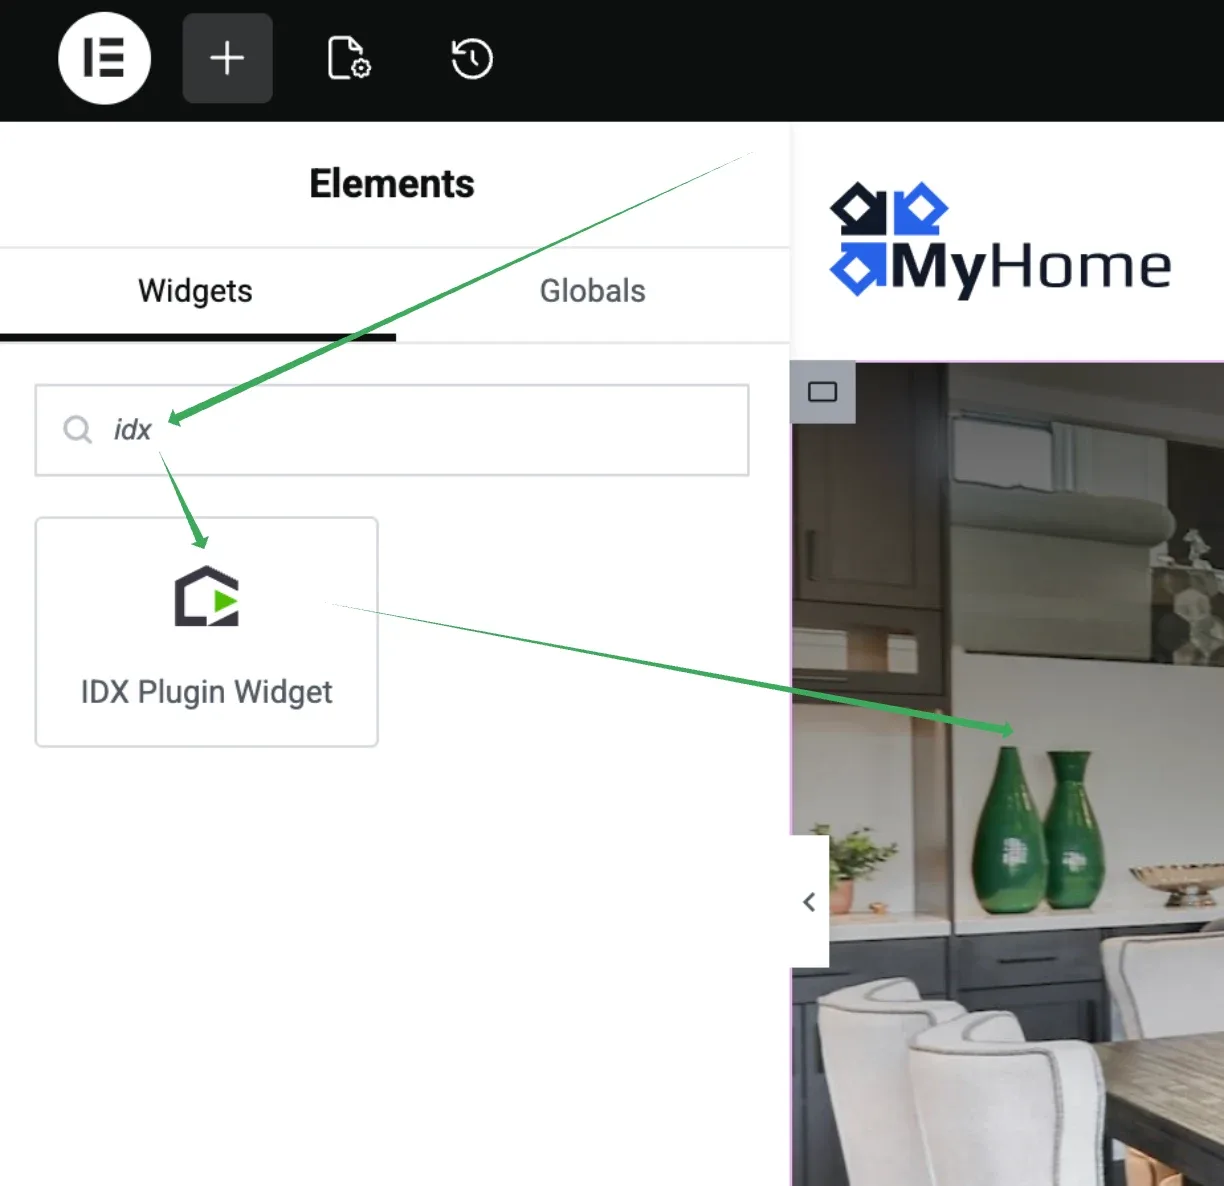
Open the page in Elementor and search for IDX Plugin in the widget panel, then drag and drop it onto your page.
-
2
Choose the widget to display
In the widget settings, choose the widget type and then the specific widget you want (for example "Search V1" or "Newest Listings"). Click Publish and refresh the page. Your widget will be added.
Settings
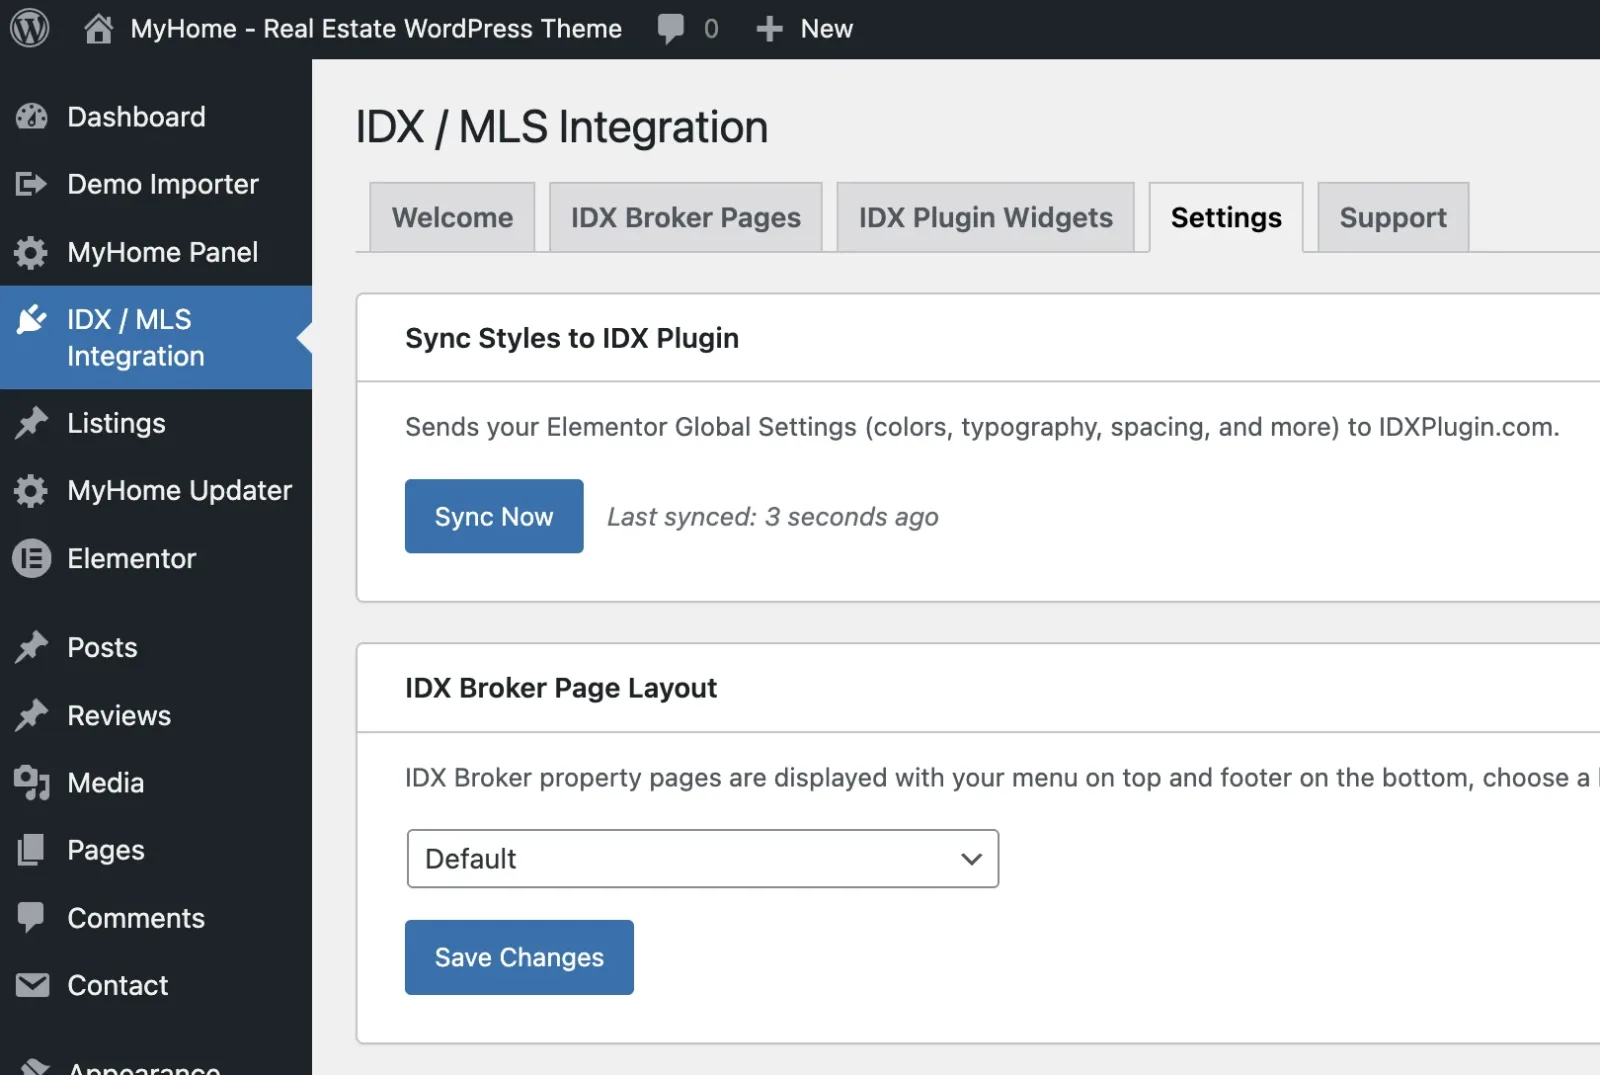
Sync Styles to IDX Plugin — sends your Elementor Global Settings (colors, typography, spacing) to IDX Plugin so your IDX pages match your design. Click Sync Now after making changes.
IDX Broker Page Layout — choose the layout for IDX Broker pages (displayed with your site's menu and footer).
Need Help?
Contact us at support@tangiblewp.com.
Ask the people who build MyHome
We answer by email from support@tangiblewp.com. With Premium Support, we also fix your site when something breaks.
We can also run your site for you, or build a new one.
Was this guide helpful?