Mailchimp Integration with MC4WP Plugin: A Step-by-Step Guide
Connect your site's newsletter widget to Mailchimp with the free MC4WP plugin, so every address a visitor types lands in the right Mailchimp list — and rename the form's placeholder and its messages while you are there.
2 minute read
This article shows how to configure the Mailchimp integration on your website using the MC4WP plugin. You will learn how to add the Mailchimp API key to the plugin, choose the correct list to sign up visitors, and rename texts such as the field placeholder or the notifications shown after a successful or unsuccessful subscription.
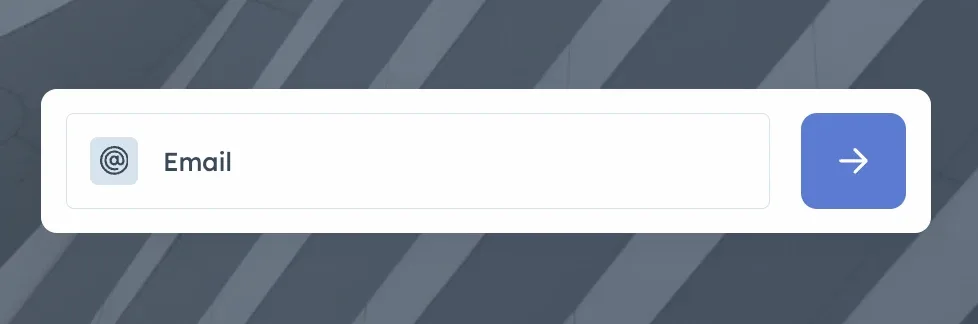
Connect Mailchimp to your website
-
1
Create a Mailchimp account
Start by signing up at https://mailchimp.com/.
-
2
Generate an API key
Follow Mailchimp's official documentation, About API keys, to create one.
-
3
Add the API key to MC4WP
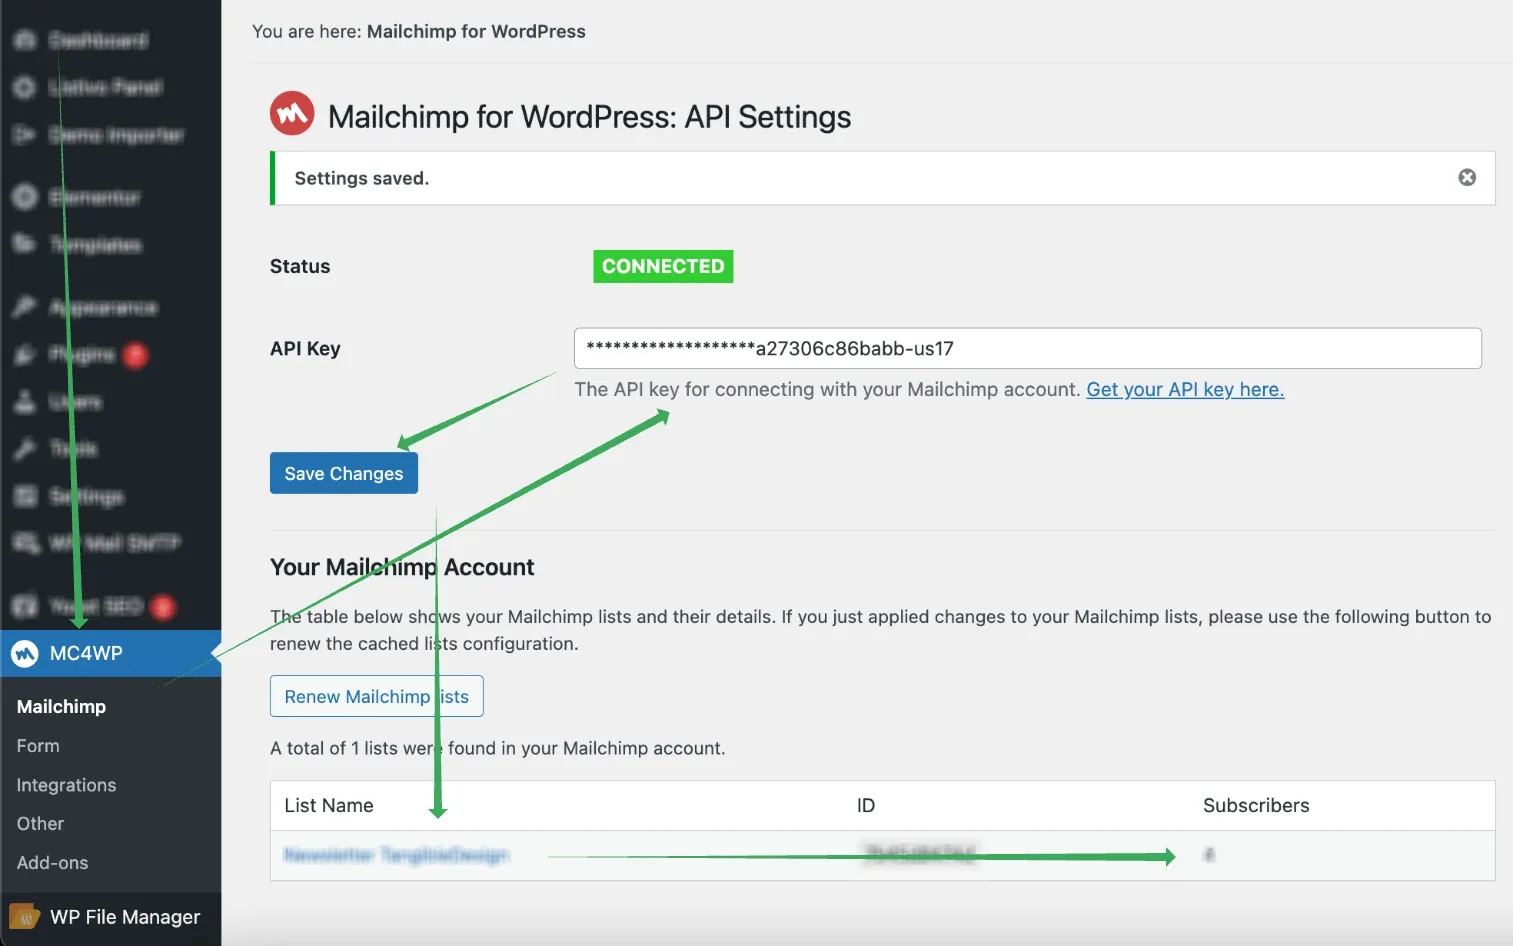
In wp-admin, go to MC4WP > API Key, paste the key and save. The status then reads Connected, and the lists found on your Mailchimp account are listed underneath.
-
4
Pick the list the form subscribes to
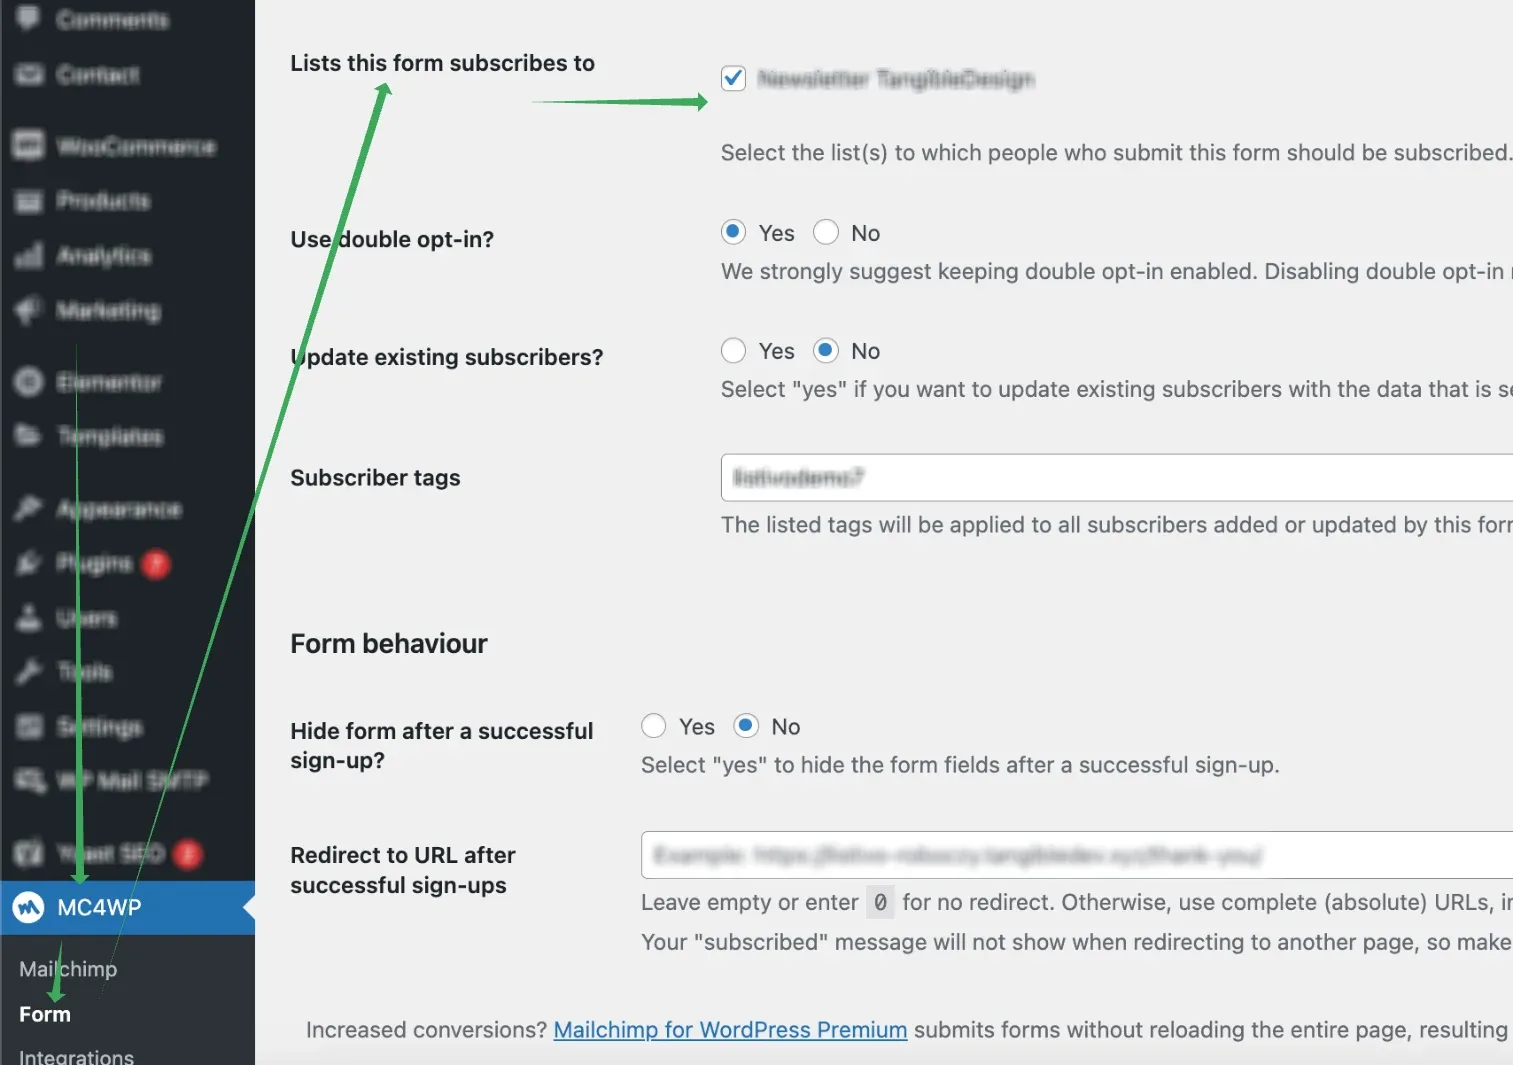
Open MC4WP > Form, tick your list under Lists this form subscribes to, and click Save Changes.
Customize the form texts
New users are now added to your Mailchimp list whenever they fill in the widget form field. If you wish to customize it further — changing placeholder texts, or the notifications users see after filling it out — go to MC4WP > Form > Form Code. The placeholder comes from the placeholder attribute on the email input, for example placeholder="Email":
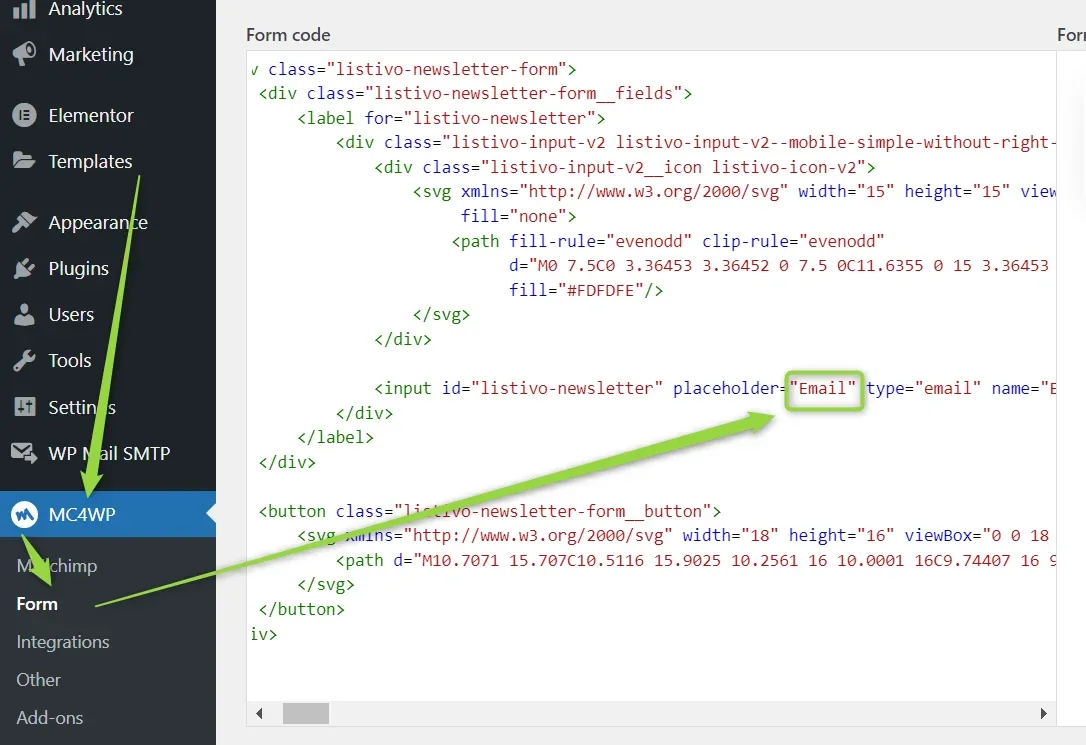
Change it to placeholder="Enter your email address" and the same line reads:

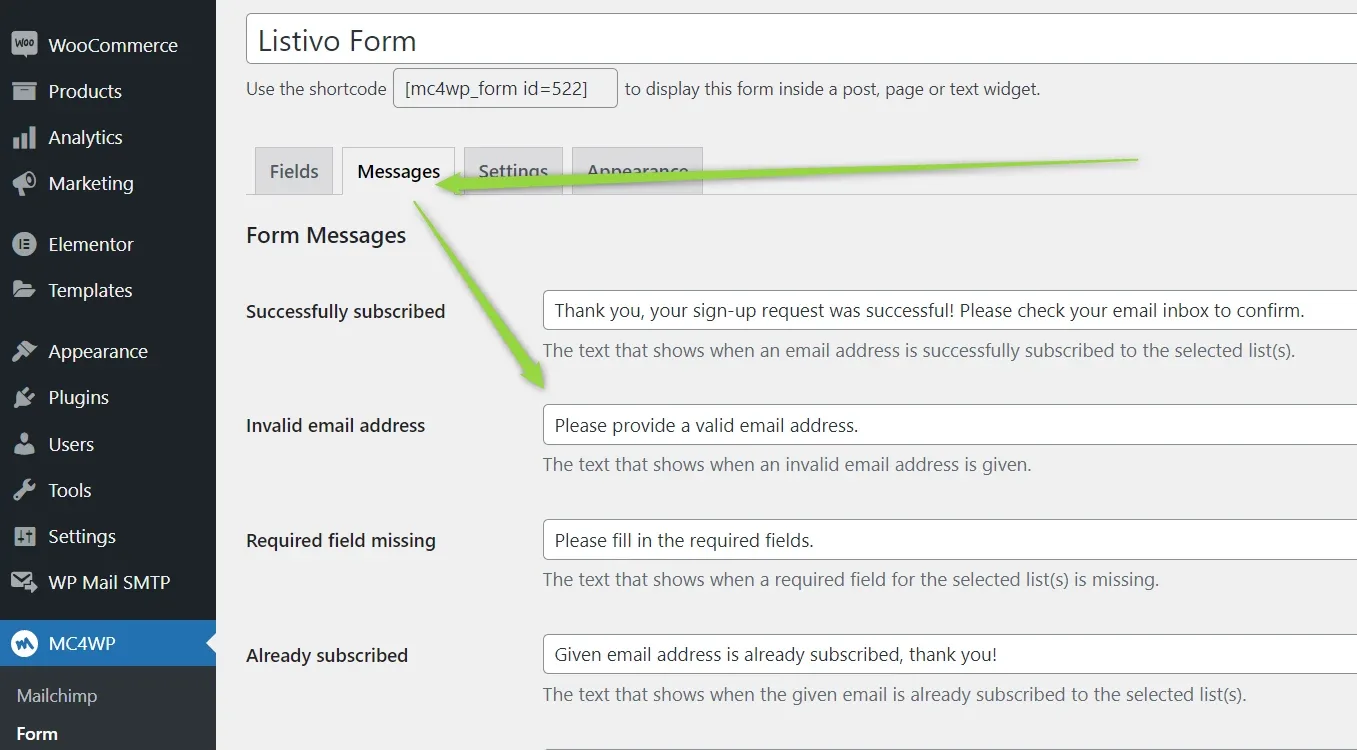
Check the other tabs for additional options. The Messages tab, for instance, holds the texts shown after a successful sign-up, an invalid email address, a missing required field, or an address that is already subscribed.
Ask the people who build Listivo
We answer by email from support@tangiblewp.com. With Premium Support, we also fix your site when something breaks.
We can also run your site for you, or build a new one.
Was this guide helpful?